OS X El Capitan Installer USB

This video will show you how to create an OS X El Capitan Installer USB.

Hi All,
We previously showed 123myIT users how to create an OS X Yosemite and Mavericks USB drive. And we have the video on how to create an OS X El Capitan installer USB. The process is very simular to the other OS X installer videos that we have done in the past. There is a few code changes so just be aware of that.
Again you will need a computer running Mac OS X and you will also need a 8GB or larger USB drive. In this video I didn’t take any chances and I use a 16GB USB drive, which are quite cheap to buy these days.

sudo /Applications/Install\ OS\ X\ El\ Capitan.app/Contents/Resources/createinstallmedia --volume /Volumes/ElCapInstaller --applicationpath /Applications/Install\ OS\ X\ El\ Capitan.app --nointeraction

Copy and paste the code into a Terminal window and press enter, you will be prompted for a user name and password. This should be your Admin accounts user name and password. Remember to change the name of your USB device to ElCapInstaller if you miss this step the code will error out with something like incorrect syntax error. 🙂

OS X El Capitan Installer USB

You should see the name of the USB change from whatever its called when you plug the USB in to Install OS X El Capitan. Once this has completed you should then be able to use the USB drive to do clean installs of OS X on almost any Mac hardware or computer. Its always helpful to keep a back up of OS X versions. Because if you ever want to go back a version or install OS X on a different Mac its good to have this backed up copy. Also Apple updates their OS X software once a year and then makes their old version unavailable. So to save yourself getting caught out this way the USB is a great step.

In the next video I will show you how to do a clean install this OS X El Capitan Installer that you have just created.

Cheers
Matt

How to do a Clean Install of OS X Yosemite from USB

This video will show you how to do a clean install of OS X Yosemite from USB.

Hi All
I have had a few people from the 123myIT YouTube channel ask me how to Fix GPT Error: Windows cannot be installed to this disk.

If you have followed the video linked above and still having some problems getting Windows installed on your Mac because of the GPT partition it is probably best to do a clean install of OS X Yosemite and this video will help you achieve this.

You will need to Create a bootable OS X Yosemite installer USB drive, this drive will install OS X Yosemite on to your Mac.

Clean Install of OS X Yosemite

Make sure you back up your Mac with Time Machine, because the OS X install will remove any data you have on the Mac hard drive. Once you have everything backed up use the newly created USB drive to do Clean Install of OS X Yosemite.

Boot into the USB driver and format the Mac hard drive with Disk Utility. At this stage all of your data with be removed from the Mac hard drive and you can then proceed with the install. Doing a clean install of OS X Yosemite will take around 30 mins to 45 mins depending on the speed of your Mac hardware. Your Mac will also restart a few time during this stage. Just let it do its thing. Once the Mac OS X Yosemite has been installed you will need to setup the Mac as if it is a new Mac. So you will need to choose a user name a password, choose time zone and location.

If you want to know more about the OS X Yosemite you can find more info on the official Apple web page here.

Create USB installation media for Windows 8.1

This video is for users that have purchased Windows 8.1 from the 123myIT.com Store or Microsoft and would like to create a USB installation media drive.

Hi All
This is a pretty cool one so I thought I would make a video on it to help people out. If you have purchased a copy of Windows 8.1 software through the 123myIT.com Store or directly through Microsoft, but didn’t buy the DVD or receive the ISO file as a download you will be able to follow this video and create USB installation media for Windows 8.1.
This process uses a tool called “Windows installation Media Creation Tool” and will allow you to download and create a bootable Windows 8.1 USB or ISO file. You can later on burn that ISO file to a DVD if you wish. And 123myIT has a few videos to show you how to burn ISO files to DVDs. See below.
On Windows
How to Burn an ISO to DVD Windows Bootable
Or a Mac.
How to Burn an ISO or DMG file to DVD on a Mac
The draw back to this process is you will need a legit product key to install the software. Also this process can only be done on a Windows computer. That can be a boot camp or VMware Mac or just another other Windows PC.

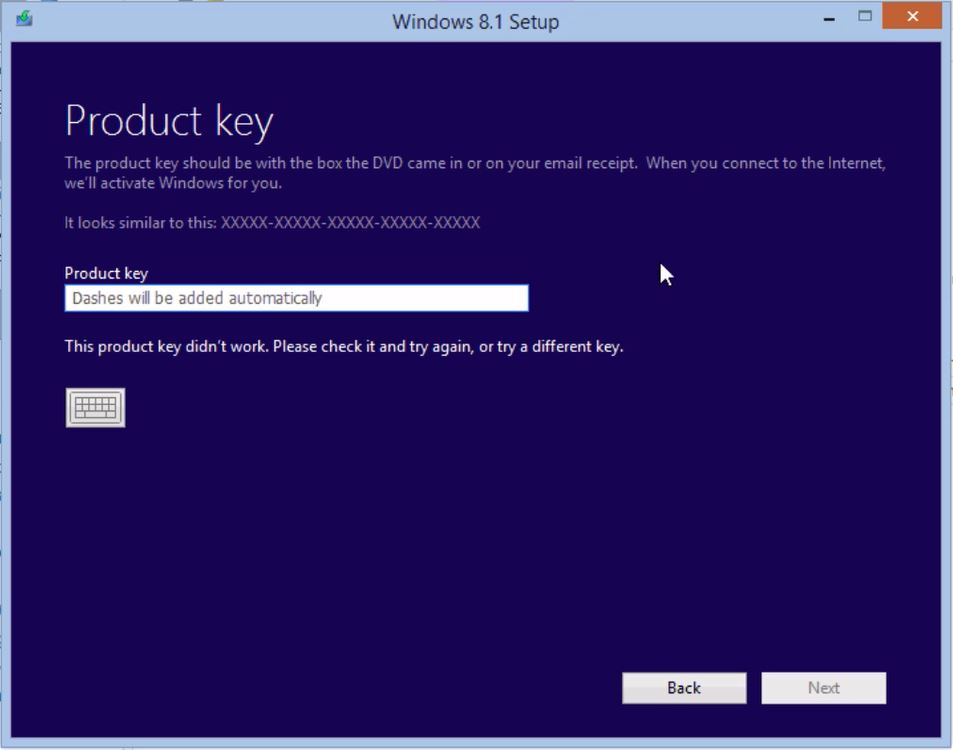
Windows 8.1 Product Key
If you are looking for the link the Windows installation Media Creation Tool, you can find it on the 123myIT Download page here. Or if you want the direct link to the Windows installation Media Creation Tool page you can click here.

You will need an internet connection to download the software and prepare for it to take some time as the 32bit version of the Windows software is around 3GB in size and the Windows 64bit version is around 4GB in size. If you are copying the files to DVD or USB make sure that that have 4GB or large capacity.

I hope that helps out.
Cheers
Matt

Create a bootable Windows 8.1 USB on a Mac running OSX Yosemite

This video will show you how to Create a bootable Windows 8.1 USB on a Mac running OSX Yosemite.

Hi All
Allot of 123myIT users have decided to take the plunge and upgrade their Mac OS X to Yosemite and I thought it might be a good idea to do a short video on how to create a bootable Windows 8.1 USB on a Mac running OSX Yosemite.
This video is mainly for people that want to be able to create a USB installer disk drive, so that they can install Windows on any computer whether it be a Mac or another brand. This method can also be used at a later date to reinstall Windows on the same Mac that you create the USB drive on.
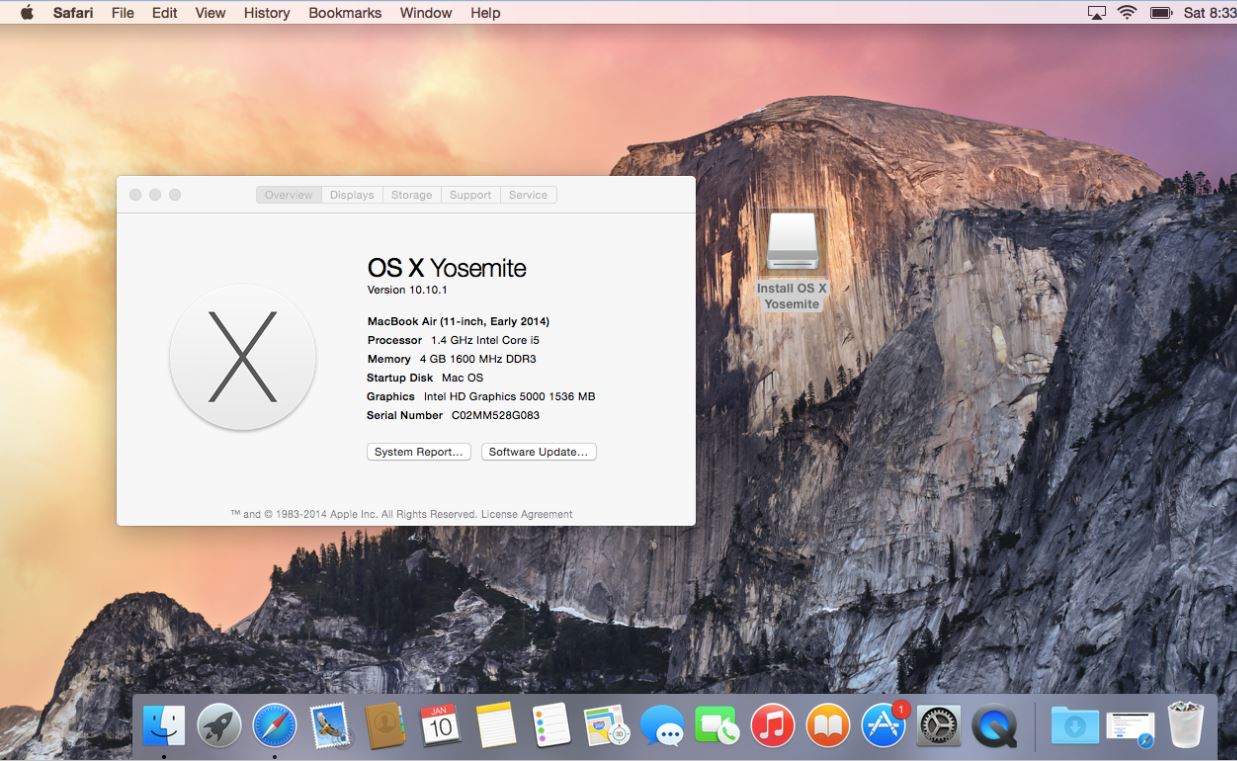
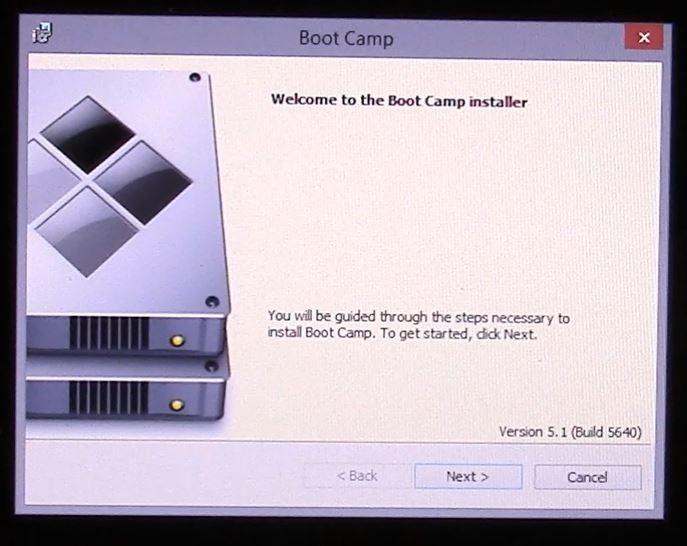
So in the example in the video I created the USB on a early 2014 MacBook Air. In this process it also downloaded the Windows support software for this Mac hardware. This means it will run the boot camp installer after Windows gets installed. See the picture below.

Boot Camp Installer

So the If you want to check out the list of Windows support software or boot camp drives for your Mac a great place to start is the 123myIT boot camp drivers page here.

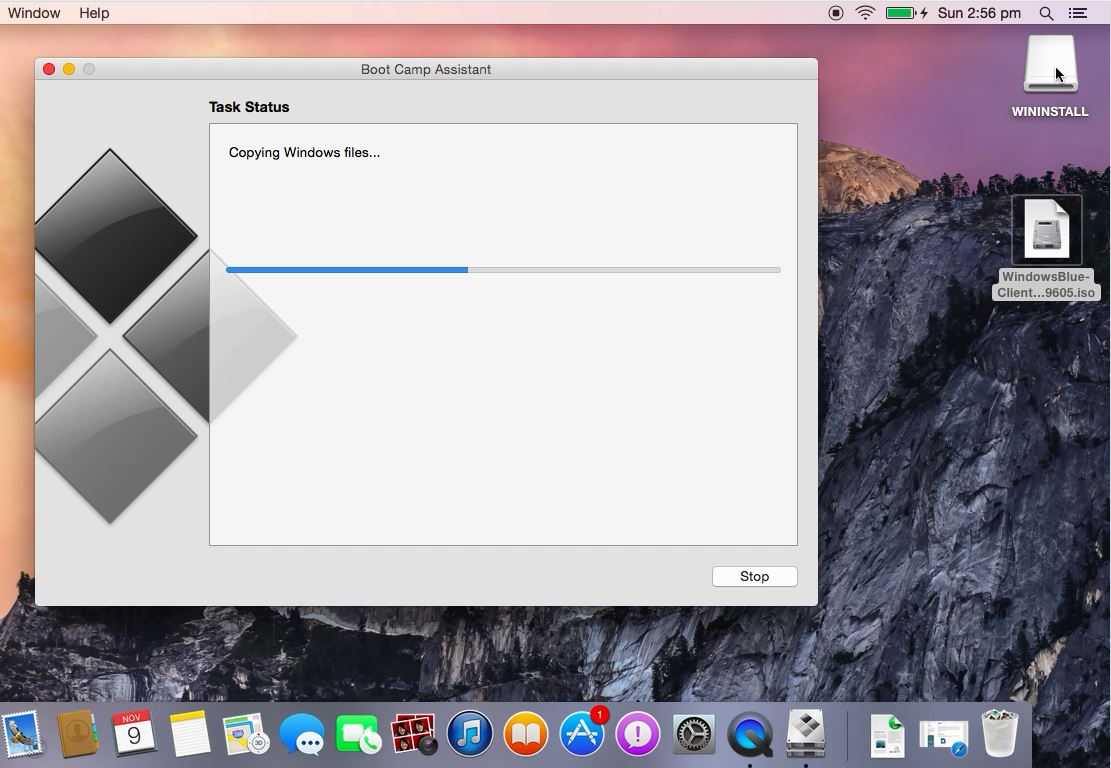
Bootable Windows 8.1 USB on a Mac running OSX Yosemite

In the photo above you can see a picture or the Yosemite desktop as the Windows files are being copied to the USB drive.
If you want more info on Apple Boot Camp you can find the official link here.
If you want to find out more about OS X Yosemite you can go to the official Apple page here.
Want to buy Windows 8.1? Check out the 123myIT.com Store page here.

Fix Error Your bootable USB drive could not be created

This video and article will show you how to Fix Error Your bootable USB drive could not be created.

Hi All
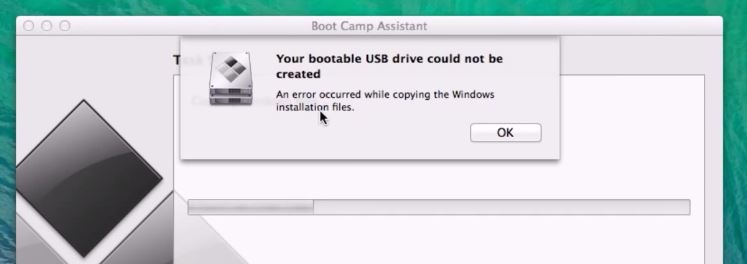
When installing Windows on a Mac I came across this error when I was trying to create a USB drive. The problem is the DVD is already mounted in Disk utility and when this is the case the Boot Camp Assistant cannot mount the DVD at the same time so you get this Error Your bootable USB drive could not be created.

Your bootable USB drive could not be created

The fix for this is pretty straight forward. You need to unmount the USB drive in order to get this to work. But also you will need to make a copy of that DVD so that you will be able to continue along with the setup.
If you want to know how to create a ISO or DMG file from a DVD then you can follow the 123myIT.com video here.
How to create an ISO file on a Mac

Once you have created your DMG or ISO file, you can then start the process again with the Boot Camp Assistant. However this time instead of selecting the DVD drive, go into your Documents folder and select the newly created DMG or ISO file. This should then allow you to continue on with the installation as normal and Fix Error Your bootable USB drive could not be created one and for all.

Users that have upgraded to Yosemite may also get this same error. If this is the case just follow the steps outlined above and you should hopefully resolve the same error.

If you want to see the official Apple page on how to create an ISO image file click on the link below.
Boot Camp: Creating an ISO image from a Windows installation DVD

Good luck
Matt

How to do a clean install of OS X Mavericks from USB

This video and article will show you how to do a clean install of OS X Mavericks from USB.

Step 1. Create a OS X Mavericks USB drive. You can do that by following the 123myIT video guide here.

Step 2. Once installed, plug the USB into the side of your computer restart the Mac and hold down the ALT or Option key on the keyboard of your Mac.

Step 3. Use the arrow keys on your Mac keyboard to navigate to the USB drive that you have plugged into your computer. Once highlighted press Enter or Return.

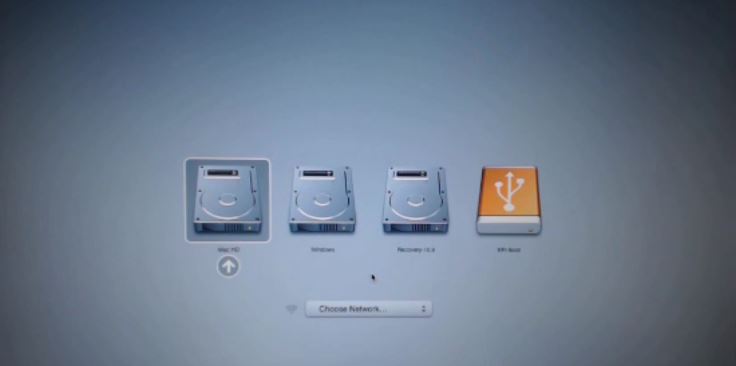
Mac Preboot Menu

Step 4. That will bring up the OS X Utilities menu. At this stage you can opt to format the hard drive with Disk Utilities. Make sure you backup your data before you do this as you will lose any data on the drive when you format it. If you want to know how to do a backup with Time Machine click here.

Step 5. Go back to Install OS X and follow the prompts. You will be asked to agree to Apple terms and conditions and you will also need to select the hard drive you want to do a clean install of OS X Mavericks on.

Step 6. This process should take around 30 mins depending on the speed of your Mac. The Mac will reboot a few times while this is happening.

Once the Mac restarts one last time and then you are done you will have to setup your Mac as if it was brand new from the Mac store. You will need to setup the country location, Wifi and there is also an option to transfer some files between your Mac and other computers. Then setup your Computer account.

For more information on OS X Mavericks you can check out the Apple official website here.

How to create a bootable Windows 7 8 USB on a Mac

This video will show you how to create a bootable Windows 7 8 USB on a Mac.
You can use the bootcamp assistant to create a bootable Windows 7 8 USB on a Mac. However the option may not be highlighted in your bootcamp assistant.
To make the option appear you can try the following steps.

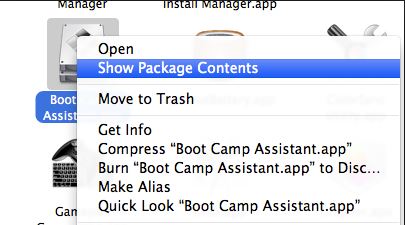
Step 1. Click on Go then Utilities. Find the Bootcamp assistant, right click on it and go to Show package contents and then go into the contents folder.

Bootcamp Assistant Show Package Contents

Step 2.Copy the info.plist file to the desktop and make a backup copy of it and open it.

Step 3. Find the line which says PreUSBbootsupportmodels and remove the Pre from the line. Try running the bootcamp assistant again and this time you should have the Create a Windows 7 or later install disc option.

Step 4 Copy the info.plist back to the contents directory. And start the bootcamp assistant again and see if the Create Bootable USB Drive for Windows installation comes up. If not try this next step.

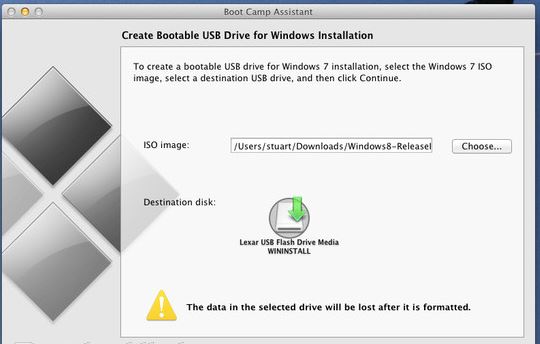
Bootcamp assistant create bootable usb drive

Step 5 Change the USBbootsupportedmodels in the info.plist file.
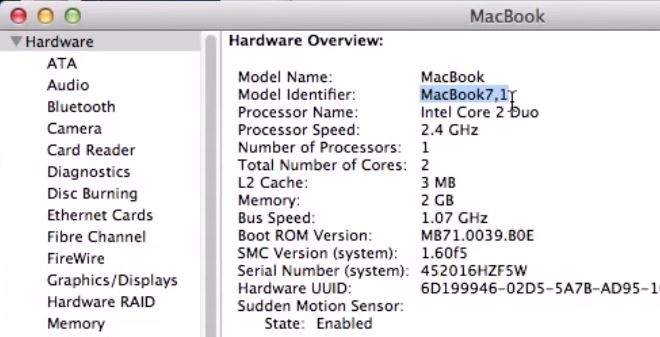
You can find the model on the Mac that you are using by going into the Apple menu then click on About This Mac and then click on More info. Next click on System report and under Hardware Overview look up Model Identifier.
In the example in the video my MacBook model was MacBook7,1.
In the info.plist file I had to change the USB supported models to my MacBook model so that I could create a Windows USB on a Mac.

Hardware Overview Mac

Hope this works guys. Feel free to leave some feedback.

Cheers
Matt

For more into you can check out Apples discussions page here.