Hi Guys Matt from 123myit here. In this video, we will show you how to record the screen on your iPhone or iPad. First, up, you need to add Screen Recording to the Control Centre. To do this go into Setting and then Control Centre. Scroll down and then tap the green plus next to Screen Recording. Scroll backup and should see that Screen Recording has been added to the Included Controls menu.
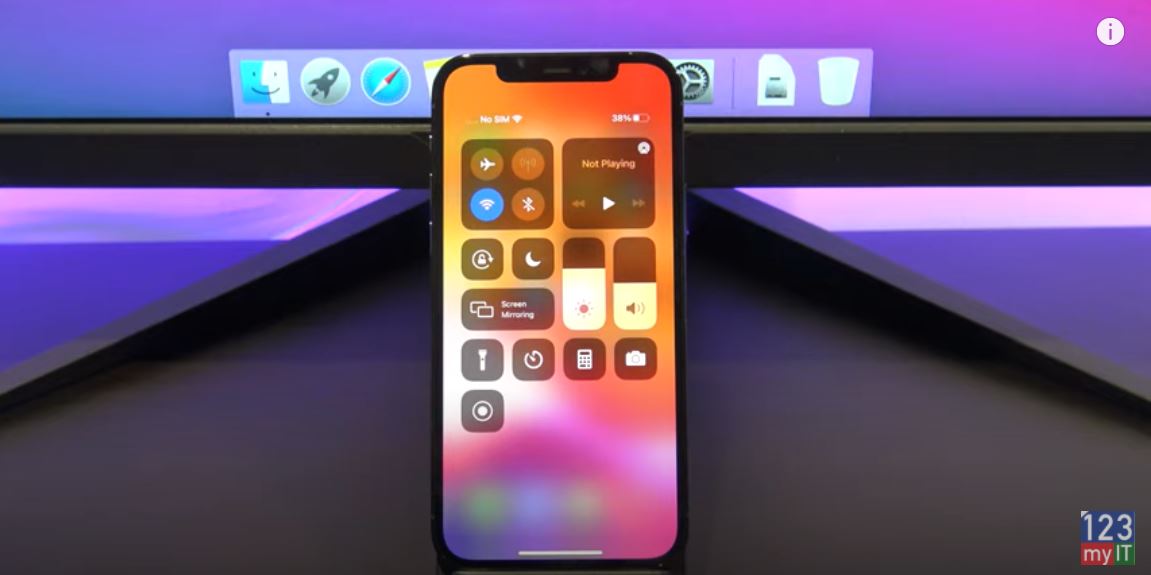
All right, let us show you how it works. Go back out of Settings and swipe down from the top right corner to access Control Centre. Here you can see the new Screen Recording button has been added. Tap and Hold to turn on your microphone if you want it to record your voice.
Capturing the action – Record Your Screen on iPhone
Let us capture some action. To start the Screen Recording swipe down from the top right hand corner and tap the screen-recording button. It will start Screen Recording when the three-second countdown ends. Next, close the control centre to pick up where you left off. Great Shot! When you want to stop recording. Go back to the Control Centre and tap the Screen Recording again. You Screen Recording will be saved to Photos. Tap edit to edit your Screen Recording and cut out the parts you do not want. When you finished tap done and you can save it as a new clip. When you are finished, editing you can share it with friends by tapping the Share button.
In addition, people do not forget to check out my other videos such Turn on Speak Screen on your iPhone or iPad. Also, do me a favour if you know anyone who might need this video please share it will them, hit the subscribe button and smash the bell icon.
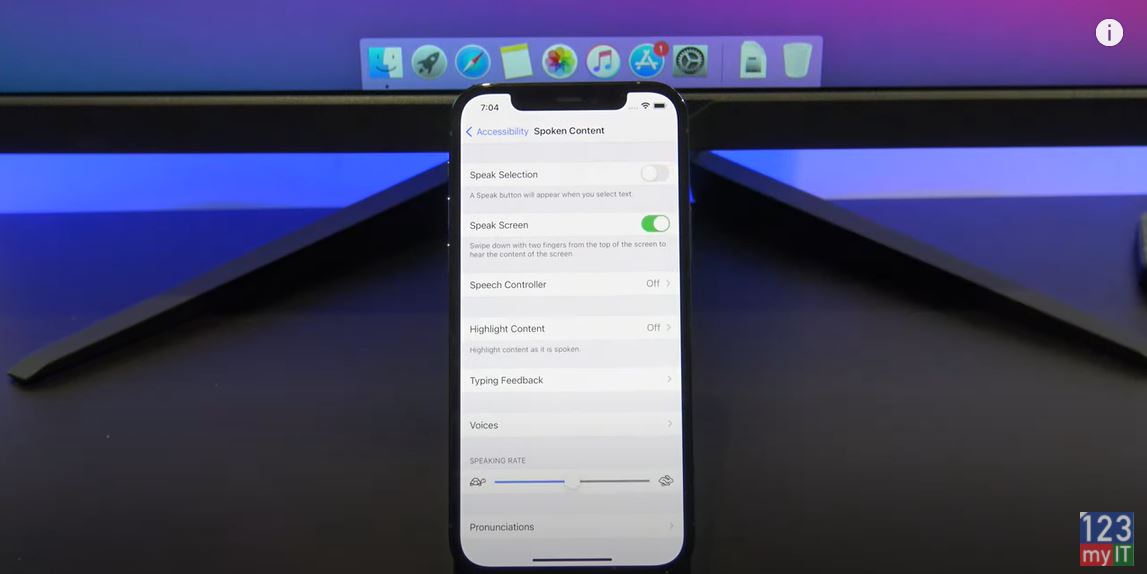
IF you want to know how to get your iPhone or iPad to read certain text that appears on your screen. You need to use Speak Screen. To turn it on go to Settings > Accessibility and tap spoken content. Then toggle on Speak Screen. To start it up, just swipe down with two fingers from the top of the screen.
Getting your iPhone to read text to you is easy.
Guys, don’t forget to check out my other videos such how to scan QR code on your iPhone. Also do me a favour if you know anyone who might like this video please share it will them, hit the subscribe button and smash the bell icon.
IF you did not know already, scanning a QR code with your camera app is super easy. Just open up your Camera. Then point your iPhone or iPad at the QR code so it appears in the view finder.
Notification – QR code on iPhone
Then you should see the notification at the top of the screen. Just tap it and then it will forward you to the website you are after. See Super easy!
Guys, don’t forget to check out my other videos such as How to Install Windows 10 on a M1 Mac. Also do me a favour if you know anyone who might like this video please share it will them, hit the subscribe button and smash the bell icon.
Hi guys and welcome to 123myIT. In this video, we will show you how to install Windows 10 on a M1 Mac.
If you have an app or game, that is Windows only and you do not want to buy a Windows Machine. Then this video might help.
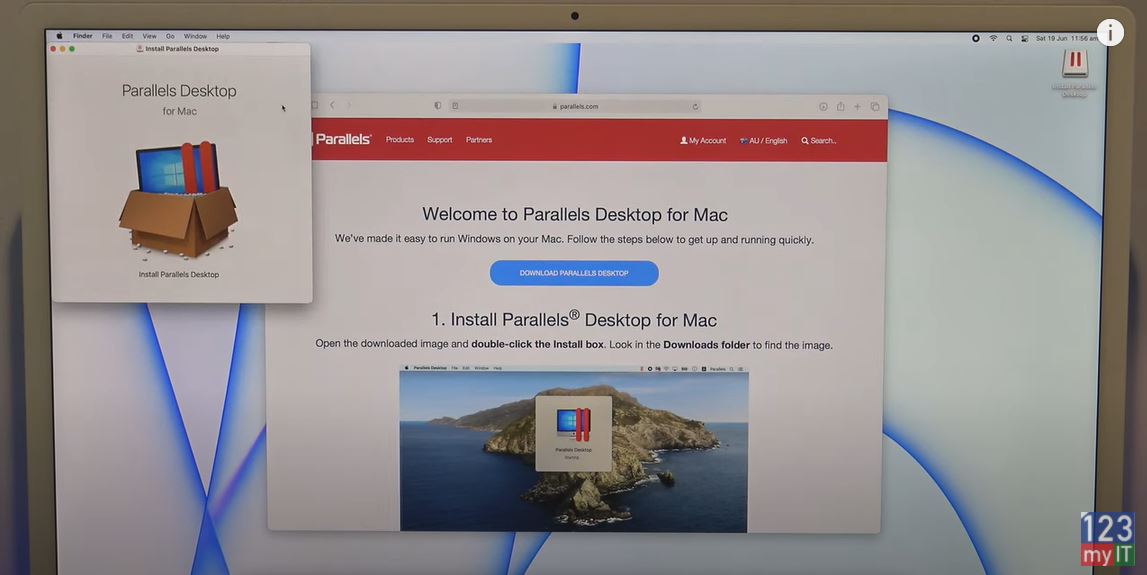
Download Parallels – Windows 10 on a M1 Mac
The first step is to download and install Parallels desktop 16 for Mac. You can do this by opening up Safari and type in paraellels.com. When you get to that page click on Download Free Trial. In addition, on the next screen click download now. This will save the Parallels desktop software to your Mac.
Go down to your Download menu and click on the Parallels desktop 16 software to install it. When you see the Parallels desktop for Mac box pop up just click on it to start the install. Then click on Open and then ok. Parallels will then go and install. If you get a password prompt, enter your administrator password.
Ok once you see Parallels desktop Permission you can close the installer and click next. Click ok to Allow Parallels access to your folders. This allows you to share documents between MacOS and Windows. Click Finish and then you should see the Install on Mac with Apple M1 chip.
Windows 10 M1 Macs
Ok next you will need to click on How to download Windows 10 for ARM Insider Preview link. Scroll down and click the Windows Insider preview link.
Because the M1 Macs are quite new, to download Windows 10 for M1 Macs you need to Registers for Windows Insider. I will put all the links from this video in the description below. Click on learn more and then click on Register. You can register with any account and it free to do so. Click sign in now and once you have signed it will ask you to agree to the terms and conditions. Put a tick in the check box and then click register.
IF you go back to the Parallels tab and click on the Windows Insider link again. It should now take you directly to the downloads page. Cool if you have done it right go ahead and click the Windows 10 Client ARM64 button and click allow to start the Windows 10 download. Awesome you can check the download by click the downloads button in the top right part of Safari and the download might take some time as it quite large.
Download Windows 10 VHDX
While that’s downloading minimize your windows and go back to the Parallels installation assistant and click continue. Next click on Install Windows or another OS and then click Continue. If the Windows 10 VHDX file does not detect automatically. You can just grab and drag it into the Install Assistant window. Click continue. Next up Parallels will to do some pre-configuration for you. So if want Windows 10 to play game click game only. On the next screen put a tick in the Customized settings before installation and then click Create.
Great you are now in the Windows 10 Configuration screen. You can customise all your settings in here. When finished close that screen and click continue.
IF you have done everything right you should see Windows 10 being installed. Awesome Windows is installed now so just Click to continue. And you will need to setup a Parallels account you get a 14 day trial and then after that you can purchase Parallels if you find it useful.
Windows 10 Finished installed
Congratulations Windows 10 is installed now. Go to the start menu and settings and click on Windows updates. You just want to go ahead and make sure Windows is fully up to date.
While that’s updating go down to the Windows insider program and click on the go to Diagnostics link. And then turn on the Optional diagnostic data button. This will allow you to get the latest update from Microsoft for this build. Make sure you also sign in with your Insider Program address. Once the updates are done, you will be prompted to do a restart. Click Restart now. If you get a prompt for Parallels Desktop access just go into the System preferences and give it access. Parallels might also need to update. Click Restart. Awesome everything is ready to go. Just go ahead now and install any app you might need.
Guys don’t forget to check out my other videos such as How to Erase and Reset your M1 Mac. And do me a favour if you know anyone who might need this video please share it will them, hit the subscribe button and smash the bell icon.
Hi guys and welcome to 123myIT. In this video, we will show you everything you need to know about the Apple iMac 24 Inch in 2021.
This is the Apple iMac 24 inch, which is the direct successor to the 21.5 inch Intel based 4K iMac. The iMac range has not had a complete redesign since 2012, which is almost a 10 years. So it’s been a long time coming.
The 2021 iMac gets the new Apple Silicon M1 chip and we get an extremely compact internal design. This allowed the designers to reduce the overall size and volume of the iMac while giving us a much larger screen.
Pricing – Apple iMac 24
Pricing for the iMac starts around $1299 USD for the 256 GB base model and goes up to $1699 USD for the 512BG model. Things to note the Base model only has a 7 core GPU while the other models have 8. And the other model come with an extra two USB 3 ports, Gigabit Ethernet and Magic Keyboard with Touch ID. The new iMac is very colourful and come in the colour Blue Green Pink Silver Yellow Orange and Purple.
In the box, you will get Warranty and setup documentation. Along with Apple stickers. Also included is a 143 watt power adapter which is external to the iMac. This is better design for cooling and allows you to replace the power supply without opening the iMac. The cable is also colour matched to the colour of iMac. In the upgraded model, you will have an integrated Ethernet port as well.
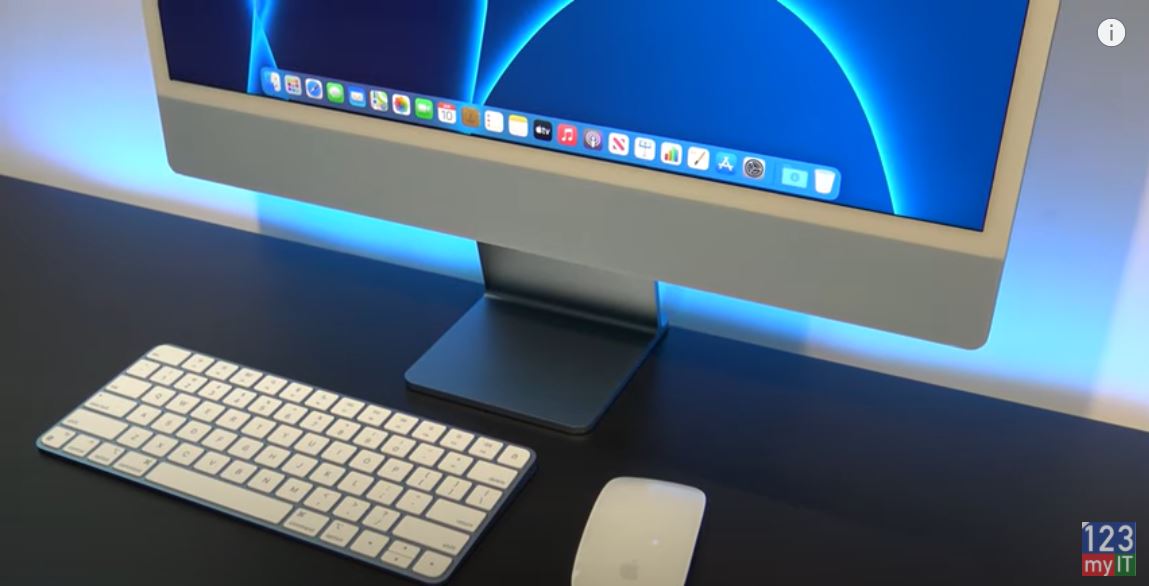
Magic Mouse – Apple iMac 24
Next up is the magic mouse 2 which didn’t get any update apart from the colour. So, you get the mulitouch gesture service on the top which also has a mechanical click. And you have the lighting port on the bottom of the mouse which means you cannot charge the mouse and use it at the same time. Which remains quite controversial.
The keyboard is a Magic keyboard and has a really nice lock button in the top right hand corner. The upgraded model will come with Touch ID sensor, which will do the same functions it did on the older iPad. The only drawback I see with my model is it you pick up the keyboard you might bump the button and lock your screen when you don’t want to. Both the mouse and keyboard are changed with a colour matched USB-C to Lighting Cable. You only get one cable so you would probably need to charge the keyboard and mouse individually. Last accessory is the power supply cable. Thankfully, this makes the total length of the cable long enough for most desks. This is the Australia version but if you were in the US, you would have the US version.
24 Inch Screen
Next, you will have the Apple iMac 24 itself. The biggest upgrade on this iMac is the larger display. You get a 24-inch 4.5K screen instead of a 4K and that allows you to get the pixel density of 218 ppi which is what makes it a Retina Display. It has a resolution of 4480 x 2520 and 500 nits of brightness which is pretty standard on the M1 Macs. True Tone technology also adds a warmer more realistic colour to the display.
In Terms of how heavy the iMac is its 9.83 pounds or 4 kgs which is slightly lighter than the 2012 iMac on 12.5 pounds or 5.68 kgs. And in regards to Dimensions it stands 18.1 inches high and 21.5 inches wide.
On the back of the iMac you have the stunning deep blue colour with a two tone effect. However, for the most part you won’t see this. The glossy Apple logo on the back is colour matched to same colour on the front chin of the iMac. So when you pick your iMac maybe note you wont see much of the colour on the back.
Ports
On the back left side of this base iMac, you have two Thunderbolt, USB 4 ports. I would have like to see three as one could be taken up when charging the keyboard. There is no Ethernet on the base model, so this model is WIFI only. And you will be prompted for WIFI password on setup.The USB 4 doubles as a display port so if you have a USB 4 to HDMI adapter you can plug in an external display.
If you are plugging in an external display. Make sure you set the main display to be optimised in the display settings. This should give your main display the best clarity as you can see here.
On the back right side, you have the power button which is concaved so you can feel it when turning the iMac on. Along the side you have an 3.5 Headphone Jack. And there is no SD card reader which I get it, you can buy an Apple Adapter if you need that. However, it does feel limited in terms of connectivity.
The Stand
The design of the stand is a thing of beauty, however it only tilts back and forth. If you want to raise the height you would need to put a book under it and if you want to mount the screens on a different VESA stand you need to buy the iMac without the stand included.
The iMac comes with a six-speaker system and force-cancelling subwoofers. This improves the performance of the subwoofers without distortion. They sit in the chin of the iMac and there’s a speaker grill along the bottom. Lets take a listen.
The magic keyboard does have a lock computer button which is really handy. Just tap it and the iMac locks itself instantly. Great if you work in an office. The power cable is colour matched and magnetic so it clicks into the power socket on the iMac but isn’t designed to pop out like it does on the MacBook range.
FaceTime HD Camera
Along the top, you will find an integrated 1080p FaceTime HD camera with an indicator light. This replaces the 720p version from the last generation. The improvement here is the image signal processor which is on the M1 chip and it makes a huge difference. Another big upgrade is the microphone on the back of the iMac. Apple calls these Studio grade microphones however that might ne be a bit of a stretch. They are still quite good.
Cool, lets run the benchmarks real quick and I will show you the fan noise. Starting the benchmark software really works the iMac hard. And you can hear the fan spinning its quite loud. To see where all the heat is heres a capture of the heat on the iMac. You can see the bottom right part of the chin is the hottest at 42 degrees. This heat is probably the M1 chip doing it thing.
The Cinebench multicore score on the iMac was 6126. This is better than the MacBook Air M1 we tested which had a score of 5324, but not as good as the MacBook Pro M1 which was 7780. So the 24 inch iMac won’t perform as good as the MacBook Pro M1 laptop.
Here is the benchmark for the disk read and write speeds.
The iMac might seem like is just home desktop PC for the family. However, in Reality it is extremely powerful and can edit multiple streams of 4K video. As well as drive, a 6K external display and edit 100 megapixel photographs. The only drawbacks might be if you want to play games or you need more than 2 USB C ports.
Guys don’t forget to check out my other videos such as How to setup Sound Recognition on your iPhone. And do me a favour if you know anyone who might need this video please share it will them, hit the subscribe button and smash the bell icon.