Burn ISO files to DVD Windows Bootable

This video will show you how to Burn ISO files to DVD and make Windows Bootable DVDs.

Hi All
This is the second video of its type. I put a video the first video up to help people creating and burning ISO files on a Windows PC. However the programs that I was recommending to 123myIT readers recently had some malware installed in it.
So this is a follow up video to show 123myIT users how to Burn ISO files in Windows without having to install the IMG Burn program and get stuck with the malware.

I have to say I think its a real shame that the programmers owners of IMG Burn have decided to go down this path because the program was an excellent easy to use tool that allows you to burn and create ISO files with ease.

Anyway to burn an ISO file you don’t need any extra software, this can be done directly with Windows software.
Simply download your ISO file. You can get the preview versions of Windows from the 123myIT.com webite under Downloads here.

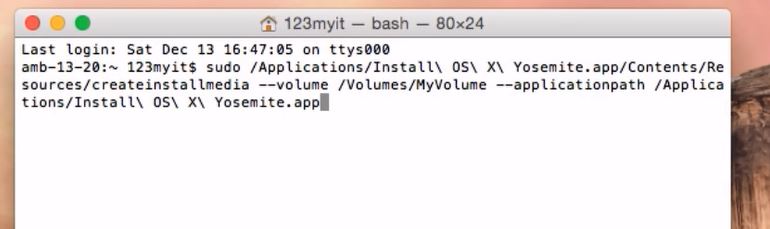
Once you have downloaded your ISO file, copy it to your Desktop or navigate to the location where you saved the ISO file. Simply right click the ISO file and click on Burn disk image. You should then get the following Window.

Burn iso files

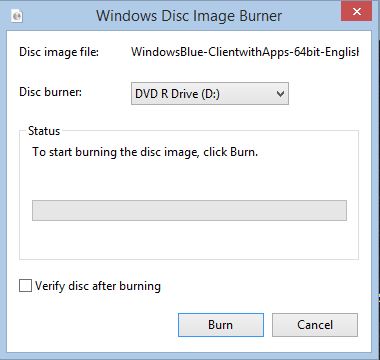
Once you see this Windows select Your Disc burner that you want to burn the DVD with. Put a tick in Verify disk after burning and you should be good to go.
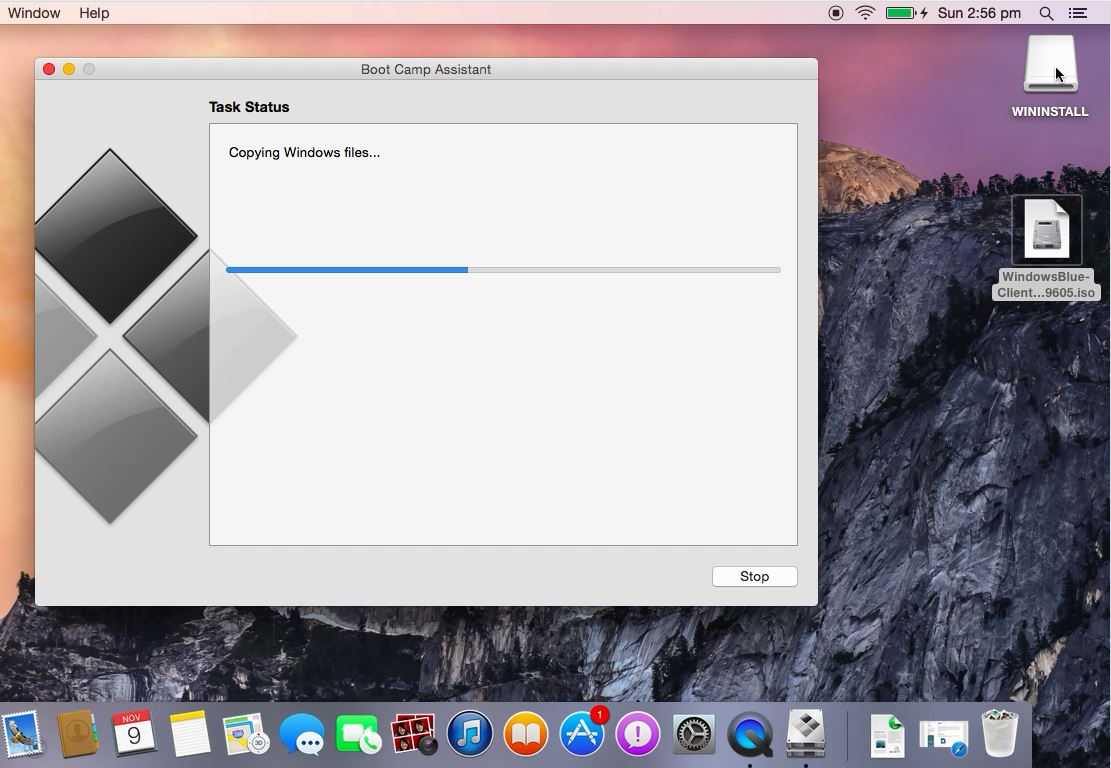
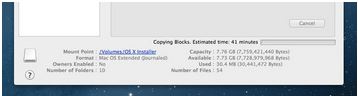
Depending on the side of the file and the speed of your hardware it should take around 5 to 10 mins to burn a full sized DVD.

If you are looking for more information on the steps above or you for other resources you can check out the official Microsoft web page for burning ISO files to DVD here.

Create a bootable OS X Yosemite installer USB drive

Apple have made it much easier to create an OS X Yosemite installer USB drive and this same process can also be done for OS X Mavericks. In this video and article I will show you what you need to do to make this happen.

You can check out the older video 123myit.com video for the Mavericks USB here.

What do you need to get started?
* 8GB or larger USB drive, SD Card or USB hard drive
* OS X Yosemite.app or Mavericks.app (this can be downloaded from the App Store)
* An Apple computer with access to the Apple App Store
* A user account with administrator rights

Step 1. Download Yosemite, Mavericks from the App store.
Apple direct link here.
Step 2. Insert your USB into the Mac and run the Disk Utility.
Step 3. Erase the USB, so it becomes a clean USB with no data on it.
Step 4. Download OS X Yosemite App, get it from the Apple Store.
Step 5. Open Terminal and use the command below. Make sure the Yosemite App is located on your Desktop of your Mac.

NOTE: Change the USB name to MyVolume or you can change code “MyVolume” to the same name as your USB drive.

OS X Yosemite
sudo /Applications/Install\ OS\ X\ Yosemite.app/Contents/Resources/createinstallmedia --volume /Volumes/MyVolume --applicationpath /Applications/Install\ OS\ X\ Yosemite.app

OS X Mavericks
sudo /Applications/Install\ OS\ X\ Mavericks.app/Contents/Resources/createinstallmedia --volume /Volumes/MyVolume --applicationpath /Applications/Install\ OS\ X\ Mavericks.app

OS X Terminal Command

This install may take some time depending on the speed of your Mac hardware. Once the Terminal finishes copying everything across you will then be able to use the OS X Yosemite installer USB drive to do clean installs of OS X Yosemite.

If you are looking for a video on how to setup OS X Mavericks USB you can use the code above if that doesn’t work you can find the 123myIT.com video.
How to do a clean install of OS X Mavericks from USB

Good luck,
Matt

Create a bootable Windows 8.1 USB on a Mac running OSX Yosemite

This video will show you how to Create a bootable Windows 8.1 USB on a Mac running OSX Yosemite.

Hi All
Allot of 123myIT users have decided to take the plunge and upgrade their Mac OS X to Yosemite and I thought it might be a good idea to do a short video on how to create a bootable Windows 8.1 USB on a Mac running OSX Yosemite.
This video is mainly for people that want to be able to create a USB installer disk drive, so that they can install Windows on any computer whether it be a Mac or another brand. This method can also be used at a later date to reinstall Windows on the same Mac that you create the USB drive on.
So in the example in the video I created the USB on a early 2014 MacBook Air. In this process it also downloaded the Windows support software for this Mac hardware. This means it will run the boot camp installer after Windows gets installed. See the picture below.

Boot Camp Installer

So the If you want to check out the list of Windows support software or boot camp drives for your Mac a great place to start is the 123myIT boot camp drivers page here.

Bootable Windows 8.1 USB on a Mac running OSX Yosemite

In the photo above you can see a picture or the Yosemite desktop as the Windows files are being copied to the USB drive.
If you want more info on Apple Boot Camp you can find the official link here.
If you want to find out more about OS X Yosemite you can go to the official Apple page here.
Want to buy Windows 8.1? Check out the 123myIT.com Store page here.

How to create a bootable Windows 7 8 USB on a Mac

This video will show you how to create a bootable Windows 7 8 USB on a Mac.
You can use the bootcamp assistant to create a bootable Windows 7 8 USB on a Mac. However the option may not be highlighted in your bootcamp assistant.
To make the option appear you can try the following steps.

Step 1. Click on Go then Utilities. Find the Bootcamp assistant, right click on it and go to Show package contents and then go into the contents folder.

Bootcamp Assistant Show Package Contents

Step 2.Copy the info.plist file to the desktop and make a backup copy of it and open it.

Step 3. Find the line which says PreUSBbootsupportmodels and remove the Pre from the line. Try running the bootcamp assistant again and this time you should have the Create a Windows 7 or later install disc option.

Step 4 Copy the info.plist back to the contents directory. And start the bootcamp assistant again and see if the Create Bootable USB Drive for Windows installation comes up. If not try this next step.

Bootcamp assistant create bootable usb drive

Step 5 Change the USBbootsupportedmodels in the info.plist file.
You can find the model on the Mac that you are using by going into the Apple menu then click on About This Mac and then click on More info. Next click on System report and under Hardware Overview look up Model Identifier.
In the example in the video my MacBook model was MacBook7,1.
In the info.plist file I had to change the USB supported models to my MacBook model so that I could create a Windows USB on a Mac.

Hardware Overview Mac

Hope this works guys. Feel free to leave some feedback.

Cheers
Matt

For more into you can check out Apples discussions page here.

How to create a bootable OS X Mavericks usb drive

This guide will show you how to create a USB installer of Apples OS X 10.9 Mavericks.

Have you ever wanted to do a clean install of OS X from but your new MacBook Air doesn’t come with a DVD drive?
Well this guide will step you through how to create a bootable OS X Mavericks 10.9 USB drive.

To complete the process you will need the following items:
* 8GB USB drive or SD Card
* OS X Mavericks.app (this can be downloaded from the App Store)
* An Apple computer with the Mac App Store
* A user account with administrator rights

OS X Mavericks USB drive

Step 1. Download Mavericks from the App store.
Apple direct link here.
Step 2. Insert your USB into the Mac and run the Disk Utility.
Step 3. Select the USB drive that appears in the left-hand menu and select the Partition tab across the top.
Step 4. Select the drop down menu and click on 1 partition.
Step 5. In the format type menu make sure you have Mac OS Extended (Journaled) selected.
Disc Utility

Step 6. Select the Options button and make sure the GUID Partition Table radio button is selected.
Disc Utility - GUID Partition Table

Step 7. Open up the Terminal.app you can find it under the Applications Utilities folder or search for it in Finder.
In the terminal window type the following command.

defaults write com.apple.Finder AppleShowAllFiles TRUE;\killall Finder;\say Files Revealed

Terminal Window

Step 8. When the USB completes the formatting, go into the Launchpad and copy the Install Mac OS X Mavericks.app to your desktop then Right-click and click on Show Package Contents.

Mavericks App
Step 9. Go into the Contents > Shared Support folder and double click the InstallESD.dmg file.

Install ESD

Step 10. Click on the mounted.dmg file and find the hidden BaseSystem.dmg file.

null

Step 11. Go into Disk Utility and open the newly formatted USB and click on the Restore tab.
Step 12.Drag and drop the BaseSystem.dmg into the Source field. And drag and drop the partition that you recently created on the USB drive, into the Destination field.

OS X Restore

Step 13. Click the restore button and click Erase. You might get prompted for the Administrator password.

Untitled Message

Step 14. It may take some time to copy all the data to the USB drive.

Copy Time OS X Mavericks

Step 15. When the files have finished copying, the USB drive should mount automatically. Go into the System > Installation folder and delete the Packages directory.

OS X Packages Directory

Step 16. Go back into the mounted Install ESD.dmg file and find the directory called Packages. Copy this to the Installation folder.

Installation Folder

And now you are done. You have just created a bootable copy of OS X Mavericks on a USB drive.

Good Luck.

How to make a bootable OSX Mountain Lion USB drive.

This video is a tutorial on how to create a bootable osx mountain lion USB drive. This step by step guide will show you how to download and extract the mountain lion files and install them to a USB drive so then you can boot into that usb drive and install OSX on a mac.