Apple iPhone 7 Plus Product Red Unboxing & Firstlook

Apple iPhone 7 Plus Product Red Unboxing & Firstlook

Hi guys and welcome to 123 my IT’s video on Apple’s latest iPhone release the Apple iPhone 7 Plus Product Red.
the first thing that you will notice about Apples new iPhone is that it’s red and you can get this model in both the iPhone 7 and iPhone 7 Plus. These phones come with 2 storage options 128 gigabyte and a 256 gigabyte capacity. Apple very conveniently have released this new colour on the very same week that Samsung Galaxy S8 is due to be announced.

iphone 7 plus product red

This iPhone is called the Product Red iPhone because it’s part of the Product Red cause which means that a portion of the profit from the sale of this iPhone goes to the Product Red cause. And you can find out more about this on the link below.
https://red.org/

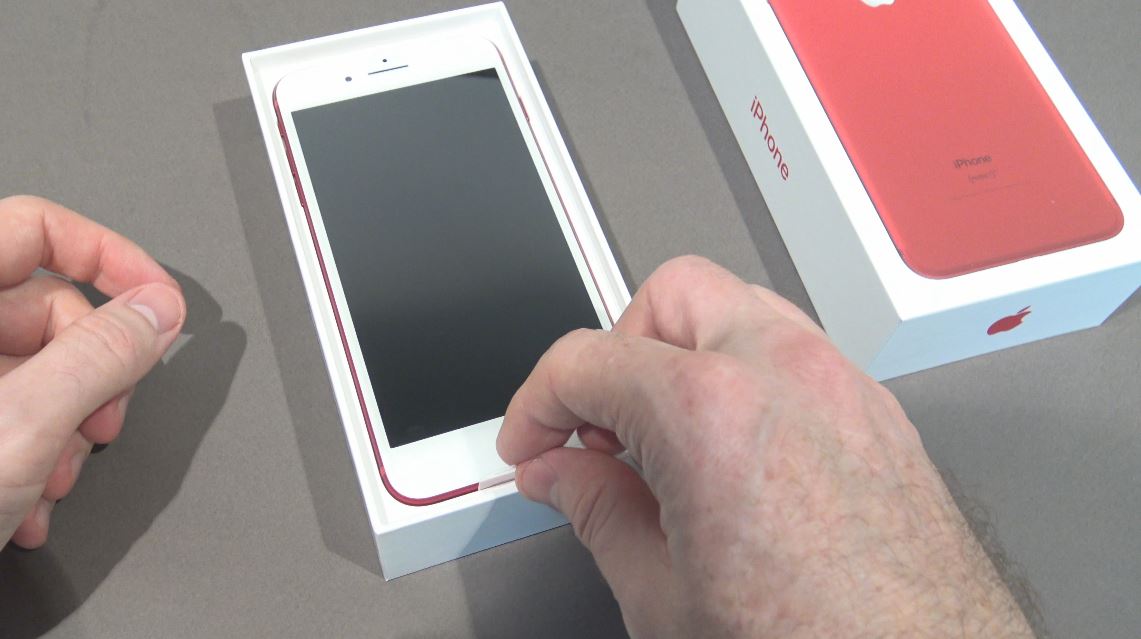
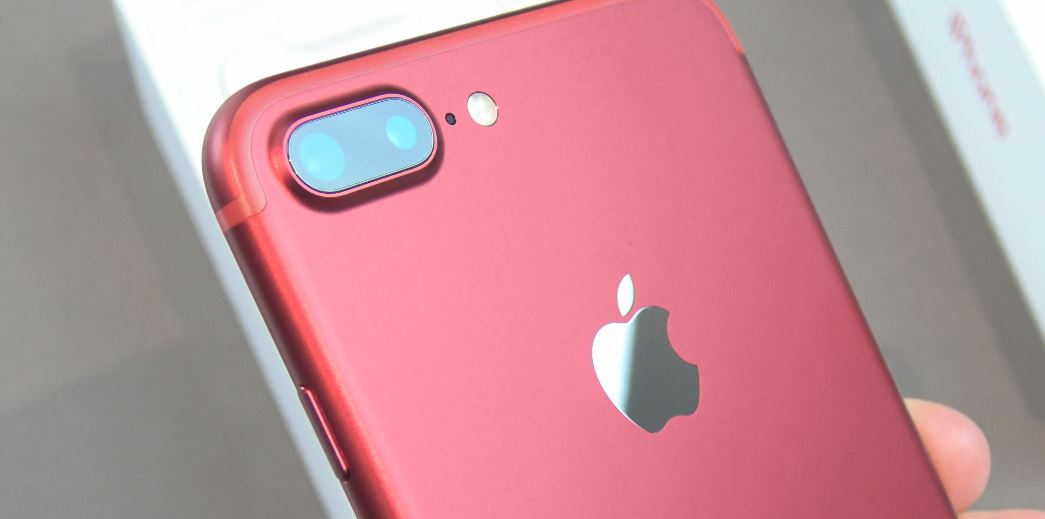
As you take the iPhone out of the box the first thing that you will notice is the back of the phone is red however the front of the phone is white. This has been a big disappointment for myself and also a lot of other iPhone fans, because a lot of people would have liked to have seen a black front on the iPhone with a red back or a fully red iPhone both on the front and back.

iPhone 7 Plus Product Red Front

This aside the quality of the iPhone and the deepness and sharpness of the red his outstanding. Is it worth upgrading to well I’m not convinced unless however if you are in the market for a new iPhone then this would be an ideal selection.

Apple iPhone 7 plus product red back

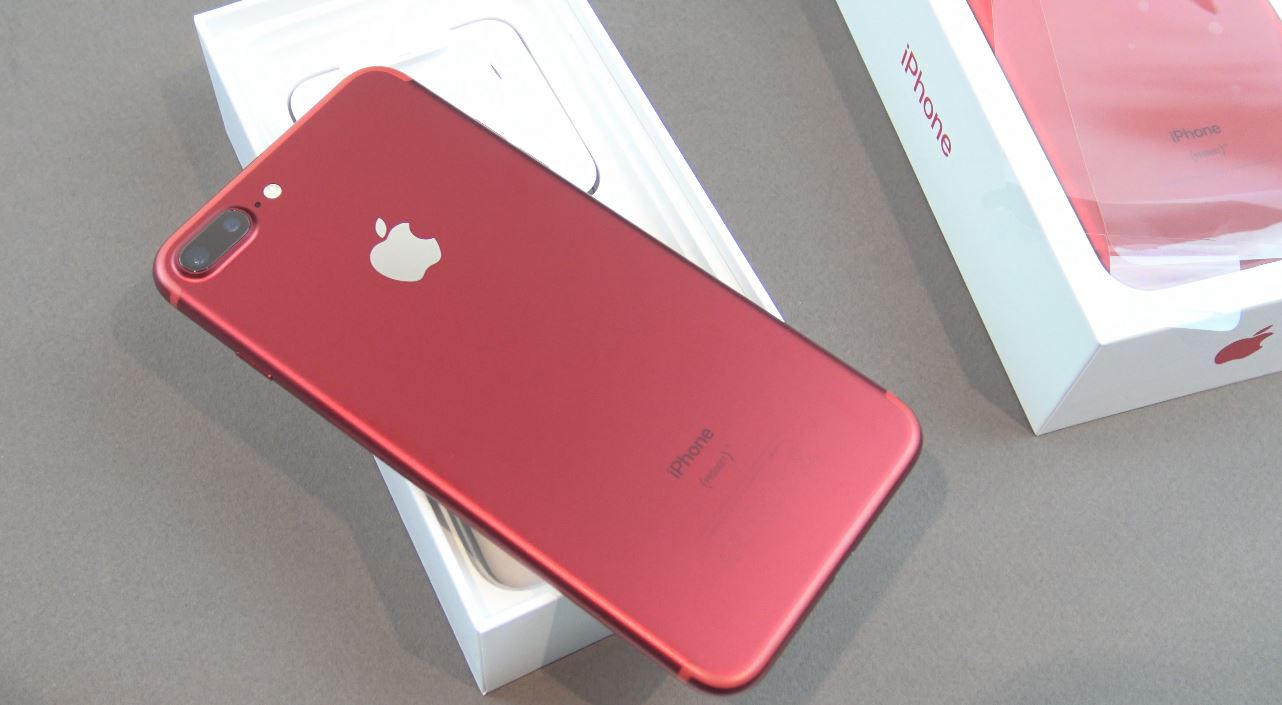
This is the matte finish very similar to the other iPhones, however this is not like the Jet Black model which had a glossy finish. So it should be fairly durable.

One nice thing that Apple has done here is they have match the antenna lines with the bezel of the phone so the antenna lines are almost hidden.

iPhone  7 plus product red antenna lines

So what do you think guys do you think the iPhone read is worth the upgrade? leave your comments in the comments field below and thanks for watching.

Create MacOS Sierra Install USB

Create MacOS Sierra Install USB

Hi guys and welcome to 123 my IT’s video on how to create an MacOS Sierra Install USB.
Ok guys recently I did a video on how to download Mac OS Sierra and to see that video you can find it on the following link. How to download Mac OS Sierra.

That video shows you how to download this app and now the next step is to show you how to actually create a MacOS Sierra Install USB from this app. So the USB thumb drive has to be a minimum of 8 gigabytes in size for you install the OS X Sierra software on the USB and then you can do a fresh install of Mac OS Sierra from this use to any Mac.
Lets for example say you wanted to sell your old Mac or you had a problem with your Mac like you had a virus on there any need to do a fresh install. You can use this USB to format the Mac and install a fresh copy of OS X.

So the first step you will need to do is format the USB and you can do this by plugging your USB thumb drive and then go to go in the Apple menu and then go down to disk utilities.

Create MacOS Sierra Install USB

Click on the USB that you want to format and make sure it’s set to Mac OS X extended journaled and keep it as untitled for now you can change this around but if you change this around you have to actually change the untitled part in the code there so let’s just leave it as untitled for now.

Make sure you have no important data on the USB because the next step will delete any data that was on the USB.
Once you have done this just click erase and then erase again. The USB will disappear and it will start to format the USB.

The next step is to download the install disc creator app you can get the install disc creator app from the 123myIT.com website, under downloads or simply click the link here.
Open up the install disc creator you will need to select the untitled USB from the drop-down menu. Make sure the OS X Sierra app is selected below then click create installer button. You may be prompted for a password this will be the administrator password type in the password and then click ok. This process can take about 5 to 10 minutes depending on the speed of your Mac.

Install Disk Creator

To do this same process with the terminal code copy the terminal code below then open up a terminal Window by going to finder and then type terminal and then hit return.

sudo /Applications/Install\ macOS\ Sierra.app/Contents/Resources/createinstallmedia --volume /Volumes/Untitled --applicationpath /Applications/Install\ macOS\ Sierra.app --nointeraction &&say Done

Simply right click and paste the command into the terminal window, press return again and you will be prompted for your administrator password type in your administrator password.

Terminal command MacOS Installer Disk

if successful you should see the terminal window start to erase the USB and copying installer files to the disc. Once this is done you should be able to then use the USB to do a clean install of any Mac.
I hope that helps guys ! 🙂

How to Download macOS Sierra

How to Download macOS Sierra

This video and article will show you how to download MacOS Sierra, which can be used at a later date to install on any Apple Mac computer.

Why would you want to download a copy of OS X Sierra? When you have an offline copy that means you can then install it on any Mac, so let’s say you wanted to sell your Mac wipe all the data that was on the local hard drive before you sold it you can go through it and reinstall the operating system with macOS Sierra.
Another good thing about having the offline copy is you can actually install it on other Mac’s, also Apple tends to update this software once a year so if you don’t download a copy at some stage and you wanted to reinstall this particular version of macOS you won’t be able to.

So to download macOS Sierra it’s straightforward all you need to do is open Safari and then go to the Apple website. Or you can use this link as a quick link. http://www.apple.com/macos/sierra/

Download macOS Sierra

You should then have a download or upgrade button. Click that and download the macOS Sierra app.

Download or Install MacOS Sierra

Once downloaded you should see the macOS Sierra app in the Applications menu. This is good news because you now have a copy of the software and its ready to be installed on to a USB.

macOS Sierra app

I will do a video of how to install macOS Sierra on USB too shortly, but basically if you wanted to install this on the USB lets say you had some problem with your Mac any wanted to do a fresh install, maybe it got a virus or something like that.
What you can do is follow my video will be on the 123myit.com website on how to extract this and put it onto a USB and then I’ll show you how to basically reload a Mac with a clean install with the new version of Mac OS X Sierra.

I hope this helps guys.
Cheers
Matt