Hi guys and welcome to 123myIT. In this video, we will show you how fix the error this copy of the Install Mac OS application is damaged and it will also fix the error OS X could not be installed on your computer.
Upgrading your Mac – Install MacOS Application is Damaged
Guys if you are upgrading Mac OS or trying to do a clean install from USB you might encounter the error messages I just mentioned and the fix is easy. Open up a web browser and go to Google and do a search for the release data of the Mac OS you are trying to install. In my case its macOS High Sierra.
Changing the date.
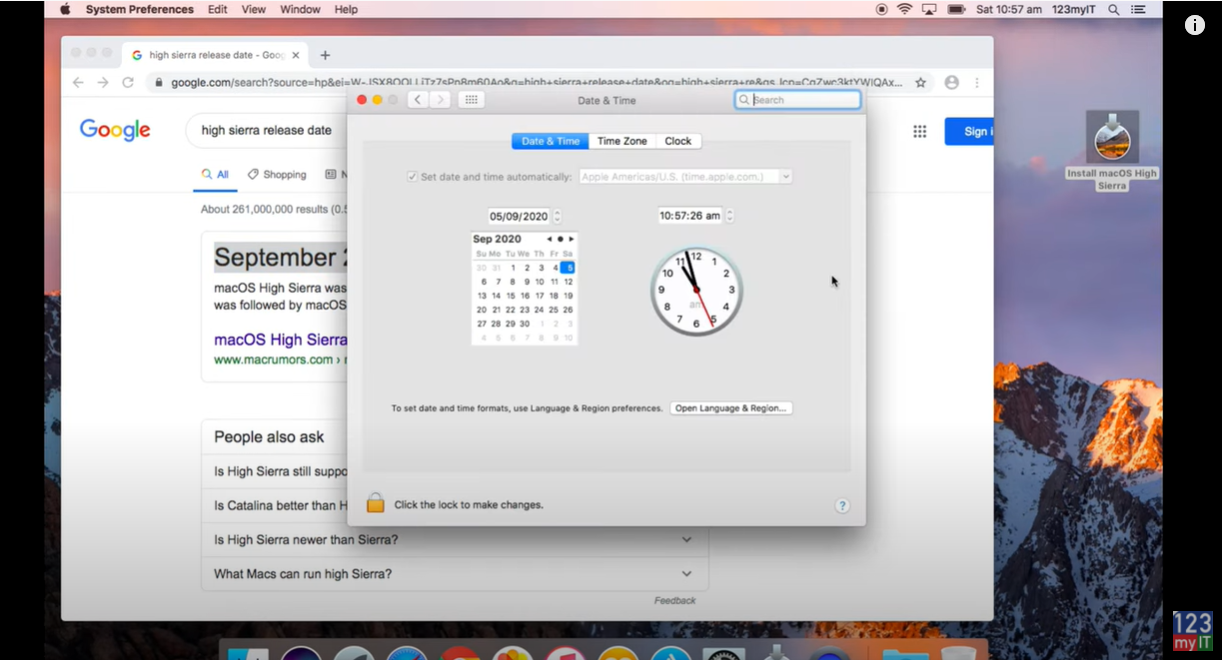
As you can see hear the release date for High Sierra was September 25 2017. So to get the macOS installer to work you will need to change the time on your computers clock.
Open up the Date & Time on your Mac and unlock it with your Admin password. Once you have unlocked it take the tick out of Set date and time automatically. Set your time back to just after the release date of the version of MacOS you are trying to install. So for me iam going to set my data to October 2017. This tricks the installer file to thinking the date is 2017 and will install MacOS on your computer. Watch and see what happens now when I go to run the installer.
There you go the error is gone and the MacOS will continue to install. The Install MacOS Application is Damaged error is fixed.
Guys don’t forget to check out my other videos such as how to do a Clean install of MacOS Big Sur. And do me a favour if you know anyone who might need this video please share it will them, hit the subscribe button and smash the bell icon.
Hi guys and welcome to 123myIT. In this video, we will show you how to do a clean install of MacOS Bug Sur.
Guys in a previous video I showed you how to create a MacOS Big Sur installer USB. I will put a link to that in the top of the video and it the description below. Once you have followed that video and created your USB, we can now show you how to do a clean install on any Mac. Lets get started.
One more thing to mention its good to have a USB type A and USB type C this allows you to do a clean install on any Mac that has USB type A and USB C ports. I will leave an Amazon link in the description.
First Step – Install Mac OS Big Sur
So, the first step is to shut down your Mac. So go to Apple menu and hit shutdown. Ok just go ahead and plug in your MacOS Big Sur USB. Next up press and hold your Alt Option key on your keyboard.
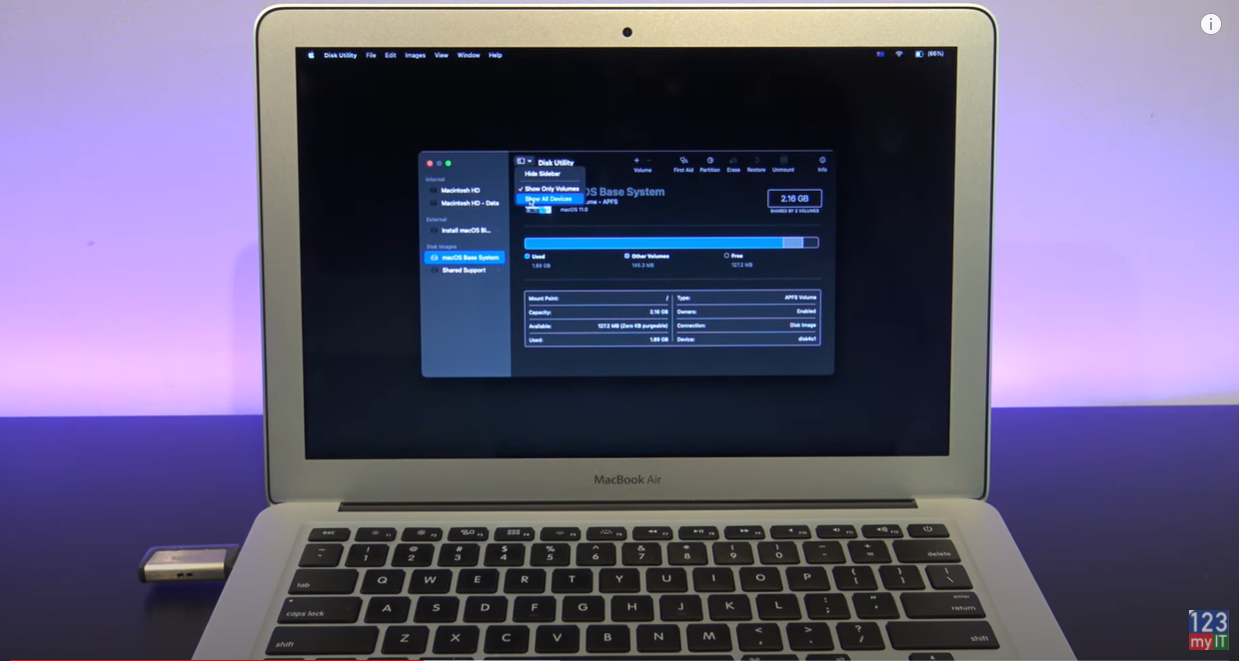
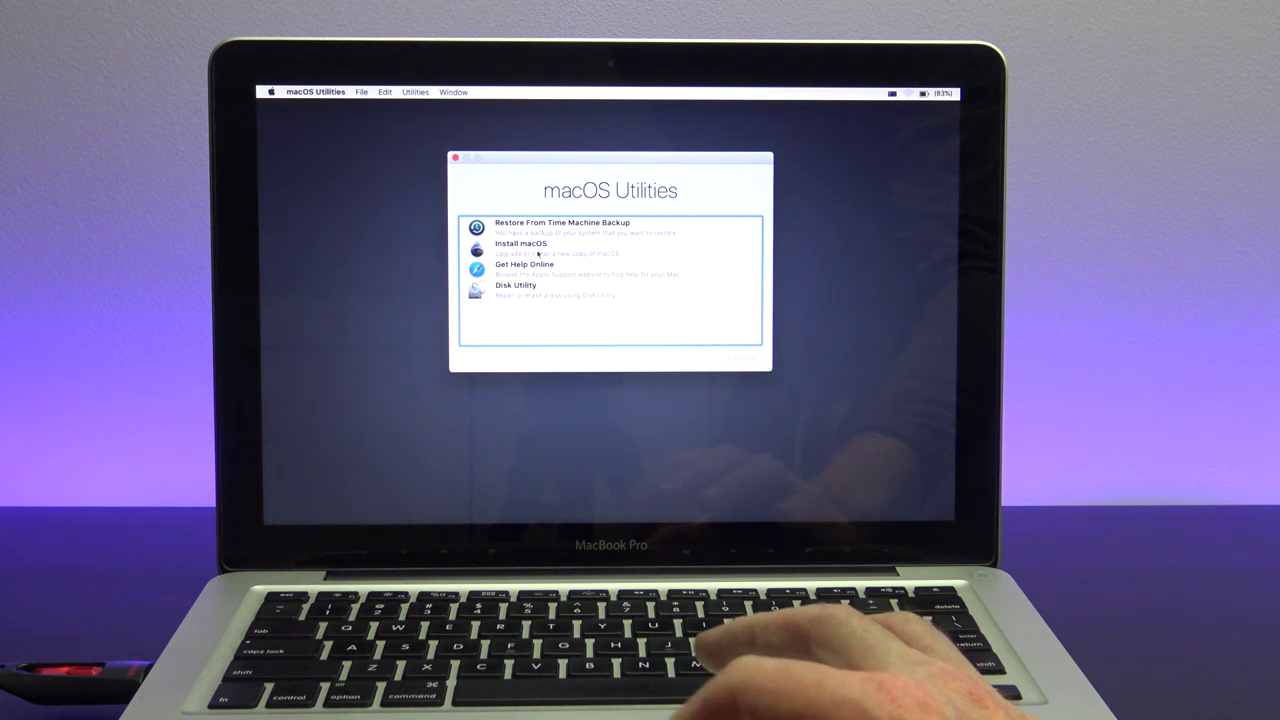
And press your power button to turn your Mac on. You should then see the boot menu with install MacOS Big Sur. Use the arrow keys to select the drive. It will eventually boot you into the MacOS Utilities menu. IF you want to upgrade or install a new copy of MacOS select the install MacOS option. I want to show you how to do a clean install so I am going to wipe the hard drive first. So click on disk utility. Go to view and then show all devices. Select your Apple Hard disk or SSD and click on erase. Type a name for your Hard drive and click erase. I will call mine Macintosh HD.
Using Disk Utility to format the disk.
Once that’s finished just click done. If you have an older Mac go to partition and partition again. And under the Format menu you will have other options. For newer Macs use APFS. For older Macs try Mac OS Extended Journaled.
Disk Utility
Once you are finished just close the disk utility and click on install MacOS. Click continue continue again and then agree. Select your Macintosh hard disk and click continue. Ok so that’s going to take a little while to install so while you are waiting why not hit that subscribe button for me and smash the bell icon! And also I will put a play list of all my Mac videos in the top of the video now.
By now you Mac would have rebooted and you should see the welcome screen where you select the country you are from. You have now done a clean install of MacOS Big Sur. And you can just go through the Mac setup prompts very similar to when you first purchased your Mac.
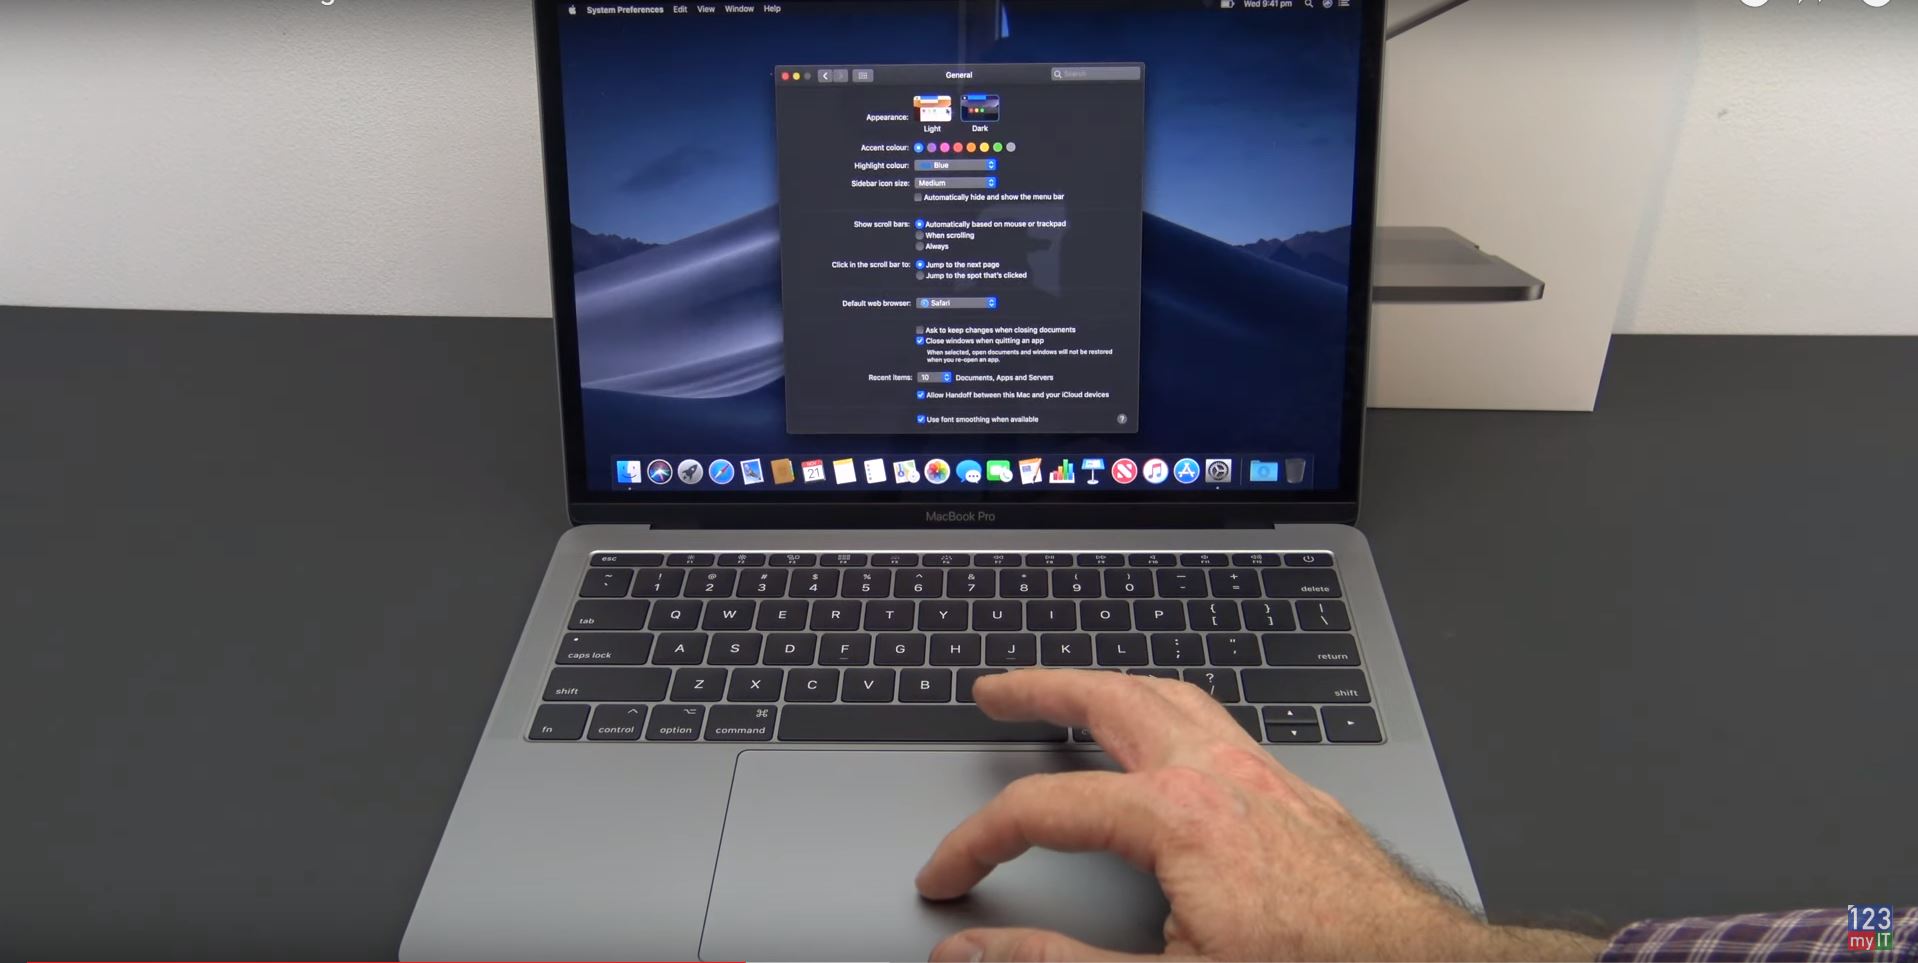
Dark Mode
Don’t forget to choose your look. You can choose your look, so you have the options of light or dark or auto. If you select auto it will change depending on the time of day. Pretty cool.
Guys you have just completed a clean install of MacOS Big Sur and its ready to use.
Guys don’t forget to check out my other videos such as create a MacOS Big Sur usb drive. And do me a favour if you know anyone who might need this video please share it will them, hit the subscribe button and smash the bell icon.
Hi Guys and welcome to 123myit. In this video, we will show you how to record your screen on a Mac. Guys if you are new to the channel we do tech related videos that can help you with any questions you might have. So please don’t forget the hit the subscribe button and smash the bell icon.
Let’s Get Started!
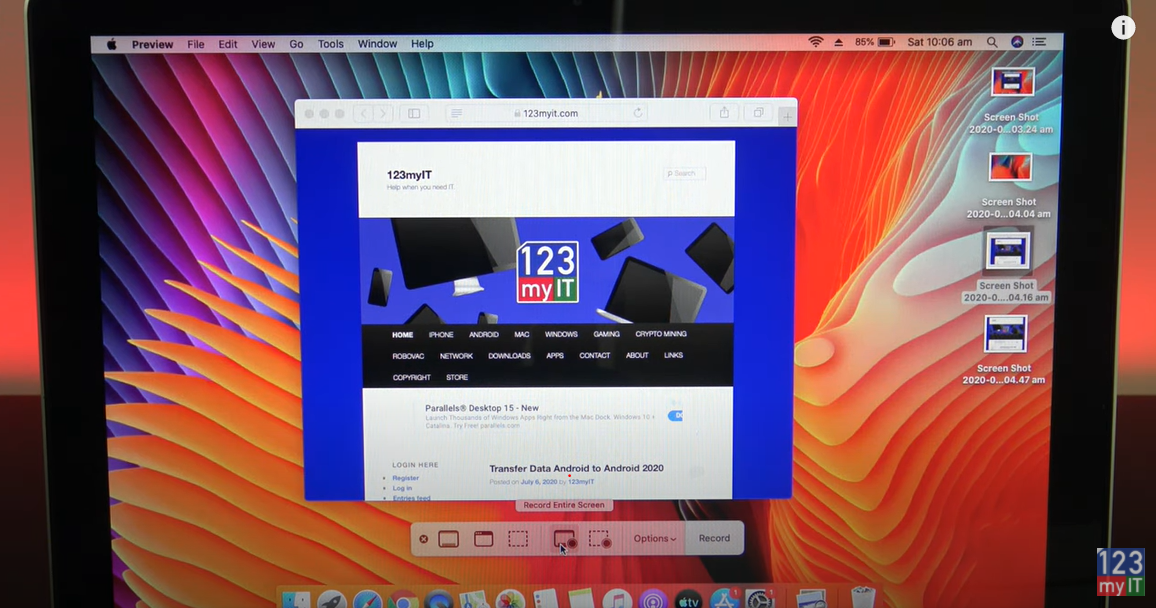
To record your screen on a Mac you will need to bring up the Screen Recording menu by pressing Command + Shift + 5.
The different options when record your screen on a Mac.
So that’s buttons command shift and 5 all at the same time. You will see the Screen Recording menu pop up. I am going to go through each part and show you what they all do. The first option is capture screen shot. This will basically take a screen shot of you screen as it is. Once its selected click on Capture and you will see a preview pop up. It will also save this image to your desktop.
Command + Shift + 5 keys
Double click on it and you be able to preview it. Press Command + Shift + 5 again and click Capture selected window. This will allow you to select a part of your window to screen shot. This allows you to screen shot a window that is currently open. If I select the background it will screen shot that only. See the preview in the bottom right. If I do it a again and select the 123myIT website it will screen shot that only.
Capture Selected Portion
And again I can double click it to preview it. Next up is capture selected portion. This allows you to capture a exact part of the screen. Just move the guidelines to where you want them and click on capture.
Alright the next part of the menu is called Record Entire screen. This will allow you to record a video of your entire screen. So click that and then click record and move something on your screen. Once your are done click the stop button in the menu bar. If you want to look what you have recorded click the preview and play the video.
Record Selected Portion
Next up is record selected portion. This allows you to record a video of only the part of the screen that you move the grid lines too. Click record and move your video and then click stop when you are finished. Now there is some other cool options you can choose. If you click on the options menu you can choose where you want the files to be saved. The default is to the desktop but if you want you can change this.
Other Helpful Tips
Next it’s a timer count down which gives you 5 or 10 seconds before its starts to record. Handy if you need to clear your throat or something before you start.
Under Microphone, if you want to record your voice or sound to the video you can select Microphone. Lets test it. Cool so the sound came through.
The last option I want to show you is mouse clicks. This is handy if you want to highlight where your mouse is clicking in your video. So turn it on in options record you video and I am going to click on the link on the 123myIT website. No if I stop the recording and play the video you should see a circle highlighting a click around the mouse cursor. And there it is.
One last thing, if you want to quickly trim a video simply click on the preview and then click the Trim button. Move the yellow sliders to select the part you want to keep. And then click done to save your recording. Let say I want to move that click to the beginning of the video. Double click your video and it will play you the video you Trimmed.
Also guys don’t forget to check out my other videos such as Setup & Reset Screen Time Passcode on iPhone, iPad & iPod touch. And do me a favour if you know anyone who might need this video please share it will them, hit the subscribe button and smash the bell icon.
Hi Guys I want to show you guys what will happen to your iTunes when Apple upgrade you to the new MacOS Catalina which is due to be released around Monday 23 September 2019. I am getting a few people asking about what will happen to iTunes and their music files. Is Apple shutting down iTunes? Watch the video to find out.
In this video I have added one MP3 file to test with. One video file and a pods cast. Alright so the version I am currently running is MacOS High Seirra. Version 10.13 and we will upgrade that to MacOS Catalina 10.14.
I am going to do the upgrade with my MacOS Catalina USB installer that I created in a previous video and I will put a link to that video here.
After the upgrade – Shutting down iTunes
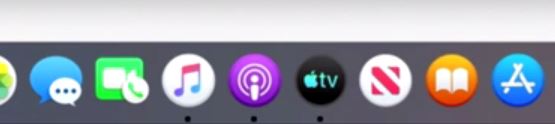
Ok the upgrade has finished and now you can see iTunes has been replaced with three new icons. Apple Music, Podcasts and Apple TV.
If you start by opening Apple Music this is where your Music files should now be stored.
If we check for our test MP3 we can see it now shows up under the recently added menu in our Apple Music app.
Next up you can check out the Podcasts app. If you open that you should see your podcasts list. And theres the one we added earlier.
And the last app to check will be your Apple TV app. All your video content will be added here. And theres our 123myIT video I added.
3 new apps Apple Music, Podcasts and Apple TV.
Your probably wondering what about iTunes for Windows users. Well apparently it will stay the same. Also guys don’t forget t check out my other video, Low power mode on iPhone, hit the subscribe button and smash the bell icon.
In the video we will show you how to do a clean install of MacOS Catalina on any Mac. In a previous video I showed you how to create a MacOS Catalina installer USB and I here is the link. Create MacOS Installer Drive.
Once you have followed that video and created your USB we can now show you how to do a clean install on any Mac.
One more thing to mention your USB can be USB type A or USB type C it doesn’t matter which one. If you want to buy one similar to what I am using here’s the link.
Go ahead and shutdown your Mac. Apple Menu > Shut Down and Select Shutdown again. Next plug in your MacOS Catalina USB. Press and hold your Alt Option Key on your Keyboard and press your power button to turn your Mac on.
You should then see the Boot menu with Install macOS Catalina, use the arrow keys and select Mac OS Catalina drive. Press return on your keyboard.
It will eventually boot you into the macOS Utilities menu. If you want to Upgrade or Install a new copy of macOS, select the install macOS option. I want to show you a clean install so I am going to wipe the hard drive first. Click Disk Utility.
Disk Utility a program to help you format your hard disk before installing MacOS Catalina.
Step 2 – Disk Utility
When you are in Disk Utility, select your Internal Hard drive in the top left hand corner and press partition. Press partition again. Give your partition an Name in this case I will call it Mac HD. Under format you can select APFS or if you have an older drive Mac OS Extended (Journaled).Click Apply and click Partition. When you have done that go back up to Disk Utility menu and Quit Disk Utility.
Alright you have wiped your hard drive and now you are about to do a clean install of macOS. Select install macOS. Click continue. Agree to the terms. Select Mac HD and then click install.
So by now you Mac would have rebooted and you should get the Welcome screen where you select the country you are from. You have now done a clean install of macOS Catalina and you can just go through all the mac setup prompts, similar to when you first purchased your mac.
Ok Guys, Don’t forget to check out my other videos.
This video will show you how to create MacOS Catalina USB installer drive. This installer drive can be used to do a clean install of MacOS Catalina on any Mac.
Step 1 – Download MacOS Software
You will need to open up a Safari browser and navigate to beta.apple.com. Click on Sign in or join up if you haven’t already. Type in your Apple ID when prompted.
Next up you want to scroll down to where it says “Get Started” and Enroll your Mac. Then the next menu to look out for is the Download the MacOS Public Beta. You will be able to upgrade this version to full version when its released, some time in September 2019. Once downloaded open your beta file and run through the prompts.
Close the installer windows by going to the Apple menu and into the Install MacOS Beta and then quit Install MacOS.
Step 2 – Create MacOS Catalina drive
Go into your Finder menu, then click on Go. Then go down to Applications, find your Install MacOS Catalina app. Right click it and go to show package contents. Go into Contents and go into Resources folder. Then find the create install media file. Drag that Windows to the left side of the screen to give yourself some space.
Go into Finder and do a search for Terminal window. Move your Terminal window to the right so you can see both windows. In the Terminal window type sudo space. Then drag your create install media file into the Terminal window. It should look something like the picture below.
Using the Terminal to create the USB drive.
After that type in –Volume and then press space again. Next go back up to the Go menu then down to Go to folder. In the text box type /Volumes and click on Go.
Plug in your USB to the Mac. I use a SanDisk version but you can buy your own version here. 🔥 Do you want a USB drive like the one in the video? Click here. https://amzn.to/2NqJI5k
Step 3 – Create MacOS USB
Go back into your Volumes folder and you should see your SanDisk USB or whatever USB you are using should appear. Click and drag it into your Terminal window. press Return and the next step will wipe and data on the USB. Type Y and press Return again on your Keyboard. Double click on your USB drive and you should see the installer file. Your drive has been created and you are ready to do a clean install of MacOS Catalina.
Also guys if you want to see more of my videos like share files iPhone to Mac click the links now and help me out by hitting the Subscribe button and smashing the bell icon.
My After thoughts are that the MacBook Pro its a great laptop for web browsing some video editing, but still these MacBook’s lack a strong GPU for people who also want to do some Gaming. Another issue that I should mention is that heat is a problem on such s small computer as a result you will hear the fans spin up quite high when the laptop is under load. I have added these details in the video so you can hear the back ground noise that they make.
Mac OS Mojave light or dark featureis pretty cool too, it allows you to set your Mac OS to light or dark mode.
This model has the following specs:
Retina display
13.3-inch (diagonal) LED-backlit display with IPS technology; 2560-by-1600 native resolution at 227 pixels per inch with support for millions of colors
500 nits brightness
Wide color (P3) CPUs
2.3GHz dual-core Intel Core i5, Turbo Boost up to 3.6GHz, with 64MB of eDRAM
Configurable to
2.5GHz dual-core Intel Core i7, Turbo Boost up to 4.0GHz, with 64MB of eDRAM Storage SSD
128GB, 256GB, 512GB, 1TB, 2TB Memory
8GB or 16GB Graphics
Intel 640, Intel 655 Two Thunderbolt 3 (USB-C) ports with support for:
Charging
DisplayPort
Thunderbolt (up to 40 Gbps)
USB 3.1 Gen 2 (up to 10 Gbps)
Wifi
Bluetooth
720p FaceTime HD Camera
Stereo Speakers, Two Mics and 3.5 headphone jack
Battery
Up to 10 hours wireless web
Up to 10 hours iTunes movie playback
Up to 30 days of standby time
Built-in 54.5-watt-hour lithium-polymer battery
61W USB-C Power Adapter Size and Weight
Height: 0.59 inch (1.49 cm)
Width: 11.97 inches (30.41 cm)
Depth: 8.36 inches (21.24 cm)
Weight: 3.02 pounds (1.37 kg)3
MacOS Current Mojave
Apple MacBook Pro website.
123myIT MacBook boot camp drivers.
For this guide and other 123myIT social pages see the links below.
This video and article will show you how to download MacOS Sierra, which can be used at a later date to install on any Apple Mac computer.
Why would you want to download a copy of OS X Sierra? When you have an offline copy that means you can then install it on any Mac, so let’s say you wanted to sell your Mac wipe all the data that was on the local hard drive before you sold it you can go through it and reinstall the operating system with macOS Sierra.
Another good thing about having the offline copy is you can actually install it on other Mac’s, also Apple tends to update this software once a year so if you don’t download a copy at some stage and you wanted to reinstall this particular version of macOS you won’t be able to.
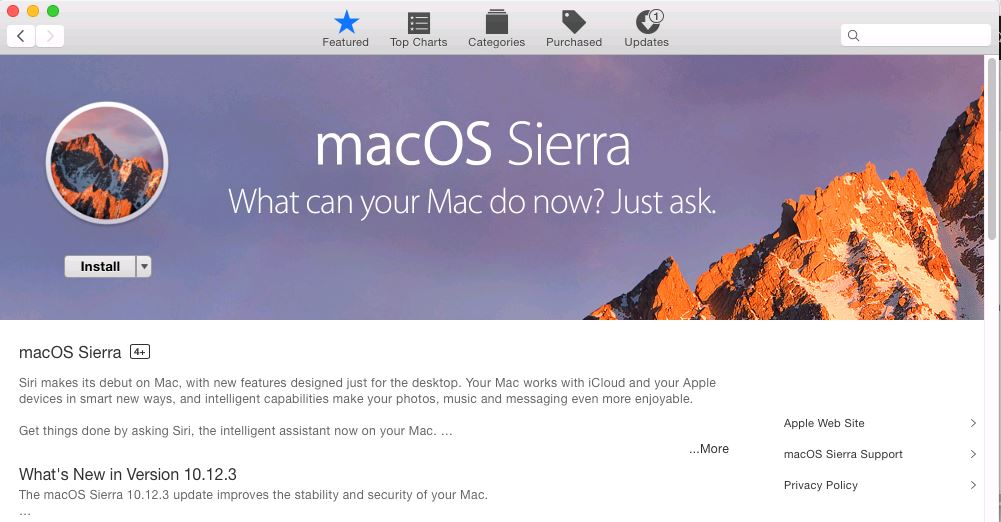
So to download macOS Sierra it’s straightforward all you need to do is open Safari and then go to the Apple website. Or you can use this link as a quick link. http://www.apple.com/macos/sierra/
You should then have a download or upgrade button. Click that and download the macOS Sierra app.
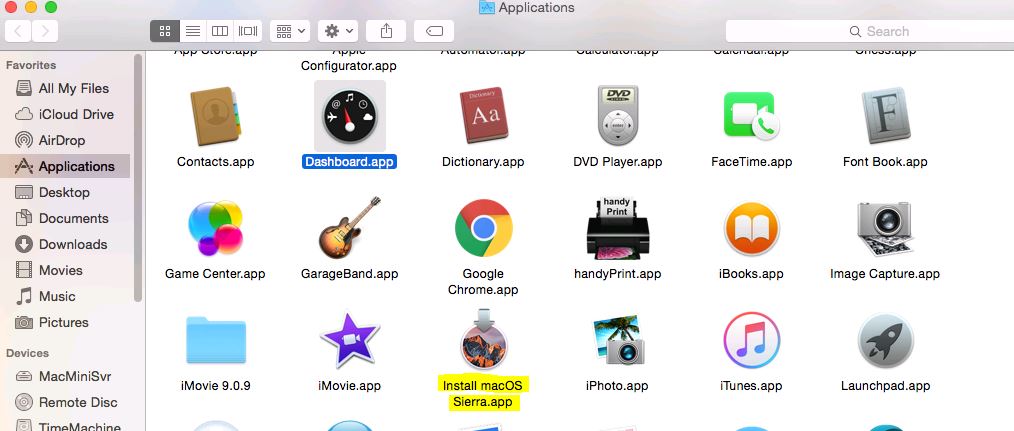
Once downloaded you should see the macOS Sierra app in the Applications menu. This is good news because you now have a copy of the software and its ready to be installed on to a USB.
I will do a video of how to install macOS Sierra on USB too shortly, but basically if you wanted to install this on the USB lets say you had some problem with your Mac any wanted to do a fresh install, maybe it got a virus or something like that.
What you can do is follow my video will be on the 123myit.com website on how to extract this and put it onto a USB and then I’ll show you how to basically reload a Mac with a clean install with the new version of Mac OS X Sierra.