5 Start-up Modes for M1 Macs

Hi guys and welcome to 123myIT. In this video, we will show you all the Mac M1 Start-up Modes. These are helpful if you need to troubleshoot or work on your Mac for any reason.

This video will show you how to open Startup Options. Start the Mac with Diagnostics, Recovery and Safe Mode. Also show you how to set a default Startup Volume.

Lets get started. I am using a MacBook Pro M1 computer. First step is to shut down the Mac.

Start-up Modes

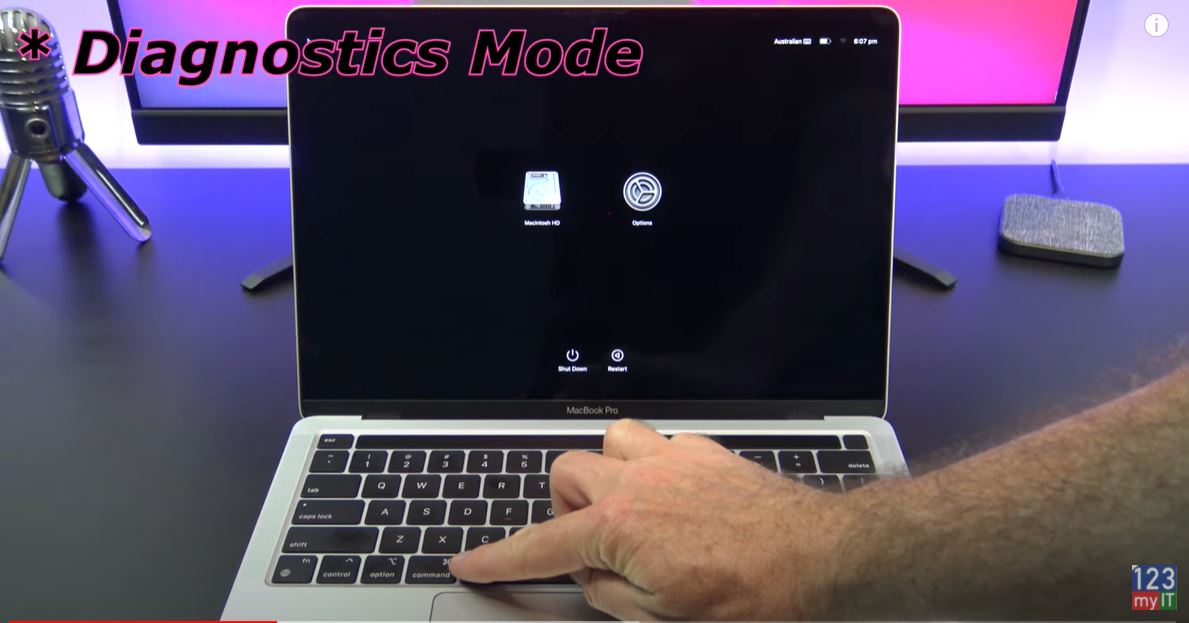
Once your Mac is shutdown to get into Startup Options press and hold the power button until you see the Apple logo with Continue holding for Startup Options menu. When you see the Options cog you can let go of the power button. This is the Startup Options menu and you can do things like select bootable disks.
start-up modes M1 Macs
Diagnostics modes and other modes

Diagnostics Mode

To get into Diagnostics Mode we want to press and hold Command and D keys until your Mac Restarts and you will see the Diagnostics Menu load. Now you might need to connect the Mac to your WIFI to start the diagnostics. Once you have connected to WIFI the Diagnostics will download and you can use the Diagnostics to see if you have a hardware problem with your Mac.

Just click Run Offline and the Mac will check all your hardware to see if its ok. I get an error with my power adapter because its not plugged in. If you click get started it will show you a list of error codes. So if you have faulty hardware you can contact Apple for help.

If I plug my cable back in and run the test again I don’t get any error codes. This means that the Mac hardware is fine and working correctly.

Start-up Disks

If you want to check startup disk, reinstall MacOS, restore from backup or change security settings go into Recovery mode by pressing the Options Cog. So in Recovery menu you have Restore from Time Machine. Reinstall Mac OS. Disk Utility and Browse Apple support.

Safe Mode allows you to Flush user cashes and disable third-party extensions. TO get into Safe Mode go back into Startup Menu and press and hold the Shift key. Then click continue in Safe Mode underneath it. You Mac will restart and then you should be able to see the top right hand menu. Simply logon and your Mac will be in safe mode.

If you want to set a default startup disk go back into the Startup Menu and press and hold the Option key. Under the Disks it will show Always Use option. This allows you to set the default Startup disk. Helpful if you have multiple disks.

Guys don’t forget to check out my other videos such as Fix Broken Bricked Mac with Restore Revive. This will show you how to put a M1 Mac into DFU mode. And do me a favour if you know anyone who might need this video please share it will them, hit the subscribe button and smash the bell icon.

Transfer Data Old iPhone to New iPhone

Move your data from old iPhone to your new iPhone.

Hi Guys and welcome to 123myit. This video will show you how to transfer data from your old Phone to your new Phone.

Start the Transfer – Old iPhone to New iPhone

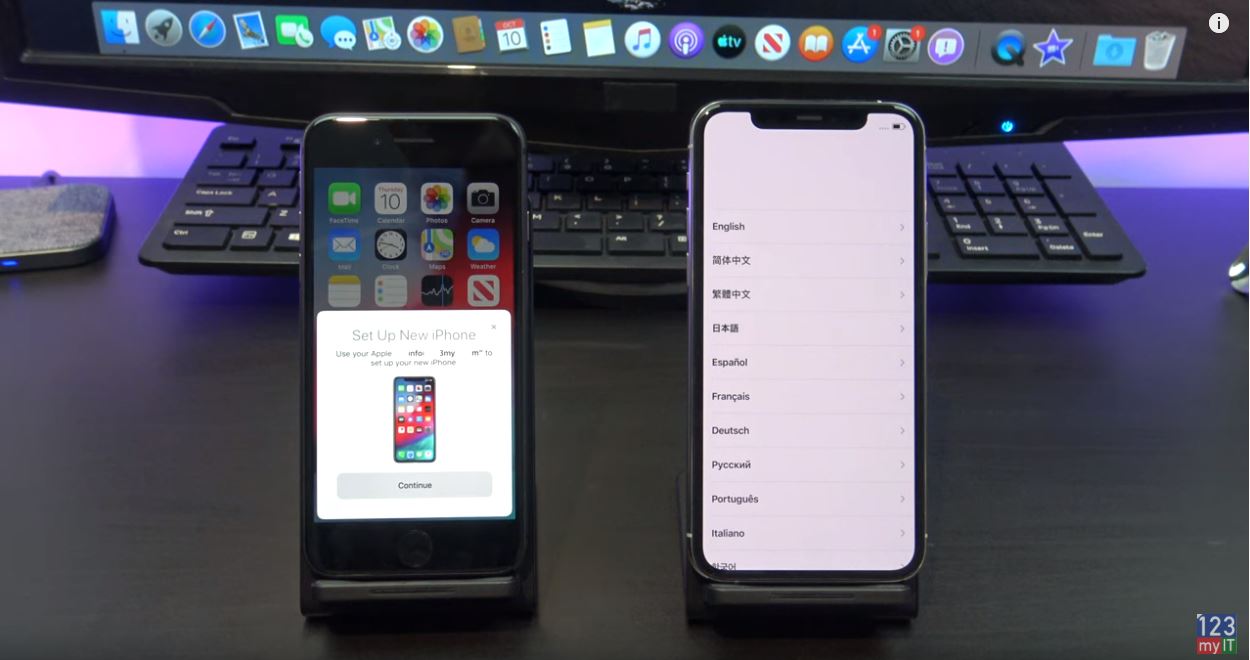
If you have a new Phone you can transfer data by turning it on and placing it beside your old Phone. You should see the Quick Start screen appear on your old Phone.
On your old Phone make sure you are logged in with your Apple ID and check that your iOS is 11 or later.
Next you should see an animation appear on your new Phone scan it with the rear camera on your old iPhone.
If you get prompted for a passcode enter your old iPhone passcode on your new Phone.
I didn’t have a passcode on my old Phone so its gone into the activate step.

Old iPhone to New iPhone
Quick Transfer window.

Also If you didn’t get the Quick Start screen try restarting your old Phone and make sure you have the WIFI turned on.

Follow the steps to setup Face ID or Touch ID on your new Phone. I am going to set mine up later.
Awesome you have made it this far! Hit continue to Start the transfer between your iPhones. This will take a while so now is a good time to plug your iPhones into power.

Logon to your Apple ID account

Next up enter you Apple ID password.
Agree to the terms and conditions. And then follow the next few setup prompts.
Awesome your iPhones are starting to transfer data. Depending on how much data you have this could take some time.

Your Phone will restart and you should see the Restore completed message. Hit continue. Again follow the prompts to setup your new Phone.

Ok you should be all done now. check your new Phone and make sure all your data is there. I am going to check that my pictures have copied across.

Also guys done forget to check out my other videos like Apple Watch series 5 Unboxing and do me a favor hit the subscribe button and smash the bell icon.
Apple Watch Series 5 Unboxing First Look

Apple iPhone 11 Pro Silver Unboxing First Look

Transfer data Android to iPhone 2019

How to make your Phone Number private on Samsung

How to make your Phone Number private on Samsung

This video & article will show you How to make your Phone Number private on a Samsung phone. The phone used In this video is the Samsung Galaxy S7 Edge.

Every now and then you will need to make phone calls from your phone where you don’t want the person you are calling to know the number you are calling from. I made this video for privacy reasons if you wish to hide your number you can follow this guide. Just be aware some people might think your hidden number is a sales call so they might not answer when you want them too.

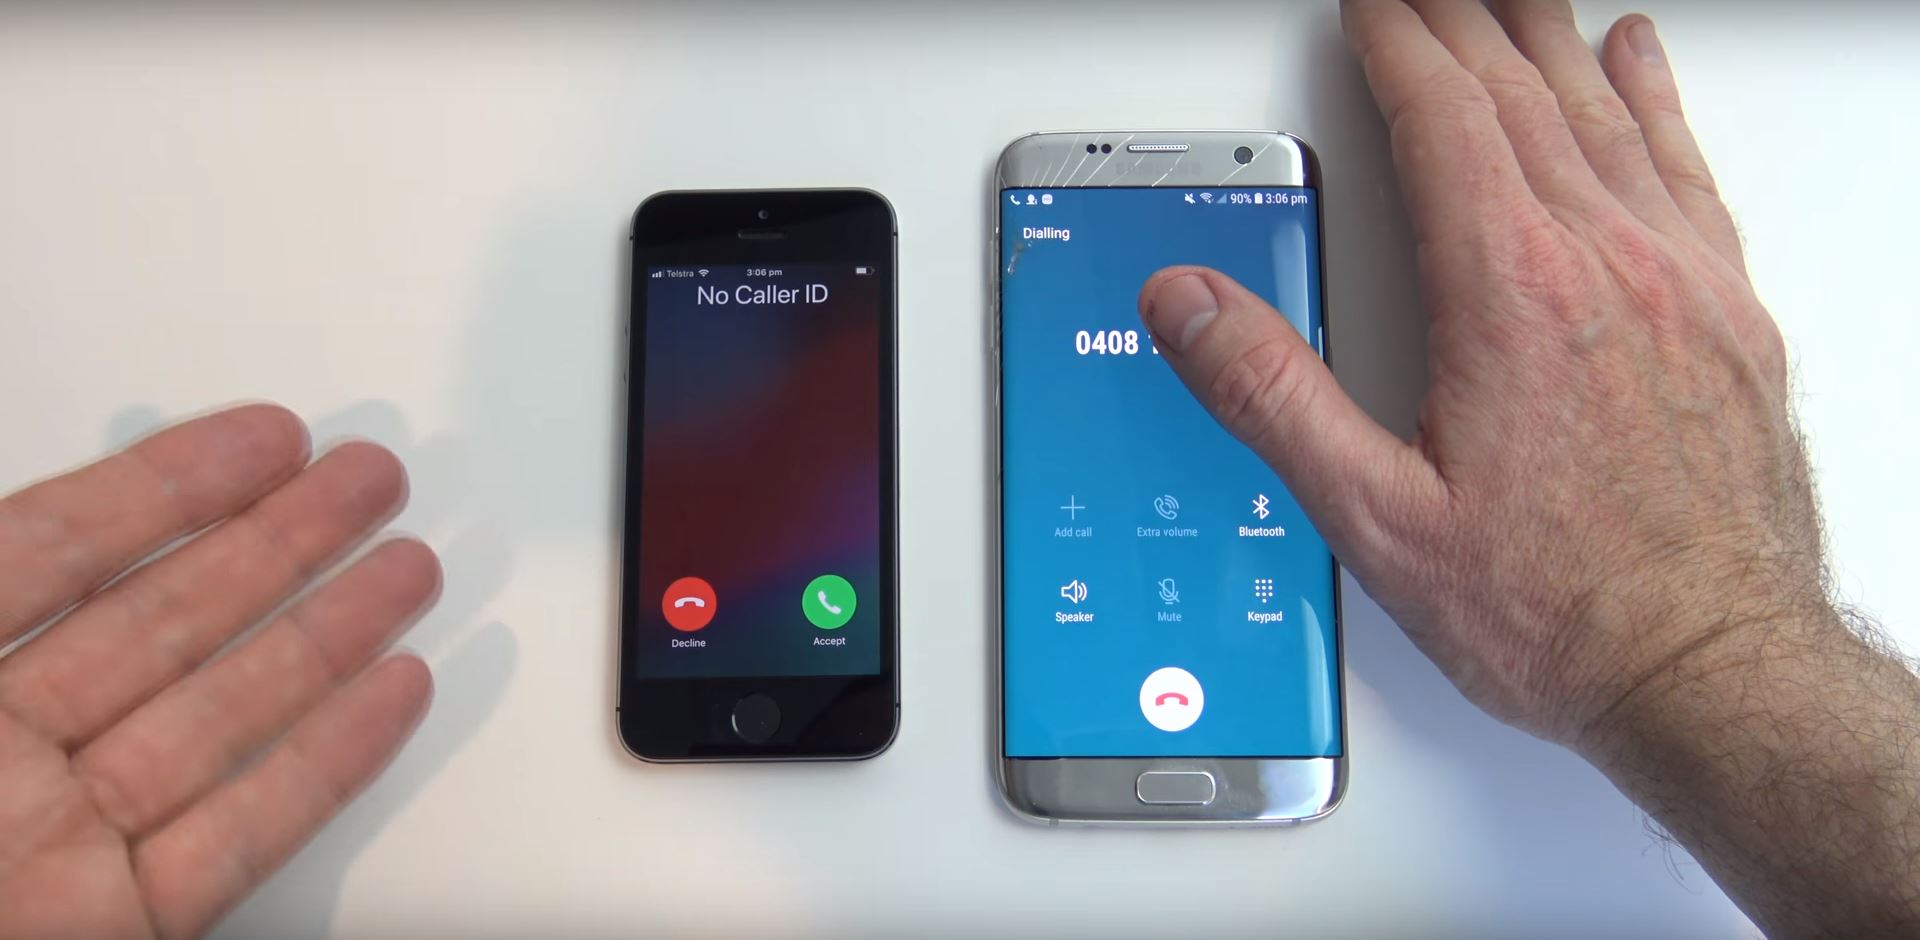
So what happens when you setup your phone and make a call what does the other person see?

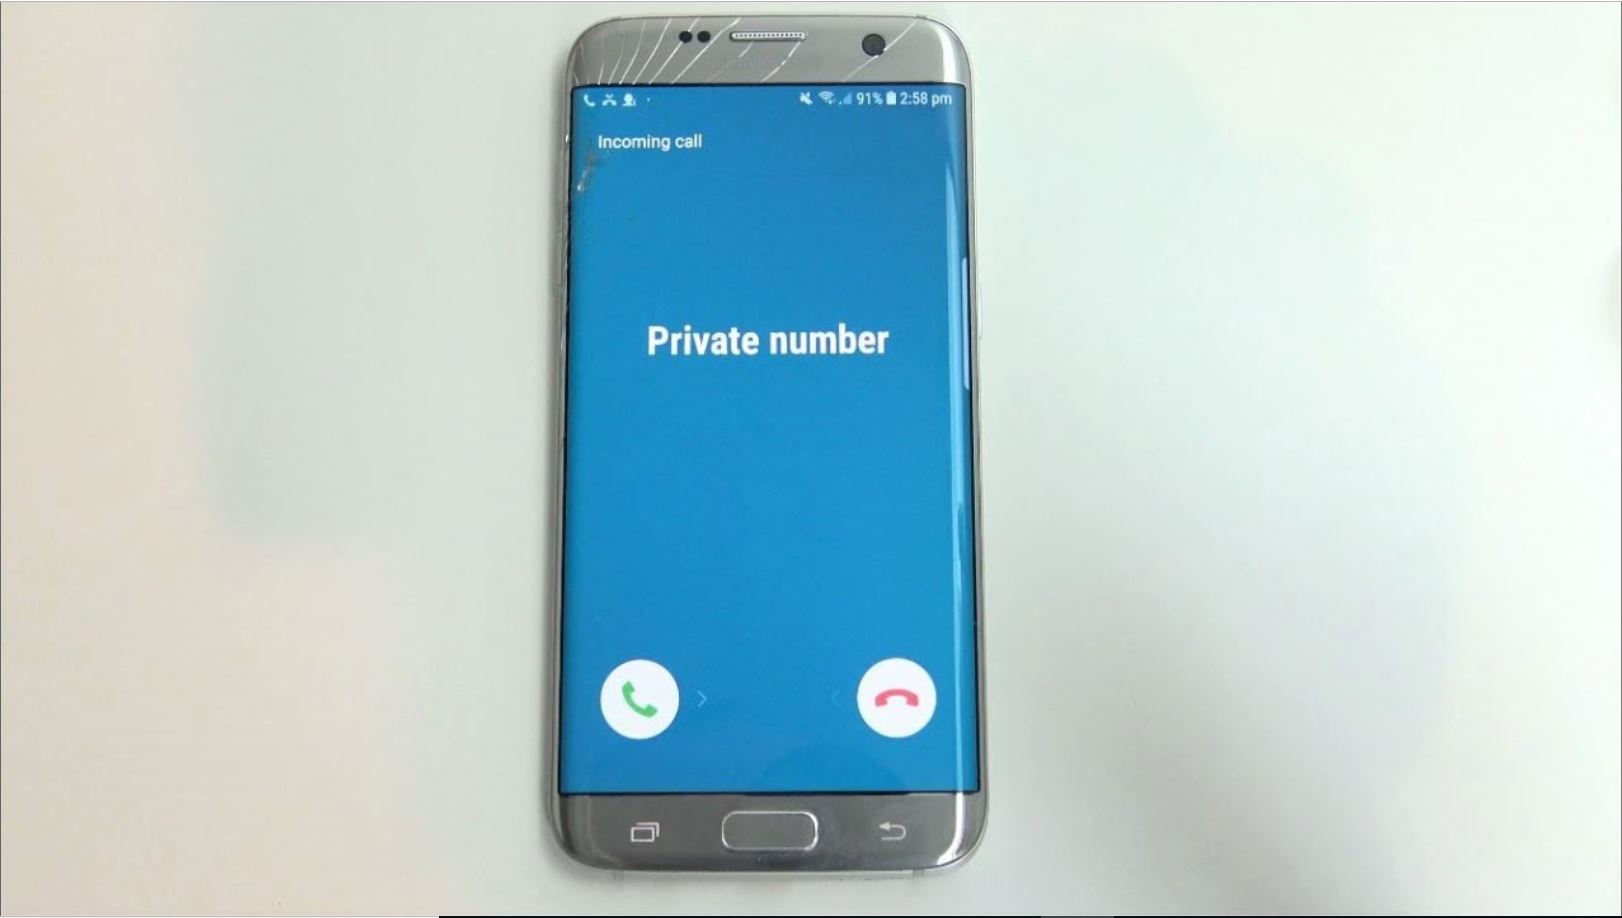
On a Samsung phone it should look something like the picture below.
phone number private

On a iPhone is should look something like the picture below.
phone number private iphone

So to do this go to your phone icon and you will have 3 little dots in the top right hand corner. Tap on those 3 dots and then tap on Settings.
Scroll down to where it says more settings. Next you should have show my caller ID, tap on that. Simply select Hide number.
Any outgoing calls that you make should be hidden from the person you are calling.

The next thing you need to do is to test your hidden number before you call out with the phone. The last thing you want to do is not turn on the Phone Number private and give away your number. Test it to a friends phone or a family member and you should be good to go.

If you want more information on How to make your Phone Number private on Samsung you can check out the official Samsung website here.

Nvidia Mining Rig – The Gambler Build

Nvidia Mining Rig – The Gambler Build

This video will show you how I went about creating an Nvidia Mining Rig for my friend Phil. Phil likes to Gamble so I called this build The Gambler!
I have setup a full list of parts below if you wish to copy this build. And I have tried to add in some secondary parts list incase some parts are no longer available.
The Gambler build is very simular to my RX570 The Kraken build accept I swapped out the AMD RX 570 cards with Nvidia 1070s.
Through this video I also give some tips when building a new rig to do with troubleshooting setup and faulty risers.

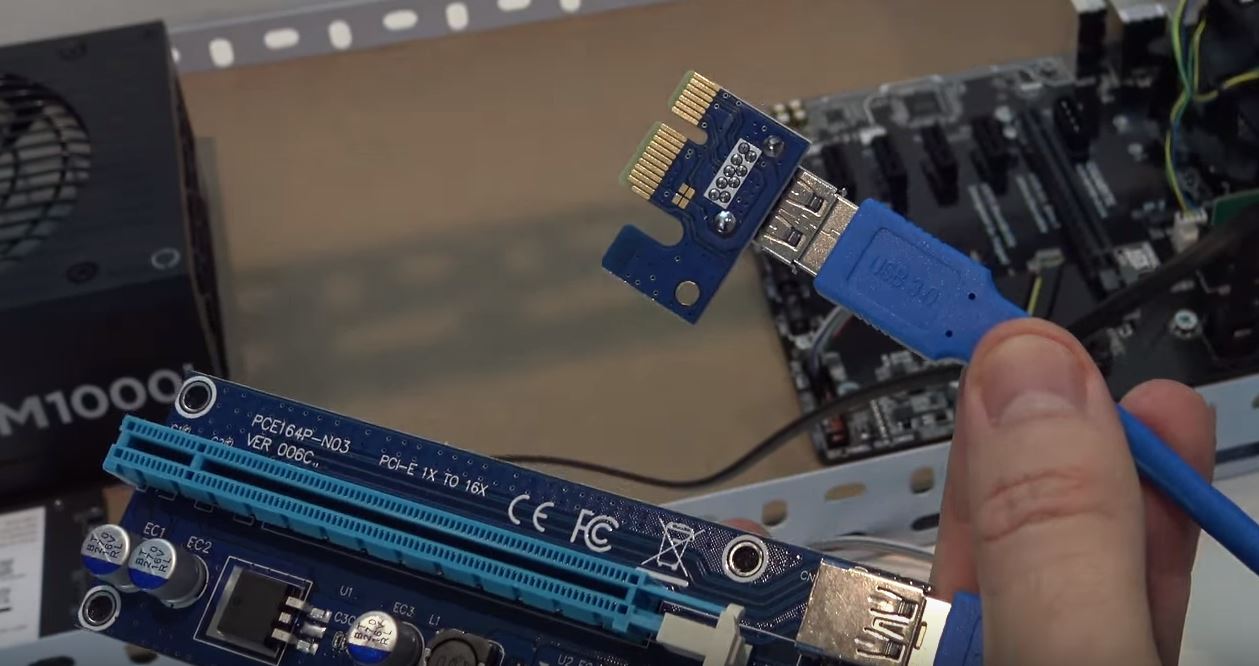
Nvidia Mining Rig Riser

a faulty Riser can cause all sorts of issues with mining rigs. The more hardware you add the more chance of failure.

β—‹β—‹β—‹β—‹β—‹β—‹ Want to buy the parts at Amazon β—‹β—‹β—‹β—‹β—‹β—‹
Gambler Mining Rig Build Parts see below.
β–Ί Gigabyte motherboard http://amzn.to/2ivOIUr
(Alternative) Biostar Motherboard
TB250 http://amzn.to/2CvCHVV
β–Ί Celeron CPU http://amzn.to/2iwek3v
(Alternative) i7 7700 Intel CPU http://amzn.to/2rgTRGM
i7 Can mine ETN as well.
β–Ί Corsair 1000 watts http://amzn.to/2HtzCts
(Alternative) EVGA Power supply http://amzn.to/2iwnIUz
β–Ί Crucial 8GB Memory http://amzn.to/2ivo6Tm
(Alternative) G.Skill Ripjaws Series
http://amzn.to/2Djz5aR
β–Ί Couldnt find the GALAX model on AMAZON so just grab any
card will do fine. http://amzn.to/2ECsUDz
(Alternative)
1080 TI http://amzn.to/2FPh4mp
1080 http://amzn.to/2DntBAa
1070 TI http://amzn.to/2FTNRa6
1070 http://amzn.to/2rlDt7K
1060 6gb http://amzn.to/2DvTTzl
1050 TI http://amzn.to/2Dlcdbe
RX VEGA http://amzn.to/2DMNkWT – 64
http://amzn.to/2DhNXGK – 56
RX580 http://amzn.to/2DQTeq5
RX560 http://amzn.to/2DMrNgS

β–Ί PCIE Riser cards http://amzn.to/2iv1nXK
(Alternative) Mailiya 2-Pack PCIe Risers Dual Chip
http://amzn.to/2BDyIKv
or
Rebbic Latest VER009S 2-Pack PCI-E 16x
http://amzn.to/2HqyXsH
β–Ί SSD SanDisk http://amzn.to/2Cx9IBq
(Alternative) Any 120gb will do. http://amzn.to/2Hq4hrD
β–Ί Frame if you need one. http://amzn.to/2CuqIrN
β–Ί Fans to Keep rig cool http://amzn.to/2Gmk759
β–Ί Power Button Cable for motherboard.
http://amzn.to/2FUGMpU
(Alternative) http://amzn.to/2sEkAgT
β–Ί Power meter http://amzn.to/2FQgW6l
(Alternative) TP LINK Smart Plug http://amzn.to/2Grlsb0
P3 P4400 Kill A Watt Electricity Usage Monitor
http://amzn.to/2BCiCR9
β–Ί PCIE M.2 Adapter Card http://amzn.to/2mOofTl
(Alternative) http://amzn.to/2C6lYNi
β–Ί Tripp Lite Heavy-Duty Power Extension Cord 15A
http://amzn.to/2CtRf8N

Cryptocurrency Wallets and Exchanges

Cryptocurrency Wallets and Exchanges

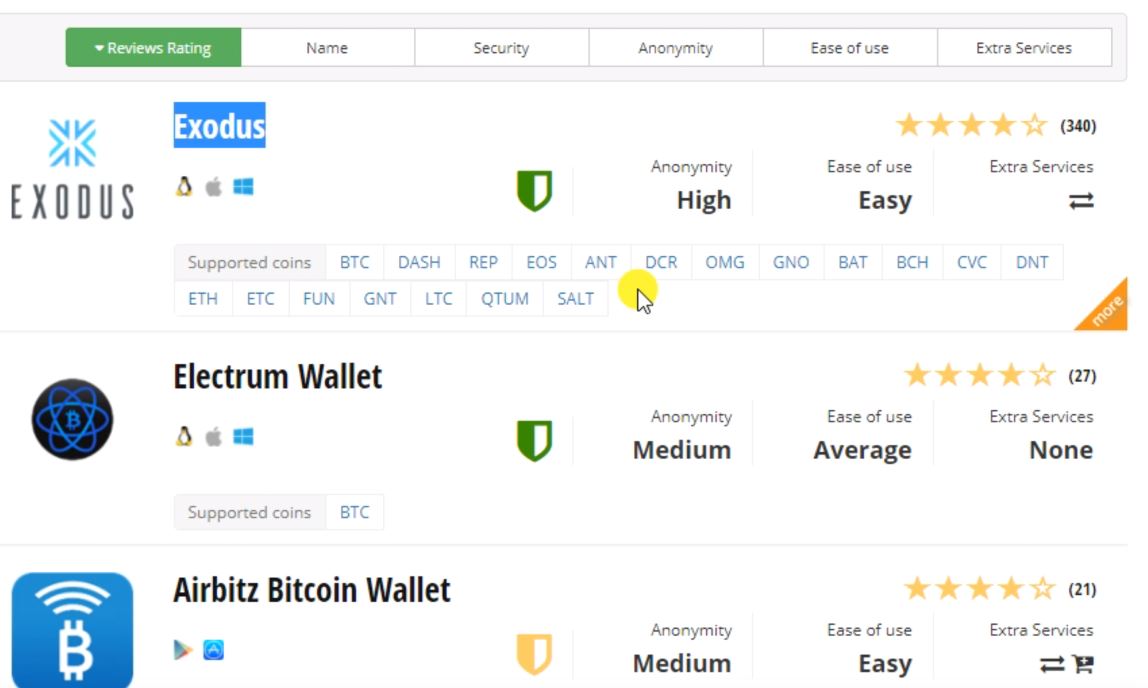
In this video I talk about Cryptocurrency Wallets and Exchanges. I use the website www.cryptocompare.com because I find it has allot of really good info on it if you are looking to find out more info on Cryptocurrency Wallets and Exchanges.
Once you find the Wallets menu on the site have a look through at the different types of wallets you can find.

The ones I talk about and use is Exodus.

Cryptocurrency wallets

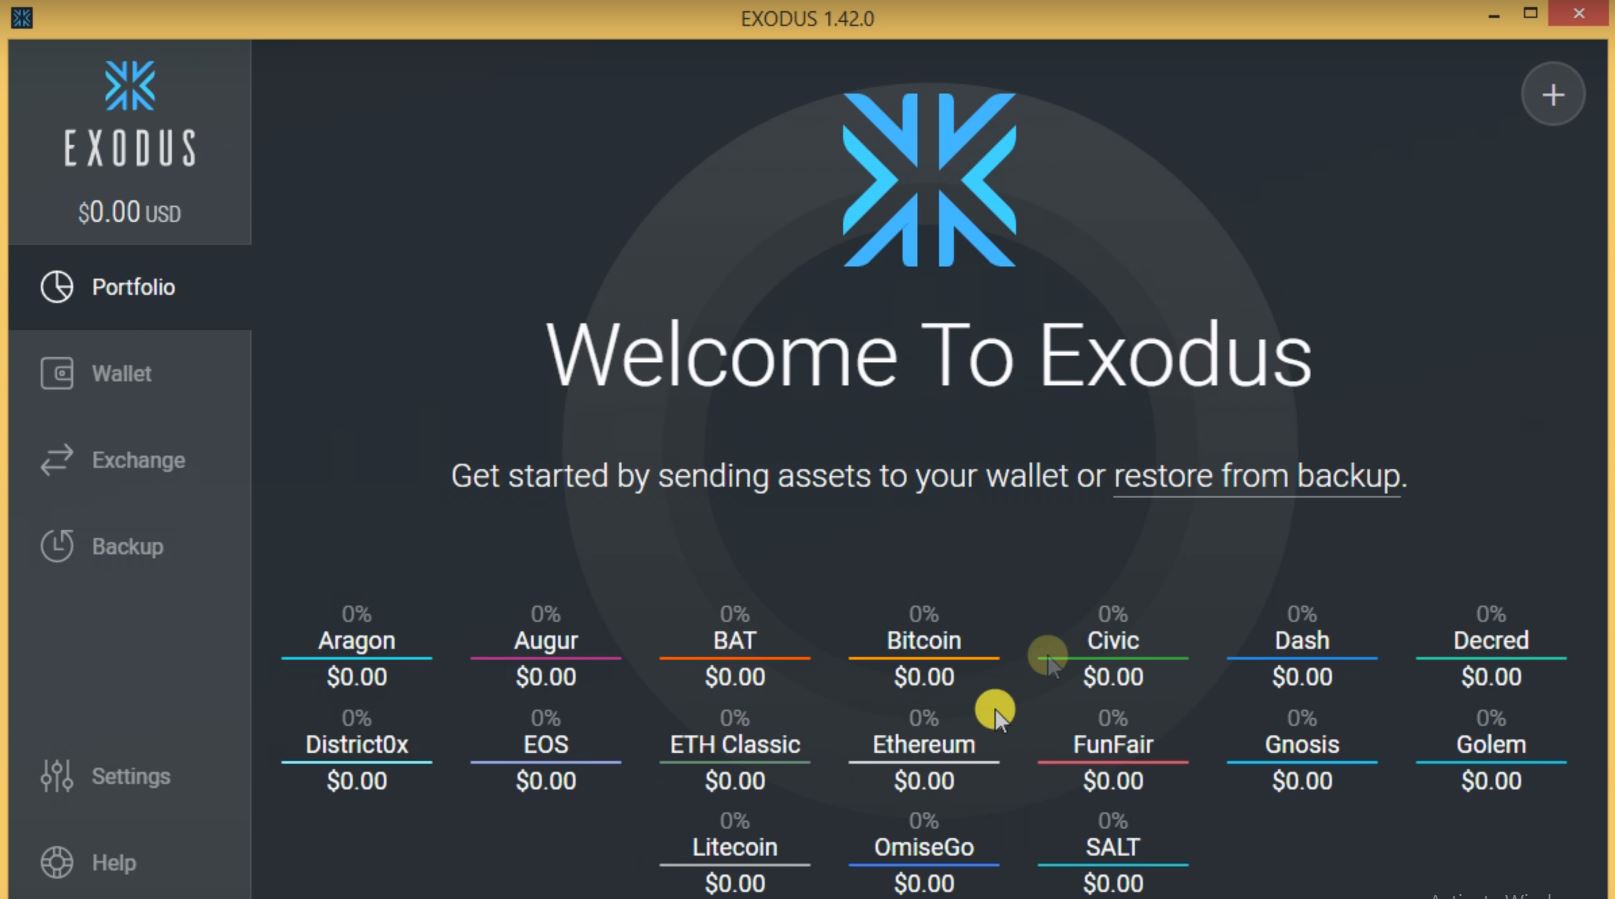
The good thing about Exodus is that is supports a wide range of Cryptos. Bitcoin Ethereum Litecoin and other.

Exodus Wallet

These wallets allow you to send and receive directly from your Computer. I use this wallet on my Windows computer. Also the wallet has a backup feature which is really cool.
Down side with the Exodus wallet is that it only works on one computer at once.
The tabs across the top of the Cyrptocompare website which allows you to filter the types of wallets. So for example if you wanted a wallet that was highly secure you would click the Secure tab.

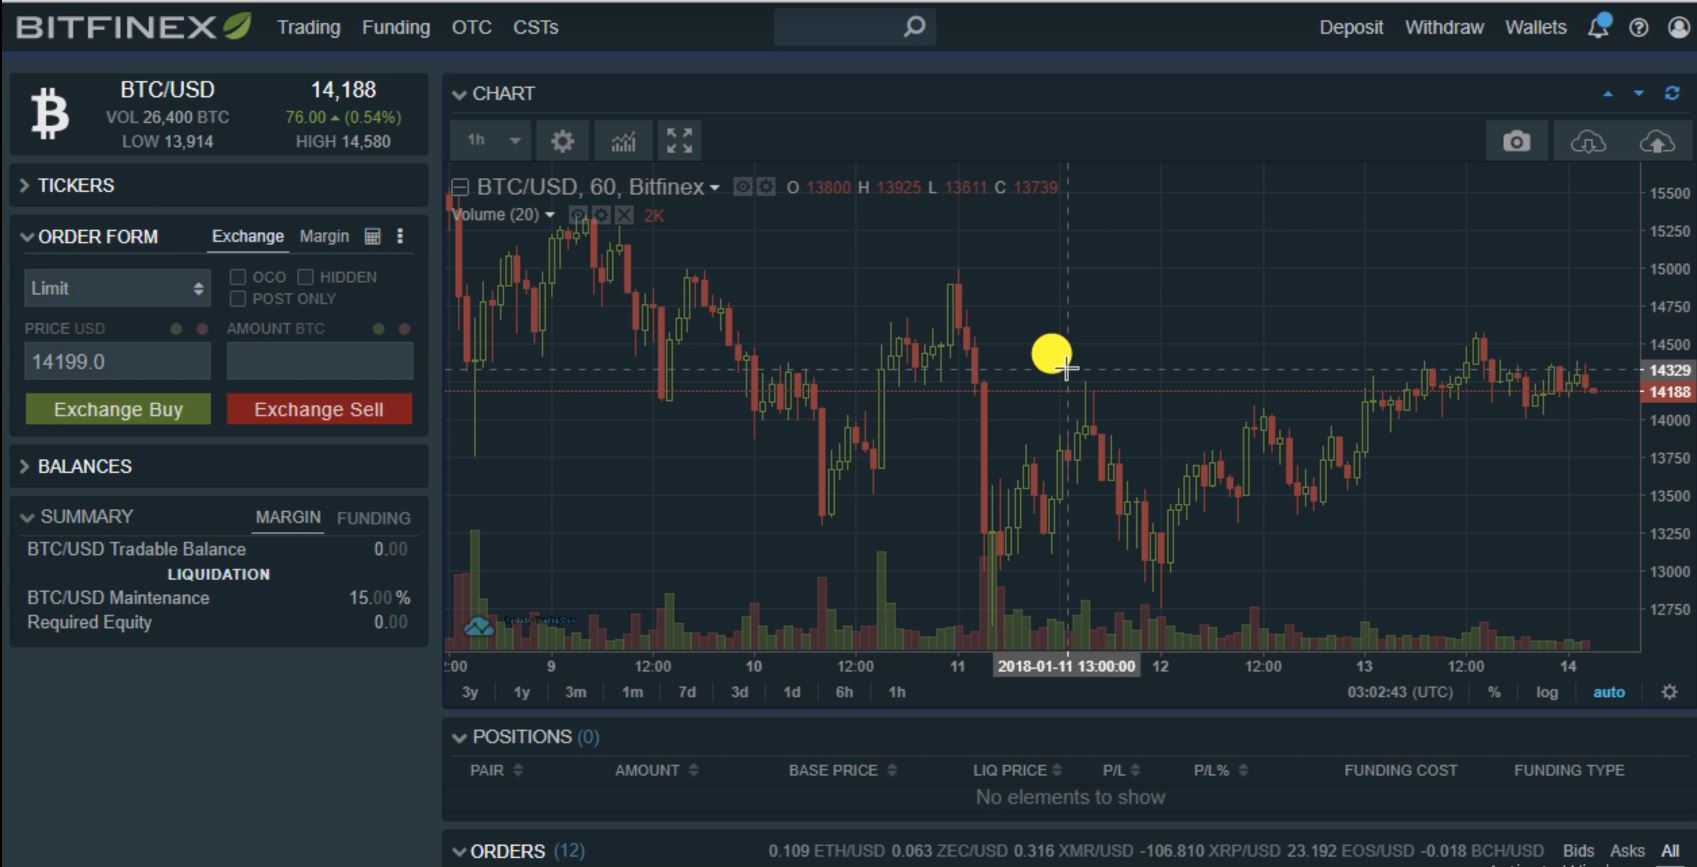
Bitfinex exchange is the next thing I talk about. Once you have mined Cryptocurrency the next thing you can do with it is trade it on an Exchange. In this video I use Bitfinex as an example, see the picture below.

Bitfinex Exchange

This is a good way to make extra coins but it also requires allot of patience. Which is something I struggle with! Also the other really good thing about exchanges is that you can trade your mined Crypto for different types of alt coins. Let say you have a good feeling about EOS then you would be able to Trade your mined earnings for the coin EOS.
So I show you how to setup your account and deposit your first coins into Bitfinex. I use it to mine my coins directly to the exchange saves me allot of hassle with gas fees from the myetherwallet wallet.

Well thanks for watching and reading guys I hope this one helps you out.

Cheers

Mining Cryptocurrency on Android

Mining Cryptocurrency on Android

Electroneum Referal Code: C2C4DD
Support 123myIT and use the code guys! πŸ™‚

A quick video today guys had to go to work so I rushed this one through. Electroneum has release the mobile miner for Android and its awesome! So check it out.

β—‹β—‹β—‹β—‹β—‹β—‹ Want to buy Android at Amazon β—‹β—‹β—‹β—‹β—‹β—‹
Android phones here: http://amzn.to/2FWDvXr

Android phone hash rates.
iOS Phones
N/A — Unreleased
Android Phones
Google Pixel 2 — ~36-40 H/s
Google Pixel — ~14 H/s
Google Nexus 6P — ~18 H/s
Google Nexus 5X — ~18 H/s
LG G6 — ~22-36 H/s
LG G4 — ~22-27 H/s
LG Stylo — ~9H/s
HTC One M8 — ~6-18 H/s
Samsung Galaxy S8+ — ~ 50+ H/s
Samsung Galaxy S8 — ~50 H/s
Samsung Galaxy Note 8 — ~31 H/s
Samsung Galaxy S7 — ~22-32 H/s
Samsung Galaxy S7 Edge — ~16 H/s
Samsung Galaxy S6 Edge — ~34 H/s
Samsung Galaxy S5 — ~5 H/s
Samsung Galaxy Note 5 — ~25-32 H/s
Samsung Galaxy S4 — ~4 H/s
Samsung Galaxy A5 2017 (sm-a520w) — ~17-18 H/s
Huawei Honor 9 — ~50 H/s
Huawei Honor 5X — ~11 H/s
Huawei P9 Lite — ~22 H/s
Oneplus 5 — ~35-50 H/s
OnePlus 3T — ~ 16-21 H/s
Oneplus One Bacon — ~5 H/s
Moto G Play — ~11 H/s
Moto G 2015 (SD410) — ~9 H/s
Moto Z Play — ~18 H/s
Moto Z – ~24 H/s
Droid Turbo 2 — ~29 H/s
Sony XZ1 – ~33 H/s
Blu Life One X — ~11 H/S
Xiaomi Mi6 — ~40 H/s
Xiaomi Redmi Note 4 — ~25 H/s
Xiaomi Mi Mix 2 — ~50 H/s
Xiaomi Mi A — ~14 H/s
BlackBerry DTEK60 — ~17 H/s
Coolpad Arise — ~2-4 H/s
Android Tablets
Kindle Fire 7” (Sideloaded via ADB) — ~6-7 H/s
Xiami Mi Pad 3 — ~35 H/s

Want to buy me a beer?
Bitcoin: 19UmoUcWjVztU27s9Fqy6Ty8g1aJGiyQ82
Ether: 0x215a057d415958e7a1540150143249d143078b36

For this guide and other 123myIT social pages see the links below.

Facebook: http://www.facebook.com/123myit
Twitter: https://twitter.com/123myit
Google+: https://plus.google.com/+123myIT
Instagram: http://instagram.com/123myit

First Mining Rig Build

First Mining Rig Build

123myIT’s First Mining Rig Build!

Hi all
Well busy time of the year Christmas. For of all Merry Christmas to all. So I have been very busy trying to get into the Cryptocurrency market by learning how to build a first mining rig.
This video will show you how I got started as I go about building my first mining rig. the aim of this build is to mine Cryptocurrency’s. Mainly Ethereum and Bitcoin.

First Mining Rig Build

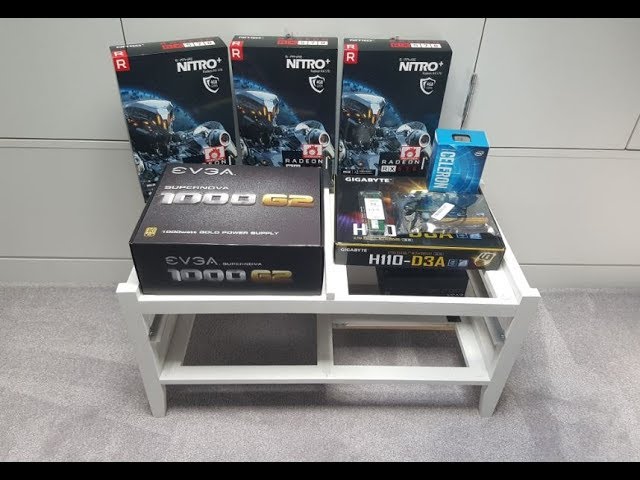
Below is a list of parts that I have used in this first mining rig build.

β–Ί Gigabyte motherboard
This motherboard is specifically designed for 6 GPUs and is cheap buy in price makes it a steal. Worst comes to worst you can reuse this motherboard for gaming if you wish.

β–Ί Celeron CPU
We choose the Celeron CPU because it’s cheap to buy. But also it’s cheap to run. 3930 has a power draw of 51 watts.

β–Ί EVGA Power supply
EVGA power supply are probably the best power supplies around. Their power supply’s efficient and they also have plenty of cables so that you are not daisy chaining to much hardware together.

β–Ί Crucial 8GB Memory
You can go the cheaper 4GB of ram. But just in case I want to turn this rig into a gaming PC I went with the 8GB of ram.

β–Ί Sapphire Nitro + 4GB
Sapphire RX 570s pound for pound probably the best cards that’s you can get with regards to hash rate and power supply. The higher the hash rate the higher the return on investment.

β–Ί PCIE Riser cards
PCIE riser cards, these little babies are used to lift the graphics cards off the motherboard allowing you to stack more graphics cards.

β–Ί SSD
Your SSD allows you to store the Windows 10 software along with the Software that you will use for mining example NiceHash or Claymores.

β–Ί Frame if you need one.
This hold all your equipment together in one frame. I made mine out of a chest of draws that someone threw out. Cheap and good for the environment as it doesn’t go into landfill.

I hope this helps guys. Heap more to come.

Use iCloud to backup your iPhone iOS devices

Use iCloud to backup your iPhone iOS devices

This video will show you how to use iCloud to backup your iPhone, iPad or iPod. With iCloud you can backup all your contacts, photos, videos and data. iCloud starts with FREE 5GB storage.