Hi Guys and Matt from 123myit here. If you have just upgraded your iPhones iOS version to 15 or you have one of the iPhone 13 models. This video will show you the iPhone settings that you should turn off straight away. Turning off these settings will speed up your iPhone and save you cellular data and battery life. It will also increase the privacy on your iPhone which you should consider doing this anyway if you are not doing this already.
I am using an iPhone 13 Pro which comes with iOS 15, but depending on the iOS version, it might look a bit different but the settings will be the same. Let’s go into the settings of your iPhone.
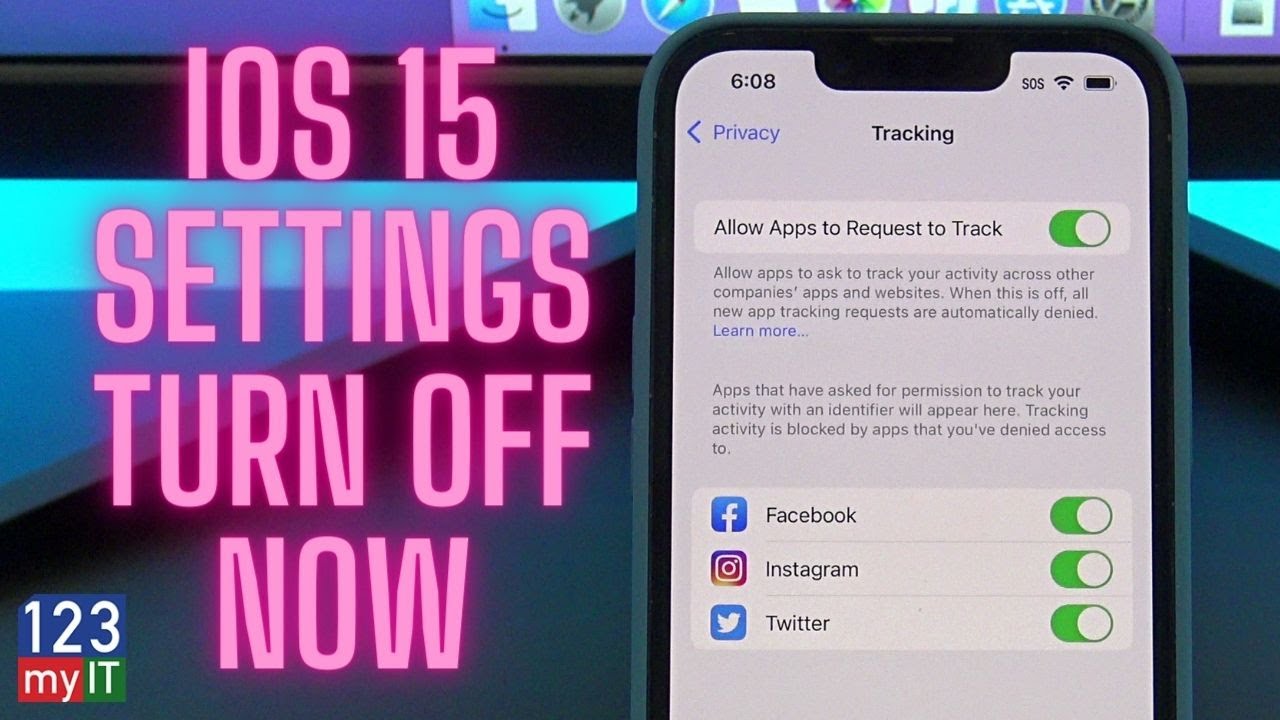
Allow apps request to Track You!
The first setting you should turn off is Allowing Apps to Request to Track you. You can find this under Settings, Privacy and Tracking. This setting allows apps to track you when you use apps or when you visit websites on your iPhone. You can see here I am being tracked by Facebook, Insta and Twitter. They track you because they can sell better targeted ads, based on where you have been and what you looked at. So when you have this turned on you are basically helping them make more money with no personal gain for yourself. Up to you if you leave this on or not. But now at least you know its there. Toggle the button at the top to turn it off and then tap Ask Apps to Stop Tracking. Really easy.
Location Services
The next one I want to talk about is Location Services. Go back out of privacy and go into location services. In here, you will see a list of Apps that are using the GPS to track your location. IF the App has the word “Always” next to it, it means that the App is tracking you via GPS all the time and not just when you are using the App. Apart from being Tracked this will also drain your battery life. As you can see most of my Apps say while using which is fine. This stuff can get confusing so let me show you and example. If you look here you can see my compass says while using the App. So if we go out and go back into your compass app. As soon as you open your compass, you will see a little blue arrow at the top of your iPhone. This means the GPS service is being used. Obviously the compass would use the GPS to find your location so it can give your co-ordinate information. So this it how Location Services work.
So at the top you can turn this off globally for all apps or if you want too you can go into each app and you can set it to Never or While using the App.
Location Services – System Services
Go back to Location Services and Scroll down to System Services.
If you have a purple arrow this might be a bad sign. It means that an app or service has been using your location. So turn all of these off accept for Emergency Calls and SOS, Find my iPhone and Networking & Wireless.
Cool you have turned them all off now, head down to significant locations. These are places that you have visited and Apple saves those locations, pretty weird. I do not have any locations because I don’t take this iPhone anywhere but if you toggle this off and clear your history, you will save data and battery life.
Product Improvement
Back under Systems Services, scroll down to Product Improvement and turn these all off. Unless Apple is paying you to help them improve their products, just turn it off.
Turn Off Analytics & Improvements. To find it go into Settings, Privacy and go into Analytics & Improvements. So if you have all these turned on, data is constantly being sent from your iPhone to Apple and other App developers. So again turn these off to save battery life and Data. You can turn them off one by one or use the global switch at the top. Too Easy!
Personalised Ads
The next one here to turn off is Personalised Ads and you can find I under Settings, Privacy and Apple Advertising. To switch it off just toggle the button off. What it does it is stops Apples advertising platform from tracking you and then it can’t use your information to sell Ads. A no brainer really.
Push Mail
The next setting we should talk about it Push Mail. This is handy if you use your phone to get email. To find it tap back to Settings and scroll down to mail. Once your in Mail tap on Accounts and then Fetch New Data. This setting uses up heaps of Battery life on your iPhone. When you have push turned on, your iPhone is constantly looking for new email. When you turn push mail off your iPhone can choose how often it will check for email.
So what you want to do is toggle the Push button to Off and then you can go into each account and set it to Manual or fetch. Manual just means when you open the Mail account it will download the mail when you look at it. Rather than checking the mail servers all the time which will drain your battery life. If you want to put a tick beside Every 30 mins or every 15 mins. This means it will check for email every 30 mins or 15 mins which ever you prefer. Obviously if you set it to every 30 mins you will save more battery life and data.
5G phone settings
This next one is for 5G iPhones only so iPhone 12 or 13 models. Go to Settings, Your Name, iCloud and iCloud Backup. Under here you have a setting which says Back Up Over Mobile Data. In the US it will say Backup Over Cellular. This pretty bad setting. It means it will backup your data over the Cellular network rather than WIFI. And if you are on a limited data plan this means you might get charged if you go over you cap.
The next one to turn off is called iCloud drive. You can find it under Settings, Cellular and iCloud Drive. What this means is if you use iCloud drive it will sync over your cellular data plan rather than WIFI. So toggle this off to save battery life and cellular data.
Photos Cellular data
Turn off Photos Cellular Data, you can find it under Settings, Photos and Cellular Data. This setting backs up your Photos and Video files over your Cellular Data plan rather than waiting till you get connected to a WIFI network. So it can put you over your cellular cap. Turn it off to save battery and cellular data.
Ok so lets show you how to turn off Safari Preload. Go into Settings, Safari and Preload Top Hit. What this does is when you do a search in Safari and you get the search results. Safari will start to load the first webpage in the list automatically without you selecting it. It will make the webpage seem to load faster if you do select it however this will use up data and battery life. SO turn it off.
Background Apps
Turn off Background App refresh, You can find it under Settings, General and Background App Refresh. This setting allows apps to use your cellular data to download new content in the background even when you might not be using the app. Turn this off to save battery life and data. And also make sure that at the top you set it to WIFI only.
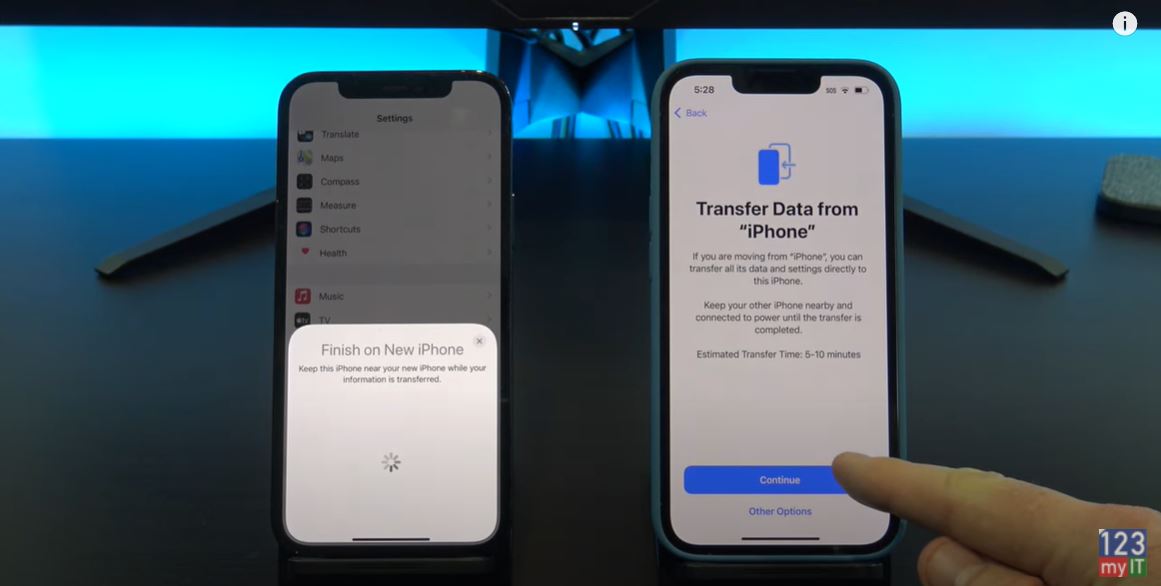
Also guys don’t forget to check out my other videos such as Transfer Data iPhone to iPhone 13. And do me a favour if you know anyone who might need this video please share it will them, hit the subscribe button and smash the bell icon.
Transfer Data Android to iPhone 13, 13 Mini, 13 Pro, 13 Pro Max