How to do a clean install of OS X Mavericks from USB

This video and article will show you how to do a clean install of OS X Mavericks from USB.

Step 1. Create a OS X Mavericks USB drive. You can do that by following the 123myIT video guide here.

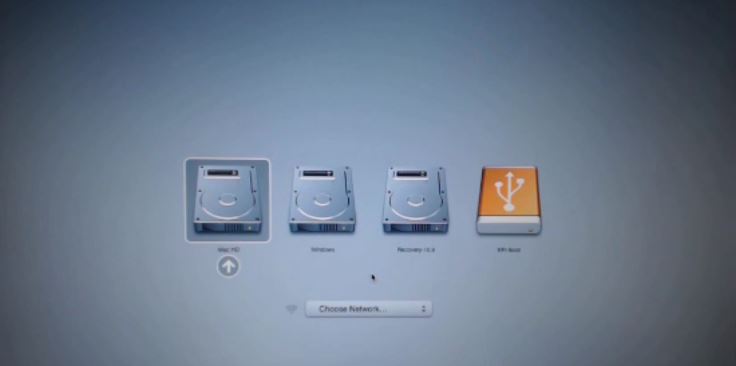
Step 2. Once installed, plug the USB into the side of your computer restart the Mac and hold down the ALT or Option key on the keyboard of your Mac.

Step 3. Use the arrow keys on your Mac keyboard to navigate to the USB drive that you have plugged into your computer. Once highlighted press Enter or Return.

Mac Preboot Menu

Step 4. That will bring up the OS X Utilities menu. At this stage you can opt to format the hard drive with Disk Utilities. Make sure you backup your data before you do this as you will lose any data on the drive when you format it. If you want to know how to do a backup with Time Machine click here.

Step 5. Go back to Install OS X and follow the prompts. You will be asked to agree to Apple terms and conditions and you will also need to select the hard drive you want to do a clean install of OS X Mavericks on.

Step 6. This process should take around 30 mins depending on the speed of your Mac. The Mac will reboot a few times while this is happening.

Once the Mac restarts one last time and then you are done you will have to setup your Mac as if it was brand new from the Mac store. You will need to setup the country location, Wifi and there is also an option to transfer some files between your Mac and other computers. Then setup your Computer account.

For more information on OS X Mavericks you can check out the Apple official website here.

How to upgrade the firmware 2.3.6 on a Samsung Galaxy S.

This video will show you how to upgrade the firmware 2.3.6 on a Samsung Galaxy S.

WARNING: Make sure you back up your Phone before proceeding!!!!
All the data on your phone will be deleted when you do this upgrade so please make sure you take the time to backup your data.
* Backup any photos and images that you have on the phone.
* Backup your contacts list, SMS and emails.
* Backup your music and video.
* Backup your APPS and phone settings
* Backup your bookmarks and stored pages.
* Backup all your data on your SD card.

Prepare your PC and Phone for the upgrade.
* Plug your Samsung phone into your Pc and make sure that the phone drivers install correctly. You should be able to browse to the phone in explorer.

Samsung Galaxy S in Windows Explorer

Step 1. Download the firmware and pit file from our download site here.
The firmware filename is sam_GTI9000_firmware.zip
Its quite a large file the size is 225.9 MB, so be prepared to take some time to download.
The file password is: 123myit.com

Step 2. Extract the downloaded sam_GTI9000_firmware.zip.
You should extract the following files.
* CODE_I9000XXJVU_CL851880_REV03_user_low_ship.tar.md5
* GT-I9000-CSC-MULTI-OXAJVU.tar.md5
* MODEM_I9000XXJVU_REV_00_CL1059471.tar.md5
* s1_odin_20100512.pit

Step 3. Download and extract the Odin3 v1.7.exe file from our downloads section here.

Step 4. Put your phone into “Download Mode” by holding down the Volume down button + the Home button + the Power button.

Step 5. Start the Odin3 v1.7.exe and connect your phone to the PC. The Odin application should say the message “Added!” If it doesn’t say added then you will have an issue with the drivers and your should reboot your PC with the phone still plugged in and repeat this step.

Step 6.Once Odin has started and you have your phone Added. Select the files that you extracted in step 2.
They should all be loaded in the following order.
* Select the “PDA Tab”, and select “CODE_I9000XXJVU_CL851880_REV03_user_low_ship.tar.md5”
* Select the “Phone Tab”, and select “MODEM_I9000XXJVU_REV_00_CL1092175.tar.md5”
* Select the “CSC Tab”, and select “GT-I9000-CSC-MULTI-OXAJVU.tar.md5”
* Select the “PIT Tab”, and select “s1_odin_20100512.pit”

Step 7.Make sure that you select the Re-Partition, Auto Reboot and F.Reset Time checkbox within Odin.
Step 8.Click the start button to kick off the flashing process.The phone will reboot when it finishes and Odin should give a green PASS message.
When the phone restarts you should be running the new Android, v2.3.6 XXJVU firmware.