5 Start-up Modes for M1 Macs

Hi guys and welcome to 123myIT. In this video, we will show you all the Mac M1 Start-up Modes. These are helpful if you need to troubleshoot or work on your Mac for any reason.

This video will show you how to open Startup Options. Start the Mac with Diagnostics, Recovery and Safe Mode. Also show you how to set a default Startup Volume.

Lets get started. I am using a MacBook Pro M1 computer. First step is to shut down the Mac.

Start-up Modes

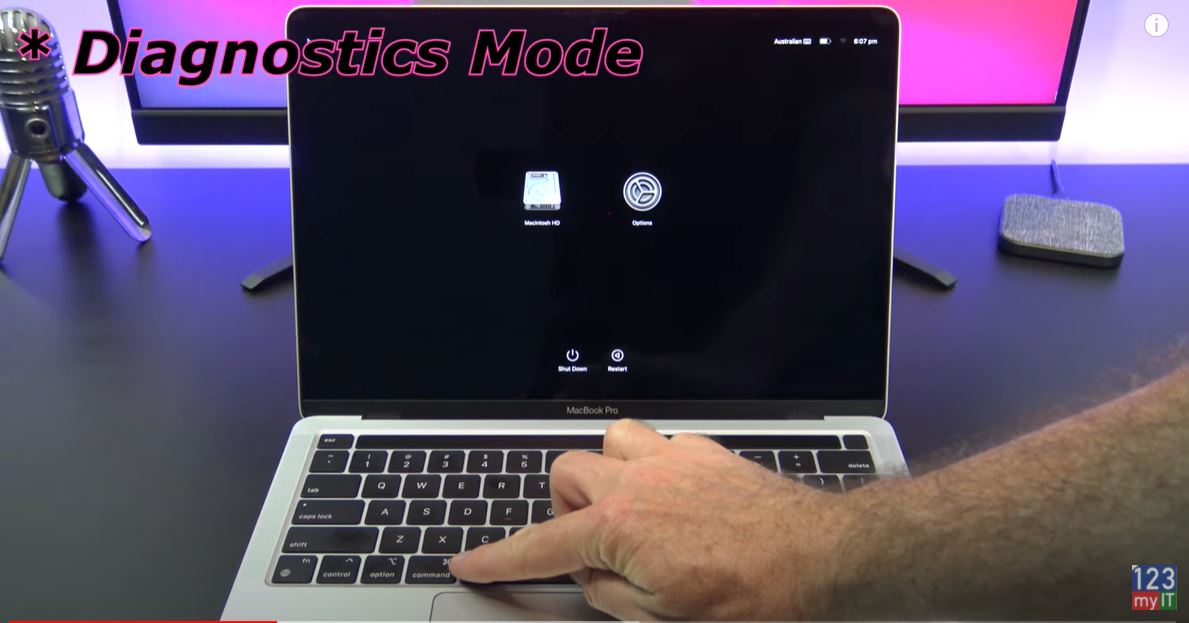
Once your Mac is shutdown to get into Startup Options press and hold the power button until you see the Apple logo with Continue holding for Startup Options menu. When you see the Options cog you can let go of the power button. This is the Startup Options menu and you can do things like select bootable disks.
start-up modes M1 Macs
Diagnostics modes and other modes

Diagnostics Mode

To get into Diagnostics Mode we want to press and hold Command and D keys until your Mac Restarts and you will see the Diagnostics Menu load. Now you might need to connect the Mac to your WIFI to start the diagnostics. Once you have connected to WIFI the Diagnostics will download and you can use the Diagnostics to see if you have a hardware problem with your Mac.

Just click Run Offline and the Mac will check all your hardware to see if its ok. I get an error with my power adapter because its not plugged in. If you click get started it will show you a list of error codes. So if you have faulty hardware you can contact Apple for help.

If I plug my cable back in and run the test again I don’t get any error codes. This means that the Mac hardware is fine and working correctly.

Start-up Disks

If you want to check startup disk, reinstall MacOS, restore from backup or change security settings go into Recovery mode by pressing the Options Cog. So in Recovery menu you have Restore from Time Machine. Reinstall Mac OS. Disk Utility and Browse Apple support.

Safe Mode allows you to Flush user cashes and disable third-party extensions. TO get into Safe Mode go back into Startup Menu and press and hold the Shift key. Then click continue in Safe Mode underneath it. You Mac will restart and then you should be able to see the top right hand menu. Simply logon and your Mac will be in safe mode.

If you want to set a default startup disk go back into the Startup Menu and press and hold the Option key. Under the Disks it will show Always Use option. This allows you to set the default Startup disk. Helpful if you have multiple disks.

Guys don’t forget to check out my other videos such as Fix Broken Bricked Mac with Restore Revive. This will show you how to put a M1 Mac into DFU mode. And do me a favour if you know anyone who might need this video please share it will them, hit the subscribe button and smash the bell icon.

Fix Broken Bricked Mac with Restore Revive

Hi guys and welcome to 123myIT. In this video, we will show you how to fix a bricked mac or broken MacBook with revive or restore.

Guys if you are like me and you have bricked your new Mac M1 or other MacBook’s then you can try to do a restore or revive process to get it working again. You might be getting the black screen with exclamation mark and the restore URL on it. This video will show you how to fix it.

Fix Broken Bricked Mac
Fixing Bricked Macs with DFU mode, Like and iPhone.

Restore Revive Bricked Mac

To do a restore or revive you will need another Mac or MacBook. This Mac will push the restore to software to the broken Mac. IF you are like me and did not have a second Mac try borrowing one from a friend or you might have to go to an Apple store.

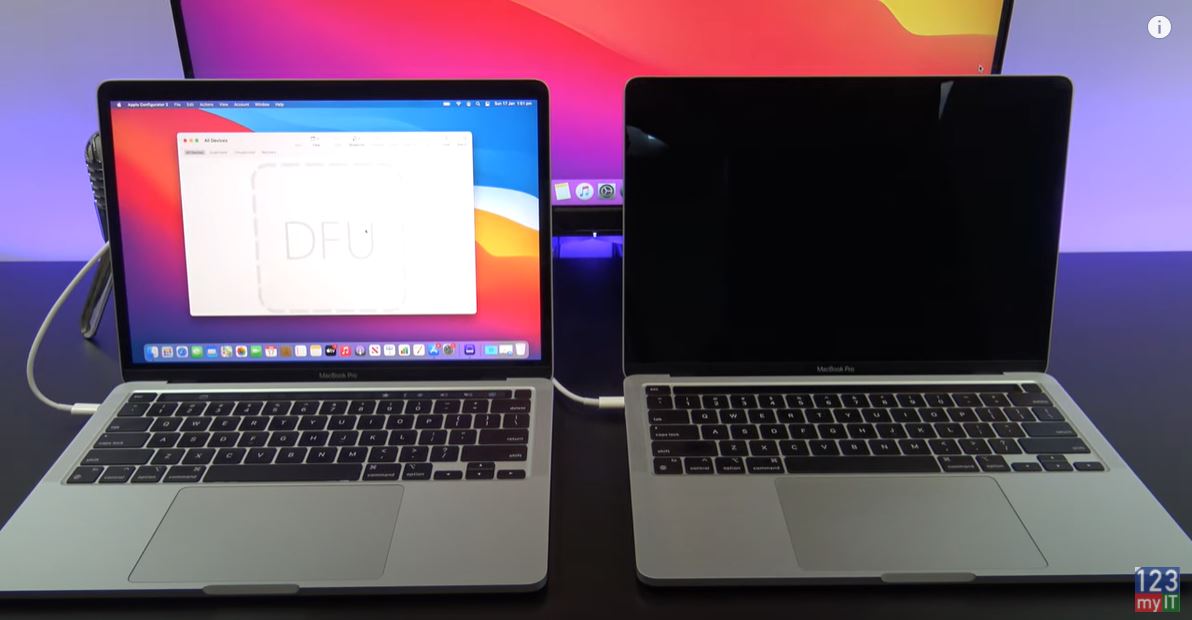
Let us get started. I am using two MacBook Pro M1 computers. You need to plug the power cable into the working MacBook on the right USB C port. In addition, plug the second USB C cable from the second MacBook to the left port. Then plug the cable from the left port into the left port of the broken Mac. Here’s a picture you might find helpful for the different Macs.

Apple Configurator

Next up download and app called Apple Configurator 2 from the App Store. Go ahead and open Apple configurator 2. Once that is done, you will need to put the MacBook in DFU mode. This can be a bit tricky.

You need to:

1. Press the power button.

2. While holding down the power button, at the same time press all three of the following keys for about 10 seconds:

The right Shift key

The left Option key

The left Control key

Other things to know are revive will revive the firmware and reinstall the latest version of recoveryOS.

Restore Firmware

Restore will restore the firmware, erase all data, and reinstall the latest version of recoveryOS and MacOS. Bricked Mac.

Therefore, if you do it wrong it will come up like this. It has the padlock there and you cannot revive or restore this Mac. Ok so let try again. Press and hold the Power button then press and hold the Right shift, Left Option and Control keys.

3. After 10 seconds, immediately release the three keys but continue to hold down the power button until it appears in Apple Configurator 2.

Your Mac in DFU mode – Bricked Mac

Awesome, you have now just put your Mac in DFU mode. Just like an iPhone. Now depending on how you broke your Mac you will need the Revive option or the restore option. To find these menus right click on the DFU sign on the first Mac and go to Advanced. Under Advanced you will have the revive option otherwise I will use the restore option.

Ok the restore revive will start and may take some time so go ahead and hit the like button and subscribe guys!

Cool, if everything goes well then you should see the DFU replaced with a padlock. Moreover, your broken Mac should now be fixed. You can go ahead and setup your Mac again.

Guys don’t forget to check out my other videos such as Setup your own Google iPhone. And do me a favour if you know anyone who might need this video please share it will them, hit the subscribe button and smash the bell icon.

Setup your iPhone or iPad in 2021

Transfer Data iPhone to iPhone in 2021