Fix Error Your bootable USB drive could not be created

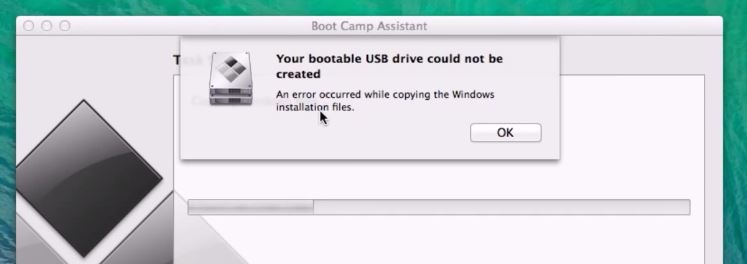
This video and article will show you how to Fix Error Your bootable USB drive could not be created.

Hi All
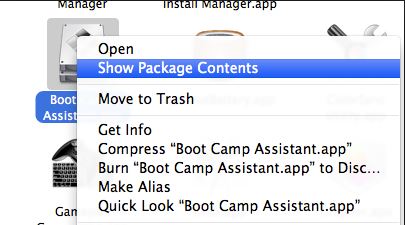
When installing Windows on a Mac I came across this error when I was trying to create a USB drive. The problem is the DVD is already mounted in Disk utility and when this is the case the Boot Camp Assistant cannot mount the DVD at the same time so you get this Error Your bootable USB drive could not be created.

Your bootable USB drive could not be created

The fix for this is pretty straight forward. You need to unmount the USB drive in order to get this to work. But also you will need to make a copy of that DVD so that you will be able to continue along with the setup.
If you want to know how to create a ISO or DMG file from a DVD then you can follow the 123myIT.com video here.
How to create an ISO file on a Mac

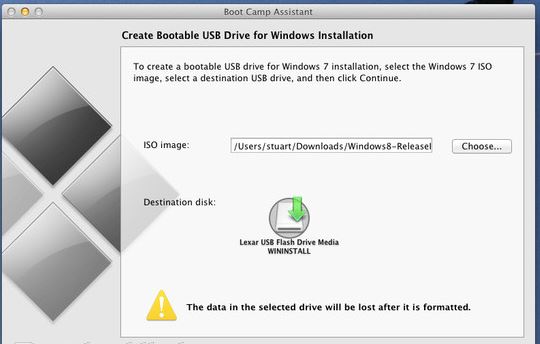
Once you have created your DMG or ISO file, you can then start the process again with the Boot Camp Assistant. However this time instead of selecting the DVD drive, go into your Documents folder and select the newly created DMG or ISO file. This should then allow you to continue on with the installation as normal and Fix Error Your bootable USB drive could not be created one and for all.

Users that have upgraded to Yosemite may also get this same error. If this is the case just follow the steps outlined above and you should hopefully resolve the same error.

If you want to see the official Apple page on how to create an ISO image file click on the link below.
Boot Camp: Creating an ISO image from a Windows installation DVD

Good luck
Matt

How to Burn an ISO to DVD Windows Bootable

WARNING: Malware has been added to the IMG Burn software. This is out of the control of 123myIT.com. So please don’t use this software any more. If you still need to burn an ISO file please see the new video here.
Burn ISO files to DVD Windows Bootable
Thanks
Matt

This video will show you How to Burn an ISO to DVD Windows Bootable.
If you want to see how to burn an ISO file on a Mac click here.

How to create a bootable Windows 7 8 USB on a Mac

This video will show you how to create a bootable Windows 7 8 USB on a Mac.
You can use the bootcamp assistant to create a bootable Windows 7 8 USB on a Mac. However the option may not be highlighted in your bootcamp assistant.
To make the option appear you can try the following steps.

Step 1. Click on Go then Utilities. Find the Bootcamp assistant, right click on it and go to Show package contents and then go into the contents folder.

Bootcamp Assistant Show Package Contents

Step 2.Copy the info.plist file to the desktop and make a backup copy of it and open it.

Step 3. Find the line which says PreUSBbootsupportmodels and remove the Pre from the line. Try running the bootcamp assistant again and this time you should have the Create a Windows 7 or later install disc option.

Step 4 Copy the info.plist back to the contents directory. And start the bootcamp assistant again and see if the Create Bootable USB Drive for Windows installation comes up. If not try this next step.

Bootcamp assistant create bootable usb drive

Step 5 Change the USBbootsupportedmodels in the info.plist file.
You can find the model on the Mac that you are using by going into the Apple menu then click on About This Mac and then click on More info. Next click on System report and under Hardware Overview look up Model Identifier.
In the example in the video my MacBook model was MacBook7,1.
In the info.plist file I had to change the USB supported models to my MacBook model so that I could create a Windows USB on a Mac.

Hardware Overview Mac

Hope this works guys. Feel free to leave some feedback.

Cheers
Matt

For more into you can check out Apples discussions page here.