Create a bootable OS X Yosemite installer USB drive

Apple have made it much easier to create an OS X Yosemite installer USB drive and this same process can also be done for OS X Mavericks. In this video and article I will show you what you need to do to make this happen.

You can check out the older video 123myit.com video for the Mavericks USB here.

What do you need to get started?
* 8GB or larger USB drive, SD Card or USB hard drive
* OS X Yosemite.app or Mavericks.app (this can be downloaded from the App Store)
* An Apple computer with access to the Apple App Store
* A user account with administrator rights

Step 1. Download Yosemite, Mavericks from the App store.
Apple direct link here.
Step 2. Insert your USB into the Mac and run the Disk Utility.
Step 3. Erase the USB, so it becomes a clean USB with no data on it.
Step 4. Download OS X Yosemite App, get it from the Apple Store.
Step 5. Open Terminal and use the command below. Make sure the Yosemite App is located on your Desktop of your Mac.

NOTE: Change the USB name to MyVolume or you can change code “MyVolume” to the same name as your USB drive.

OS X Yosemite
sudo /Applications/Install\ OS\ X\ Yosemite.app/Contents/Resources/createinstallmedia --volume /Volumes/MyVolume --applicationpath /Applications/Install\ OS\ X\ Yosemite.app

OS X Mavericks
sudo /Applications/Install\ OS\ X\ Mavericks.app/Contents/Resources/createinstallmedia --volume /Volumes/MyVolume --applicationpath /Applications/Install\ OS\ X\ Mavericks.app
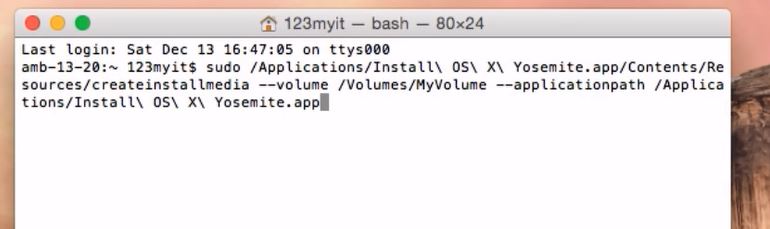
OS X Terminal Command

This install may take some time depending on the speed of your Mac hardware. Once the Terminal finishes copying everything across you will then be able to use the OS X Yosemite installer USB drive to do clean installs of OS X Yosemite.

If you are looking for a video on how to setup OS X Mavericks USB you can use the code above if that doesn’t work you can find the 123myIT.com video.
How to do a clean install of OS X Mavericks from USB

Good luck,
Matt
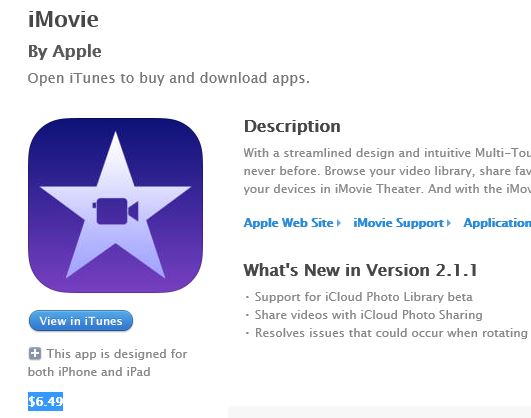
Apple Frustrations Versioning

This video Apple Frustrations Versioning, is a look at one issue with Apple’s versioning and how it can be problematic when it forces you to upgrade your operating system before you can use certain apps in this case iMovie.

Hi All,
I get a few 123myIT users ask which Operating System I think is better OS X or Windows. Its true I like both, however I do prefer Windows over OS X. And this is mainly because of Apples versioning and the frustrations that can occur when using Apple products. When I say versioning I am talking about OS X, iTunes and iOS versions which I am sure you are all have some experience with at one time or another.
To give you an example where I think Apple’s versioning has gone completely mad and where it can be extremely frustrating for Apple users, recently I wanted to start trying to create one of the 123myIT videos by using Apples iMovie. You can find it on the Apple website here.

iMovie byr Apple

The iMovie software currently retails for $6.49, great! So I logged onto Apple’s App Store and went to buy the software and was greeted by a message which suggested that I need to upgrade my operating System OS X Mavericks to OS X Yosemite before I can install iMovie. This really seems crazy to me because the MacBook Air which I just purchased at the start of this year 2014 with OS X Mavericks install is now out of date.
This coupled with the fact that Mavericks Operating System is only one year old anyway ???
I understand the need to keep software up to date and add functionality and fix bugs and security flaws. But to upgrade the Operating System before you can install an Application seems a bit crazy to me.
Surely they can keep some backward compatibility in mind when it comes to creating their new you beaut software?

After all this I decided to stay keep using what I know and use the free Microsoft Movie Maker. Maybe when I get some more space for recording I will revisit the Apple software but until then I will stick with what I know.

Create a bootable Windows 8.1 USB on a Mac running OSX Yosemite

This video will show you how to Create a bootable Windows 8.1 USB on a Mac running OSX Yosemite.

Hi All
Allot of 123myIT users have decided to take the plunge and upgrade their Mac OS X to Yosemite and I thought it might be a good idea to do a short video on how to create a bootable Windows 8.1 USB on a Mac running OSX Yosemite.
This video is mainly for people that want to be able to create a USB installer disk drive, so that they can install Windows on any computer whether it be a Mac or another brand. This method can also be used at a later date to reinstall Windows on the same Mac that you create the USB drive on.
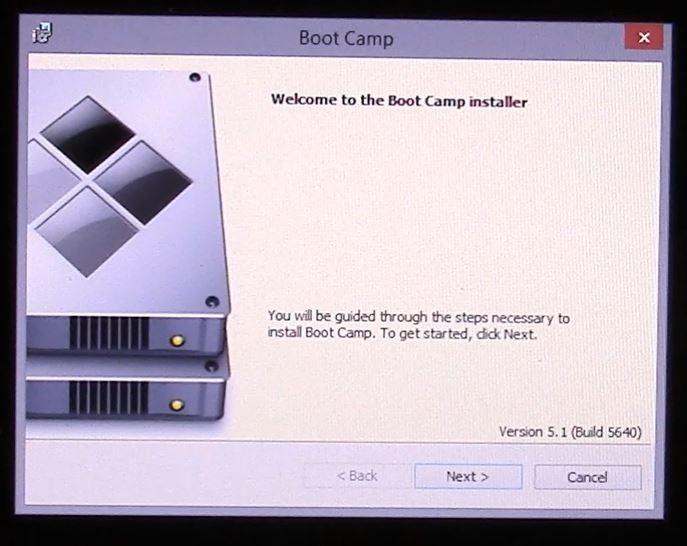
So in the example in the video I created the USB on a early 2014 MacBook Air. In this process it also downloaded the Windows support software for this Mac hardware. This means it will run the boot camp installer after Windows gets installed. See the picture below.

Boot Camp Installer

So the If you want to check out the list of Windows support software or boot camp drives for your Mac a great place to start is the 123myIT boot camp drivers page here.

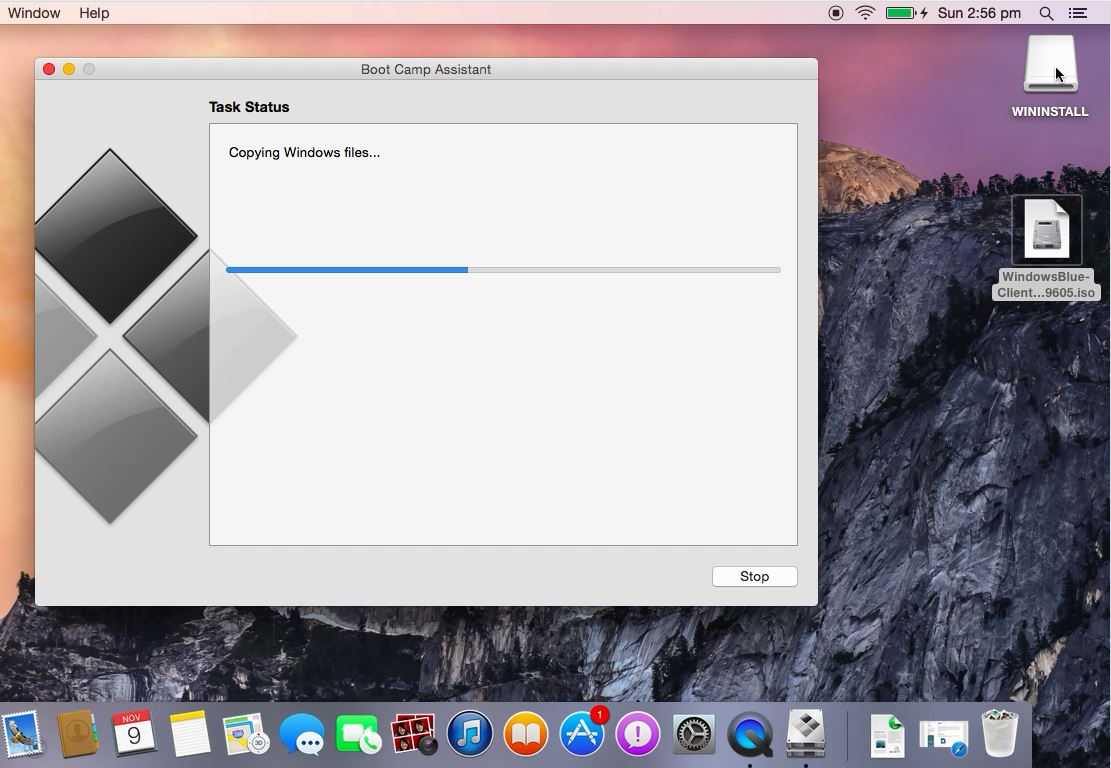
Bootable Windows 8.1 USB on a Mac running OSX Yosemite

In the photo above you can see a picture or the Yosemite desktop as the Windows files are being copied to the USB drive.
If you want more info on Apple Boot Camp you can find the official link here.
If you want to find out more about OS X Yosemite you can go to the official Apple page here.
Want to buy Windows 8.1? Check out the 123myIT.com Store page here.

Install Windows 8.1 on a Mac running OS X Yosemite

This video will show you how to Install Windows 8.1 on a Mac running OS X Yosemite. For this guide you will need the Windows 8.1 iSO file and an 8GB or larger USB drive.

Hi All
So the long awaited video of how to Install Windows 8.1 on a Mac running OS X Yosemite is finally here. I have tried to add in as much important tips as I could without making the video too long and I hope it helps those of you that run into some issues with the install.
The main issues people seem to get are:
* Windows iso file permission error. For some reason users get this issue with the Windows iso file is placed on the desktop. Its like Yosemite has permissions that doesn’t allow files on the desktop to be mounted for some reason. Copying the file to the users documents directory should fix this issue.

* GPT partition error. I have already setup a video with some tips on how to solve this GPT partitioning error. So click the link to the video if you are having issues with that. Hopefully those tips will get it working for you.

* Touchpad & Volume buttons don’t work. To solve this issue you will need to download the Windows support software or Boot Camp drivers. To do that click here for a link to download the this software for your model of Mac.

If you have any comments or questions please feel free to ask also if you need a copy of Windows 8.1 you can buy it through the 123myIT store or download the Preview copy from the 123myIT downloads page.

Yosemite OS X

Want to know more about Yosemite? Direct link to Apple here.

How to create an ISO file on a Mac

This video will show you how to create an ISO file on a Mac.

An ISO file is the Windows equivalent to the cdr file created by MAC systems.

Creating an ISO file on a MAC is a two step process. The following steps, outlined in the video, will guide you through the both steps of the process.

Creating the cdr file

Step 1: Insert the DVD

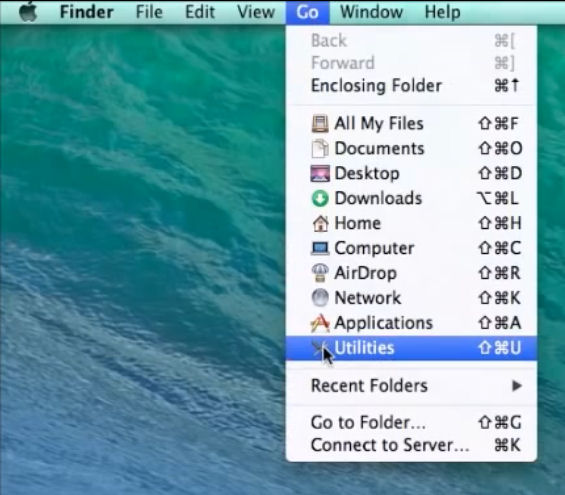
Step 2: Select Go / Utilities at the top of the window

create an ISO file on a MAC

Step 3: Open ‘Disk Utility’

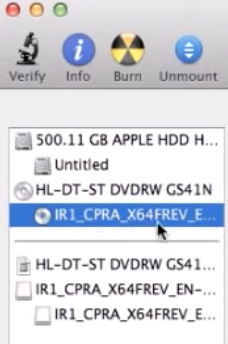
Step 4: Click on Windows 8 DVD drive on the left of the window

create an ISO file on a MAC

Step 5: Click on ‘New Image’ at the top of the window

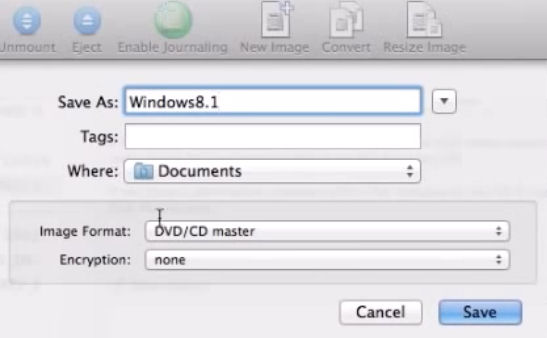
Step 6: Change the following;

  • ‘Image Format’ to DVD/CD Master
  • ‘Save As’ to desired output filename
  • ‘Where’ to desired destination for output file

create an ISO file on a MAC

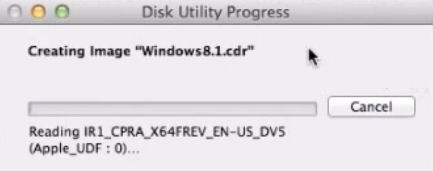
Step 7: Click the ‘Save’ button on the bottom right of the window

create an ISO file on a MAC

The following steps will guide you through converting the completed cdr file to an ISO file.

Creating the ISO file on a MAC system

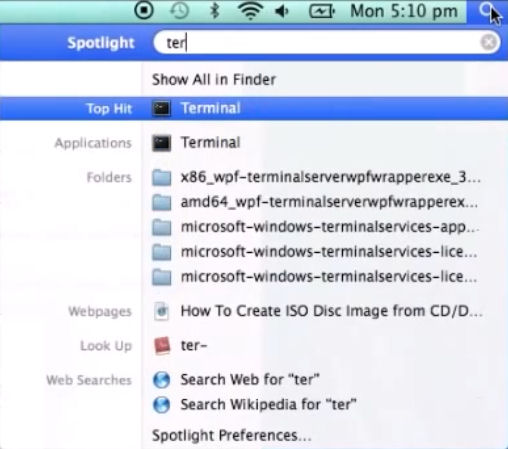
Step 1: Go to ‘Finder’ and type in terminal at the top of the window

create an ISO file on a MAC

Note: the following will require administration rights to complete.

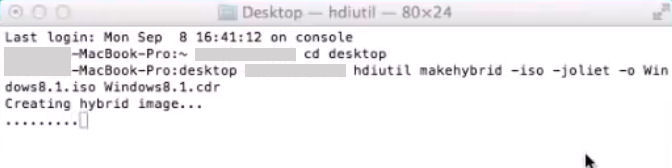
Step 2: Type cd desktop and hit Return

Step 3: Type or copy/paste the following command *

hdiutil makehybrid -iso -joliet -o [filename].iso [filename].cdr

*Note: you will need to change both occurrences of [filename]. The first is the output filename, the second is the filename of the cdr file you just created.

create an ISO file on a MAC

Once the process in the terminal window is complete, simply click on the ISO file in your chosen location to view the contents.


Fix Error Your bootable USB drive could not be created

This video and article will show you how to Fix Error Your bootable USB drive could not be created.

Hi All
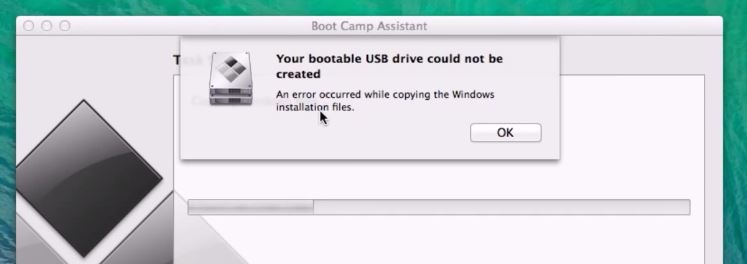
When installing Windows on a Mac I came across this error when I was trying to create a USB drive. The problem is the DVD is already mounted in Disk utility and when this is the case the Boot Camp Assistant cannot mount the DVD at the same time so you get this Error Your bootable USB drive could not be created.

Your bootable USB drive could not be created

The fix for this is pretty straight forward. You need to unmount the USB drive in order to get this to work. But also you will need to make a copy of that DVD so that you will be able to continue along with the setup.
If you want to know how to create a ISO or DMG file from a DVD then you can follow the 123myIT.com video here.
How to create an ISO file on a Mac

Once you have created your DMG or ISO file, you can then start the process again with the Boot Camp Assistant. However this time instead of selecting the DVD drive, go into your Documents folder and select the newly created DMG or ISO file. This should then allow you to continue on with the installation as normal and Fix Error Your bootable USB drive could not be created one and for all.

Users that have upgraded to Yosemite may also get this same error. If this is the case just follow the steps outlined above and you should hopefully resolve the same error.

If you want to see the official Apple page on how to create an ISO image file click on the link below.
Boot Camp: Creating an ISO image from a Windows installation DVD

Good luck
Matt

How to change the lock screen timeout on a Mac

This video will show you how to change the lock screen timeout on a Mac.


So you have setup a password on your Mac, but the annoying thing is the screen times out too fast. You can change the amount of time the Mac takes for the lock screen timeout.

Why does the Screen Timeout on a Mac?

Sleep mode is designed to save battery life and will start after a very short time. When you wake your Mac up from a lock screen timeout you will be prompted for your password.
the good news is you can tell your Mac how long you want this time out to be.

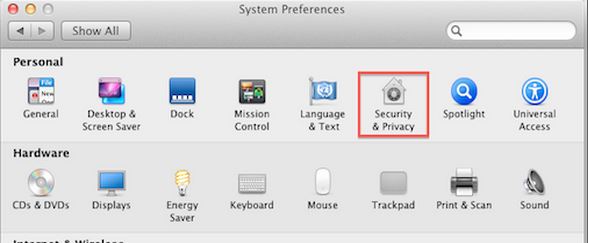
The picture below is of the Security and Privacy settings in your Mac settings.
Security and Privacy

Step 1 – Security and Privacy

If you want to change your time out you will need to go into System Preferences and then Security and Privacy. To change the settings in here you will need the Admin password and this will prompt when you click the Pad Lock icon. Next up enter you Admin password. So where it says Require password immediately, click the drop down menu. And then select a time that’s suitable. Remember you want to try and find a nice balance between annoying and helpful time outs. Also remember that having a time out set for too long will have an effect on your Battery life.

Step 2 – Turn lock screen off

To turn your lock screen off, simply reverse the steps taken above. You will be able to test the time out settings by going to Apple menu and sleep. I hope this helps.

Ok Guys, Don’t forget to check out my other videos.

Clean Install MacOS Catalina on any Mac

Create macOS Catalina USB Installer Drive

Share files iPhone to Mac with AirDrop