Apple MacBook Pro 14 Inch Unboxing, Benchmark Compare

Hi guys Matt from 123myIT here. In this video, we will take a look at the Apple MacBook Pro 14 inch and see if it’s still worthwhile in 2022.

There are three different MacBook’s in the MacBook Pro range. There is the entry level 13 Inch MacBook which I already did a video and you can check that out from the link in the description. Then there is the 14-inch MacBook, which is the model we have here today. Last in the line-up is the 16 inch, which has a slightly larger screen.

MacBook Pro Hardware

This MacBook is a 14-inch laptop comes with a M1 Pro processor, which has 8 cores it also has a 14 core GPU and a 16 core Neural Engine. If you do not know what a neural engine is, it controls the AI part of the MacBook.  Along with 16GB of Unified Memory and 512 GB of SSD storage.

Pricing for the 14 Inch Pro starts around $1999 USD for the M1 Pro CPU and goes up to $3499 USD for the M1 Max CPU. When buying the laptop on the Apple website you will have a chance to choose bigger storage memory and CPU options. Let’s take a look inside the box.

What’s in the box

First, up you will have the Apple MacBook Pro 14 itself. Along the bottom, it has MacBook Pro Stamped in the aluminum. The chassis is held together by eight-teck screw and It also has four think black rubber feet to improve air flow. In addition, on the top you will have the standard Apple logo.

Accessories

In terms of accessories, in the box you will get Warranty and setup documentation. It also includes two black Apple stickers. Next, up you have a 67-watt USB C power adapter. I tested the MacBook and it uses around 42 watts when charging and a Max of 60 watts when doing benchmark. However, you can expect to get around 11 hours of general use and up to 17 hours of video playback. Charging the battery from empty to full should take around 1 hour. The plug of the adapter does come off and you can buy an extension cable for it. The last accessory in the box is the USB-c to MagSafe 3 cable.

MacBook Pro Touch ID

When you take the MacBook Pro out and open the lid it will guide you through the setup process. During this process, you will be prompted to setup Touch ID and you will have to train your finger. Now this can used to unlock your MacBook Pro, authenticate payments or authenticate passwords.

If it’s one thing that I feel Apple never skimp on its their screens. The MacBook Pro comes with a 14.2 inch Liquid Retina XDR Display. With a resolution of 3024×1964 at 254 pixels per inch and up to 1000 nits of sustained brightness. It can even go higher to 1600 nits for HDR content.

apple MacBook pro 14

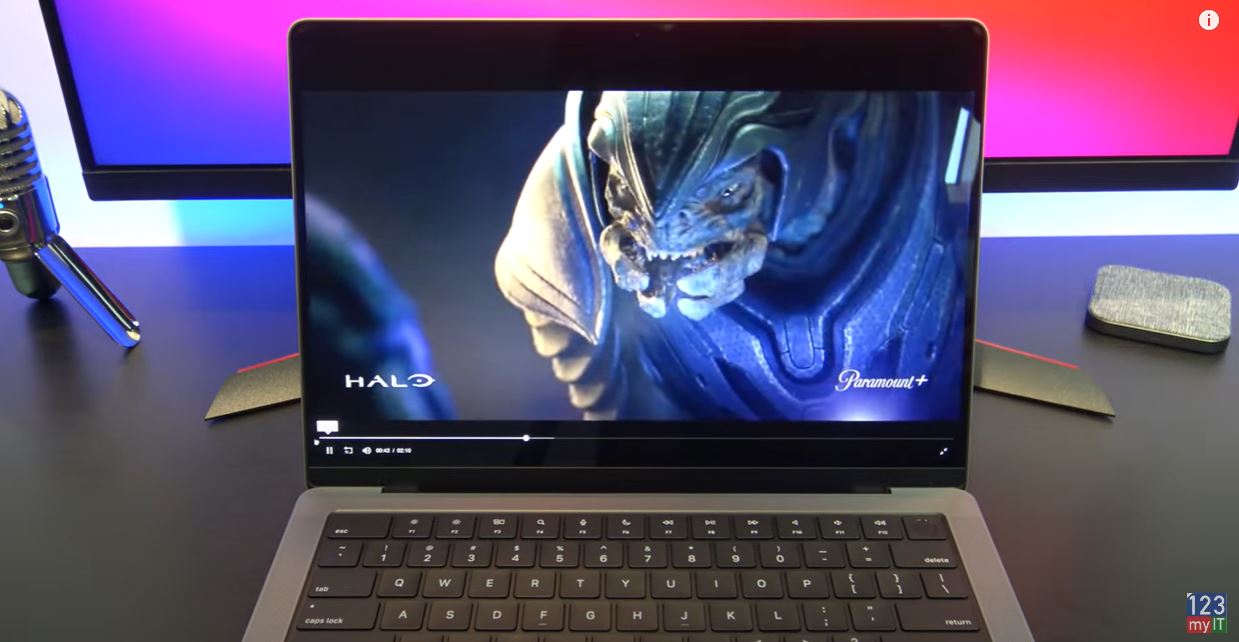
And it makes for some pretty impressive movie watching. Let’s take a look.

MacBook Notch

You might have noticed across the top of the display there is a notch. Apple has done well with this design as it gives you more display space without taking up any extra room because it sits in the menu bar. Inside the notch, you have an upgraded 1080p FaceTime HD camera. Which is great for those conference calls. Its upgrade from the 13 inch MacBook that only has a 720p camera.

All the MacBook Pros come with backlit Magic Keyboard and its a delight to type on. The keys do not bend when pressing and don’t tend to wobble too much. One difference between the 13 inch model and the 14 inch model is the touch bar has been remove and the Escape and function keys have been re-added. The backlit keyboard is also controlled by the ambient light sensor so it only turns on when the lights are low. Pretty cool huh!

Trackpad

The trackpad is still pretty much the same, it’s a force touch trackpad and allows for precise cursor control and multi-touch gestures.

The MacBook Pro 14-inch comes with a six-speaker sound system with force-cancelling woofers and wide stereo sound. I thought the 13-inch had good speakers but the speakers on this 14-inch MacBook Pro are really the next level. I do not say this lightly. It’s like having a dedicated stereo in your room. Let’s take a listen.

Ports

On the left, you have a MagSafe 3 Charging port, two Thunderbolt 4 ports and a headphone jack.

On the right side, you have a HDMI port, Thunderbolt 4 port and a SDXC card reader. The Thunderbolt 4 port doubles as a display port so if you have a USB C to HDMI adapter you can plug in an external display. For me the HDMI port is a necessary addition and I never understood why Apple didn’t include them in the first place. You can have up to two externals displays at 6K resolution running at 60Hz. 

Build Quality

The overall build quality is great and there is little to no flex on the MacBook Pro. Also the silver aluminium doesn’t leave finger prints which is great. For me I feel like its almost the perfect size but there is some weight to it. So if you intend to carry the MacBook Pro around allot maybe check the weight because the 13 inch MacBook Pro or MacBook Air range might be better for you.

Underneath on both sides you have an air vent. I get that there are they for airflow, but the position of these vents are right where you would put your hands to carry the MacBook. In addition, while they are not sharp I found them annoying. Better placement for air vents are within the hinge itself like these ones are.

Display Hinge

Talking about hinges the display hinge only folds back about 160 degrees, however other laptops go all the way to 180 degrees, so 160 feels a bit awkward.

Lets go ahead and run the Geek Bench Benchmark software. Cool, so the MacBook Pro 14 Inch recorded a single-core score of 1770 and a multi-core score of 9995. Moreover, if we compare that with the scores from the MacBook Air and MacBook Pro 13 inch we see there is not much difference in the single core scores. However, the multi-core scores there is a big difference of 2315.

Benchmarks

When running a Benchmark and while the Apple MacBook Pro 14 is under load, it is a really good time to check the temperatures and see where the MacBook Pro is heating up. The room I am in has a temperature of about 27 degrees Celsius at the time of recording. As you can see here, the MacBook Pro really heats up in the middle of the keyboard to about 44 degrees. And about 40 degrees in the hinges of the display. So there is some clever design here as there is no heat where you might be placing your hands and palms when typing.

MacBook Pros are designed with content creators in mind. People who are video editors and music creators. And in doing so they leave out gamers. The hardware just does not support gaming or a native install of Windows. So if you are after a gaming machine then you’re better off going with a gaming laptop. However if you are a content creator then the Apple MacBook Pro 14 is the best all-rounder in my opinion. The display is brilliant and the speakers are the best I have heard on any laptop. And you get all this in 14 inch footprint.

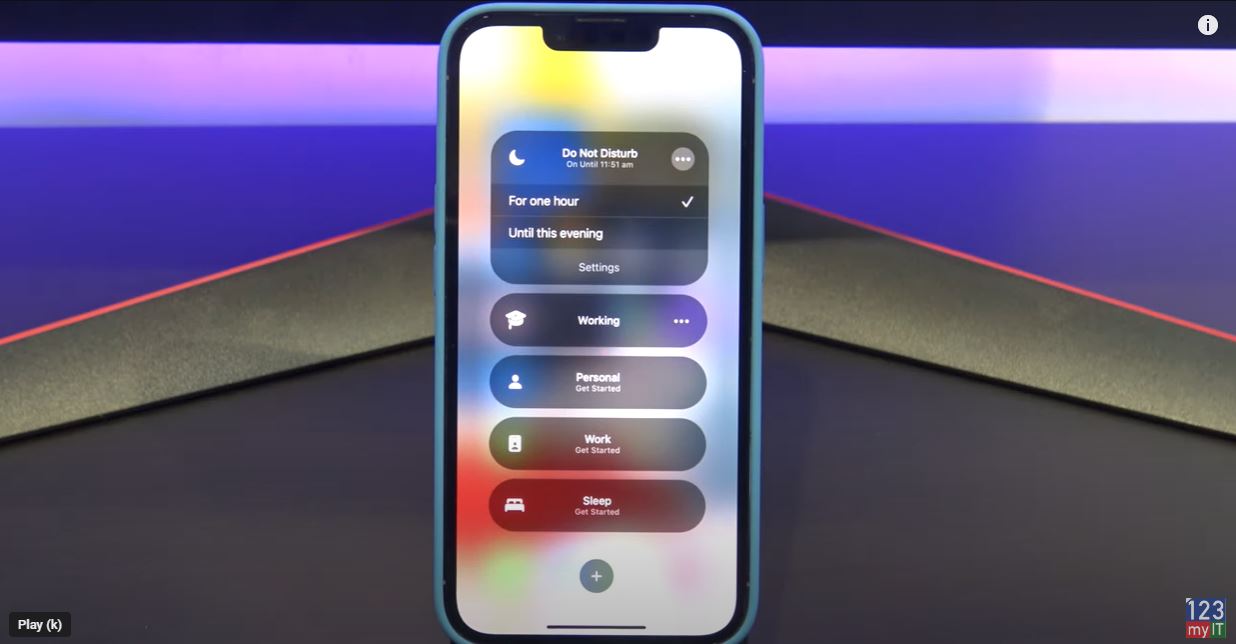
Guys don’t forget to check out my other videos such as How to use focus on iPhone and iPad. And do me a favour if you know anyone who might like this video please share it with them, hit the subscribe button and smash the bell icon.

Top 5 Android Settings to Turn Off in 2022

Using Focus on iPhone iPad and iPod touch

Hi Guys and Matt from 123myit here. In this video I will show you how to use focus on iPhone or iPad. Focus allows you to filter notifications based on what you are doing. You will find focus in control centre by swiping down from the top right and tapping on focus.

Do not disturb – Focus on iPhone

In here you will find the default focus which is do not disturb. Do not disturb silences all notifications by default. So, if you are really busy and don’t want to be interrupted you could set this and your phone won’t send any notifications. You can also tap the three dots and turn it on for 1 hour or until this evening. Alright if you close it and just go back out I will show you where it displays that Do Not Disturb is turned on.

focus on iphone ipad

Ok if you look in the top left corner you should see the do not disturb icon which tells you that the do not disturb is not turned on. Cool ok, let go back in an setup our own personalised do not disturb.

If you want to find the focus menu if is located under Settings and Focus. Focus on iPhone.

Focuses

To setup your own focus tap the plus icon down the bottom. Then you will have a list of pre set focuses. Up the top you have driving and fitness. Driving silences notifications, but will turn on automatically when connected to carplay or Bluetooth. Also if you have friends on iPhones, it will send them a reply that you are driving. Which is handy.  Gaming is a good one too. So if you want playing games on your iPhone and don’t want notifications interrupting the game then you can turn this on. And the last two down the bottom are mindfulness and Reading. Lets go a head and setup our own custom Focus.

Study Focus

Iam going to call mine Study. Because I want my phone to be quite when I study. Next you can select a colour and an icon for study. Tap Next. Now choose the people you want notifications from while you are studying. Notifications from other people wont appear until you turn the focus off.

That’s for notifications what about phone calls? If we tap on Calls From and then can choose calls from Everyone, No one Favourites or all contacts. When you are finished tap allow. If you don’t want to hear from anyone tap Allow none.

Allow notifications on Apps

Next you can select which Apps you want to allow notifications from so tap the plus and I am going to select Find My, Books and Messages. You can also turn on Time sensitive apps to send you notifications. Tap allow and your Focus is setup tap done to continue.

Alright before we personalised the focus I will show you what it looks like if you turn it on. Ok to personalise your Focus under the Options menu you have Focus Status. When Focus Status is turned on Apps like Messages will let people know that you have your Focus turned on.

Hide notifications on home screen

If you want to hide notification badges you can tap Home Screen. And in custom pages you can select which home screen page you want to show while in the focus. Under the lock screen menu you can dim lock screen in your focus and or show silenced notifications there.

One of the cool features is the Add Schedule or Automation. This allows you to choose to start your focus as a specific time, in a specific location or when you launch an app. So lets say I want to turn on the Study focus when I go to the Library. I would tap Smart activation to turn it on and then tap on Add Schedule or Automation. You want to tap on location and then type Library at the top. This will show you a list of Libraries near you. If this does not come up check under Settings, Privacy, Location Services and System Services.

Library Focus – focus on iPhone

Cool I found the library I am after. So what this will do is Whenever I go to the Library it will turn on my Study Focus automatically. You can use the little slider bar to make the circle bigger or smaller. Lets say I go to a nearby café afterwards. Really cool. So this would be useful if you had a work or school focus setup or a church or mosque something like that. If you scroll down you can also delete the Focus if you no longer need it.

Awesome so our Study focus is setup and ready to use. Guys don’t forget to check out my other videos such as how to find Purchase History on iPhone and iPad. And do me a favour if you know anyone who might like this video, please share it will them, hit the subscribe button and smash the bell icon.

Take Control of Your Notifications iPhone iPad iOS

Turn On Background Sounds on iPhone to Help you Sleep

Learn how to turn on background sounds on iPhone

Guys Matt from 123myit here. People you might be wondering why I am showing you a planes on a iPhone video. Well these are the planes that fly over my house and as you can hear, they are very loud! So if you are trying to sleep, study, concentrate or just get some peace from the outside world. I will show you a new iPhone feature that allows you to block out some of this outside noise.

background sounds on iphone

Let us take a look. Helpful background sounds on iPhone. The features is called background sounds and it’s only available on iOS version 15 or later. To find it swipe down from the top right and go into control center and it’s the little ear icon. If it off you can just tap the ear icon to turn it on. I will show you how to find it in settings and turn it on. All right so this is my older iPhone 12 and it’s not updated. So if you have swiped down from the top into control center and you do not have the ear. I will show you where to find it in settings > accessibility > Audio Visual and background sounds. On my iPhone, 12 Pro its running iOS 14 and I will show you it’s not there so you will need to update to iOS 15.

Cool so to turn it on toggle the button at the top. And then you are done. Easy as.

Guys, don’t forget to check out my other videos such iOS 15 settings to turn off right now. Also do me a favour if you know anyone who might like this video please share it will them, hit the subscribe button and smash the bell icon.

Dont Use Nicehash Optimized Settings

Create Windows 11 USB & Download Windows 11 for Mac

iOS 15 Settings You Should Turn Off Now

Hi Guys and Matt from 123myit here. If you have just upgraded your iPhones iOS version to 15 or you have one of the iPhone 13 models. This video will show you the iPhone settings that you should turn off straight away. Turning off these settings will speed up your iPhone and save you cellular data and battery life. It will also increase the privacy on your iPhone which you should consider doing this anyway if you are not doing this already.

I am using an iPhone 13 Pro which comes with iOS 15, but depending on the iOS version, it might look a bit different but the settings will be the same. Let’s go into the settings of your iPhone.

Allow apps request to Track You!

The first setting you should turn off is Allowing Apps to Request to Track you. You can find this under Settings, Privacy and Tracking. This setting allows apps to track you when you use apps or when you visit websites on your iPhone. You can see here I am being tracked by Facebook, Insta and Twitter. They track you because they can sell better targeted ads, based on where you have been and what you looked at. So when you have this turned on you are basically helping them make more money with no personal gain for yourself. Up to you if you leave this on or not. But now at least you know its there. Toggle the button at the top to turn it off and then tap Ask Apps to Stop Tracking. Really easy.

iOS 15 settings

Location Services

The next one I want to talk about is Location Services. Go back out of privacy and go into location services. In here, you will see a list of Apps that are using the GPS to track your location. IF the App has the word “Always” next to it, it means that the App is tracking you via GPS all the time and not just when you are using the App. Apart from being Tracked this will also drain your battery life. As you can see most of my Apps say while using which is fine. This stuff can get confusing so let me show you and example. If you look here you can see my compass says while using the App. So if we go out and go back into your compass app. As soon as you open your compass, you will see a little blue arrow at the top of your iPhone. This means the GPS service is being used. Obviously the compass would use the GPS to find your location so it can give your co-ordinate information. So this it how Location Services work.

So at the top you can turn this off globally for all apps or if you want too you can go into each app and you can set it to Never or While using the App.

Location Services – System Services

Go back to Location Services and Scroll down to System Services.

If you have a purple arrow this might be a bad sign. It means that an app or service has been using your location. So turn all of these off accept for Emergency Calls and SOS, Find my iPhone and Networking & Wireless. 

Cool you have turned them all off now, head down to significant locations. These are places that you have visited and Apple saves those locations, pretty weird. I do not have any locations because I don’t take this iPhone anywhere but if you toggle this off and clear your history, you will save data and battery life.

Product Improvement

Back under Systems Services, scroll down to Product Improvement and turn these all off. Unless Apple is paying you to help them improve their products, just turn it off.

Turn Off Analytics & Improvements. To find it go into Settings, Privacy and go into Analytics & Improvements. So if you have all these turned on, data is constantly being sent from your iPhone to Apple and other App developers. So again turn these off to save battery life and Data. You can turn them off one by one or use the global switch at the top. Too Easy!

Personalised Ads

The next one here to turn off is Personalised Ads and you can find I under Settings, Privacy and Apple Advertising. To switch it off just toggle the button off. What it does it is stops Apples advertising platform from tracking you and then it can’t use your information to sell Ads. A no brainer really.

Push Mail

The next setting we should talk about it Push Mail. This is handy if you use your phone to get email. To find it tap back to Settings and scroll down to mail. Once your in Mail tap on Accounts and then Fetch New Data. This setting uses up heaps of Battery life on your iPhone. When you have push turned on, your iPhone is constantly looking for new email. When you turn push mail off your iPhone can choose how often it will check for email.

So what you want to do is toggle the Push button to Off and then you can go into each account and set it to Manual or fetch. Manual just means when you open the Mail account it will download the mail when you look at it. Rather than checking the mail servers all the time which will drain your battery life. If you want to put a tick beside Every 30 mins or every 15 mins. This means it will check for email every 30 mins or 15 mins which ever you prefer. Obviously if you set it to every 30 mins you will save more battery life and data.

5G phone settings

This next one is for 5G iPhones only so iPhone 12 or 13 models. Go to Settings, Your Name, iCloud and iCloud Backup. Under here you have a setting which says Back Up Over Mobile Data. In the US it will say Backup Over Cellular. This pretty bad setting. It means it will backup your data over the Cellular network rather than WIFI. And if you are on a limited data plan this means you might get charged if you go over you cap.

The next one to turn off is called iCloud drive. You can find it under Settings, Cellular and iCloud Drive. What this means is if you use iCloud drive it will sync over your cellular data plan rather than WIFI. So toggle this off to save battery life and cellular data.

Photos Cellular data

Turn off Photos Cellular Data, you can find it under Settings, Photos and Cellular Data. This setting backs up your Photos and Video files over your Cellular Data plan rather than waiting till you get connected to a WIFI network. So it can put you over your cellular cap. Turn it off to save battery and cellular data.

Ok so lets show you how to turn off Safari Preload. Go into Settings, Safari and Preload Top Hit. What this does is when you do a search in Safari and you get the search results. Safari will start to load the first webpage in the list automatically without you selecting it. It will make the webpage seem to load faster if you do select it however this will use up data and battery life. SO turn it off.

Background Apps

Turn off Background App refresh, You can find it under Settings, General and Background App Refresh. This setting allows apps to use your cellular data to download new content in the background even when you might not be using the app. Turn this off to save battery life and data. And also make sure that at the top you set it to WIFI only.

Also guys don’t forget to check out my other videos such as Transfer Data iPhone to iPhone 13. And do me a favour if you know anyone who might need this video please share it will them, hit the subscribe button and smash the bell icon.

Transfer Data Android to iPhone 13, 13 Mini, 13 Pro, 13 Pro Max

Apple iPhone 13 Pro First Look Sierra Blue & Blue Case

Transfer Data iPhone to iPhone 13, 13 Mini, 13 Pro & 13 Pro Max

Hi Guys, Matt from 123myit here. If you have a new iPhone 13, 13 mini, 13 Pro or 13 Pro Max, this video will show you to transfer your data from any iPhone to any of the iPhone 13 models. So if you have the iPhone 13 Pro like this one on the right or any other iPhone that’s new to you, then this video will help you move contacts, text messages, music, photos, videos and app data. This also includes apps like Whatsapp but just remember you will need your Whatsapp password to transfer those apps.

The three ways to transfer your data

There is three ways to Transfer your iPhone data. You can backup and restore from iCloud. Sync and backup to iTunes on a Windows or Mac computer. You can Transfer wirelessly. I will show you how to Transfer wirelessly, because you do not need a computer and it is the easiest way.

If you have already setup, your phone and you are on the Home screen. Unfortunately, you will have to reset the new phone. If you do not want to reset your iPhone then you can do a backup and restore from iCloud. Alternatively, backup and restore from iTunes.

Reset your iPhone

To reset your phone Go into settings > General and scroll down to transfer or reset iPhone. Once you are there tap on Erase Content and settings. Then tap continue and then skip backup. If you get prompted for the Apple Id enter it now. If you have two factor authentication turned on it might send you a SMS or a code on one of your other devices. Swipe to the two factor authentication page an enter your code.

It should start the reset process, but if it does not go into settings and enter your password again and tap on sign out. Ok go back into general back into Transfer or Reset iPhone and tap on Erase all content and settings again. Then continue and Erase iPhone.

iphone to iphone 13

Once your iPhone has reset itself. Go ahead and select your country and language. You should see the quick start screen appear on your old iPhone. If you do not see the quick start screen on your old iphone, make sure Bluetooth is turned on and you can press the sleep wake power button to put the device to sleep then tap it again to wake it up.

Scan your Rear Camera

Tap continue and you should get a little blue animation now. There you go now the little blue animation has come up. Scan it with the rear Camera on your old iPhone. Now at this stage you might need to enter your old iPhone passcode on your new iPhone. It didn’t come up for me because I turned it off before starting the transfer process. Follow the prompts to setup touch id or face id on your new iPhone.

Finally, tap continue and agree to start the Data Transfer from your old iPhone to your new iPhone. Almost there follow a few more prompts to setup your iPhone until you get to the Transferring Data from iPhone screen. There it is so all your data should be copying across now.

Keep the two devices close by and make sure they are plugged into power.

Your new iPhone will restart itself and when you log on you go and check that all your data has transferred across ok. I will check my pictures and see if that are the same. Cool looks like everything has copied across.

Also guys don’t forget to check out my other videos such how to Transfer data from Android to iPhone 13. Do me a favor If you know anyone that might need this video please share it with them hit the subscribe button and smash the bell icon.

Apple iPhone 13 Pro First Look Sierra Blue & Blue Case

Clean Install Windows 11

Transfer Data Android to iPhone 13, 13 Mini, 13 Pro, 13 Pro Max

Hi Guys, Matt from 123myit here. If you have a new iPhone 13, 13 mini, 13 Pro or 13 Pro Max In this video, we will show you two free ways to transfer your data from any iPhone to the new iPhone 13. The first way is recommended by Apple but it requires you to reset your iPhone 13. If you don’t want to reset your iPhone then fast forward to the 5.24 min mark and I will show you how to Transfer your data without resetting your iPhone.

This video will help you transfer your contacts, message history, camera photos and videos. Web bookmarks, mail accounts, calendars and free apps.

What you can transfer.

Tips before you start.

  • Create a backup
  • Make sure both phones are on WIFI and plugged into Power
  • Make sure that you have enough storage space on your iPhone 13
  • If you have a sim card you can transfer that after the data is transferred

The phones that we are using today are Samsung S21 and the iPhone 13 Pro.

Android to iPhone 13

Reset your phone

To reset your iPhone.

Go into settings > General and scroll down to Transfer or reset. Once you are there tap on Erase Content and settings.  Tap continue. This will delete all media and data so do a backup first if you need too. Type in your passcode. And then tap Erase iPhone.

Once your iPhone has reset itself. Just follow the prompts and start setting it up again.

Next up connect to your WIFI and make sure your Android device is connected to the same WIFI.

Continue setting up your iPhone until you get to the Apps and data screen. Once you’re on the Apps and data screen. Go to your Android phone and download the move to iOS app from the Google play store. Play.google.com

Go ahead and when that’s done tap open. On your iPhone tap Move data from Android. Then tap continue, agree and then allow on your Android phone.

Error when transferring

If you are getting  the could not connect error message make sure you turn on location services on your Android phone. You will find it under settings and location. Its important to turn that on. Here it is under Settings and location. Just toggle the button on and go back to the move to iOS app.

Tap continue on your Android device and then type in the code that you see on your iPhone. It now shows you the iPhone wifi. Tap continue. If it comes up again with the wifi to connect to just tap connect.

Ok great you are on the transfer data screen just deselect anything you don’t want to transfer and press Continue. I am going to include messages contacts and camera roll. And I will have to tap allow to give the iOS app access.

Lots of Data to transfer

Depending on how much data you have it might take some time.

Cool your data is transferred now. Tap done on your Android phone and you can close the app. On your iPhone 13 tap, continue setting up iPhone. And then go ahead and set up your iPhone 13. Go ahead and add your apple id if you have one. If not just hit forgot or don’t have one.

If you have two factor on your apple account if will send a code to another apple device or email address type it in. This is something new it might also ask for you Mac password if you have one. Go ahead an enter the password you use for your mac.

Awesome your phone is ready now. Check that your data was copied across. I will check my photos first.

Free Apps

The last step here is to check your free apps. IF they didn’t copy across open up your app store and enter your apple id. Tap on the blue icon in the top right and tap on purchased. This will show you a list of all your previous purchased apps. Just tap to download them.

Don’t have an apple id you can create one by going to the website appleid.apple.com.

If you swipe across you should see all your apps start to appear. If you didn’t get the prompt to Add Apps, then don’t worry, just go to the App store and download the Apps you need.

Copy my data app

The second part of this video is if you don’t want to reset your iPhone. We will move the data with an App called, Copy my data.

Go to the google play store on Android phone and download Copy my data. On your iPhone you can download it through the App Store. Go ahead and deselect anything you don’t want to copy.

Tap next and then Tap to or from Anther Device over WIFI. Tap on the iPhone 13 Pro and Enter the pin number from your android device onto your iPhone. On your Android phone deselect any data you don’t want to copy across. I don’t want contacts and calanders.

Awesome all your data is copied across now. If you have a SIM card you can move it across now too.

Also guys don’t forget to check out my other videos such Apple iPhone 13 Pro and do me a favor If you know anyone that might need this video please share it with them hit the subscribe button and smash the bell icon.

Clean Install Windows 11

How to Create a Windows 11 Bootable USB

Apple iPhone 13 Pro First Look Sierra Blue & Blue Case

Hi Guys and welcome to 123myit. In this video, we will show you everything you need to know about the iPhone 13 Pro. The iPhone 13 Pro has the same A15 Bionic processor as its bigger brother the iPhone 13 Pro Max. Both models have the same price as last year’s 12 Pro and 12 Pro Max.  The cameras have been updated and the battery is larger.

Pricing

Pricing for the iPhone 13 Pro starts at $999 USD and it comes in four different colours Blue, Silver, Gold and Graphite. Storage capacity starts at 128GB and goes up the to 1TB which is impressive.

First up in the box you have the iPhone 13 Pro itself. Next will find the documentation a SIM card eject tool, quick start guide, Guarantee information and Apple sticker. The only other accessory is the Lighting USB cable, which does up to 50% charge in 30 mins with a 20-watt adapter. Not to forget that the 13 Pro supports 15 watts wireless charging and is IP68 water and dust resistant.

This video & article will show you everything you need to know about the Apple iPhone 13 Pro. Helpful if you are looking to upgrade your phone

Display

The iPhone 13 Pro has a 6.1-inch Super Retina XDR OLED display, which is the same size as the iPhone 12 pro. However, the display now includes ProMotion technology that automatically changes the screen refresh rate from 10Hz to 120Hz. It has a 2532 by 1170-pixel resolution at 460 ppi and a brightness boost starting at 1000 nits, which is brighter than the iPhone 12 Pro. If you compare the Pro 13 with the Pro 12 on the left, you can’t really see allot of difference side by side. Therefore, an upgrade from the Pro 12 to the Pro 13 might not be worth it. However, for those of your who are thinking about upgrading from the iPhone 8 it would be a big update.

Design

Apple has kept the smooth flat edge design from the 12 pro on the 13 Pro line up as well. This allows the iPhone to stand up on its end. I love this design we first saw it on the iPhone SE. However, if you buy a cover the phone might not stand on its side with the cover on the aluminium frame does show fingerprints.

The left side of the iPhone, you have the Ring Silent and Volume up and down buttons and a SIM card slot.

On the right side, you have the Sleep Wake power button. On the bottom, you have the lighting connector, microphone and one of the stereo speakers. Actually, the Stereo speakers are impressive. Take a listen.

Face Unlock

Face unlock is standard on the iPhone 13 models. Also along the top, we have a 12-megapixel True Depth Camera that has a F2.2 aperture. While you cannot see them, there is actually a whole bunch of sensors hidden here. Ambient light, Proximity, Flood illuminator, infrared camera and dot projector.

On the back of the 13 Pro, you have a Triple Camera setup which features a Ultra Wide, Wide and Telephoto cameras. The Telephoto camera has a 3x optical zoom. The Ultra Wide camera has a f 1.8 aperture and allows better photos in low light. In addition, the new Wide Camera has a F.15 aperture.

Therefore, out of the box the iPhone 13 Pro will take amazing photos. Here are some comparisons between the iPhone 13 Pro and iPhone 8. Can you spot the difference?

Processor

The iPhone 13 Pro has the A15 bionic processor, which has an updated 5 GPU cores. A fast processor is important when playing games and videos or when generally moving around the iPhone. Here is the Geekbench scores for the iPhone 12 Pro and the iPhone 13 Pro. As you can see the iPhone 13 Pro wins with a single core score of 7509 and multicore score of 19477

Battery

In terms of Battery life for the iPhone 13 Pro, it has a 3095 mAh battery and you can expect up to 22 hours video playback. This will get you about 20 hours of streamed video playback. Say from the web.

My thoughts pretty amazing phone. The cameras get better all the time so if you are looking for the best Instar worthy shots you can’t really go wrong. However I think the price could have dropped a bit since Apple no longer includes a charger and battery life could be also be improved in my mind. I would like to see it last longer.

Guys, don’t forget to check out my other videos such as How to record your screen on iPhone or iPad. Also do me a favour if you know anyone who might like this video please share it will them, hit the subscribe button and smash the bell icon.

Clean Install Windows 11

How to Create a Windows 11 Bootable USB

Record Your Screen on iPhone or iPad

Hi Guys Matt from 123myit here. In this video, we will show you how to record the screen on your iPhone or iPad. First, up, you need to add Screen Recording to the Control Centre. To do this go into Setting and then Control Centre. Scroll down and then tap the green plus next to Screen Recording. Scroll backup and should see that Screen Recording has been added to the Included Controls menu.

Record Your Screen on iPhone

All right, let us show you how it works. Go back out of Settings and swipe down from the top right corner to access Control Centre. Here you can see the new Screen Recording button has been added. Tap and Hold to turn on your microphone if you want it to record your voice.

Capturing the action – Record Your Screen on iPhone

Let us capture some action. To start the Screen Recording swipe down from the top right hand corner and tap the screen-recording button. It will start Screen Recording when the three-second countdown ends. Next, close the control centre to pick up where you left off. Great Shot! When you want to stop recording. Go back to the Control Centre and tap the Screen Recording again. You Screen Recording will be saved to Photos. Tap edit to edit your Screen Recording and cut out the parts you do not want. When you finished tap done and you can save it as a new clip. When you are finished, editing you can share it with friends by tapping the Share button.

In addition, people do not forget to check out my other videos such Turn on Speak Screen on your iPhone or iPad. Also, do me a favour if you know anyone who might need this video please share it will them, hit the subscribe button and smash the bell icon.

Scan a QR code on iPhone iPad or iPod Touch

Install Windows 10 on a M1 Mac