How to Add Bookmarks in IOS 8

This video will show you how to Add Bookmarks in IOS 8.

Hi All,
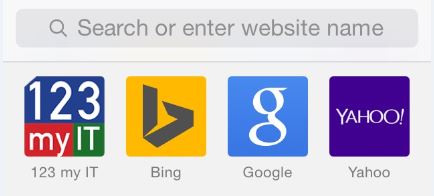
I always cringe a bit when I see people that use their iOS device everyday. But still have the same old default Apple, Bing, Google and Yahoo Bookmarks icons in their Safari browser. This also goes for any Mac running OS X Yosemite as the home page on these Mac’s now defaults to a bookmarks screen bringing them inline with their iOS devices.

Mac OS Bookmarks Page

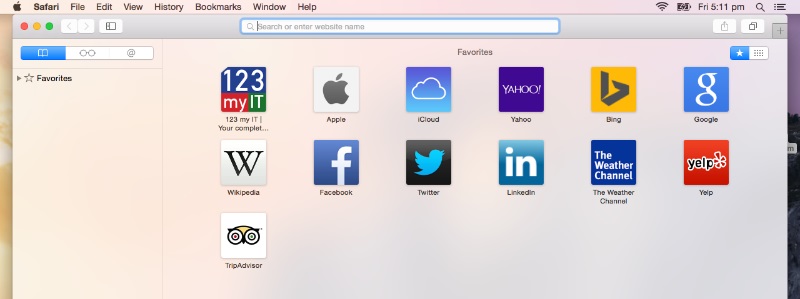
I really don’t like this page as I feel its locking people in. However its here to stay so we may as well work with it.

So the steps to add a Bookmark in iOS is pretty straight forward, all you need to do is go the website you want to add. For the example in the video I used the www.123myit.com website. Once you have browsed to your website. Press the up arrow icon in the middle of the page at the bottom.

iOS Bookmark 1

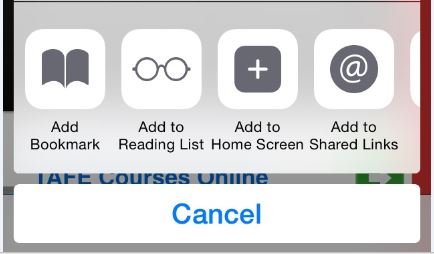
Once this is done you will see a menu which contains the Add Bookmark, Add to Reading List, Add to Home Screen, Add to Shared Links buttons, press the Add Bookmark button and this will take you to the next screen.

Add Bookmarks in IOS 8

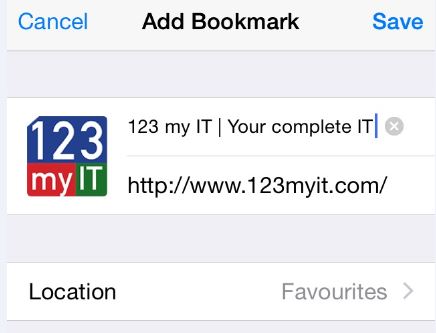
The next screen will have the Bookmark that you want to save, at this stage you can change the heading of the Book mark if you wish. In the video I have removed the “Your complete IT help portal” from the 123myit.com Bookmark. Once you have adjusted the heading simply press save.

Save iOS Bookmark

Once saved the Bookmark will show up every time you start a new Safari browser session.

Saved iOS Bookmark

If you want to know more about iOS 8, you can find the official Apple site here.

How to change the Sim & SD cards in a Samsung Galaxy S5

This video will show you how to change the Sim & SD cards from iPhone to Samsung Galaxy. Recently I moved my data from an iPhone 4S to a Samsung Galaxy S5. Once this was done the next step would be to change the sim card over as well. This will give the Samsung Galaxy S5 phone, mobile cell network access.

How to change the lock screen timeout on a Mac

This video will show you how to change the lock screen timeout on a Mac.


So you have setup a password on your Mac, but the annoying thing is the screen times out too fast. You can change the amount of time the Mac takes for the lock screen timeout.

Why does the Screen Timeout on a Mac?

Sleep mode is designed to save battery life and will start after a very short time. When you wake your Mac up from a lock screen timeout you will be prompted for your password.
the good news is you can tell your Mac how long you want this time out to be.

The picture below is of the Security and Privacy settings in your Mac settings.
Security and Privacy

Step 1 – Security and Privacy

If you want to change your time out you will need to go into System Preferences and then Security and Privacy. To change the settings in here you will need the Admin password and this will prompt when you click the Pad Lock icon. Next up enter you Admin password. So where it says Require password immediately, click the drop down menu. And then select a time that’s suitable. Remember you want to try and find a nice balance between annoying and helpful time outs. Also remember that having a time out set for too long will have an effect on your Battery life.

Step 2 – Turn lock screen off

To turn your lock screen off, simply reverse the steps taken above. You will be able to test the time out settings by going to Apple menu and sleep. I hope this helps.

Ok Guys, Don’t forget to check out my other videos.

Clean Install MacOS Catalina on any Mac

Create macOS Catalina USB Installer Drive

Share files iPhone to Mac with AirDrop 

How to Change Your Default Browser on an Android Device

This video will show you how to change the default browser on your Android Device.
If you don’t like the stock standard default Android browser, you can change if for Free in the Google Apps Store.
Once you download the free browser, make sure you set it to the default browser so that you can use it every time you use the internet.

Step 1. Open up the Google Play Store and do a search for Browsers.

Android Browser Search on Google Play

Step 2. Select the browser you want to install and press Install.

Install Android Browser

Step 3. Go back to your Home screen and tap into the Google search bar.

Android Browser Google Search

Step 4. Search for anything in the search bar and then press the Search Button in the bottom right hand corner of the screen.

Android Google Search Bar Results

Step 5. Put a tick in the checkbox that says “Use by default for this action.” And then press the Browser that you want to be the Default Browser.

Android Browser Set Default Button

And that’s all you need to do. Changing the default web browser will give you greater functionality like being able to create new tabs more easily.

Related 123 my IT Videos
How to Save Battery Power on an Android Device
How to change the Screen Timeout on Android
How to unbrick Samsung Galaxy Nexus, GT-I9250, GT-I9100G, GT-I9300 and S3 GT-I9300
How to get a Samsung Galaxy S phone out of black screen of death

How to change the Screen Timeout on Android

This video will show you how to set the Screen Time out on Android.

Hi All
One of the biggest killers of battery life is the screen timeout, so I have make a quick video on how to change the screen timeout on your Android device to save battery!!! 🙂

step 1. Go into your phone menu and tap settings.

Android Settings Menu

Step 2. Tap on display.

Android Display Menu

Step 3. Scroll down and press the screen timeout button.

Android Screen Timeout Menu

Step 4. Select how long you want the time out to be. Remember the shorter the timeout set the more battery life you will have on your Android device. You should have the following Timeout choices.
* 15 seconds
* 30 seconds
* 1 minute
* 2 minutes
* 10 minutes
* Never turn off

Android Select Screen Timeout Menu

Hope that helps you increase your battery life ! 🙂
Good luck

How to Change the Computer Name of your Mac

Hi All
If you have purchased a second hand Mac and had a hand me down from a family member. The Mac may still hold the Computer Name that the previous owner had entered when they initially configured the Mac.
The video above shows you how to change the computer and also shows you how to add the computer into the Finder sidebar.

Step 1. Go into the Apple menu, and click on System Preferences.
System Preferences
Step 2. In the System Preferences menu click on Sharing.
Mac Sharing
Step 3. In the top of the Sharing window you will see Computer Name followed by the current name of the Mac.
Computer Name
Step 4. Delete the Computer Name and type what ever name you would like the Mac to be.

Once you have changed your Computer name if you would like to display your MacBook in the Finder Sidebar do the following.
Step 1. Click on Finder and then Preferences.
Finder Preferences
Step 2. Click on the Sidebar Tab across the top of the Finder Preferences Window.
Then down the bottom of the Window out a tick beside the Name of your Mac. Close you Window and your Mac will now appear in your Finder Sidebar.
To see it click Go then Computer.
Finder Sidebar

I hope that helps out.
Good luck 🙂