Hi Guys and welcome to 123myit, in this video I will show you how to Fix your MacBook Air by resetting SMC.
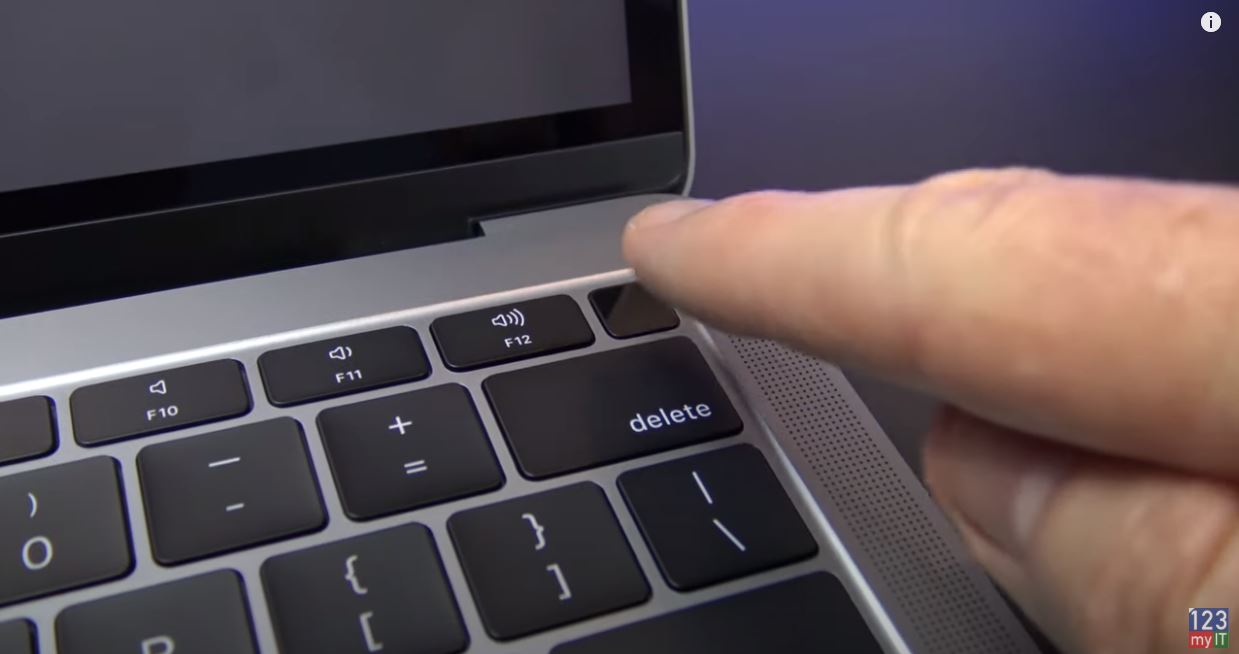
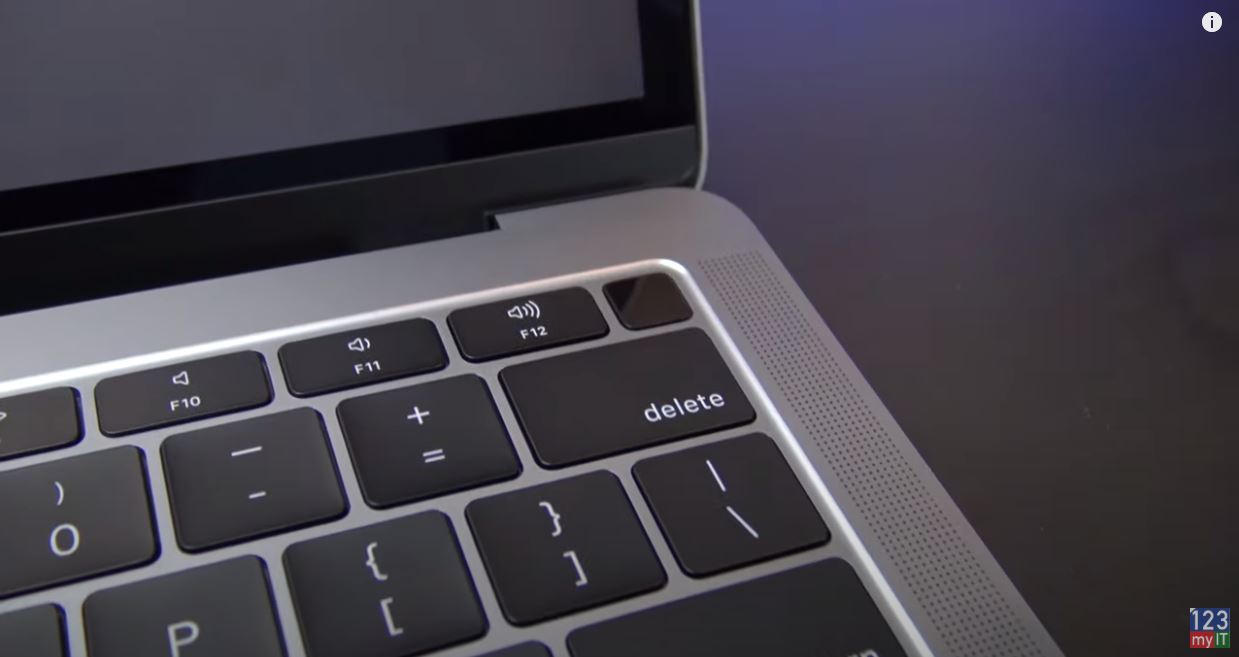
Ok guys in this video we will show you the official way to Fix your MacBook Air with the T2 chip. If you do not have the T2 chip on your Mac but you still want to reset the SMC then I will put a link in the video to an earlier video I made which shows you how to do it on Macs without the T2 chip. Find that link here. If you do not know what I mean by T2 chip, it is that funny little power button on some Macs.
The T2 Chip on some Macs – Resetting SMC
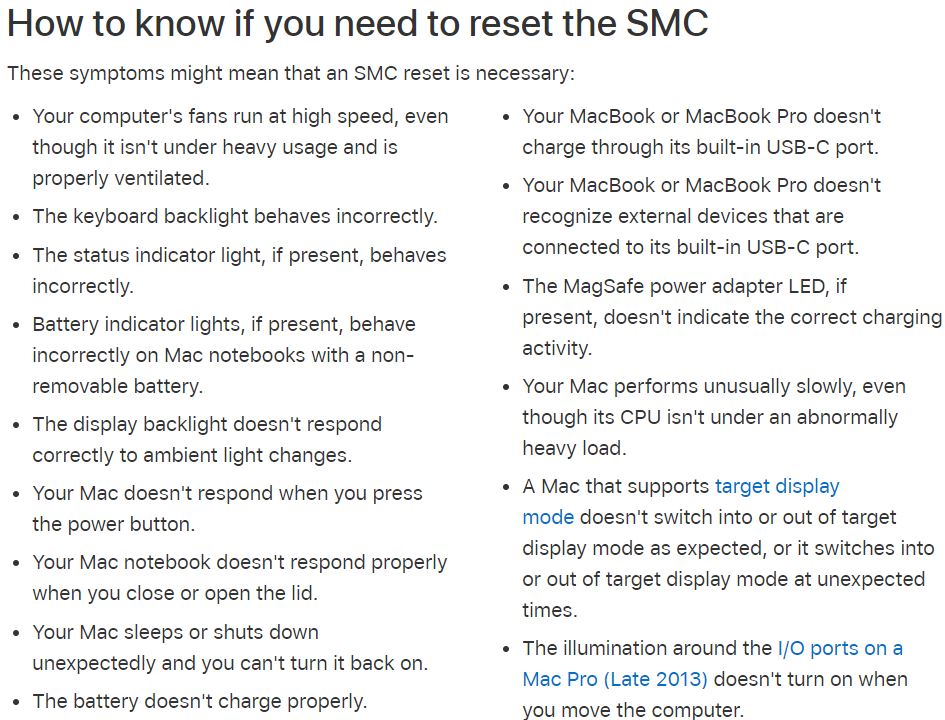
Resetting SMC can fix issues such as fans running at high speeds. Battery and charging issues. Sensors and status indicator light issues.
Problems when opening and closing the lid on your mac as well as a host of other issues you might be having with your Mac.
Resetting SMC
To reset the SMC when your Mac is powered off hold down the Ctrl, Option and right shift buttons for 7 seconds. Once 7 seconds is up press and hold the power as well. If you Mac is on it will turn off. Here’s a picture of the keys you should be holding down.
Keep holding the keys down for another 7 seconds and then release them. Wait a few seconds and then press the power button to your Mac on. Once you Mac is powered back up check and see if you are still having the issue that bought you to this video. If you are, still having an issue leave a comment in the comments field below. I can try figure it out for you.
Also guys don’t forget to check out my other videos such as Apple MacBook Air 2019. And do me a favour hit the subscribe button and smash the bell icon.
Hi guys and welcome to 123myIT. In this video, we take a look at the Apple MacBook Air 2019.
MacBook 2019 vs MacBook 2018
The 2019 MacBook Air is pretty much the same as the 2018 MacBook Air, However the 2019 version brings a lower price tag at $1099 USD for the 128GB storage model. An updated True Tone display and some small SSD changes and a butterfly keyboard which uses the same updated materials as the 2019 MacBook Pro.
Other included features are Retina Display, Force Touch trackpad, Touch ID, Great Speakers, the MacBook Air compact form factor. Modern eighth gen processor as well as Thunderbolt 3 ports. The colour that we have today is space grey. However, the MacBook Air also comes in the colours silver and gold. Now the MacBook Air only comes with one processor this is dual core 8th generation i5 clocked at 1.6 GHz.
Accessories
On to the accessories and it we take a look at the paper work first. We have the quick start guide, a set of colour matched Apple stickers and guarantee information. Next, up we have our charging Adapter. This is a 30-watt USB C charger. The model I have here is the Australian New Zealand version. However if you are in the US you will have the US version. You can actually remove the adapter prongs and add in an extension cable or an international wall adapter.In addition, the last accessory in the box is the USB C Charging cable.
Touch ID
Touch Id – A great feature on the MacBook Air
Although the MacBook Air did not get the touch bar it did get touch ID. When you start the setup process, you will be prompted to setup touch ID. Now you can use this to unlock your MacBook Air as well as authenticate payments and authenticate passwords. Along with the 13.3-inch Retina display, you also get a true tone screen. I hope that you can see the difference as I toggle true tone of and on.
The display is fantastic with a resolution of 2560 x 1600. This is the most affordable retina display on the Mac and it produces 40% more colour than the older design. You also get four million pixels, which is up from one million on the older models. The display is a IPS display now instead of a TN display, which means it has truer colours and better off axis viewing angles. IPS panels have a slower refresh rate than TN panels. Therefore, it means that this display is more suited to design work over gaming. The older models also had a wider display bezel. Which was aluminium right up to the glass. Now we have an edge-to-edge glass panel which is also more anti reflective than the old glossy panel.
Butterfly Keyboard
The Apple MacBook Air also has a butterfly keyboard which was the same one that debuted on the 2018 MacBook Pro. The great thing about this Keyboard is its quitter, but it also has a membrane under each key, which keeps dust out. This keyboard is a nice upgrade from the old keyboard as the keys are wider so that makes them easier to strike. Wider and more stable and they do not wobble like they did on the old MacBook keyboards. Because the keys do not move around so much you can type much faster. Improvements in backlighting because each key gets its own LED light, which means there is much less light bleeding around the side of the keys. In addition, each key is brighter.
In terms of a Trackpad on the Apple MacBook Air, you get the force touch Trackpad that replaces the mechanical Trackpads on the older versions. So now, we have larger Trackpad surface that responds to pressure thanks to a haptic motor. The Trackpad is a little bit smaller than the one on the MacBook Pro, so there is more room on either side. This is good because it helps with palm rejection meaning that the mouse does not move around when you are typing.
Audio
On both sides of the keyboard, you have a set of front facing stereo speakers. Which are a massive improvement over the older keyboard design. The speakers are 25% louder and have twice the base with a much wider stereo sound. There are more immersive and less muffled. Take a listen.
Ports
If we look at the left side of the MacBook Air, we have two Thunderbolt three ports. These ports, which can be, used for charging as well as up to 5K displays. On the right side of the Mac Air, we have 3.5 Headphone Jack for your earphones. To plug in an external display you might need a USBC to HDMI adapter like this one. You just plug it into the USBC port on the left and plug the other end into your external display. Once done you should be good to go. Along the top of the MacBook Air, we have the FaceTime HD camera, which still records at 720p. You also get an LED indicator and ambient light sensor.
On the underside of the Mac Air, you have a single panel, which is held together by Pentalobe screws. In addition, they are matched to the colour of your Mac Air we also have plastic feet on each corner which protect the underside of the MacBook Air. Again, the ventilation hides in the hinge of the MacBook Air and this time the hinge is integrated into the Aluminium unibody. Gone is the black plastic of the old design. On top of the MacBook, you get the standard polished inset Apple logo. The Apple logo is colour matched along with the MacBook Air text on the front of the display.
Benchmark
Now I mentioned the Touch ID button before but here is the button in action. The Mac is locked and with a press of the Touch ID it unlocks itself and it’s very fast in doing so. For those that are interested in the Geekbench scores the MacBook Air brought a single-core score of 3510 and multi-core score of 6957.
The battery life is really very good considering its smaller than the old MacBook Air and they were to do this by Adding the more efficient 1.6 GHz dual core intel i5 Processor. So you can expect about 12 hours of wireless web browsing. Which is good among the MacBook range.
So if you are looking a portable laptop that will be good for doing some video editing and designing then this MacBook Air would be a good choice. However if you wanted to do some gaming you might be better off looking elsewhere.
Also guys don’t forget to check out my other videos such as Official Pixel 4 Cases + Eco Cases. And do me a favour hit the subscribe button and smash the bell icon.
In the video we will show you how to do a clean install of MacOS Catalina on any Mac. In a previous video I showed you how to create a MacOS Catalina installer USB and I here is the link. Create MacOS Installer Drive.
Once you have followed that video and created your USB we can now show you how to do a clean install on any Mac.
One more thing to mention your USB can be USB type A or USB type C it doesn’t matter which one. If you want to buy one similar to what I am using here’s the link.
Go ahead and shutdown your Mac. Apple Menu > Shut Down and Select Shutdown again. Next plug in your MacOS Catalina USB. Press and hold your Alt Option Key on your Keyboard and press your power button to turn your Mac on.
You should then see the Boot menu with Install macOS Catalina, use the arrow keys and select Mac OS Catalina drive. Press return on your keyboard.
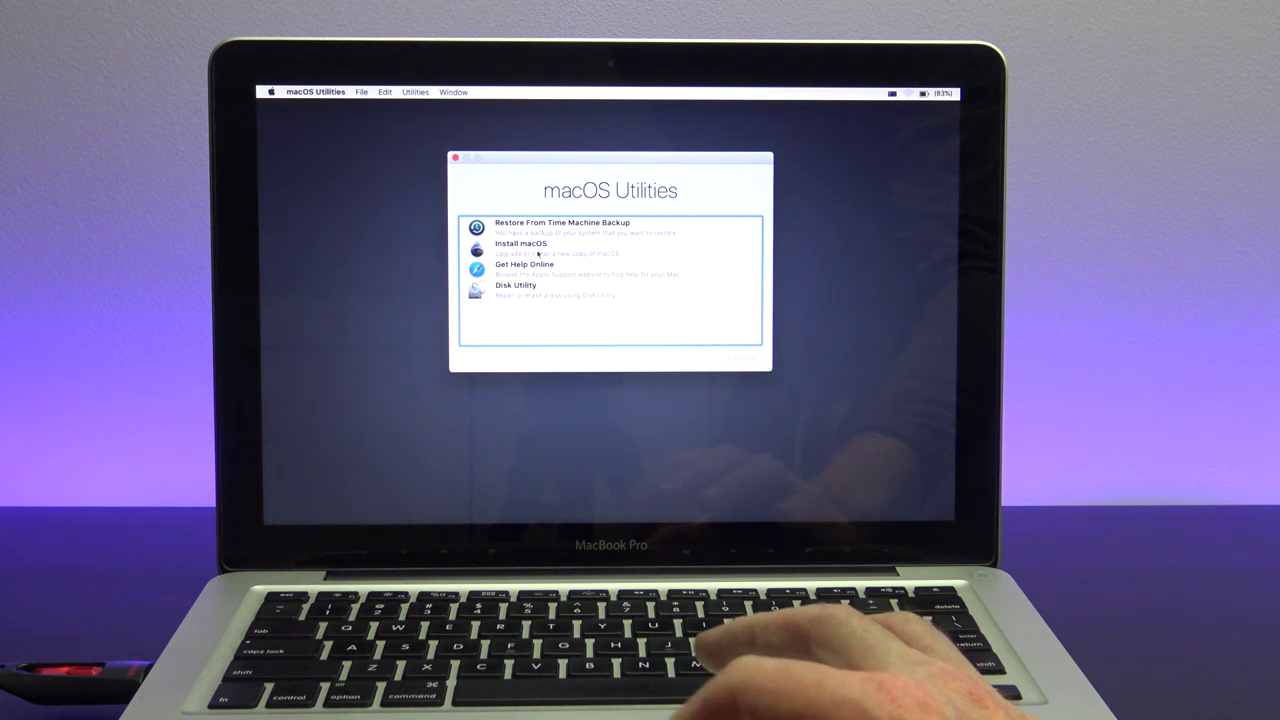
It will eventually boot you into the macOS Utilities menu. If you want to Upgrade or Install a new copy of macOS, select the install macOS option. I want to show you a clean install so I am going to wipe the hard drive first. Click Disk Utility.
Disk Utility a program to help you format your hard disk before installing MacOS Catalina.
Step 2 – Disk Utility
When you are in Disk Utility, select your Internal Hard drive in the top left hand corner and press partition. Press partition again. Give your partition an Name in this case I will call it Mac HD. Under format you can select APFS or if you have an older drive Mac OS Extended (Journaled).Click Apply and click Partition. When you have done that go back up to Disk Utility menu and Quit Disk Utility.
Alright you have wiped your hard drive and now you are about to do a clean install of macOS. Select install macOS. Click continue. Agree to the terms. Select Mac HD and then click install.
So by now you Mac would have rebooted and you should get the Welcome screen where you select the country you are from. You have now done a clean install of macOS Catalina and you can just go through all the mac setup prompts, similar to when you first purchased your mac.
Ok Guys, Don’t forget to check out my other videos.
This video will show you how to Fix MacBook by resetting SMC System Management Controller.
This should be a pretty straight forward easy one. Sometimes your Macbooks will play up and you will need to Fix it by resetting the SMC. If you are having issues suggested in the picture below then resetting the SMC should resolved these issues.
You will need to hold down a combination of buttons and it will vary slightly depending on which MacBook model you have. I have tried to cover all models in the video.
I should add first to reset SMC on older MacBook’s try this video here.
Ok to get started you will need to shut your MacBook down. So just power it off. Once the Mac is powered off, Press and hold down the Shift, Ctrl and Option buttons are the same time. While holding down these buttons next press and hold the power button for 10 seconds while still holding down the Shift, Crtl and Option buttons.
Once this is done hold your power button down again to start your Mac up. This should now have reset your SMC and any issues that you were experiencing should now be gone.
If you want to check out the original Apple SMC reset page you can do that on the link here.
Macs with the T2 chipset you will need to shutdown again. Once the Mac is shutdown you will need to hold down the T2 button again for 10 seconds and this should reset the SMC and this should fix MacBook.
Lastly, shutdown your Mac again.press and hold down the right shift key. and the left option key and hold it for 7 seconds. And then press and hold down your power button for 7 seconds keeping the right shift key and left option key held down. Let them all go power on your Mac and you should have reset the SMC.
My After thoughts are that the MacBook Pro its a great laptop for web browsing some video editing, but still these MacBook’s lack a strong GPU for people who also want to do some Gaming. Another issue that I should mention is that heat is a problem on such s small computer as a result you will hear the fans spin up quite high when the laptop is under load. I have added these details in the video so you can hear the back ground noise that they make.
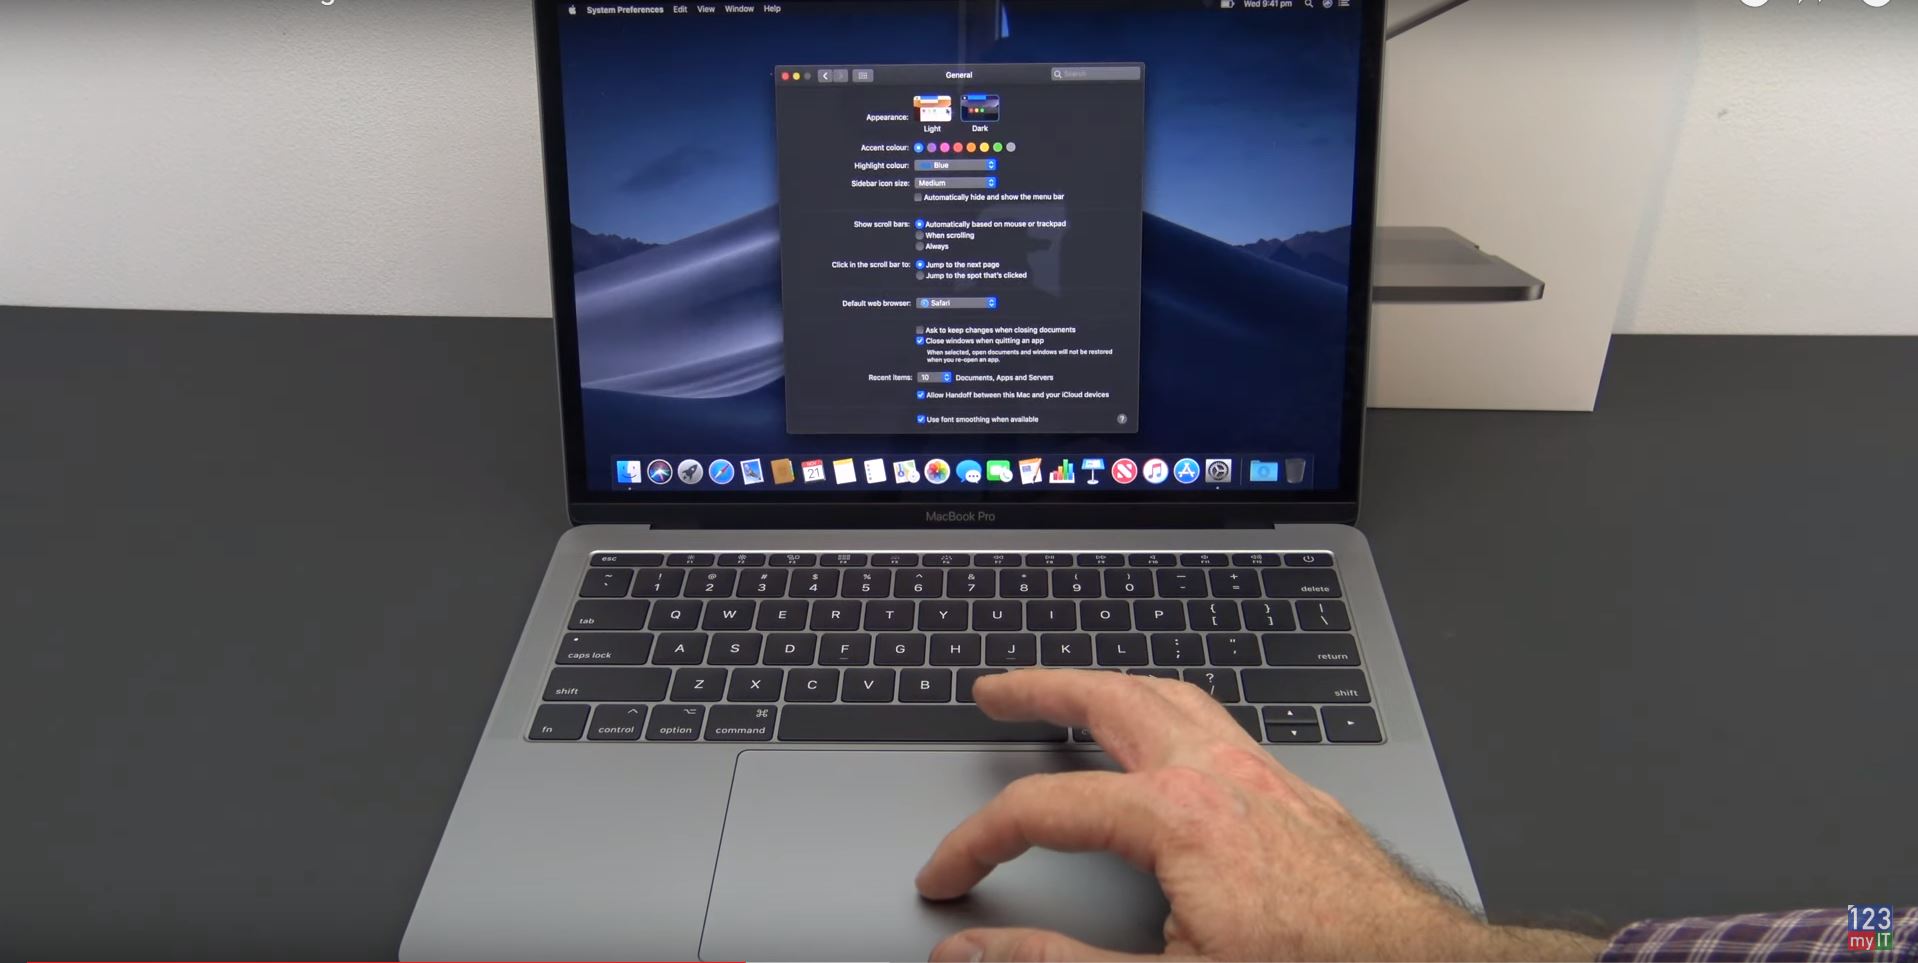
Mac OS Mojave light or dark featureis pretty cool too, it allows you to set your Mac OS to light or dark mode.
This model has the following specs:
Retina display
13.3-inch (diagonal) LED-backlit display with IPS technology; 2560-by-1600 native resolution at 227 pixels per inch with support for millions of colors
500 nits brightness
Wide color (P3) CPUs
2.3GHz dual-core Intel Core i5, Turbo Boost up to 3.6GHz, with 64MB of eDRAM
Configurable to
2.5GHz dual-core Intel Core i7, Turbo Boost up to 4.0GHz, with 64MB of eDRAM Storage SSD
128GB, 256GB, 512GB, 1TB, 2TB Memory
8GB or 16GB Graphics
Intel 640, Intel 655 Two Thunderbolt 3 (USB-C) ports with support for:
Charging
DisplayPort
Thunderbolt (up to 40 Gbps)
USB 3.1 Gen 2 (up to 10 Gbps)
Wifi
Bluetooth
720p FaceTime HD Camera
Stereo Speakers, Two Mics and 3.5 headphone jack
Battery
Up to 10 hours wireless web
Up to 10 hours iTunes movie playback
Up to 30 days of standby time
Built-in 54.5-watt-hour lithium-polymer battery
61W USB-C Power Adapter Size and Weight
Height: 0.59 inch (1.49 cm)
Width: 11.97 inches (30.41 cm)
Depth: 8.36 inches (21.24 cm)
Weight: 3.02 pounds (1.37 kg)3
MacOS Current Mojave
Apple MacBook Pro website.
123myIT MacBook boot camp drivers.
For this guide and other 123myIT social pages see the links below.
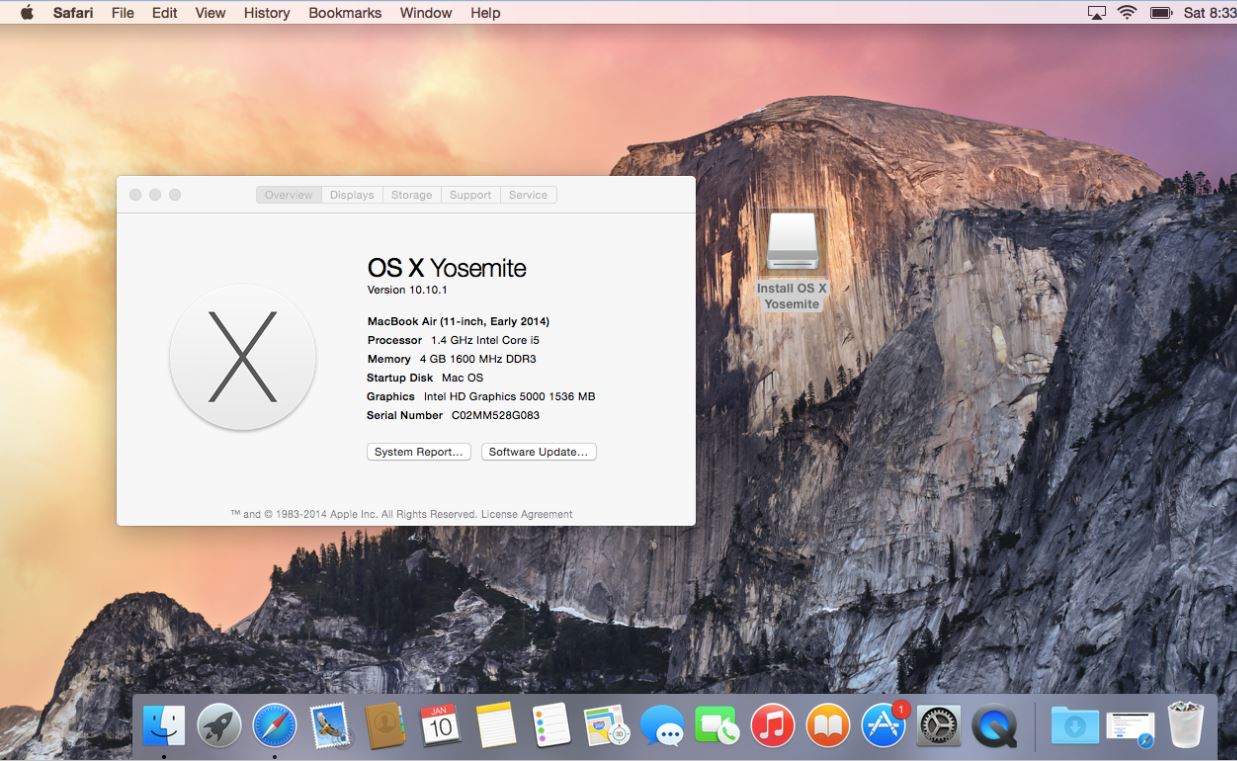
This video will show you how to Install Windows 8.1 Enterprise on a MacBook Air OS X Yosemite.
Hi All,
I setup this video to show people how to Install Windows 8.1 Enterprise on a MacBook Air OS X Yosemite. You need to know how to install Windows 8.1 Enterprise to allow you to then setup Windows to Go. Windows to Go is installing Windows 8.1 on an external USB drive rather than installing it to the computers built in hard drive.
You need to have a copy of Windows 8.1 Enterprise install on a Mac or a PC to allow you to setup the Windows to Go USB drive and I will do the next video on exactly how to do this.
So this video is in actual fact one step closer to setting up Windows to Go.
If you want to know more about the Windows to Go process you can check out the official Microsoft page here.
And for the techies out there, you can take a look at the TechNet version here.
So where do I get Windows 8.1 Enterprise version from I here you ask? Well you can follow the 123myIT.com video here. On the downloads page you will have a choice of Windows 8.1 or Windows 10 Enterprise version. For the Windows to go setup it probably doesn’t matter a whole lot which version you choose.
Once you have downloaded the Windows 8.1 Enterprise version, you can burn that ISO to a DVD and then install it either on a Mac or PC. Burning the copy to DVD allows you to install any computer but it also allows you to make sure you have a back up copy if anything does happen to the ISO file or to the computer that the ISO file is stored on.
Subscribe to the 123myIT.com YouTube channel to keep up to date with the latest 123myIT.com videos. Click here.
If you have followed the video linked above and still having some problems getting Windows installed on your Mac because of the GPT partition it is probably best to do a clean install of OS X Yosemite and this video will help you achieve this.
Make sure you back up your Mac with Time Machine, because the OS X install will remove any data you have on the Mac hard drive. Once you have everything backed up use the newly created USB drive to do Clean Install of OS X Yosemite.
Boot into the USB driver and format the Mac hard drive with Disk Utility. At this stage all of your data with be removed from the Mac hard drive and you can then proceed with the install. Doing a clean install of OS X Yosemite will take around 30 mins to 45 mins depending on the speed of your Mac hardware. Your Mac will also restart a few time during this stage. Just let it do its thing. Once the Mac OS X Yosemite has been installed you will need to setup the Mac as if it is a new Mac. So you will need to choose a user name a password, choose time zone and location.
If you want to know more about the OS X Yosemite you can find more info on the official Apple web page here.