Samsung Galaxy S21

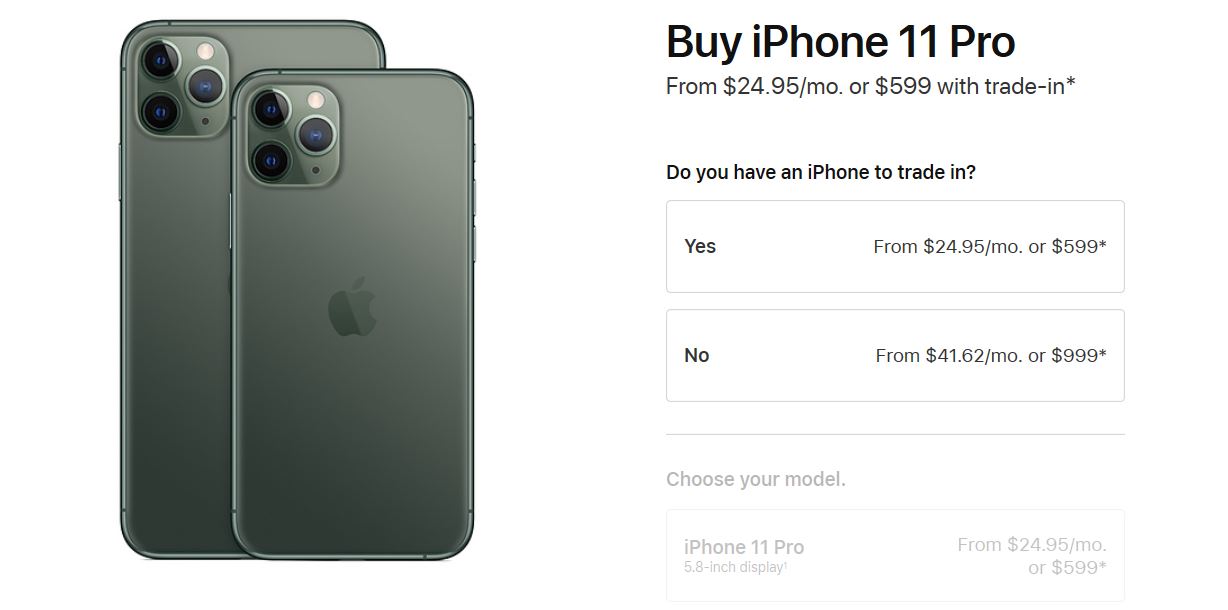
Models and Pricing – Samsung Galaxy S21

Hi Guys and welcome to 123myit. In this video, we will show you everything you need to know about the Samsung Galaxy S21. The Galaxy S21 is $200 cheaper than last years model. Which is a pretty big drop! The S21 comes in three different models, the S21, S21+ and the S21 Ultra. Pricing for the S21 starts at $799 USD and it comes in four different colours, Gray, White, Violet and Pink.

First up in the box of the Samsung Galaxy S21 you have the phone itself. Next will find the documentation a quick start guide, Warranty information and Samsung Care info. The only other accessories are the USB C cable and the sim eject tool.

No more USB charger with the Samsung Galaxy S21

Samsung has followed Apple’s lead by removing a USB charger, Headphones and a see through case which was included in the box last year. In doing so they have minimised packaging. There has been some criticism from Youtubers about weather this I good move for the environment or not.  In my opinion is that is still a step in the right direction, as those Youtubers focused mostly on the users would go out and buy these extras. But, didn’t focus on the fact that allot of users might not buy these extras. I usually charge my phone with a cable which is attached to my laptop. So no adapter in the box actually works for me.

The Galaxy S21 supports 15 watts wireless charging and is IP68 water and dust resistant up to 1.5 meters for 30 mins.

Display

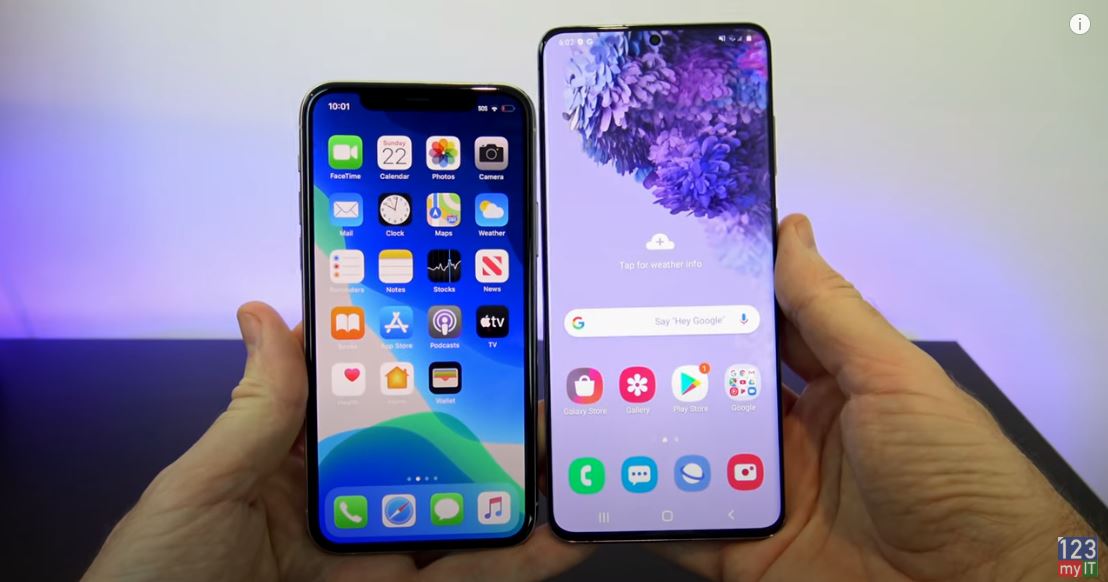
The Galaxy S21 has a 6.2-inch Dynamic AMOLED 2X display. It has a 1080 by 2400 -pixel resolution at 421 ppi. If you compare it with last year’s model the S20+ on the right, you can see the S20+ has a bit more screen real estate on its 6.7-inch AMOLED display. If you are looking to update to the S21 this might help you get an idea of the screen size.

On the right side, you have then Volume up and down buttons and Sleep Wake power button. On the bottom, you have the USB C connector, microphone pin hole, sim card slot and 1 of the stereo speakers. Actually, the Stereo speakers are impressive. Take a listen.

On the left side of the iPhone, you have the Ring Silent and a SIM card slot.
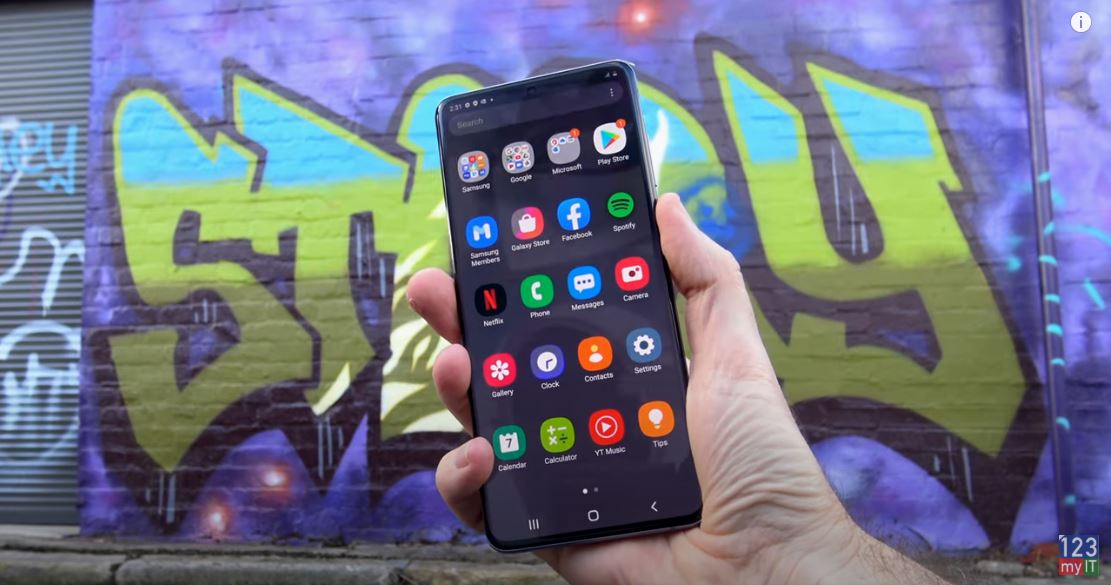
Face Unlock

Face recognition and Face unlock are standard on the Galaxy S21 models. Along the front top of the S21 we have a 10 megapixel Camera which has a F2.2 aperture. While you can’t see them there is a whole bunch of sensors here. FingerPrint, Proximity, accelerometer, gyro and compass. The camera detects you face so you don’t have to enter a passcode to open the device.

Cameras

On the back of the S21 you have a Triple Camera setup which features a Ultra Wide, Wide and Telephoto cameras. The 12MP Ultra Wide camera has a 120-degree field of view with a F2.2 aperture. The 12 megapixel Wide camera has a f 1.8 aperture and the last camera features a 64 MP telephoto camera Which has a 3x Hybrid Zoom and F2.0 aperture. for stunning portrait shots.

So out of the box the Samsung Galaxy S21 will take amazing photos. Here are some comparisons between the S21 and last years model the S20+. Can you spot the difference?

Samsung Galaxy S21 Zoom

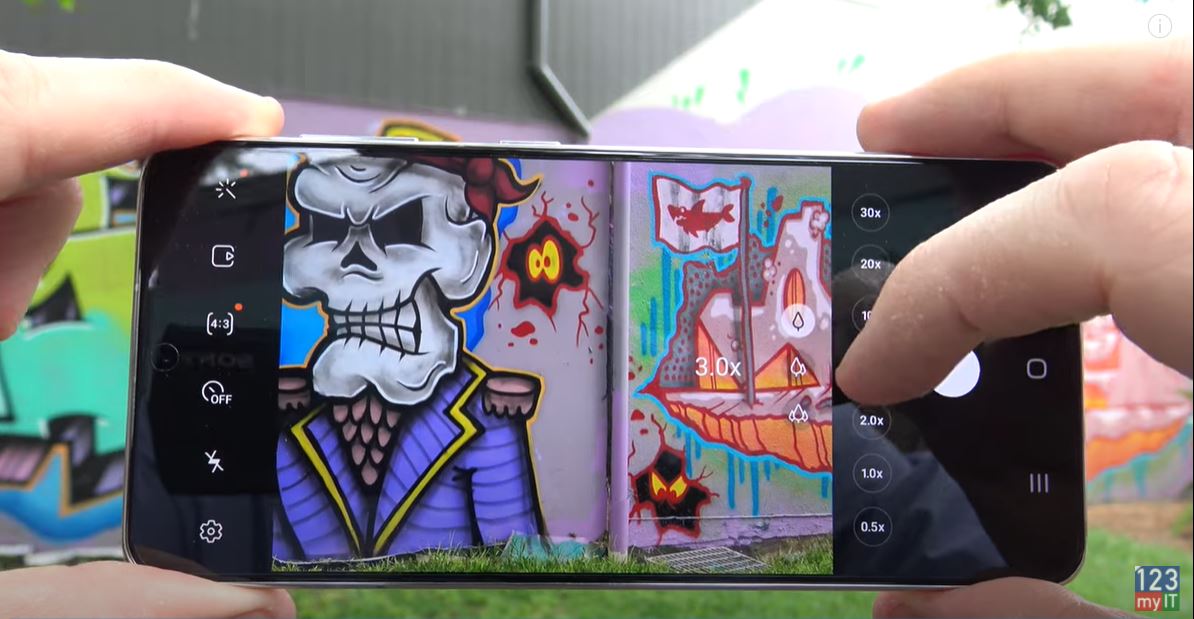
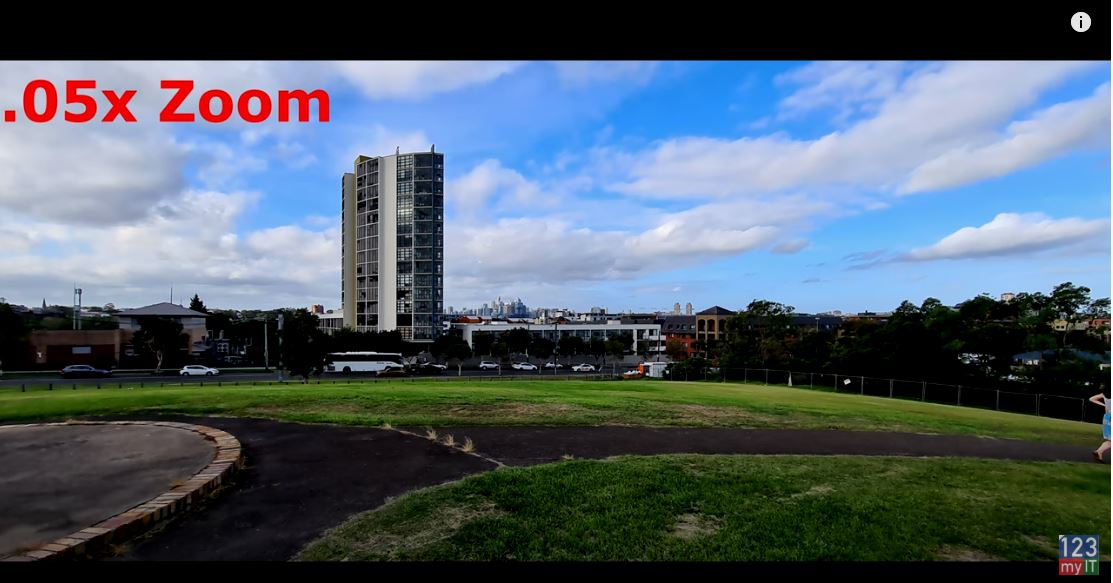
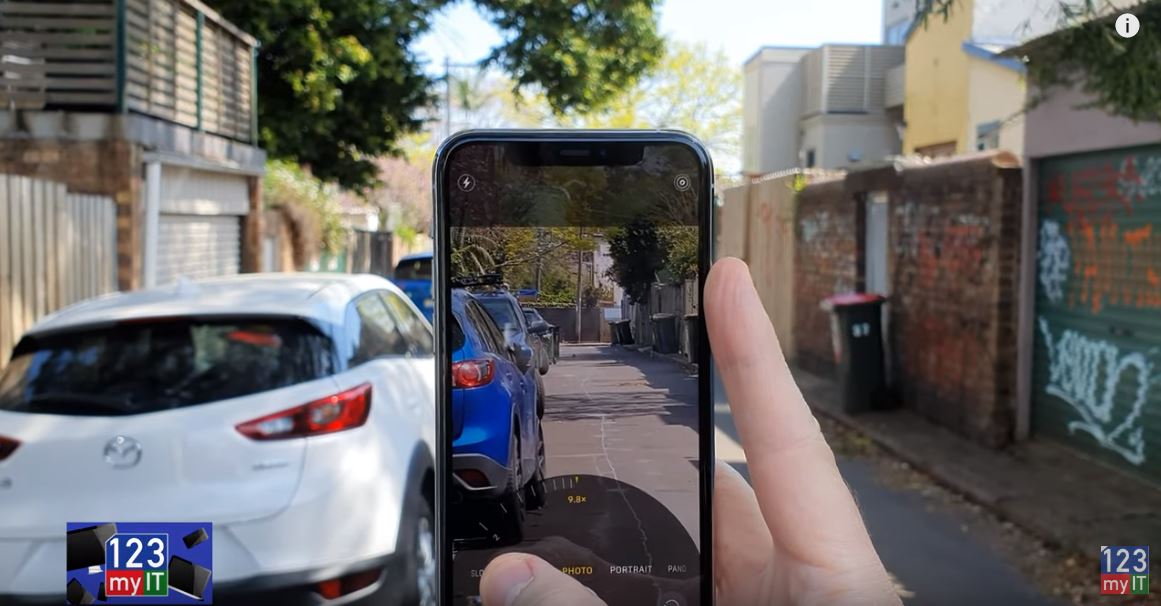
To use the Zoom go into the camera and you have the default Zooms marked with tree. The default is one times. You have a Three and a .5 times zoom as well. If you swipe up you will find the rest and here you can zoom all the way into 30 times and back out.

CPU Snapdragon or Exynos?

The Galaxy S21 can come with either the Exynos or Snapdragon CPU depending where you live. A fast processor is important when playing games and videos or when generally moving around the phone. Here’s the Geekbench scores for the Galaxy S21 and the Galaxy S20+.

The results of the Geekbench scores show that the S21 does out perform last years model the S21+. One other thing you might notice here is the S21 has adaptive 120Hz screen. This means there is less flicker because it uses AI to adjust the screen refresh rate. Its means that the screen is less likely to flicker as you see here.

After running the CPU benchmark if we take a look at where the S21 is heating up it seems to me mostly at the top of the device near the cameras.

So what’s my thoughts, it’s a pretty amazing phone its really grown on me. I like the smaller size is just right for your pocket and its $200 cheaper which is amazing.

Guys, don’t forget to check out my other videos such as 5 start-up modes for M1 Macs. Also do me a favour if you know anyone who might like this video please share it will them, hit the subscribe button and smash the bell icon.

Fix Broken Bricked Mac with Restore Revive

Setup Your Own Google iPhone

MacBook Air M1 vs MacBook Pro M1

Hi Guys and welcome to 123myIT. In this video, we will show you comparison between the Apple MacBook Air M1 vs MacBook Pro M1.

Before I start I already have done a video on the MacBook Air and Pro M1 model and if you want to see that video I will put a link in the top of the video and the description below.

Dirsplay – MacBook Air M1 vs MacBook Pro M1

Display Brightness compare MacBook Air M1 vs MacBook Pro M1
Compare display brightness between MacBook Air M1 and MacBook Pro M1

Both the MacBook Air and Pro M1 come with a 13.3-inch LED Backlit Retina Display with IPS technology. They both a resolution of 2560 x 1600 and 227 pixel per inch, but the Air has 400 nits of brightness and the Pro has 500 nits of brightness. This means you should be able to see the slightly brighter display on the Pro on the right. Its not a massive difference but if you are looking buy the Air or Pro, its something you should consider. True Tone technology also adds a warmer more realistic colour to the display.

 In Terms of how heavy the MacBook Air and Pro are the Air is 2.8 pounds, which is lighter than the MacBook Pro on 3 pounds. The Dimensions are very simular for both models .16-.63 inches high on ther Air compared with .61 inches on the Pro and the are the same in width at 11.97 inches. When talking about portability the Air is slightly lighter but I don’t think the difference between 2.8 pounds and 3 pounds is noticeable.

Pricing – MacBook Air M1 vs MacBook Pro M1

Pricing for the MacBook Air M1 starts at $999 USD and the Pro is $300 more expensive on $1299. You can get the Air in three different colours Space Grey, Gold, Silver and the Pro in Silver and Space Grey. Storage options start at 256GB and go up to 2TB. Using the 256 GB model, I found the upgrade to 512 GB is probably worthwhile as I started having disk space issues after installing the Fortnite game, which requires about 90 GB. I started to wish I had the extra space. So consider this when buying the new MacBooks.

Connectivity

On the left side, you have two Thunderbolt, USB 4 ports. I would have like to see three as one could be taken up with a power adapter. There is No Ethernet, so this model is WIFI only. The USB 4 doubles as a display port so if you have a USB 4 to HDMI adapter you can plug in an external display.

On the right, you have a 3.5 Headphone Jack and there is no SD card reader so it does feel limited in terms of connectivity.

Design

The design of the MacBook Air is different from the Pro as the palm rests slope down slightly at the front. This does make resting your palms on the MacBook Air slightly more comfortable. The Backlit Magic keyboard is a delight to type on and does not bend when pressing the keys. And there is very little flex on the keyboard too. The MacBook Pro does come with a touch bar which replaces the Function keys

Both models have Stereo speakers with Wide Stereo sound. However the MacBook Pro M1 has Stereo speakers with high dynamic range. They sit both side of the keyboard and are designed to point upwards towards your ears. The speakers have the best sound on any laptop I have heard so far. They are truly amazing. Here’s a comparison. Let me know what you think in the comments below.

Trackpad

The Force Touch trackpad is nice and wide on both models however the Trackpad is smaller on the MacBook Air but I never find myself missing a click or having to click twice.

Along the top, you will find an integrated 720p FaceTime HD camera with an indicator light. This is the same webcam on both models and there is no button to manually close the webcam. MacBook Air and Pro have Touch Id built into the power button. This allows you to set a finger print which negates the need for a password and you can log in to your Mac by tapping the power key.

Also included in the box is a 30 watt USB C power adapter for the MacBook Air and the Pro has a 61 watt adapter. You can expect to get up to 18 hours of battery life on the Air and up to 20 hours on the Pro, which is outstanding.

Benchmark

Cool, let us run the benchmarks. Starting the Cinebench software really works the MacBook Air hard. But you wont hear the fan spinning because there is none.

Heres the Cinebench multicore score for the Air which was 5324 this is not as good as the MacBook Pro score which was 7780.

Here is the Geekbench CPU single core score and the Mulitcore score.

Heres the GeekBench Compute score. As you can see the MacBook Pro did much better.

One other thing I noticed too. If you have two Macs and plug them in together via the USB C cable you only need to press the power button on one Mac and it starts up the other Mac Automatically.

You should buy the MacBook Air M1 if you want an affordable Apple Mac computer. It’s a powerful thin light laptop that runs Mac OS Big Sur. It’s very portable and it has amazing battery life and runs whisper silent as it doesn’t have a fac.

You should buy the MacBook Air M1 if you need even better performance and battery life. However it does have a loud fan which can be annoying. Which even model you decide to get I would defiantly recommend getting the 512GB storage model.

Guys don’t forget to check out my other videos such as Apple MacBook Air M1 review. And do me a favour if you know anyone who might need this video please share it will them, hit the subscribe button and smash the bell icon.

Apple MacBook Pro M1

Backup Your Android Phone to Google Drive

Samsung S20 + Unboxing Firstlook Zooming Awesome!

Hi Guys and welcome to 123myit, in this video I will show you a first look at the Samsung Galaxy S20 plus.

Samsung S20 + Display

It’s pretty clear the Samsung S20 + does have allot of differences over its predecessor the S10 plus. These differences start with the design. The display is taller now and runs at 120 Hz along with that you an upgraded CPU, more Ram and a bigger battery. In addition, the annoying Bixby button is gone, thank goodness! Seems like Samsung is listening. Other features include and updated Camera, which we will talk more about later, and great sounding speakers.

Want to buy the S20 Plus? Click here.

Samsung S20 Plus
120 Hz display is amazing for games !

S20 Plus Colours

The colour that we have here today is Cosmic Grey, however the S20 Range also comes in Cloud Blue, Cloud Pink and Cosmic Black. In the box you also get some See us first, documentation with registration information and next up you will have a super-fast it’s a 25-watt charger and you can expect to fully charge the S20 in around an hour. The adapter I have here is the Australian new Zealand version, however if you are in the US you would have a US charger. It’s pretty standard these days to get a set of Headphones, these are design by AKG and are USB C Headphones. They also have three different sizes of rubber ear tips.

Hidden away in the top of the box you will have a SIM eject tool plus a quick start guide along with a see through case for your S20 phone. Having a cover case right out of the box is something that I think really makes a big difference and it is a really nice inclusion by Samsung. The quick start guide just shows you how to setup the phone and you have some warranty information.

S20 Plus Case

To show you what they see through case looks like on the S20 plus, you just push it in at the top and bottom corners. Without this case, the phone itself is a bit slippery, but once you put the case on straight away, it does not want to slip out of your hands. Actually it’s really hard to tell that there is even a case on the phone.

Let’s talk about the display. The S20 plus has a 6.7 inch Dynamic AMOLED 2X Capacitive touchscreen display. With a resolution of 1440 x 3200 pixels and 525 pixels per inch. Therefore, it is slightly larger than the S10 plus display. The display also supports HDR10+ and has a refresh rate of 120 and 60 Hz. There is no annoying camera notch on this model. Rather you just have a small round cut out for the 10 Megapixel front facing camera which has a F/2.2 aperture and it supports Auto HDR.

Samsung S20 + and iPhone 11 Pro side by side.

For the iPhone users out there is a quick comparison between the iPhone 11 Pro and S20 plus screen sizes. As you can see the S20 plus is a little bit wider and a fair bit taller.

S20 vs iPhone 11 pro side by side

Movies are amazing on this screen. I’ve set the refresh rate to 120 Hz and will give you 20 seconds of the new Star Wars screener. Just remember that it will be different when you have the S20 plus in your hand as some of the detail is lost during the recording, but you get the idea. One last thing listen out for the speaker sound it’s probably the most over looked feature on the S20 plus. They are described as simply Stereo Speakers but the sound is incredible. Here it is.

Camera Zoom on the S20 Plus

The Zoom on the S20 range is next level with the S20 and S20 plus doing 30 x Zoom and the S20 Ultra doing 100 x Zoom. Here is the S20 plus in action. It is a bit hard to see but can focus in on Sydney Tower which is about three miles or 5 kilometres away.

.05 x Zoom
30 x Zoom

I took some pictures at the different Zooms to give you an idea. So the way it works is that its Optical Zoom up until the 2 x Zoom. Then from four x to 30 x it’s Software Zoom. Samsung says they use AI to determine what the higher Zoom photos will look like. As you get higher in the Zoom, you do notice some pixilation of the photos. Overall pretty amazing for something you can store in your pocket.  Here it is again as I focus on a building that is out of the park and across the road.

Let’s not forget the other great features of the S20 plus. It has wireless charging and is IP68 dust and water-resistant. Along with Face Unlock, Finger Print scanner Micro SD card slot. I really think that the S20 range is worth upgrading too.

Guys if I have missed something leave a comment in the comments field below, I’d like to hear from you. And do me a favour If you liked the video share it around, hit the subscribe button and smash the bell icon.

Fix MacBook Air T2 Chip by resetting SMC

Apple MacBook Air Retina 2019 – Still good in 2020?

Official Pixel 4 Cases + Eco Cases

Google Pixel 4 Unboxing Firstlook

A look at the Google Pixel 4

Hi guys and welcome to 123myIT. In this video we take a first look at the Google Pixel 4 Unboxing. Check out the Pixel 4 on Amazon here 👉 https://amzn.to/30Bb6QU

Prices for the Pixel 4 start at $799 us and it is $100 cheaper than the Pixel 4 XL. And the main new features for the Pixel 4 over the Pixel 3 are a new bigger OLED display which has improved refresh rate up to 90hz. As well as 6 GB of Ram and a new Snapdragon 855 processor.

And of course it launches with Android 10 right of the bat.

Pixel 4 Unboxing – Right out of the Box!

All right guys let’s get to the unboxing and take a look what’s inside. So the first thing we see when doing the Google Pixel 4 Unboxing is the phone itself wrapped in plastic. And the colour I got is the clearly white, but it is also available in Just Black and Oh So Orange.

Under the phone we have the pretty standard documentation. This includes a SIM eject tool and user guide on how to setup your Pixel.

Next up we have a set of Google Pixel USB-C earbuds and there is an adjustable loop on the earbuds which allows you to set the size of your ear so they grip to the inside of your ear better.  Also included is a USB C cable and adapter for charging the phone. This adapter has the Australia new Zealand plug. However if you are in the US you will have the US adapter. You will also get a USB C to USB adapter plug. This is helpful when transferring content with the a USB cable.

Design

The pixel 4 is a decent looking phone. I actually like the design of it. It has a low key clean look. It has matt black rails that go all the way around the side of the phone. No markings along the back just the Google G at the bottom and at the top a black square which contains the rear facing camera. As well as the coloured power button on every version.

Google Pixel 4 Unboxing
Google Pixel 4 Unboxing – Display

The screen on the Pixel 4 is bigger than the Pixel 3 going from 5.5 inches to 5.7 inches. Its also got more rounded corners and it doesn’t include the annoying notch that some other phones have.

The Screen

It’s a FHD+ flexible OLED display at 444 pixels per inch and contains another big upgrade which is called Smooth Display. Smooth Display refreshes the display at 90 Hz instead of the normal 60 Hz this means the scrolling and movement of the screen will look somewhat smoother than normal. The downside to high refresh rate is the battery life. More power is needed to refresh the screen more often and thus this feature has been blamed for the Pixel 4s poor battery life.

Playing Games!

You can turn this feature off at least under the Advanced Display settings. I found it hard to tell the difference when looking at the phone in person so maybe this isn’t such a big deal for normal use.

The phone doesn’t have a finger print sensor which I thought would be quite annoying. But it does have the fastest face unlock of any smart phone.  It does this by detecting movement earlier with a little sensor called Motion Sense. This sensor detects moment early and prepares the phone to detect a face. Once it detects your face the phone unlocks it works really well.

Motion Sense

You can turn Motion Sense off under Settings System and you can also use this feature to skip songs, silence /snooze alarms and silence phone calls.

On the right hand side you have a coloured sleep wake power button. The colour will be different depending on which colour you buy. And below that you have the volume up and down buttons. On the left side you have the sim card slot. If you eject the slot you will see a little rubber seal which keeps water out and makes the phone dust and water resistant. This gives the pixel its IP68 water resistant rating.

On the bottom the speaker slots are lined up nicely with the USB type C port. On the top of the pixel  there is allot of action going on however its mostly hidden so the best way to show you is with a picture. You have a Face unlock IR Camera, 8 mega pixel Front facing camera, Ambient light Proximity sensor, Audio port, Soli radar chip, Face unlock dot Projector, Face unlock IR Camera and Face unlock Flood illuminator.

Audio

The speakers sound really good and here’s a quick sample.

Good for Movies!

The specs for the Pixel 4 are similar to the Pixel 4 XL they both have the Snapdragon 855 cpu and 6 GB of Ram. Of course to view video on the screen and play games you will need to help of a GPU and the Pixel 4 comes with the Adreno 640 chip. This also gives us a pretty solid improvement over the Pixel 3. Both the Pixel 4 and XL come with a storage options of 64 GB or 128 GB.

Battery

Battery size has been downgraded from a 2915 mAh battery on the Pixel 3 to a 2800 mAh battery on the Pixel 4. Its disappointing to say the least as the battery doesn’t seem to last as long as it should.

Camera

In terms of the two cameras on the back of the Pixel 4 you have a 12.2 mega pixel, dual pixel rear camera with a 1.7 aperture. And you also have a 16 mega pixel telephoto camera with a f 2.5 aperture. Testing out the Super Res Zoom on the camera and it does a good job zooming down the street. The Telephoto camera only has a 2x optical zoom this mean the rest of the zoom is handled by the Super Res Zoom.

The camera also has some neat new sliders for exposure and shadows adjustment. And as you can see here I change the exposure and shadows on the fly. Even when objects are closer the camera does a really good job keeping all the detail.

Lets take a quick look at the camera settings. At the bottom we have different modes. Night sight for night photos. Portrait mode for Portrait photos. The regular camera mode and a Video mode.  We also have a more setting which opens up Panorama mode. Photo sphere which is a 360 degree Panorama feature. Slow motion and time lapse mode.  Playground mode which allows you to put object within other photos.

Google Lens

And the last one is Google Lens which allows you to take photo and then it will return a Google search on the object that you photograph. As for video it will do 720p 1080p and 4K, but you will need to turn on the 4K feature in settings.

Don’t forget the Pixel 4 also support wireless charging. When using the pad you might need to ajust the phone slightly until it makes a connection.

Overall the Pixel 4 is a great phone, but I find it hard to recommend because of the small battery. I also found the software at times buggy, like when using the zoom on the camera and for no reason it would flick back to the home screen. I can imagine this happening when you are about to capture that special moment. Very frustrating.

Also guys don’t forget to check out my other videos such as Backup & restore WhatsApp messages on Android. And do me a favour hit the subscribe button and smash the bell icon.

Turn Caller ID off iPhone

Backup & Restore WhatsApp Messages on iPhone

Aorus KD25F Gaming Monitor – Cheating Stream Snipers Paradise

Hi Guys and welcome to 123, in this video I will show you how to an unboxing and first look at the Aorus KD25F Gaming Monitor.

Check out the KD25F on Amazon here 👉 https://amzn.to/2Pd7K2F

The Aorus KD25F is a 24.5 inch 240hz Gaming monitor with a 0.5ms response time. Its also  Gsync and Free sync compatible. The KD25F retails for around $400 usd and $750 aussie at the time of this video. Other features include LED Fusion lighting, Aim Stablizer and what I consider the best feature of them all OSD SideKick. Lets take a look what you get inside the box.

You get three different power plugs. So it looks to be a Chinese power plug, an Australian New Zealand power plug and a US power plug. Next we have display port 1.2 and a HDMI 2.0 cable. Its nice that you get one of each. In some monitors you will only receive one cable. And last up we have a USB 3.0 cable which powers the USB hub and OSD SideKick software.

A monitor in this price range should come with a really good stand. And the Aorus KD25F monitor doesn’t disappoint with a really solid base to the stand. More about this later in the video. Its looks a bit like a boomerang.

Next up is the arm that connects to the monitor to the base. Taking the monitor out of the box you can see it has a Energy rating of 4 stars and while on the Gigabyte website it says it uses 60 watts on average it uses about 21 watts. Which is actually pretty good for a gaming monitor.

Also in the box you get the installation guide and warranty card.

The Stand

The stand is solid as and the arm and base just slot it together. After this just tighten the screw on the base. On the back of the monitor you have a power plug with an on off switch and a Kensington lock.  You also have a toggle switch to navigate the monitor OSD which is really helpful when navigating the menus. Above that Audio and Microphone jacks. Two HDMI posts, one Display Port port! USB 3 in port and two USB 3 out ports.

On the back of the monitor itself you will find 4 screws which means the monitor has VESA wall mounting support. Helpful if you want to change stands. The stand snaps into place nicely and there is a quality feel to it. There was talk on the internet about the stand being flimsy and wolling allot and it does move when I shake like this. However after testing the monitor for about a week I didn’t find it to be an issue at all.

Once setup the monitor take up about 21 cms of desk space. This means if you have a small desk it like I do. It will sit off the wall about 21 cms. Its not a deal breaker but just something to be aware of.

Rotate the Stand

The stand not only looks great but it allow you to ajust the height. Also the pivot the monitor 90 degrees. Tilts up and down. And it can swivel 20 degrees side to side.

Aorus KD25F Monitor
Wings of excellence design

The stand has the Aorus Wings of Excellence design which looks cool. But in my opinion it lacks functionality. You can change the colour of the LEDS on the back of the Aorus KD25F monitor and the stand however they are very bright and most of the time you wont see them so they are a complete waste of time. If they were brighter you could shine them on a wall behind the monitor like I have done with my LEDs and it would make for an excellent gaming experience. The stand also has a nice built in handle, which is handy if you need to carry it.

Iam going to spend a bit of time going through the OSD SideKick because I think its really cool.

AORUS OSD Side Kick
OSD Side Kick Software – Allows greater control of Monitor settings.

OSD Side Kick – Best Feature !

The OSD sidekick software allows you to control the settings of you monitor with your mouse. You need to plug the USB into your computer for it to work but it has some great features.

The first thing you will notice the Aorus KD25F monitor is really bright, to the point of where its hard to look at. So in the OSD there is a set of seven profiles. Each of these profiles give you different settings such as Brightness, Contrast, Sharpness, Black Equalizer, Colour Vibrance, Low Blue Light and super resolution. This means you can set a really bright profile for gaming and then another low light profile for browsing the internet or working. Then you can bind these profiles to a Hot Key so you can change them on the fly. Here you can see change a few settings within the Aorus profile.

Next up we have the Gamma setting which you can change as well as the colour temperature. However, the one I want to talk about most if the Overdrive setting. The Overdrive setting controls the response time of your monitor, which is very important for RTS and First Person shooter games. You have three settings Quality, Balanced and Speed. Quality is over drive turn off and it’s the slowest setting. It has an average Gray to Gray of 5.5 ms and no overshoot. The Balanced setting has a faster response time of 3.1 ms Gray to Gray and still no overshoot so this is a great setting to use for that balance between speed and quality. Speed mode is the fastest with an average of 1.5 ms gray to gray. However you will start to see some overshoot errors and ghosting with this mode.

Ok so the next setting is Aim Stabilizer, this reduced the motion blur in fast moving games. However you cant use this feature with the FreeSync function enabled. And to be honest I couldn’t see any difference with this on.

FreeSync and G Sync

Turning on the FreeSync option will turn FreeSync or G Sync on depending on if you have AMD or NVidia graphics card. When this option is turned on it eliminates screen lag and tearing whilc playing games.

The Cross Hair option is borderline cheating. Turning this on will allow you to paint anything in the middle of the screen. So if I click on the edit button and paint a crosshair or anything else this gives an advantage over other players for sure. I was surprised how easy it was to make good Crosshairs.

PIP and PBP. This setting allows you to create a picture inside your picture or make two pictures beside each other. Lets take a look. As you can see here I now have my laptop and monitor computer screen side by side. Now the settings is picture in picture and I can change the size and the location of the picture. You can also swap your pictures around and bring the small picture to the front and large picture to the back.

Cheating Possible with the Aorus KD25F Monitor

I racked my brain thinking how this technology could be used and then it hit me. If you are a stream sniper you could use this to follow someone’s stream at play your own game. Then I realised you could watch a team mates stream and you might be able to see what enemy players are. It would be delayed slightly but still helpful!!! Again great from cheating. J

Dashboard is pretty cool. Lets say you want to keep an eye on the temperature of your CPU or GPU you can do it through the dashboard. It makes a little display which you can make it see through so it doesn’t get in the way. It’s a nice feature. Just turn off what you don’t need. For me the CPU and GPU temps were pretty helpful.

Cancel Noise

You can turn the LED indicator on and off on the monitor. Not a big deal, but I also wanted to show you that there is a mic pin hole just above it which works with the noise cancelling feature.

There is also a noise cancelling feature which people on the internet said it would be good for when you take your computer to a lan party. But I was thinking it would probably be best for those of us who intend on getting on discord with loud clacky keys. Hopefully this feature would filter out allot of that background noise.

Here is some footage of the Crosshairs in action! I will be selling the 123 crosshair on my website. Just kidding J And here is the default crosshair. Its pretty good.

Also guys don’t forget to check out my other video such as The Witcher Media PC Build. And do me a favour hit the subscribe button and smash the bell icon.

Setup XBOX controller on Apple TV, iPad or iPhone + Games

Setup DUALSHOCK 4 controller on Apple TV, iPad or iPhone

Apple Watch Series 5 Unboxing First Look

Hi Guys and welcome to 123, in this video we will show you a first look at the Apple watch series 5.
The big news for the series 5 watch is the Always-On retina display. Which allows you to always see the time and watch face.
So when the watch is sitting idea or upside down the display will dim which saves energy, but it won’t go completely off which means you can still see everything you need.

The display can refresh as high as 60 hertz and as low as 1 hertz. This is what makes the watch so efficient. Apple says that the battery life will last for 18 hours.

apple watch series 5
Refresh rate can go as low as 1 Hertz allowing 18 hours of battery life.

Cost and Sizes?


The Apple watch comes two different sizes.
40mm and 44mm. and there are heaps of different colours, cases and bands to choose from. Pricing starts at $399 for the 40mm and $429 for the 44mm in the Aluminium case.
Case types are Aluminium Stainless steel, titanium and ceramic.
And the wrist band types are Sport Band, Sport Loop, Leather and Stainless steel.

On the outside of the box you will just have the Model Case and band information.
And when you open the box you will be greeted with an embossed image of the watch face that you have purchased which is also colour matched to the model you have purchased.
The model that we have here is the Series 5 Gold Aluminium Case in the 40mm size with the Pink Sand Sport Band.

Accessories

So lifting the lid the first thing you will see are all the accessories. The USB wall adapter for charging the watch.
And to plug into the adapter you also get the wireless inductive charging puck.
Now for this Aluminium model we get a plastic puck, however with the stainless steel model you might get a stainless steel puck.
The paper work you get is very basic it shows you a setup guide and how to install the wrist band for the first time.


The last component is the Apple watch itself and its protected by a microfibre pouch. Its coloured matched to the Apple watch and it has the size imprinted on the back.
A nice feature about the wrist bands is that they should fit any model. So if you have an older band that you really like you should be able to attach it to the series 5. And if you look on the inside you should see details like the model and serial numbers.
Now you can install and remove the wrist bands by pushing a button on the underside of the watch. And you will need to move the band side to side to make sure it has latched on properly.
Next up we take a look at the watch band and we have the Pink Sand Sport Band.

Bands!

Two sizes come with the watch so you should feel comfortable not matter the wrist size.

This is the 40 mm sport band which is the same design as the original Apple watch. Another great thing to mention is that you actually get two band sizes with your Apple watch. As you can see here we have the small medium and a medium large. So that should suit most people.

Attaching the band is as easy as sliding it into the apple watch and you should feel it click into place.
In terms of setting up the watch you will need an iPhone to do this and its a fairly simple process. All you have to do is boot up the Apple watch and hold it near your iPhone.

You need an iPhone to pair your Apple watch too.

Once your Apple watch is paired just go through the setup prompts.
Underneath the watch in the centre we have a compact optical heart rate sensor which is surrounded by electrodes, this is used to measure your heart rhythm in addition to your pulse.
If we go in and start the heart rate app you will see this sensor turn green. You will also find the specs for the apple watch etched into the ceramic bottom and these include details such as LTE, GPS and 50 meters water resistant.
On the right hand side you will notice the digital crown has a little round red circle which indicates that this is a cellular model. You also have a microphone pin hole, followed by the side button.

On the left we have a speaker grill which allows better audio for two-way communication and Siri feedback.

Water resistant.

Water resistant to 50 meters.


Also another nice feature for the Apple Watch Series 5 is the watch is water resistant up to 50 meters. You can control your iPhone as well so let say you want to take a photo with your iPhone, simply setup your iPhone and open the camera app. Press the button to take a phone. You also have a three second timer, which gives you three seconds before the photo is taken.
Series 5 is the first Apple watch to come with a built in compass. This allows you to see where you are facing in the updated maps app, just like on the iphone and you can add the compass to your watch face to see which direction you are heading.

Safety Apps

You also have safety features such as fall detection, emergency sos and medical id. Every series 5 watch with cellular has international emergency calling. So you can call emergency services in 150 country’s by pressing and holding down the side button. And you don’t need your iPhone to do this.

Noise detection App

Another cool app on the Apple Watch series 5 is the noise detection app which measures the ambient noise levels of whatever environment you’re in and warns you if the sound around you is loud enough to cause hearing loss.
Here you can see the sound has gone to high and the watch starts to give a yellow warning.
So if you want to change your watch face there are heaps to choose from simply open up face gallery app on your iphone and find the face you like and add it.

Customise !

And these watch faces are configurable. So if you want to customise your complications. Just press and force touch the screen. Tap customise. Just scroll down and you can see here its changing the colours of the compass dial.
Swipe across and you will be able to configure different complications. Next up I change it from Analog to digital. Swipe across again and i can change the smaller complications. Lets see Audiobooks, Battery, Breathe I think i will stick with battery. Tap the next complication to edit it. Starts on earth find friends, heart rate. I will stick with heart rate.

And then Just tap twice to return to watch face.

Now to find your notifications just swipe down and can scroll through them.
On the side you have the side button. If you press this once it will display a list of recent apps. Again use your digital crown to scroll through them.
If you double tap the side button it will activate Apple pay.
If you tap and hold you will be able to shut down your Apple watch.


to get to your control centre you can swipe up from the bottom. In your control center you can toggle off or on your WIFI. You also have a cellular button. If you cant find your iPhone you can ping it from your watch. Check your battery and power reserve. You also have do not disturb options. Of corse there is aeroplane mode which turns off all your wireless on your watch.

My thoughts – is the battery life enough?

Is the Apple watch worth it? I don’t know. This is the first experience with the Apple watch and I have to say its a great device that does allot! However I sat it down and left it for a day without any use and when I came back to turn it on the battery was dead. For me personally I feel like the Apple watch should last for at least three days before a charged. Already I am plugging my phone in to charge daily. Do I really want another device which I have to take off and charge after 18 hours?

Also guys dont forget to check out my other videos like iPhone 11 unboxing and do me a favor hit the subscribe button and smash the bell icon.

Apple iPhone 11 Pro Silver Unboxing First Look

Transfer data Android to iPhone 2019

Transfer data Oppo to iPhone 2019

Apple iPhone 11 Pro Silver Unboxing First Look

iPhone 11 Pro Silver

Hi Guys and welcome to 123. In this video, we will show you a first look at the Apple iPhone 11 Pro Silver. While the iPhone 11 has the Pro name. Right off the bat, I am not sure that these models have enough PRO type features.

Apple have focused on four main features for this iPhone. The Display gets a small upgrade. Battery life a big upgrade. Some small design changes and the new Cameras.

iPhone 11 Pro Silver – new features

The design does grow on you. When the pictures came out of those three cameras, they looked awful. However, getting one in your hand and seeing it in person will change your mind. Another great design change is the matt finish on the back. Its such an improvement over the glossy finish. Even if that finish makes the iPhone a little more slippery. I think its worth it.

iPhone 11 Pro and Pro Max sizes and price

The iPhone 11 Pro comes in two different sizes. You have the Pro and the Pro Max. The Pro has a 5.8 inch display while the Max has a 6.5 inch display. Starting price for the Pro is $999 USD while the Max will set you back $1099 USD. They come in four different colours. Space Grey, Silver, Midnight Green and Gold. And you have three different capacity’s to choose from 65GB, 256GB and 512GB.

iPhone 11 Pro Silver
Apple iPhone 11 Pro and Pro Max

Inside the box – Accessories

So after lifting the lid the first thing see is the iPhone 11 Pro in Silver with the stunning frosted glass back panel. Normally you would see some paper work first, but this time you get to see the iPhone right away along with that new triple camera design.

Other accessories under the iPhone is the Welcome to iPhone quick guide. Which guides news users on all the buttons on the phone.  We also have the sim eject tool. And some Apple stickers.

Next up we get a set of lighting connected ear pods. In addition, the BIG news is you get the 18 watt power adapter. This means you can charge the battery up to 50% in only 30 mins. That’s a massive improvement over the smaller 5 watts adapters. I have the Australian adapter, however if your are in the US you can expect to have the US adapter.  Lastly, we have a USB C to lighting cable to support the fast charging.

The iPhone 11 Pro Silver

On the back of the phone you have the three dimensional machined glass back panel which Apple says this is the strongest glass on any iPhone. I am not going to test that but, this design does make the camera look more integrated. Inside the camera bump you will find three cameras with matching metal rings around the lenses. It is a nice look and it’s hard to tell if they are uneven or if it just an optical illusion. Don’t forget we still have wireless charging 7.5 watts.

Three Cameras, Telephoto, Wide & Ultra Wide.

The iPhone Pro is the only iPhone that has a stainless steel frame as you can see from the nice polished finish around the edges. One of the biggest new features is the battery life. Apple have added an extra 5 hours over the 10S which is a massive improvement for the iPhone. However the trade off for that is the phones are thicker and heavier.

On the left side we have the volume up and down and mute switches. On the right side we have the sleep wake power button and sim tray. However these button have been moved down slightly to make them easier to reach.

Some improvements on wireless charging, but I still had to move the iPhone around to get it to charge!

There has been some improvement with fast charging, however you still might need to move the phone around on the wireless charging pad to get it to charge. On the bottom we have a speaker on one side and microphone on the other as well as the lighting USB connector in the center.

iPhone 11 Pro Specs

Along the top once again we the earpiece which double as the second part of the stereo speakers. And these speakers sound much louder than the iPhone 10s.These phones do come with new OLED displays and they are 15% more energy efficient. But they are also brighter with 800 nits of Max brightness and can go up to 1200 nits in HDR content.The water resistance has also been improved, its still IP 68, but the depth has been doubled to four meters.

Those Cameras!

Cameras working together

So lets take a look at the all new cameras on the back. The 3 cameras all have 12 megapixels, and the camera in the top left has a F1.8 aperture with a 6 element lens an optical image stabilization. Plus we now get 100% focused pixels which helps improve auto focus in low light conditions.The Telephoto camera has a larger F 2.0 aperture and it let 40% more light into the camera.

The UltraWide camera has an F2.4 aperture and 120 degree field of view. The cameras all work together so there is no flipping between. Ill give you a demo, I start in the Ultra wide then move to Telephoto then the Wide camera. You can use the wheel to toggle up to the 2 x optical zoom, however after that it’s a software zoom. How good is it though you can see all the way down the street!!!

iPhone 11 Pro Camera Zoom

Photo Examples

And the photos come up really nice too here some examples.

Lets not forget about the new 12 megapixel front facing camera with a wide angle lens. Now its able to record 4k video at 60 frames per second plus because it’s a wider lens you don’t need to hold the phone further away to get a selfie. It also now comes with a slow motion feature so if you want to do a slowfie as Apple calls it you can.

This year’s CPU is the A13 Bionic CPU, which is a 2nd gen 7 nanometer chip and it main focus is energy efficiency. So you should see a about 20% increase in performance and about 30 to 40% improvement in energy efficiency. Of course, this improves the battery life which make gaming even better on the iPhone.

Also guys don’t forget to check my other videos like Transfer data Oppo to iPhone and do me a favour hit the subscribe button and smash the bell icon.

Fix Could not communicate with the device Move to iOS

iPhone Battery Drain – Is your iPhone letting you down?

Setup Bedtime on iPhone

HP ProBook 430 G6 Unboxing & Firstlook

Unboxing of the HP ProBook 430 G6

In this video we will show you a HP ProBook 430 G6 Unboxing.

The ProBook 430 G6 is currently the smallest model of this series and has a 13.3-inch display.
If you want a bigger display HP also sells 14-inch, 15.6-inch and 17.1-inch in the ProBook 400 range.

HP ProBook 430 G6 Specifications.

This probook comes with an Intel Core i5-8265U processor, 8 GB of RAM, a 256 GB SSD, and a Full HD display.

ProBook 430 G6 Unboxing
HP ProBook 430 G6 Specifications

The design of the previous ProBook the 430 G5 did not last long and I think this is a good thing. See the review of the G5 here.
The G5 had a dark plastic Case, where as the G6 now has a really nice silver case.
On our model both the palm rest and display cover are still made of smooth, silver plastic.
The unit feels sturdy and does not bend when I apply pressure to it. The craftsmanship is also really good. HP have done a really good job with this laptop.

The G6 has a wide drop-down hinge that grips the display and allows the display to open to a 180° angle. We could also open the display cover with one hand, underlining how well balanced the hinges are.

Wide drop-down hinge that allows the display to open to a 180° angle.

The ProBook G6 is about 100 g (~3.5 oz) lighter than the ProBook G5, 1 mm (~0.04 in) thinner and more compact overall. Hence, G6 has much thinner display bezels. Which I really like.

Ports.

The good thing about buisness laptops is that they have a much wider variety of ports.
On the right side the G6 has a full-size HDMI and RJ45 Ethernet ports along with a USB type-A port and headphone jack. There is also a USB Type-C port. Unfortunately it’s not a Thunderbolt 3 port, but at least you can charge the ProBook with a Type-C cable if you need too, as it has USB Power Delivery (PD) support.
The Type-C port supports DisplayPort out too and you also have a AC power port which lights up to let you know the G6 is being charged.

On the left side you have a Kinsington lock, USB type-A port and an SD card reader. The SD card sits flush inside the laptop so you could use this to upgrade the storage of the laptop without opening the case.

You can expect the SD card reader to transfer at speeds of around 81 MB/s.

Also included is a fingerprint reader that supports Windows Hello. We tested the infrared camera and the fingerprint reader, which both worked perfectly. HP saves a smart card reader and a mechanical camera aperture for its more expensive EliteBook series though, which prevents the ProBook from being a complete security package.

The ProBook 430 G6 comes with just a charger and a recovery DVD. The ProBook also lacks a dedicated docking port, so you must buy a USB Type-C docking station should you need one. You can use any third-party docking station though, which is positive, although HP sells compatible docking stations too.

Pick one up at Amazon here.

USB C Docking Station

Upgrade.

The ProBook 430 G6 is easy to upgrade and you can do this by removing the bottom cover. Plastic clips hold the bottom case in place as well, so I would recommend being careful when prying it free.
You will see two SODIMM slots, of which one is unoccupied in our review unit.

The system supports 64 GB RAM so you could upgrade that, there is also an empty 2.5-inch drive bay if you want to add an HDD or SSD.

There is also an M.2 2280 slot, but you must first remove the boot drive, as you must with the Wi-Fi card should you wish to upgrade that too. The fan is also easy to clean should that become dusty over time. The keyboard looks tricky to remove though and is probably only interchangeable if you remove the motherboard.

HP Warranty.

You will only get 12 months warranty on the ProBook G6, However you can opt to buy extra cover.

Keyboard and Trackpad.

The G6s’ keyboard is now smaller and HP have removed a row of dedicated navigation keys, which sat to the right of the keyboard.
The navigation keys have been merged with the right-most Function key and the arrow keys.
The flat, black, keys have a two-stage backlight and feature off on and brighter.

The ProBook 430 G6’s TrackPad measures 11 x 6.5 cm, which is pretty large for a 13.3-inch laptop.
The TrackPad is made of relatively smooth plastic, on which it is easy to slide one’s fingers, but glass TrackPads feel better to the touch.
The TrackPad is fine overall and even its integrated mouse buttons work well. I find left click sometimes hard to find.
multi-touch gestures like scrolling or zooming and allow decent TrackPads to feel almost as responsive as touchscreens.

HP ProBook 430 G6 Display.

HP gives customers the choice between a 1366 x 768 display and a 1920 x 1080 one. However the viewing angel for the 1366 x 768 is not great. Also because of the dim display you might find it hard to use outdoors.

CPU

The Core i5-8265U is a quad-core processor that has a 15 W thermal design power (TDP) and a 1.6 GHz base clock speed. The CPU also supports Intel Turbo Boost for clock speeds up to 3.9 GHz on a single core. Please see our CPU benchmarks page for more information about the Core i5-8265U and how it performs against other CPUs.

GPU and Ram.

All ProBook 430 G6 models use the Intel UHD Graphics 620 for graphics. There is no dedicated option. The UHD Graphics 620 shares its memory with the CPU and benefits from running in dual channel mode, which is only enabled when the system is running with two RAM modules installed. Our review unit is only equipped with one RAM module, so it runs in single-channel mode, which restricts GPU performance. Hence, you could squeeze more performance from the UHD Graphics 620 if you added another stick of RAM, but it would still not be powerful enough for demanding tasks like CAD or video editing.
Like the CPU, the GPU is factory-throttled when running on battery. Activating Turbo Boost in the BIOS reverses this limit though.

You could add another ram module and this would put the graphics in dual channel mode. However it would still not be powerful enough for demanding tasks like CAD or video editing.

HP ProBook 430 G6 is Not a Gaming laptop.

The ProBook 430 G6 is not a gaming laptop in disguise. And this shows in the 3d Mark Score. The intel 620 graphics is powerful enough to play older games like BioShock Infinite at 720p, but current triple-A titles are out of the question.

you cant connect an external GPU either, which would have allowed for serious gaming. I would recommend looking at the 455 G6 which I reviewed recently heres the link.

Accross the top of the display we haev a 720p HD camera, a status indicator light and two mic pinholes. Our model didnt have an infrared sensor, however you will need this for face recination.

the g6 has an excellent 45watthour battery and when browseing the web can last for around 9 hours.

The hp probook 430 g6 is an execllec laptop choice for students and small buinesses. Its battery life, upgradeability, lightweight and sturdy desgin are really impressive but its lets down by the dim display.

Guys if you want to check out other HP probook reviews I have done click the links now.

HP ProBook 430 G5 Unboxing FirstLook

HP ProBook 455 G6 AMD – Will it run Fortnight?

iPhone to Android data transfer 2019 with iCloud