Fix Broken Bricked Mac with Restore Revive

Hi guys and welcome to 123myIT. In this video, we will show you how to fix a bricked mac or broken MacBook with revive or restore.

Guys if you are like me and you have bricked your new Mac M1 or other MacBook’s then you can try to do a restore or revive process to get it working again. You might be getting the black screen with exclamation mark and the restore URL on it. This video will show you how to fix it.

Fix Broken Bricked Mac
Fixing Bricked Macs with DFU mode, Like and iPhone.

Restore Revive Bricked Mac

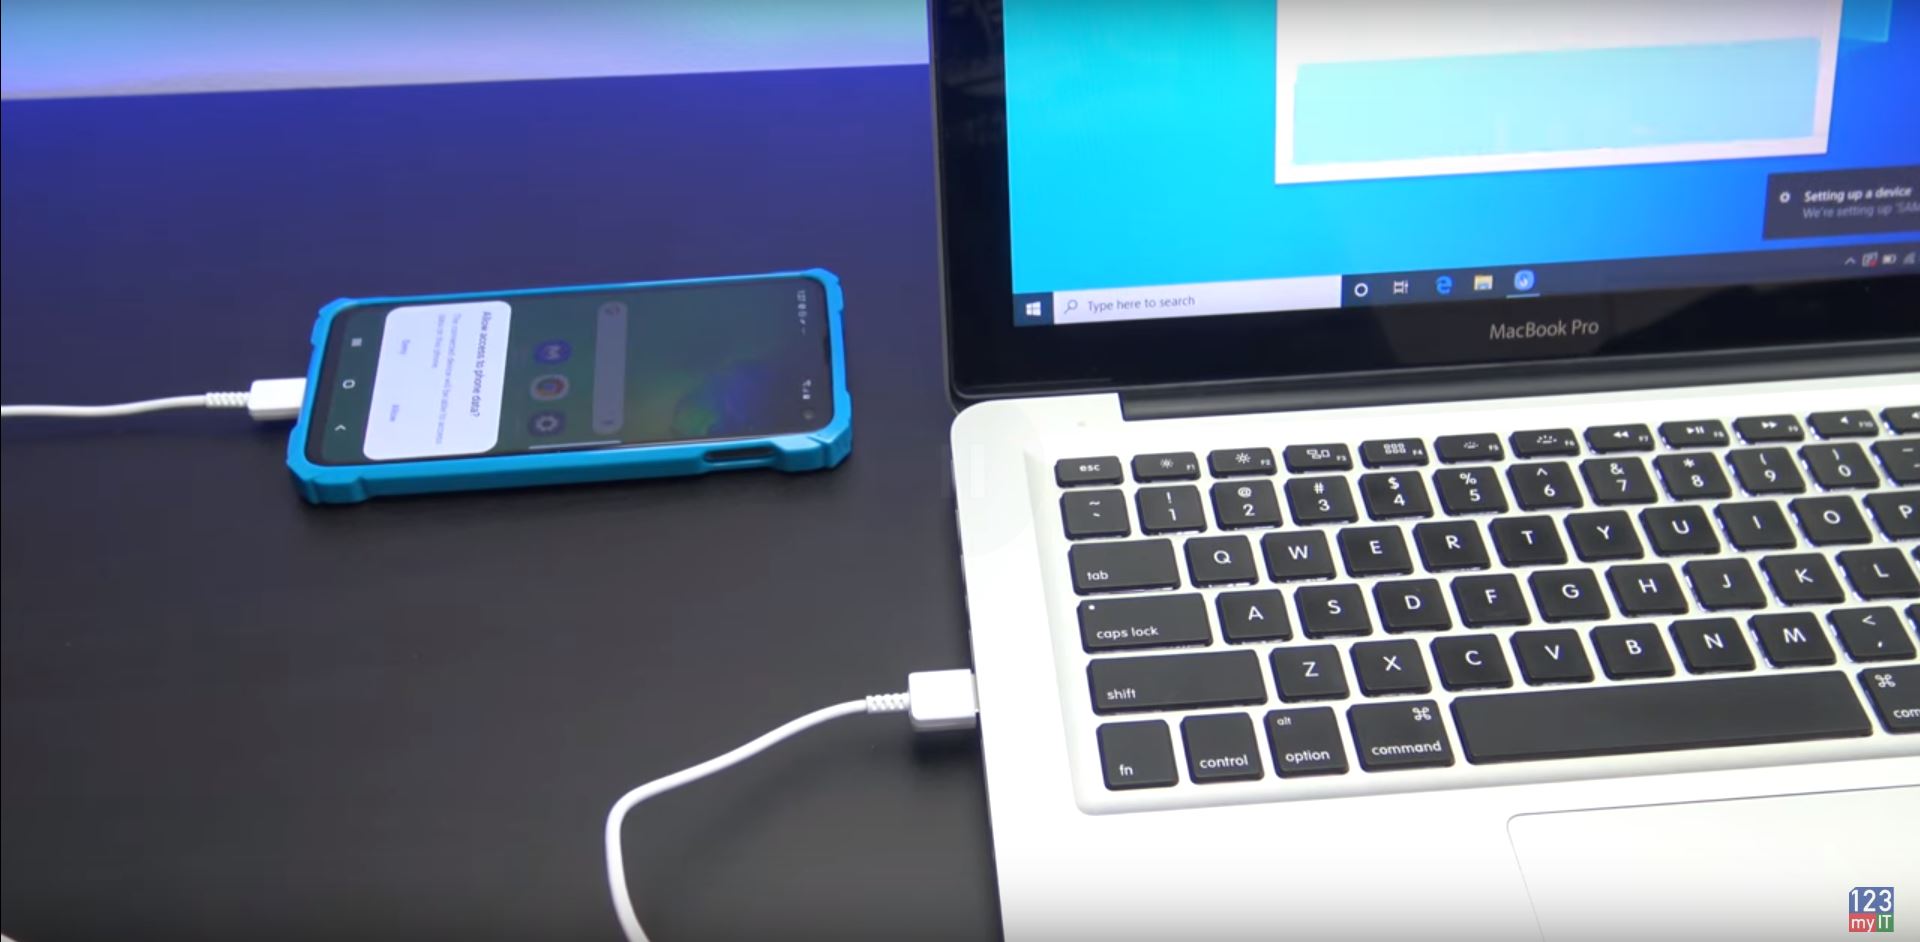
To do a restore or revive you will need another Mac or MacBook. This Mac will push the restore to software to the broken Mac. IF you are like me and did not have a second Mac try borrowing one from a friend or you might have to go to an Apple store.

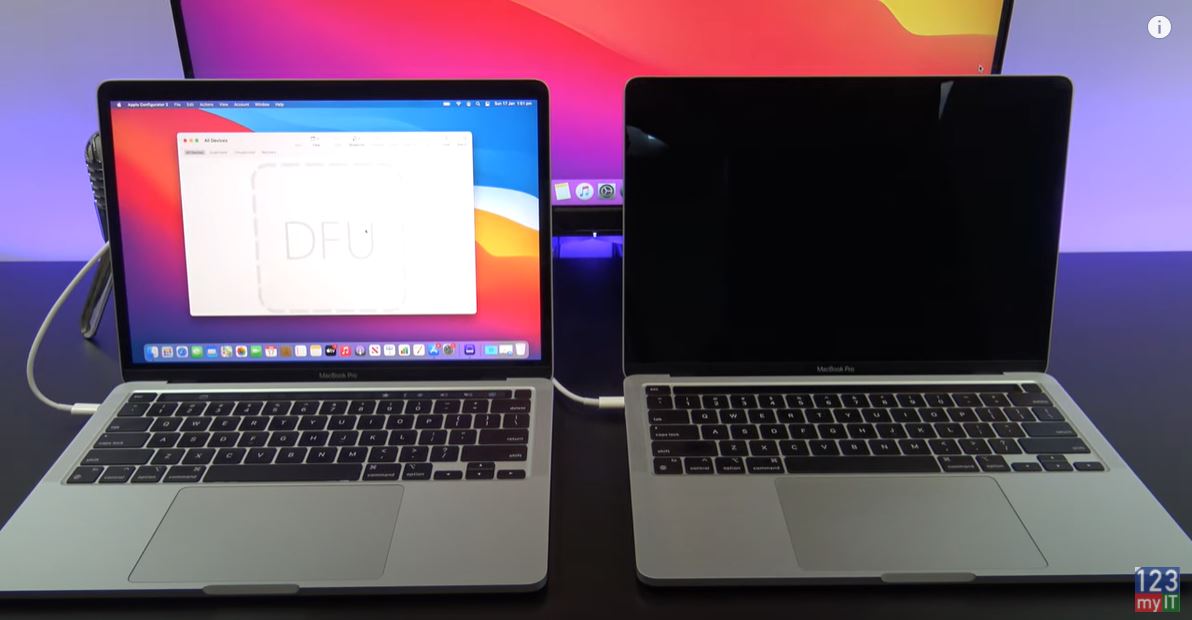
Let us get started. I am using two MacBook Pro M1 computers. You need to plug the power cable into the working MacBook on the right USB C port. In addition, plug the second USB C cable from the second MacBook to the left port. Then plug the cable from the left port into the left port of the broken Mac. Here’s a picture you might find helpful for the different Macs.

Apple Configurator

Next up download and app called Apple Configurator 2 from the App Store. Go ahead and open Apple configurator 2. Once that is done, you will need to put the MacBook in DFU mode. This can be a bit tricky.

You need to:

1. Press the power button.

2. While holding down the power button, at the same time press all three of the following keys for about 10 seconds:

The right Shift key

The left Option key

The left Control key

Other things to know are revive will revive the firmware and reinstall the latest version of recoveryOS.

Restore Firmware

Restore will restore the firmware, erase all data, and reinstall the latest version of recoveryOS and MacOS. Bricked Mac.

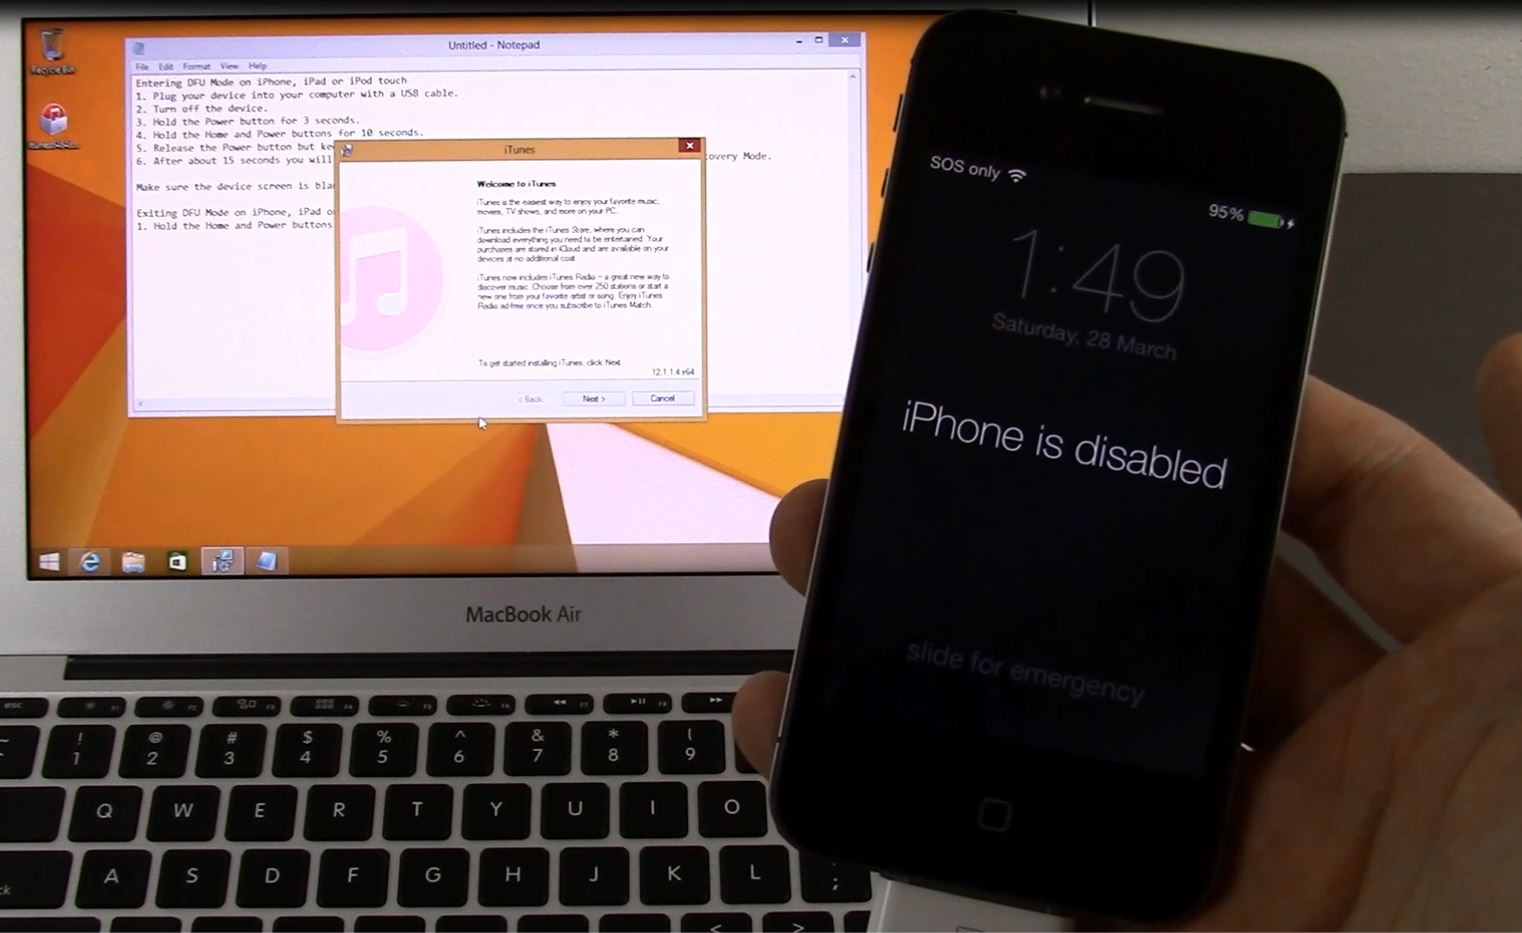
Therefore, if you do it wrong it will come up like this. It has the padlock there and you cannot revive or restore this Mac. Ok so let try again. Press and hold the Power button then press and hold the Right shift, Left Option and Control keys.

3. After 10 seconds, immediately release the three keys but continue to hold down the power button until it appears in Apple Configurator 2.

Your Mac in DFU mode – Bricked Mac

Awesome, you have now just put your Mac in DFU mode. Just like an iPhone. Now depending on how you broke your Mac you will need the Revive option or the restore option. To find these menus right click on the DFU sign on the first Mac and go to Advanced. Under Advanced you will have the revive option otherwise I will use the restore option.

Ok the restore revive will start and may take some time so go ahead and hit the like button and subscribe guys!

Cool, if everything goes well then you should see the DFU replaced with a padlock. Moreover, your broken Mac should now be fixed. You can go ahead and setup your Mac again.

Guys don’t forget to check out my other videos such as Setup your own Google iPhone. And do me a favour if you know anyone who might need this video please share it will them, hit the subscribe button and smash the bell icon.

Setup your iPhone or iPad in 2021

Transfer Data iPhone to iPhone in 2021

Backup & Restore WhatsApp on Android via Google Drive

Hi Guys and welcome to 123, in this video I will show you how to do a backup of WhatsApp on Android via Google drive.

Ok guys so this is the Official way that WhatsApp recommends for you to do a backup and restore WhatsApp on Android. You can also do a manually backup and restore from SD card and Computer. However, this video will be a backup via Google drive.

Let’s get started.

Backup your WhatsApp

You will need a Google account to Back up the WhatsApp to Google drive. This should not be a problem because to download WhatsApp from the Google play store, you would have had to use a Google account anyway.  You can add your Google account under settings, accounts and sync otherwise if that’s too confusing you can just go into the play store and log in there.

restore WhatsApp on Android
Chat Backup on WhatsApp

Just tap sign in and the Google play store will add the Google account for you whether you like it or not. If you want to back up your whole phone to Google drive then leave the backup & storage on. However, this setting does not affect the WhatsApp backup so I am going to turn it off and tap accept.

Alright we are logged in now, lets go into WhatsApp. In the top right hand corner you should see three little dots. Tap on that. And then press settings. Tap on Chats, backup, history, wallpaper. Tap on Chat backup.

Google Drive Backup

Now you will have a few options here. Go to where it says Back up to Google Drive. And then we want to change that from never to only when I tap backup. Choose the Gmail account you want to use for the backup. Next up tap allow. Scroll down and tap on Back up over wifi only. Make sure you select wifi only otherwise it could eat up your cellular data. And the last option is include videos in your backup. Turn this on if you want to backup large video files.

Press the Big green Back UP botton to start backing up all your WhatsApp data. Here I get a message warning me that I am not on wifi so I will turn my wifi on real quick.

Once this is done I hit back up again and wait for it to complete. Depending on how much data you have it might take a while. Make sure to confirm that the back up is there.

Now if you are moving to a new phone you will need to move your sim first. This is because your sim stores your contacts and phone numbers and WhatsApp needs these to attach the phone numbers with your messages.

On your new Android phone you need to install WhatsApp from the Google play store.

Tap install. Once your WhatsApp is installed open it up. Tap on Agree and Continue and then enter in your phone number. Go ahead and verify your phone number.

Restore Whatsapp on Android

Hit continue and then allow WhatsApp access to your Contacts and photos and media files. Awesome you have made it this far, now you should see the message to restore from the backup you made earlier today. Alright you can see that 11 000 messages have been restored. Tap next fill out your name and you are done. All too easy!

Also guys don’t forget to check out my other videos such as How to backup and restore WhatsApp on iPhone. And do me a favour hit the subscribe button and smash the bell icon.

Aorus KD25F Gaming Monitor – Cheating Stream Snipers Paradise

Media PC Build – The Witcher

Backup & Restore WhatsApp Messages on iPhone

Ok guys so you have a new iPhone or you want to reset your iPhone and don’t want to lose your WhatsApp messages you will need to do a backup and restore. In this video I will show you how to do a backup and restore via iCloud. Lets get started.

iCloud Login

The first step is to log onto your iCloud account with your Apple ID and turn on a service called iCloud drive. So go into Settings and iCloud. Scroll to the bottom and you should see your WhatsApp toggle switch. If its off turn it on. And then also make sure your iCloud drive button is turned on.

Backup & restore Whatsapp messages.
Use iCloud to backup your messages first.

If you go into your iCloud backup it should be on as well and feel free to turn off anything you don’t need like Book and Shortcuts.

How to Backup & Restore WhatsApp Messages?

Ok we have now turned on iCloud backup for WhatsApp, let go ahead and do a backup of the messages in WhatsApp. Go into WhatsApp and tap the settings tab down the bottom. Next go into Chats and then Chat backup.

Chat Backup
Chat Backup

Under Chat Backup you will have a few options. The first one is auto backup. This allows you to set an auto backup of the chats to iCloud drive. Maybe set this to once a month. The second option is include videos, remember that if you only have 5GB of backup space on your iCloud drive than maybe leave this option turned off. Tap backup now and it should start saving your messages to iCloud Drive. Press backup now and this should start to backup your WhatsApp messages. Make sure you do this when your on WIFI, otherwise it might eat up your cellular data.

Restore Backup

Ok now you have done a Backup. Lets see how you do a restore. So I will delete the WhatsApp app and reinstall it. Enter in your phone number and setup WhatsApp. After you enter your phone number it will ask you if you want to Restore from iCloud. It should then go ahead and download all your chat history messages videos pictures etc.

You can see here it says it has Restored 10 messages. Enter in your display name.

Once this is done you should be able to go in an check your chats. Also guys don’t forget to check out my other video such as unboxing of the Aorus KD25F Gaming Monitor. And do me a favour hit the subscribe button and smash the bell icon.

Media PC Build – The Witcher

Setup XBOX controller on Apple TV, iPad or iPhone + Games

Forgotten Passcode on iPad, iPhone, or iPod Touch 2019

Forgotten your passcode on your iOS device? This video will help.

Forgotten Passcode on iPad?

Hi guys and welcome to 123, in this video I will show you how to remove the passcode from iPad, iPhone and iPod touch. This is helpful if you have Forgotten Passcode on iPad, iPhone or iPod.

Ok guys so have completely forgotten your passcode and you need to remove it from your device. How painful it can be to have Forgotten Passcode on iPad, iPhone or iPod? Apple recommends two ways to remove your passcode. However, this will erase any data on your iPad, iPhone or iPod so I recommend trying to remember you passcode first. Because If you have backed up your device via iCloud or iTunes then you will be able to restore your data and settings after restoring your device.

Check iCloud first

Alright the first way to remove the passcode is if you have added your iPad, iPhone or iPod to iCloud backup and find my iPhone. Once you are on the iCloud.com page login with your Apple ID.

And then click on find iPhone. Click on All devices at the top and you should see your iPad, iPhone or iPod that you want to restore. If you don’t see your device there then you will have to fast forward the video to the second option of restoring your device.

Forgotten Passcode on iPad
Erase your device with iCloud if you have it added to iCloud.

Here I have my iPhone 11 Pro and I will click Erase iPhone. This will restore your iPad, iPhone or IPod back to factory defaults. But remember that this will also erase any data on the device so be sure you want to do this. Next up enter your Apple ID and password and enter your secret questions. On the Erase iPhone menu click Next and then Done. And you will a message that states your erase has started.

Setup your device as new

Ok go a head now and start setting up your device again from scratch. Your passcode will be gone now. If your get activation lock you can enter your Apple ID or click the remove from account button in iCloud then go back on your device and the activation lock won’t come up once you have removed the account from iCloud. If you cant get past activation lock. You will need to take your device to Apple with proof of purchase. Follow the prompts to setup your iPad, iPhone or iPod. Your Passcode is now gone.

And there you have it you have removed you passcode.

If you haven’t Added your iPad, iPhone or iPod to iCloud then you will need to restore your device via iTunes. So you will need a computer with iTunes.

Recovery Mode

You will need to put your device into recovery mode and here’s how to do it for the different models. So for my iPhone 11 I just hold down the side button and plug it into my computer. Once done correctly you should see the restore screen.

But on your computer you iTunes should come up with a restore option. Click Restore and then Restore and update. Click next on software update.

In the top right hand corner of iTunes you should see the software start to download the new iOS for your iPad, iPhone or iPod. If you are using Mac OS Catalina the process is the same.  Click on Go and then computer.  Find your iPad, iPhone or iPod. Click ok and then hit restore. Again click restore and update. Click Next and Agree and your software will start to download.

Slow Internet?

If you are on a slow internet connection, your device might restart itself and you will have to put it back in Restore mode again. So once the download has finished it will extract and start to restore your iPad, iPhone or iPod.

You should now see a message that your device has been restored. However your device will restart itself and your passcode will be gone. Just go ahead and setup your device again. Congratulations you now have removed your passcode.

So guys don’t forget to check out my other videos such as Turn off Turbo Boost to Fix game lag. And do me a favour hit the subscribe button and smash the bell icon.

Transfer Data Old iPhone to New iPhone

Apple Watch Series 5 Unboxing First Look

Apple iPhone 11 Pro Silver Unboxing First Look

Backup Samsung to PC or Mac

Step by step guild on Backing up your Samsung device.

In this video and article we will show you how to do a backup and restore of your Samsung device to PC.

Have you ever thought about what might happen to your pictures and videos on your Samsung device if you lose or break it? You don’t need to take the risk you can do a backup and restore with the following steps. Also if you are getting pop up ads on your device and want to clean it these steps will help. If you have a Mac You can also backup your Samsung device to a Mac.

Backup Samsung via Smart Switch app

To do the backup we are going to use an application called smart switch. You can find the direct link to the Smart Switch website here.
In the download section scroll down to where it says smart switch and click that link.
That will take you to the Samsung US website. And you can download Smart Switch for Mobile, Mac and Windows.

Backup Samsung
Plug your Samsung into your computer to start the Backup

Click the Windows link and download Smart Switch to your desktop.
Once its downloaded install the Smart Switch app. You will need to agree to the terms and conditions. Plug your Samsung USB into your computer. Tap Allow access on your Samsung Device.

Encrypt your data that you are Backing up

If you want to encrypt the data that you store on your Computer with a password go to more and preferences. Then select the checkbox Encrypt backup data. Next up just click on Backup and it will ask you for a password for your backup. You will need to enter the password on your Samsung device. So go a head and Enter a security code on your Samsung device and then confirm it.
Once its finished doing the back up it will give you a list of items that’s have been backed up successfully and a list of items that it didn’t backup.

Click ok and if you want to know what location your files have been backup in simply go back to More and Preferences. It will be under the Backup folder location.

Wiping the Samsung Device

In the video I am going to reset the Samsung device back to factory defaults. So it will wipe any data on the device and I will restore the data from the backup we just created.
I will do this under settings > General Management > Reset > Factory Reset data. However once the Samsung device has been wiped so just go ahead and set it up like a new phone again.

Plug your Samsung back into your computer with the USB and press restore. You will need to tap allow on you Samsung device again. Press Restore now.
And then you will need to enter the password you setup earlier when you created the backup.

Once your data has finished copying you can disconnect your USB cable. Go ahead and double check all our files have been restored and there they are.

Ok Guys, Don’t forget to check out my other videos.

Enable Window Zoom on iPhone or iPad

Make your iPhone iPad speak each word you type

Clean Install MacOS Catalina on any Mac

Forgot your Passcode iPhone X, 8, 7, 6, iPad, iPod

The step by step video on how to fix the forgotten passcode.

The Problem – Forgot your Passcode

So you have restarted your iPhone and you have forgot your Passcode. This can happen because you use your finger print scanner or face recognition software and when you restart your iPhone it asks you for your passcode. This can be really frustrating however we should be able to step you through this problem.

Step 1 – Remember the Passcode

The first and easiest thing to do is to try and remember the passcode. This might seem obvious, but it might be easier than wiping your device which is what we will have to do to get rid of it.

Step 2 – Computer with iTunes

Next up you will need a computer with iTunes. This is because you will actually need to restore the iOS software on your phone. Kind of like reloading the iPhone so it is the new as if you just brought it from Apple.

Forgot your passcode
Forgot your passcode, restore your iPhone with iTunes.

Once this is done the next step here is too put the iPhone in recovery mode screen. Depending on your model the steps to do this are different. Watch the video above for more info on recovery mode for your iPhone. You should know what your device is in recovery mode as it will come up with a lighting USB picture on your phone or it will come in with a message in iTunes that your device is in recovery mode.

Next you will have three options: Cancel, Update and Restore. Now is a good time to mention that this process will wipe any data on the iPhone including your passcode. So just try to remember your passcode one more time before going to the next step.

Next click restore and then next option will be restore and update. Then your iPhone should reset itself and you should be able to setup your device again from scratch. Good luck ! 🙂

Check out the other helpful IOS videos below.

iOS 12, Is it faster? Benchmark & Features

Transfer data from iPhone to Oppo with iCloud

Fix iPhone, iPad or iPod Black Screen

Forgotten Passcode on iPhone, iPad, or iPod touch

Forgotten Passcode on iPhone, iPad, or iPod touch

This video will show you how to remove your forgotten passcode on your iPhone, iPad or iPod touch. This is helpful if you have forgotten your passcode or don’t know what it is.

Have you ever forgotten passcode before on your iPad? or has a family member added a passcode and then forgotten the passcode?
My first advice or words of wisdom would be to try and remember the original passcode first. If you still can’t remember the passcode then this video will show you how to remove the passcode from your iPhone, iPad or iPod touch. The drawback to this is that you will lose any data on your device so it’s essential that you backup your device at all times. You can backup the device either through iTunes or iCloud.

Ok so the next step is to plug in your device into the computer that you synced the device with. Make sure this is the same computer that you sync the device with iTunes. If you get a passcode message this means you have plugged the device into the wrong computer. So try a different computer in your household.

If you have plugged the device into the correct computer in your iTunes there you should have a button which says restore iPad. To erase the iPad and get rid of the passcode you click the restore iPad button and you will see another window pop-up which says restore so go ahead and click restore. The iTunes will go ahead and download the iOS software which it will then restore on your iPad and this step will remove the passcode from your iPad. Make sure that your computer is connected to the internet because iTunes will download this software from apple.

Once the download has completed iTunes will extract the software to your iPad and then your iPad will restart and the passcode will be removed.

iPhone DFU Mode – iPhone is disabled

This video will show you how to put an iOS device into DFU Mode & fix the error iPhone is disabled.

Hi All,
I always get allot of questions on what to do if an iDevice Apple iPhone, iPad or iPod has been locked and the device gives and error the “iPhone is disabled“. Basically, you cannot remember the password and get access to the device.
This happened to me recently, when I switched from an Apple iPhone 4S to the new Samsung Galaxy S5. Because I had not used my old iPhone in a long time. I could not remember what passcode I had set on the device.

iPhone is disabled

The Official Apple process suggests an Erase and restore method. This erases all data on the idevice, so be aware that you will lose contacts, pictures and any other personal data on the device. Apple say that once you erase the device you can restore the data from iCloud, if you were lucky enough to have an iCloud account or if you have made an iTunes back up then you can do an iTunes restore of the data.

For me I figured if I didn’t need to access any of the data on the phone for such a long time, Then I probably wouldn’t need it after all. So in the video above I just do a clean install of iOS.

iPhone DFU Mode – which stands for Device Firmware Upgrade, allows the device to be flashed with a new version of iOS. Just bare in mind that Apple only allows you to upgrade your iOS version. You cannot go sideways or down in versions, as a general rule.
In the video example above, I had to use iPhone DFU Mode to upgrade the device from iOS 7 to iOS 8. Once I do this upgrade it is very hard if not impossible to roll back this change.

A complete list on the iPhone DFU Mode firmware can be found on the following 123myIT.com pages below.
iPhone
iPod
iPad

Good luck
Matt