Android apps crashing is a common problem on many phones. This Android apps crashing guide shows you easy ways to fix apps that keep closing, freezing, or refusing to open.
Android Apps Crashing? Restart Your Phone
The first thing to try is a simple restart. Restarting your Android phone can clear temporary glitches and is often the quickest way to stop Android apps from crashing.
Check for Android App Updates
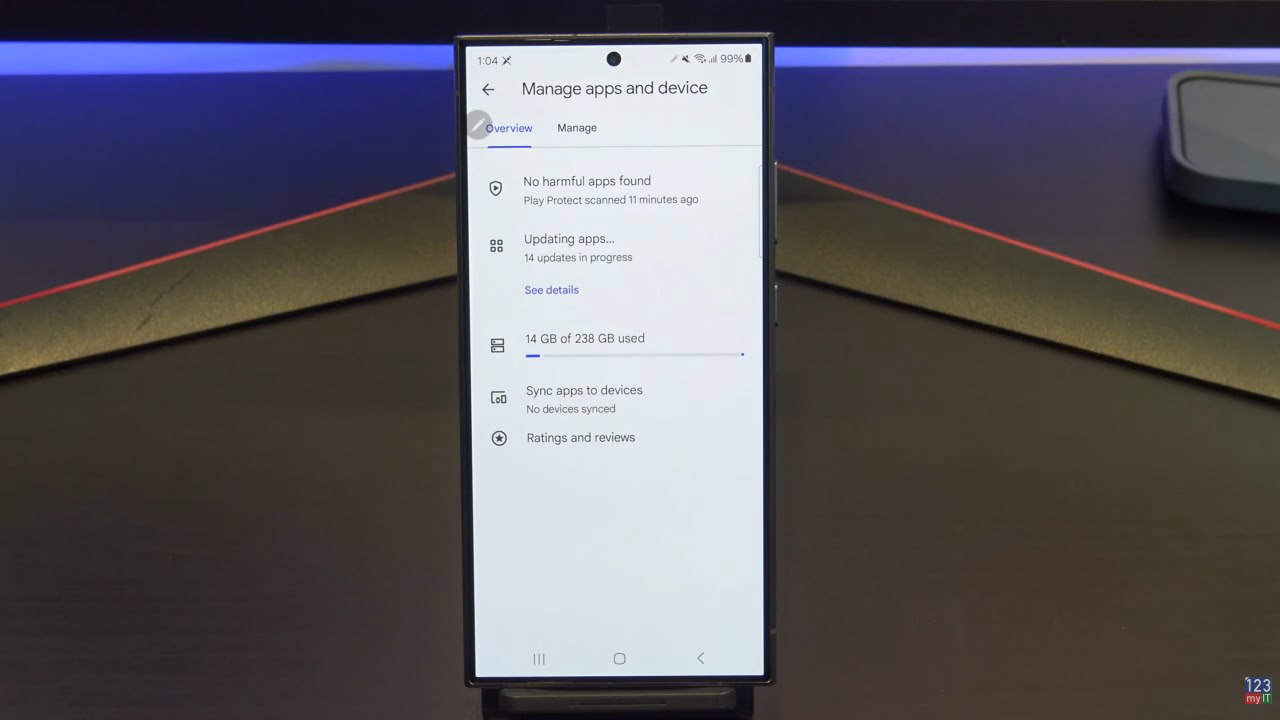
Open the Google Play Store and make sure the app that is crashing is fully up to date. App developers often release updates to fix bugs and improve compatibility with newer Android versions. You can also check for updates directly in the Google Play Store.
Android Apps Crashing? Clear App Cache
Go to Settings, Apps, choose the app that is crashing, and then clear the cache. A corrupted cache can cause apps to behave badly, so this is one of the most useful fixes to try.
Clear App Data
If clearing the cache does not work, try clearing the app data. Keep in mind this may sign you out of the app or remove saved settings, so only do this if you are happy to set the app up again.
Update Android System Software
Check if your phone has a system update available. Android updates can fix app compatibility issues and improve overall system stability.
Check Storage Space
If your device is low on storage, apps may crash more often. Make sure you have enough free space by deleting old files, clearing downloads, or removing apps you no longer use.
Android Apps Crashing? Reinstall the App
If the app still crashes, uninstall it and then reinstall it from the Google Play Store. This can replace damaged files and give you a fresh install.
Final Thoughts
If you are trying to stop Android apps from crashing, these are the best steps to work through first. In most cases, a restart, app update, cache clear, or system update will solve the problem. If one app keeps crashing while others work fine, reinstalling that app is often the best final step.
Hi Guys and Matt from 123myit here. In this video, I want to show you all the settings I use for my personal Android phone. When I setup my phone, I try to focus on three things. I want it to be as private as possible. I want it to have good battery life and I want it to be quite with no interruptions.
Aims in Android Settings
*Privacy
*Good Battery Life
*Silent, No interruptions
Start with a Reset
So I will go ahead and reset my phone so you can see every setting I set my phone up with from start to finish. Cool the phone is reset and I will start setting it up. The first setting you will get is the sending of diagnostics data to Samsung and affiliates. Make sure you don’t select this by mistake. It sends diagnostic data to Samsung and affiliates about how you use your phone. Tap on details if you want to know more. This will use up your battery and your cellular data as well as making your phone less private. So just select end user Agreement and privacy policy and tap Agree.
Ok Permissions for Samsung apps and services. Since Android Settigns12 was released, Google made it more secure requiring Apps to ask for permission before they can be used. These are all the Samsung apps asking for permission. I go ahead and turn these all off. Don’t worry when you start the app for the first time it will ask for these permissions anyway. But what you are doing is denying blanket access for all Samsung apps, which is a good step for privacy. So turn them off and tap agree.
Go ahead and setup your wifi.
Copy Apps and Data – Android Settings
Copy apps and data. If you want to follow one of my other Transfer videos I will put a link in the description. But for this video I don’t need to copy anything. I will add in the Google account later so skip for now.
Google Services, ok so the same apps permissions questions. But this time its for Google Apps and not Samsung. Same deal turning this off will help battery life, cellular data and privacy.
Fingerprint
Ok fingerprint you want to set this up and I also setup face recognition which is then backed up by a swipe. Do this to keep your data safe if you lose, your phone.
Review additional apps. If you need any of these apps leave them ticked. If you don’t just turn them off. Alright cool so the first thing to do its change my wallpaper. Leaving wallpaper black is good for however for the video I will change this back to the blue and white background.
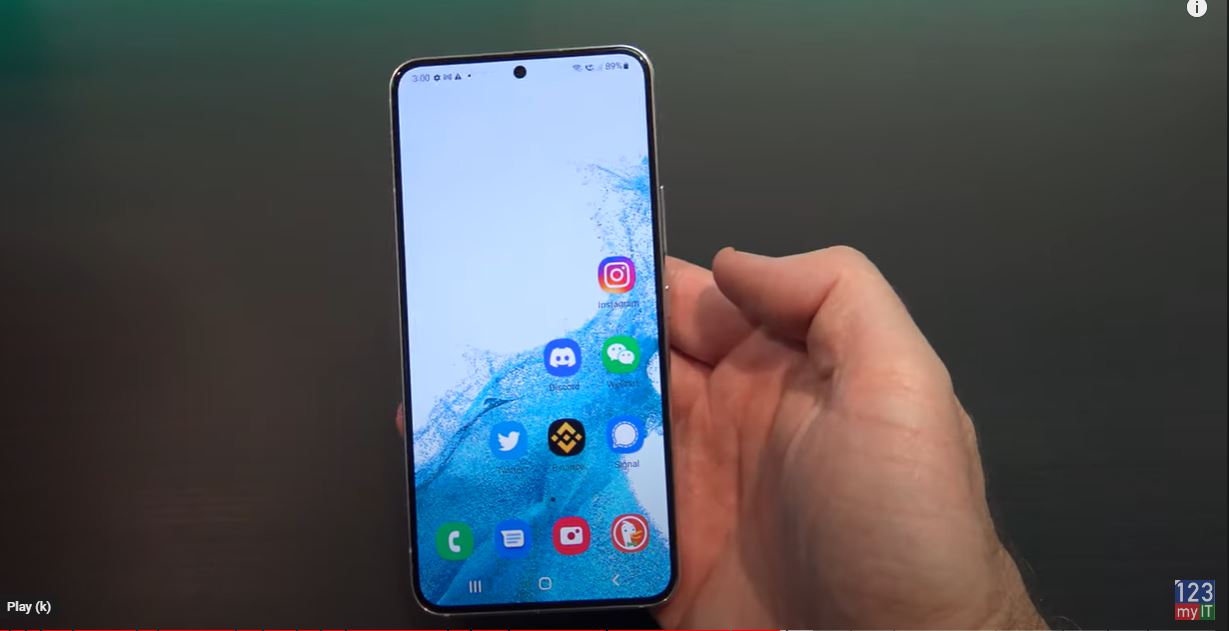
Next thing to do is to get rid of any apps that I am not using from the home screens. I will get rid of the galaxy store and I like to keep all the Google apps in one neat group so they can stay.
Timeout Screen Dimming
So the next thing I want to change is the annoying screen time out. So if you are looking at something for too long it will dim the screen to save battery life. The default is 30 seconds so I will change that to 1 mins and if I find that annoying I will adjust it again. Now is a good time to go through all the display settings anyway.
Starting from the top I like Dark mode as I find it easier on the eyes and it saves battery life. However for this video I will leave it on the light settings. And below that you have dark mode settings which means you can set a time when you want it to come on. At night might be better.
Quick Settings Android Settings
Below that you have the brightness slider bar. Don’t worry about this for now I will show you how I add that to the Quick Settings menu a bit later. Adaptive brightness I leave on. The next settings I change is the Motion Smoothness. I set this too standard and that will save battery life. However if you play games leave it on Adaptive and you will get smoother gameplay at 120 Hz refresh rate screen. Eye comfort is limiting blue light which is meant to be better for your eyes and help you sleep. So you should probably leave this on. You can add that to the quick settings as well.
Turn off Edge Panels
Screen time out is the setting we came here for. Thirty seconds is too quick for me and I find it annoying, so I will set it to one min. The shorter time this is the better the battery life. So don’t put it on 10 mins because it will drain battery life pretty quickly. I turn off Edge panels as well. I don’t use edge on the Samsung. Accidental touch protection on. Touch sensitivity off and show changing information I leave on.
Lets go back to the home screen and keep working on the icons. I remove the weather App. I generally just look out the window for weather conditions. If I need a forecast I can press the Google assistant mic and ask. If I go back and I am not on the home screen and I can access the Google assistant from holding down the home button. I find both of those Google Assistant button very handy, I use both so I will keep both.
Google Play Store Apps
The next thing I will do is installed the Apps I want to use, and I will do that through the google play store. After you log in you will get a backup to Google drive prompt. Do that if you want to back up your data. For me I leave this off. Alright go ahead and download your Apps.
Duckduckgo is a really cool browser and I will show you why I use it. Ok once its downloaded I move it to my main menu bar down the bottom of the phone. Ok when you open it up it will tell you what its doing. The internet can be kinda creepy. Not to worry! Searching and Browsing privately is easier than you think. Tap lets do it. Next Try visiting one of your favourite sites. I will block Trackers so they can’t spy on you and ill also upgrade the security of your connection if possible. Very Cool!
Burn Button – Android Settings
What’s really cool about this browser is it has a burn button at the top. If you press on that at the bottom it says. Personal data can build up in your browser, yuck. Use the Fire button to burn it all away. Give it a try now.
If I tap up the top and search for a news website in Australia called Sydney morning herald. And then Duckduckgo says. Your Duckduckgo searches are anonymous and I never store your search history ever! So again, your phone is more private. This is great! If you tap Phew and then I tap on that news website. The Duckduckgo says: Google was trying to you here. I blocked them! You can check your URL bar to see who is trying to track you when you visit a new site. Very cool! Tap high five.
Clearing Cookies
Ok so now I am on the News website. In your browser you have these things called Cookies and they are used to track you. So for example on this news website it will give you five free to read articles and then after that it will try to get you to subscribe. Watch ill show you. So if I got in and out of an article eventually it will stop me from reading full articles. Best Android Settings.
So if I go to burn and I clear all my tabs and data I will be able to go back to the website and read full free articles again. And you can bookmark the website so its easy to browse to again after you use the burn button.
Lock Screen
Cool we can quickly test our lock screen. Works fine with the fingerprint we setup. Awesome. On the second screen I keep all my apps. This is for privacy as I don’t want people to see what apps I use on my home screen. So, I will remove and apps I don’t use and download all the apps I do use. Cool I’ve removed my apps now and I will add the apps I use. Because iam right-handed I stack the apps to the right side. If you are left-handed, you can stack them to the left. This is to make them easier to reach. There ya go nice an easy to reach.
Keyboard Settings
The next annoying thing to sort out is the keyboard settings. So once you have downloaded your Apps the first things you will want to do is send a message to someone right. IF you go into messages and tap the cog icon in the top of the keyboard it will take you directly to the Keyboard settings. I do not know about you guys, but I am sure everyone has a family member or a friend who sends you a text message and you can never understand it because predictive text has changed a word and auto replace has added the word before they check what they are sending. In the end, everyone is confused. My setup, I leave Predictive text on, Suggest emoji’s on, Suggest stickers off. In addition, auto replace off. But test with a friend or family member so you get it right for you.
Setup Quick settings
The next thing to setup is the Quick Settings menu. Now I just did a video on Notifications so I won’t go over that again. However if you want to see the video on notifications I will put a link in the description. Ok so the quick settings menu just allows you to set functions on your phone quickly by swiping down from the top of your phone. In addition, you can change the buttons in here by swiping down again. Now if you remember earlier I showed you the brightness bar. I am going to move that bar into the Quick Settings menu. So go back up th top tap on the three dots and then edit buttons. This allows you to arrange the buttons you use most in the Quick Settings menu.
All you need to do is tap and hold the buttons and move them into order. The buttons I use are WIFI button, Mobile data button, and sound button, and Torch, GPS and Battery saver button. When you are finished organising your buttons tap on done. Let us move the brightness bar into that menu by tapping the 3 dots and tapping quick panel layout. Go into brightness control and tap show always and then and in device control menu and show when quick panel expanded. Then the Quick settings menu will be set. Let us take a look. Swipe down from the top and everything including the brightness bar is displaying nicely.
Battery Saving Android Settings
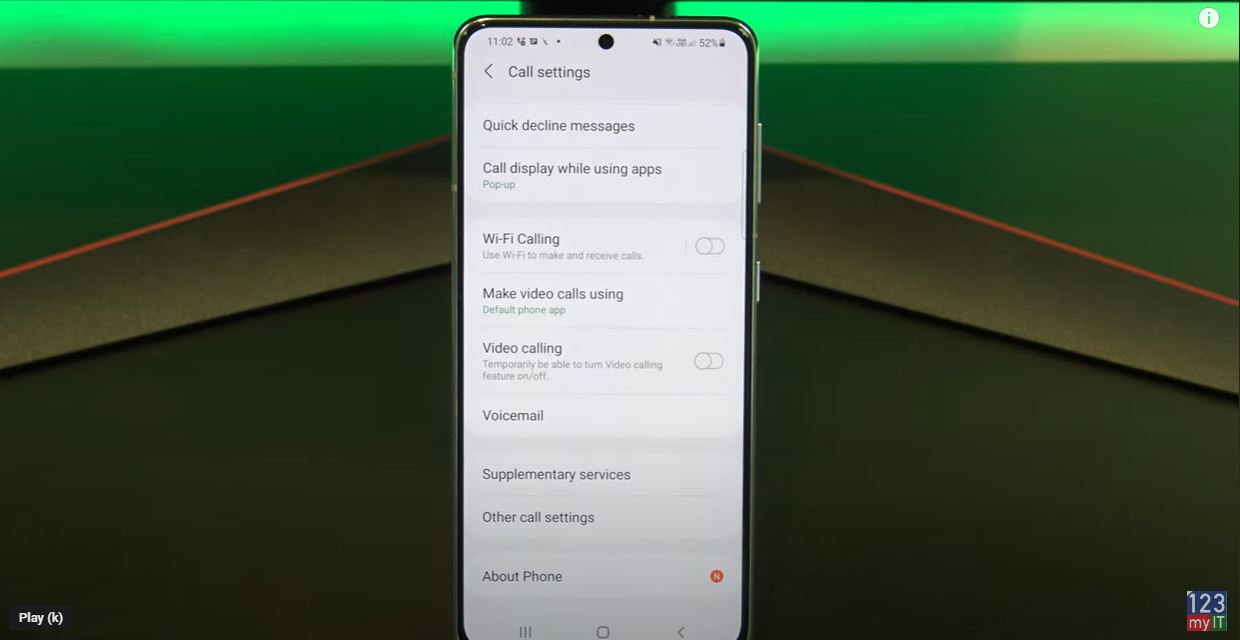
Lets change some more battery saving settings. Go into Settings and Connections and I turn off WIFI calling. Here is an example of how WIFI calling works. I went to a beach house that was remote and did not have good 4G 5G cellular services. However, the house I stayed in had a wifi connection. I turned this on and was able to use the WIFI calling settings to make a phone call. If you do not need this service just turn it off and you will save battery life. I do not use Bluetooth so I just have this off unless I need it.
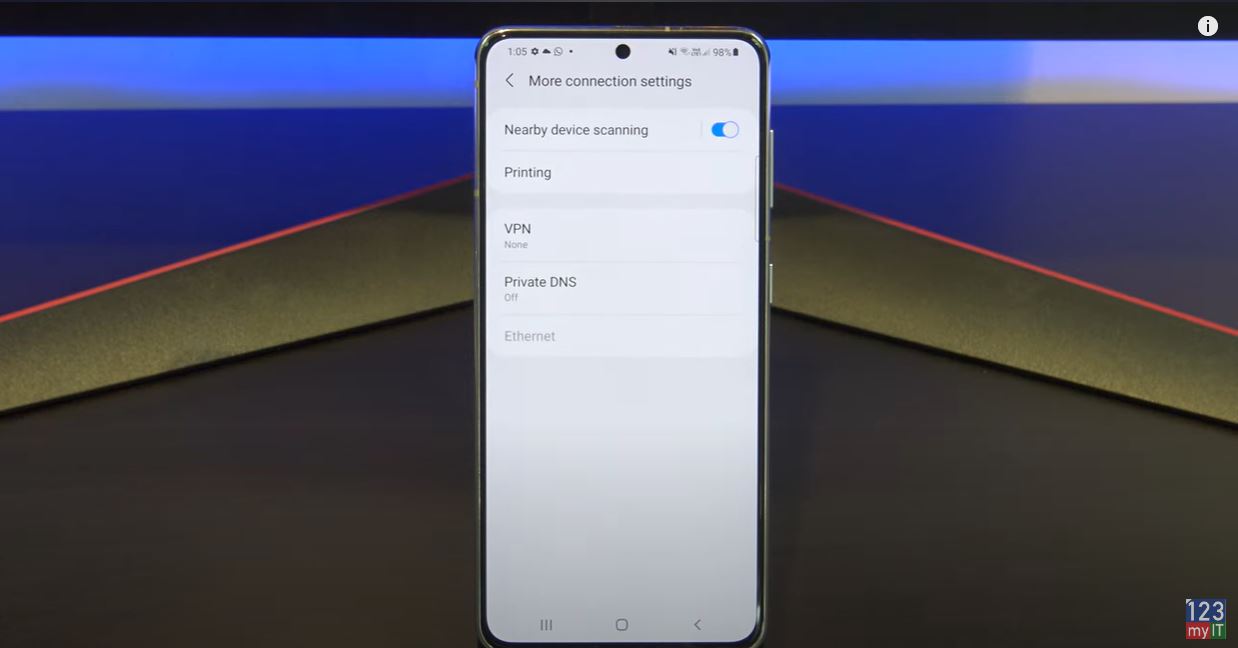
I do not use my phone for credit card payments. So this is off. If we go down to mobile networks. This will be called cellular networks in the US. In addition, go into network mode. So this Samsung phone support 5G. However, my cellular plan I am on does not. So I set this to 4G, 3G, 2G auto connect. This will save you battery life. Ok go back out and go into more connection settings and make sure nearby scanning is turned off.
Annoying Bixby Side Key
The last settings I change is the Bixby side key. You can find it under Settings, Advanced features and Side Key. I’ve already done a video for this one if you want to watch that I will put a link in the description.
Guys don’t forget to check out my other videos such as take control of your Notifications on Android Settings. And do me a favour if you know anyone who might like this video please share it will them, hit the subscribe button and smash the bell icon.
Hi Guys and Matt from 123myit here. In this video we will show you how to Take control of your notifications on Android. Guys, I wanted to do a video which will hopefully help you take control of your notifications and stop them from being annoying and distracting. Notifications on Android
Lets get started.
Quick Settings – Take Control of Your Notifications on Android
The first thing I want to show you is Quick settings by swiping down from the top. You will see a list of your latest notifications in here. This will show you a cut down version of the notification. To see more of the notification, you can tap on the little arrow. And the notification will expand. If you want to go directly into the notification, simply tap on it and it will take you directly to the service or message. Swipe down again to go back to Quick Settings.
Back in Quick Settings and down the bottom you will see two buttons notification settings and clear. If you tap on notification, settings that will take you directly to you guessed it the notification menu in the settings of your Android. And if we go back into the Quick Settings and tap on the clear button that will remove any of the latest notifications from the Quick Settings menu.
Notifications
You can find that from the Home screen by going into Settings and notifications. Cool so in here we can control how our notifications are delivered. Will your notifications keep buzzing your phone and distracting you. Or can you fine tune them to only notify you on the important contacts and messages.
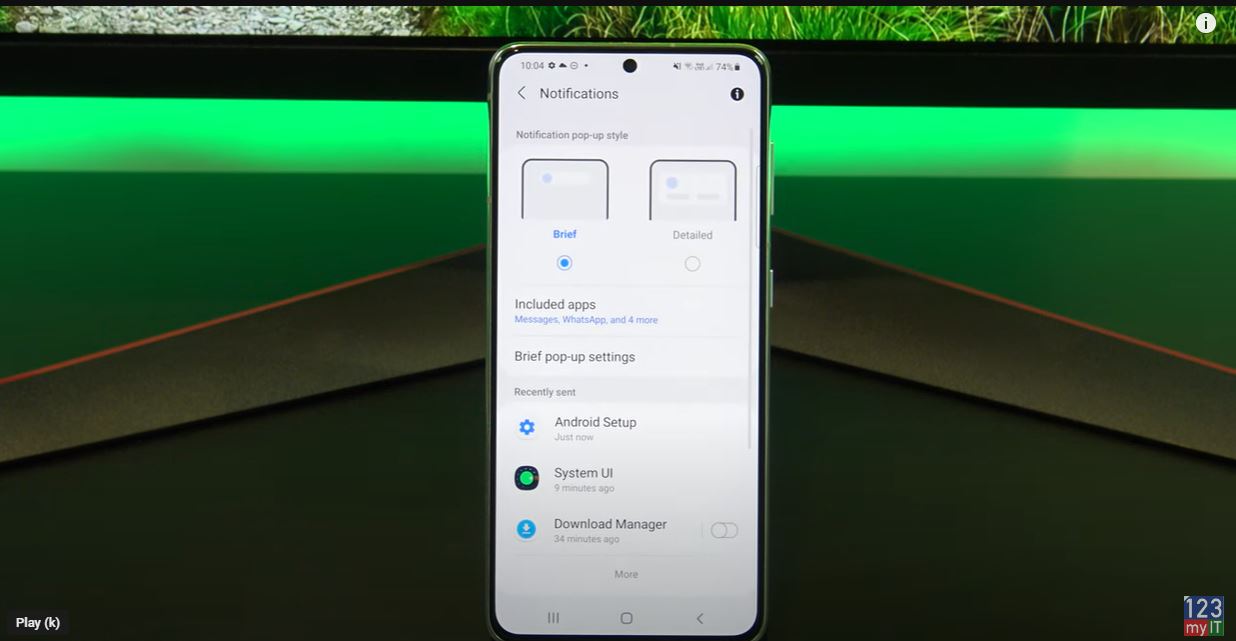
In the top of notifications, you have Brief and Detailed. Here’s an example of what Brief looks like. Here’s an example of what Detailed looks like. Detailed can be annoying if you are reading a website because it takes up more screen real estate and will pop up over some of the words.
Pop-Up Notifications
If you tap included apps this will show you a list of apps that can display pop up notifications on your Android device. Allot of these will be on by default. You should go through here and only select the Apps that you want popup notifications from. A good example of this would be messages. When some one sends you a text message you will get a notification. If we got back out of there and go into Brief popup settings. And we tap on Edge lighting style. In here you can choose an Effect, Colour and duration for when you get a popup notification. It gives you a little example at the top of the screen.
Cool so if we go back out of there you have another option to show when screen is off. I usually turn this off for privacy. But if you want it to show when the screen is off leave this turned on. Under Brief popup notification you will have recently sent which shows you a list of apps that sent you a popup notification most recently. You can tap on more to get the complete list.
Do Not Disturb
Under that you have do not disturb. This is handy if you want keep you phone from disturbing you for a set period. Maybe when sleeping or studying. You can turn on the do not disturb button at the top and set your times. Toggle on the Sleeping button, the default do not disturb is 10 pm to 7am if you tap add schedule you can select whats days you want this. And below that you can set exceptions.
Messages and Conversations
Tap on Calls messages and conversations. This allows you to take calls messages and conversations from people in your contacts lists only. Therefore, it wont allow a person to call a second time within 15 mins unless you turn on the Repeat callers button. Remember this is only in the do not disturb time frame that you have set. If you go back and go into Alarms and sounds. When do not disturb is on, sounds and vibrations will be muted, so this allows you to turn them off if you want during the do not disturb time frame.
Alarms stay on
As you can see here the alarm is still turned on. This means your alarm will still wake you up even if you have the do not disturb turned on. If we go back, it will be the same thing for Apps you can set an app to still send you a notification even if do not disturb is turned on. The last settings are Hide notifications, this will allow you to hide notifications when the screen is off as well as when it is on.
Hide Badges
You can also hide the badges on your icons. But the things to remember critical notifications about phone activity will always show up. So, badges are the little numbers beside your apps to notify you how many messages you have. See here I will turn them off.
The last setting here is Advanced settings.
Guys don’t forget to check out my other videos such as Transfer data Android to Android in 2022. And do me a favour if you know anyone who might like this video please share it will them, hit the subscribe button and smash the bell icon.
Hi Guys Matt from 123myit here. In this video, we will show you how to Transfer data from Android to Android in 2022. Ok Guys If you are transferring data from any Android device to Samsung then you will be able to transfer Calls, Contacts, Messages, Apps, Home Screen, Settings, Photos, Videos, Music and Documents. IF you are transferring from Samsung to other devices, you will be able to transfer Contacts, Calendar, Photos and Videos.
Tips before you start – Android to Android 2022
Guys I want to give you a few Tips before you Start.
Turn off any security feature such as passcodes etc. As they might interrupt the transfer process.
Delete any unwanted video and pictures. This is to save Transfer time and space on your new phone
If you have a Sim card you can transfer the Sim at any time.
Smart Switch
Today we are going to transfer data from Samsung S21 to a Samsung S22 phone and we are going to use an app called Smart Switch. Smart switch will work with most Android phones. However, if it doesnt fast forward to the 5:07 mins mark and I will show a different app to use if Smart switch does not work for you. Android to Android 2022.
Most Samsung phones will have the smart switch app already installed under Settings > Accounts and backup. But if you can’t find it on your device you can download it from the Google play store.
Join the Same WIFI
Tap agree and then join your phone to the same WIFI as your old phone. Tap on send data from the phone you want to Transfer the data from. Make sure both phones are on the same Wi-Fi and tap wireless. Ok Smart Switch will start to download. To check its progress swipe down from the top.
Ok while that is downloading go back to your old phone and tap send data. Now that its downloaded go back to the SmartSwitch app and tap continue and allow. Next, tap receive data and then tap Android and then Wireless. Tap connect on your old phone and its you get the error could not connect don’t worry. Just hit connect again on both phones. It should come up straight away the second time around. Tap Allow on your old Android phone and it should start the Transfer process.
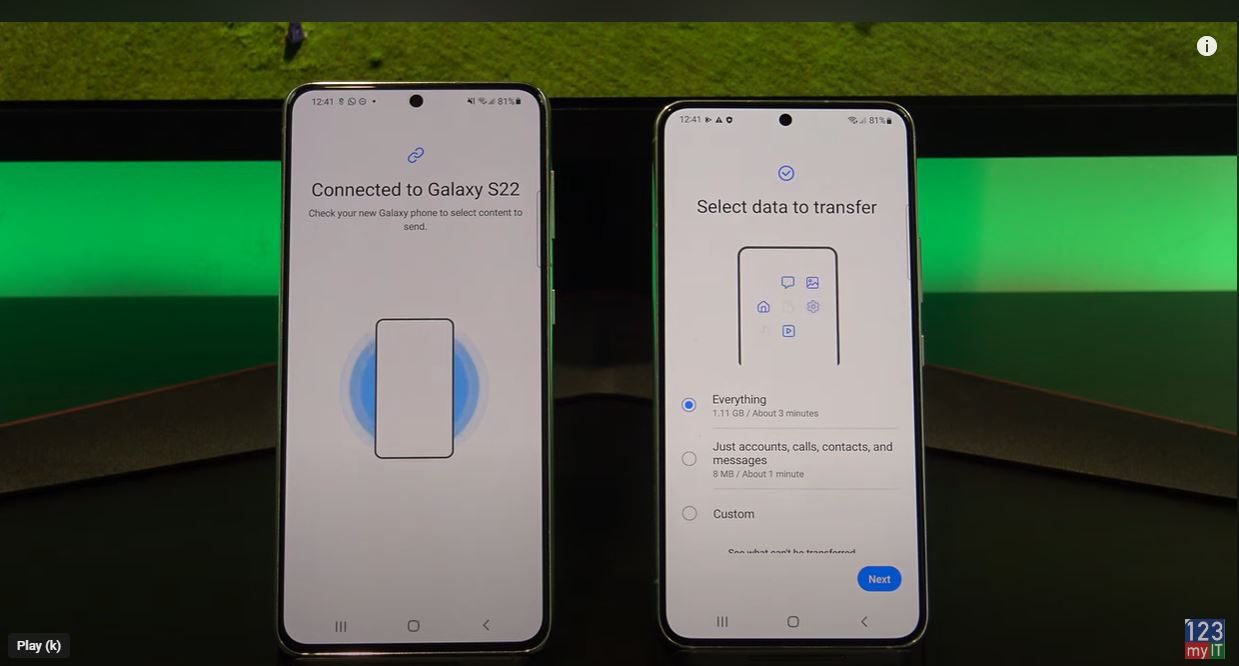
Select your data
Your Android phones should then work out what data it can copy across. Go ahead and choose what you want to transfer across and deselect anything you do not want to copy across. Tap on Custom and then next. Swipe up and select everything you want to copy to your new Android phone.
Sweet so your data will start to copy across now. If you check your time and its staking ages you might have too many large video files and slow Wireless. Let me know how long you needed to wait in the comments section below.
Check your data
Let us go back to the home screen and we will check if our data copied across. Ok lets check the gallery for our videos and photos. Ok cool so its given use the results of what it has copied. You can tap on View more, next and Done.
Let us check the gallery again. Cool there is our videos and photos.
Awesome, there’s our photos in the gallery all your stuff is copied across now.
Transfer back the other way
Alright, Let us transfer back the other way now. We are going to use an app called Copy my Data. You can download it from the Google play Store. I have already downloaded it so I will just open the app. Make sure you have it downloaded on both Android phones. Tap next on both devices. Tap to or from another device over WIFI. Select your device then select copy data from selected devices. Because we are Transferring data back the other way. Add in the pin number. Then tap next. Deselect any of your data you do not want to copy across. IF you get prompted tap allow on your other device. Congratulation you have just copied your data between two Android devices.
Finish
Finish on both phones and check if you data transferred across ok. If you have a sim card, you can also move it now.
Once your data has copied across you can go ahead and delete the Copy my Data app.
Guys don’t forget to check out my other videos such Samsung Galaxy S22 unboxing. And do me a favour if you know anyone who might need this video please share it will them, hit the subscribe button and smash the bell icon.
Hi Guys and Matt from 123myit here. In this video, we will show you my top 5 Android settings that you should turn off in 2022. Guys I’m going to show you some Android settings that you should turn off straight away. These settings are designed to take the load off your phones CPU which will speed your phone up or save the battery life. It will also help you increase the privacy on your phone. Let’s get started.
I am using a Samsung Phone, but if you are using a different phone, it might look a bit different the settings will be the same.
Turn off device scanning – Android Settings to Turn Off
The first thing to turn off is nearby device scanning. And you can find it under Settings > Connections > More Connection Settings. This sets your phone to scan for nearby devices. This is constantly running so if you turn it off it will save battery power.
Next, you can turn off usage and diagnostic’s settings. This is information that is being sent to Google or Developers when you not using your phone and it chews up battery life. To find it go to Settings, Google and Tap the 3 dots in the top right and tap Usage and Diagnostics. Then just toggle the button off. Saves your battery life and cellular data. It’s a Win win.
Ads Personalization
Next setting is turning off Ads Personalization. You can find it under settings, Google, Ads. This is a funny one, have you ever been talking about something and then all of a sudden and ad for that starts popping up on your phone? This data is collected and sent to ads networks so they can send you more relevant ads. It’s too creepy in my opinion. To turn it off you actually need to turn this one on to opt out.
Improve accuracy
Next, we will talk about Turning off Improve accuracy with WIFI and Bluetooth scanning. You will find it under Settings, Location and tap Improve accuracy. If you turn these two settings off, you will save a ton of battery life. And toggle the WIFI and Bluetooth buttons off. Great your phone will not be constantly scanning, and your GPS will still work no problems there.
The next one is Google location history. You will find it under Settings, location and Google Location History, this lists all of the locations you have been. It’s similar to iPhones significant locations where is saves a long list all the places you have been. It’s a bit weird in a tracking sense. So just, turn it off at the bottom. Done.
Guys don’t forget to check out my other videos such as how to forward calls on Android in 2022. And do me a favour if you know anyone who might like this video, please share it will them, hit the subscribe button and smash the bell icon.
Hi Guys and Matt from 123myit here. In this video, we will show you how to forward calls on Android. If you have, two phones and you do not want to carry them both around. You can forward phone calls from one phone to another.
How to forward calls on Android – forward calls on Android
Here’s how to do it. Open up your phone app and go to the three dots in the top right-hand corner.
And you will find it under Settings > Supplementary Services > Call forwarding > Voice Calls. If you are on an older Android phone it will be under Settings > More Settings > Call forwarding. If you cant find it on your Android phone. Just do a search for call forwarding.
When you tap on Voice Calls it will take a few seconds to get the settings from your service provider.
Cool so in here we have a few options. Always Forward means that it will forward any phone calls that go to your phone. Forward when busy means it will forward calls only when you are talking on the phone. This could be handy in an Office situation. Forward when unanswered means it will ring on the phone first than if the call is not answered it will forward the phone call to another number. And forward when unreachable means it will forward the call if the phone is out of service.
To forward the calls. Tap on Always forward and then enter the phone number you want to call to forward too. Tap enable when you are done.
Congratulations you have just forwards all calls to another phone. One last thing to mention. Calls will be forwarded. But services like SMS text messages will not be forwarded.
Guys don’t forget to check out my other videos such as how to focus on iPhone and iPad. And do me a favour if you know anyone who might like this video, please share it will them, hit the subscribe button and smash the bell icon.
Hi Guys and welcome to 123myit. In this video, we will show you two free ways to transfer your data from Android to iPhone 2021. There are two ways to transfer your data from Android to iPhone. The first way I will show you is recommended by Apple and way requires you to reset your iPhone. If you don’t want to reset your iPhone then fast forward to the 4:46 min mark and I will show you how to Transfer your data without resetting your iPhone.
What can your Transfer? Android to iPhone 2021
This video will help you transfer your contacts, message history, camera photos and videos. Web bookmarks, mail accounts, calendars and free apps.
Go into settings > General and scroll down to reset. Once you are there tap on Erase Content and settings. Next Tap Erase iPhone. This will delete all media and data so do a backup first if you need too.
Once your iPhone has reset itself. Just follow the prompts and start setting it up again.
Next up connect to your WIFI and make sure your Android device is connected to the same WIFI.
Continue setting up your iPhone until you get to the Apps and data screen. Once you’re on the Apps and data screen. Go to your Android phone and download the move to iOS app from the Google play store. Play.google.com
Go ahead and tap install and when that’s done tap open. On your iPhone tap Move data from Android. Then tap continue, agree and then allow on your Android phone.
Could not connect error?
If you are getting the could not connect error message make sure you turn on location services on your Android phone. You will find it under settings and location. Its important to turn that on. Here it is under Settings and location. Just toggle the button on and go back to the move to iOS app.
Tap continue on your Android device and then type in the code that you see on your iPhone. It now shows you the iPhone wifi. Tap continue. If it comes up again with the wifi to connect to just tap connect.
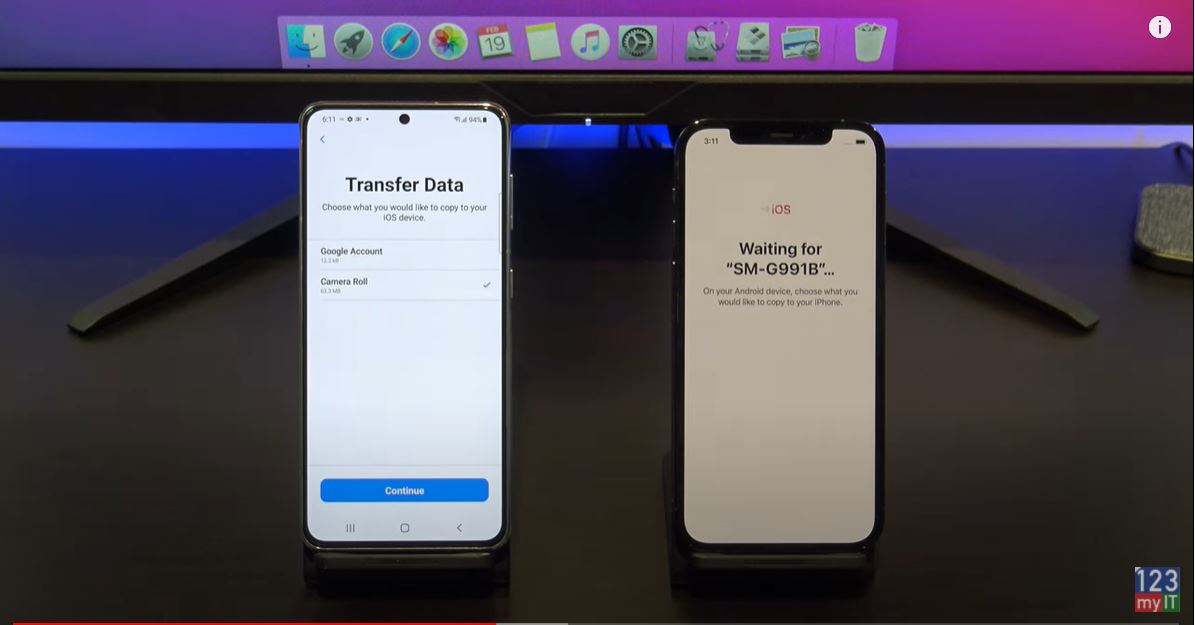
Select the data you want and Transfer.
Ok great you are on the transfer data screen just deselect anything you don’t want to transfer and press Continue. Also here’s a Pro tip. If your transfer is taking to long stop the transfer and delete and photos and videos you don’t want from your Android phone. This will free up space and make the transfer faster.
Your Data is Transferred now!
Cool your data is transferred now. Tap done on your Android phone and you can close the app. On your iPhone tap, continue setting up iPhone. And then go ahead and set up your iPhone.
While you are doing that guys do me a favour and press the like button it shows everyone that this is a legit video. Thanks very much!
Awesome the last step here is to install your free apps. To do this you will need your Apple iD. Just tap add apps and then enter in your apple id. If you don’t have an apple id you can create one by going to the website applied.apple.com.
Download Free Apps
Your iPhone will start to download all your free apps for you. If you get the Apple iD Verification just tap settings and then enter in your Two Factor Authentication. This will pop up as a message on one of your other Apple devices if you have it or as an SMS on your phone.
If you swipe across you should see all your apps start to appear. If you didn’t get the prompt to Add Apps, then don’t worry, just go to the App store and download the Apps you need. You can also check if your if you photos messages and video copied across.
The second part of this video is if you don’t want to reset your iPhone. We will move the data with an App called, Copy my data. Open up the App store on you iPhone and download the copy my data app. Tap open and then tap OK to allow the app access to your data.
Download Google Play Store
Go to the google play store on Android phone and download Copy my data. I’ve already downloaded it so I will tap open. Go ahead and select what you want to copy. I don’t want contacts or calanders so I will deselect them. On your iPhone Tap next and on your Andriod phone tap next. Tap on to or From Another Device Over Wifi.
If you done everything right you should see the iPhone appear on your Android phone. Tap copy data to selected device. Enter the pin number from yoru android device onto your iPhone. On your Android phone deselect any data you don’t want to copy across. I don’t want contacts and calanders.
Awesome all your data is copied across now. If you have a SIM card you can move it across now too.
The last step is to tap finish and close your apps and then check if your photos and apps copied across. Cool there they are.
Also guys don’t forget to check out my other videos such Samsung Galaxy S21 and do me a favor If you know anyone that might need this video please share it with them hit the subscribe button and smash the bell icon.
Hi Guys and welcome to 123myIT. In this video, we will show you how to backup your Android phone to Google Drive.
By following this video you will be able to backup Contacts, Google Calendar, SMS, WIFI networks & passwords, Wallpapers, Gmail Settings, Apps, Display Settings, Date and Time and Settings and data for apps not made by Google.
What you need to know first! – Backup Android Phone
Things to be aware of. Restoring data may vary depending on the phone and Android version. In addition, you cannot restore a backup from a higher Android version to a lower Android version. While your Android phone might look different to mine the steps should be simular just the menus might be different.
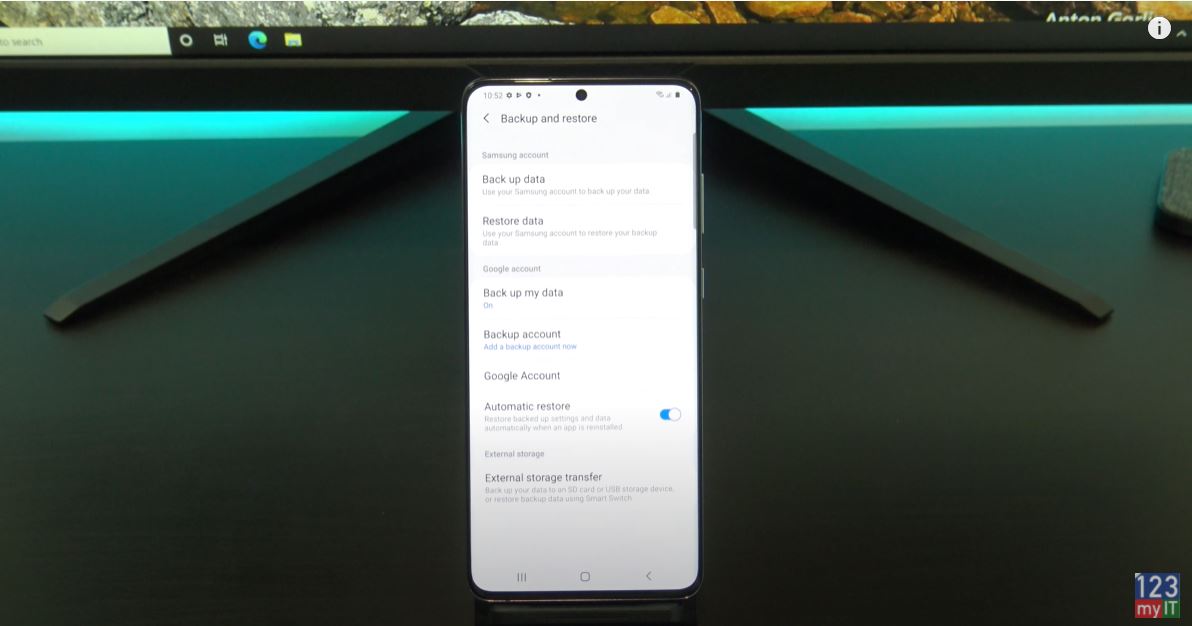
Let get started. Go into settings on your Android phone and scroll down to accounts and backup. Or on your phone it might be System and Backup. Next go into Backup and Restore and tap on Backup my data. Turn the button on and tap back.
Tap on Google Account and then add the Google account that you want to backup your Android too. Cool, here are the steps on my OPPO phone. As you can see, the menus are different but the process is the same.
Backup Settings on your Android phone.
Sign in with the Gmail account you want to back up too. Pop your password in and hit next and Agree. Tap accept and then on the next screen it gives you some info of what will be backed up. Just tap ok. On the next screen tap on Google photos and then Allow. Turn on Backup and Sync and then tap turn on backup.
Selecting which method to backup with. Backup Android Phone.
You have two backup options. Original and High quality. High quality stores the files at a smaller size. Therefore, this doesn’t eat into your storage quota. Im going to select high quality and tap Confirm. The next page you can read through or hit Skip. Alight you can see we have no photos in Google photos yet.
Let’s go in and create a contact to backup. Go into Phone, Contacts and tap the plus icon. Make sure you add the contact to your Google account if it prompts. I’ll just make a fake contact real quick. All right, so we have a contact let’s go and make a video and photo to back up.
Backup your video and photos.
Cool so we have our video and photos now let’s back them up. Go into your back up settings again. And tap on Backup now. If you want to check on the progress swipe down from the top of your screen. Once it’s finished you should get a little message saying its done. You can check Google Photos to see if you photos have been backed up.
The next step here is important. You need to check that your data has been backed up to Google Drive. Remember your back is only as good as the data you can restore. So always, check what has been backed up. Open Chrome up on another computer and login to Google drive by going to drive.google.com. Click on Storage and then click on Backups. Cool you can see here that I have a few Samsung Galaxy Backups. In addition, if you click on one you can see I have backed up 31 apps and my device settings. I can also delete the backup if I want.
But, what about my photos videos and contacts. You can find them by going to the Rubix cube icon. Heres the contact I created earlier. And your photos and video can be found under Rubix cube and photos. And same with your Calendar items. With the photos, you can click on them and remove them and they go to your trash bin. For details on your Storage, you can click the Storage icon.
You don’t need to reset your phone.
Awesome so you have checked you backup and you are happy that it’s working. Let reset your Android phone and restore the data. You do not need to do this. But, this will just show that the backup is working. I am going to just go ahead very quick and set this up.
Go ahead and add in your google account. All right, swipe down at the top and let it finish settings itself up. Allot of the apps and things need to finish downloading so give it some time. If we check out contacts and photos, they are not downloaded yet. Go back into your google apps and photos and turn the backups on. Again, choose your High Quality if you like. Backup over mobile data if you want to backup the photos when you are not on Wi-Fi. Cool, there they are if you want to move them to the gallery on your phone then tap the photo or video. Tap the three dots then tap download. Otherwise, they will be stored on your Google Drive. It also shows you a summary of where the files are stored.
Awesome so there are in the gallery now. But, what about the contacts. Let’s check. Cool and there it is its been restored now.
Logging onto Google Drive to see what’s backed up.
One last thing, if you want to see what data is being synced from the Google drive. Go into Settings, Accounts and backup, Accounts, Tap on the Account and go into Sync Account. Here are all your toggle switches for what’s being synced. Just go ahead and turn off what you do not need.
Guys, don’t forget to check out my other videos such move from Android to iPhone. Also do me a favour if you know anyone who might like this video please share it will them, hit the subscribe button and smash the bell icon.