Aorus KD25F Gaming Monitor – Cheating Stream Snipers Paradise

Hi Guys and welcome to 123, in this video I will show you how to an unboxing and first look at the Aorus KD25F Gaming Monitor.

Check out the KD25F on Amazon here 👉 https://amzn.to/2Pd7K2F

The Aorus KD25F is a 24.5 inch 240hz Gaming monitor with a 0.5ms response time. Its also  Gsync and Free sync compatible. The KD25F retails for around $400 usd and $750 aussie at the time of this video. Other features include LED Fusion lighting, Aim Stablizer and what I consider the best feature of them all OSD SideKick. Lets take a look what you get inside the box.

You get three different power plugs. So it looks to be a Chinese power plug, an Australian New Zealand power plug and a US power plug. Next we have display port 1.2 and a HDMI 2.0 cable. Its nice that you get one of each. In some monitors you will only receive one cable. And last up we have a USB 3.0 cable which powers the USB hub and OSD SideKick software.

A monitor in this price range should come with a really good stand. And the Aorus KD25F monitor doesn’t disappoint with a really solid base to the stand. More about this later in the video. Its looks a bit like a boomerang.

Next up is the arm that connects to the monitor to the base. Taking the monitor out of the box you can see it has a Energy rating of 4 stars and while on the Gigabyte website it says it uses 60 watts on average it uses about 21 watts. Which is actually pretty good for a gaming monitor.

Also in the box you get the installation guide and warranty card.

The Stand

The stand is solid as and the arm and base just slot it together. After this just tighten the screw on the base. On the back of the monitor you have a power plug with an on off switch and a Kensington lock.  You also have a toggle switch to navigate the monitor OSD which is really helpful when navigating the menus. Above that Audio and Microphone jacks. Two HDMI posts, one Display Port port! USB 3 in port and two USB 3 out ports.

On the back of the monitor itself you will find 4 screws which means the monitor has VESA wall mounting support. Helpful if you want to change stands. The stand snaps into place nicely and there is a quality feel to it. There was talk on the internet about the stand being flimsy and wolling allot and it does move when I shake like this. However after testing the monitor for about a week I didn’t find it to be an issue at all.

Once setup the monitor take up about 21 cms of desk space. This means if you have a small desk it like I do. It will sit off the wall about 21 cms. Its not a deal breaker but just something to be aware of.

Rotate the Stand

The stand not only looks great but it allow you to ajust the height. Also the pivot the monitor 90 degrees. Tilts up and down. And it can swivel 20 degrees side to side.

Aorus KD25F Monitor
Wings of excellence design

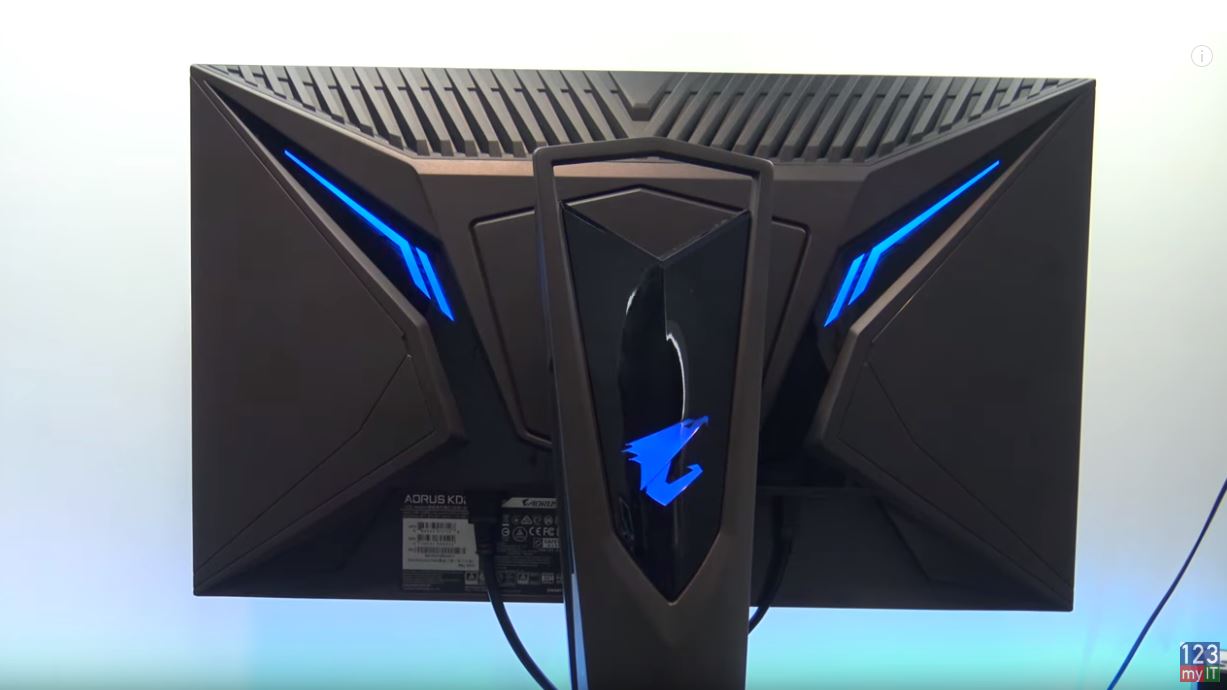
The stand has the Aorus Wings of Excellence design which looks cool. But in my opinion it lacks functionality. You can change the colour of the LEDS on the back of the Aorus KD25F monitor and the stand however they are very bright and most of the time you wont see them so they are a complete waste of time. If they were brighter you could shine them on a wall behind the monitor like I have done with my LEDs and it would make for an excellent gaming experience. The stand also has a nice built in handle, which is handy if you need to carry it.

Iam going to spend a bit of time going through the OSD SideKick because I think its really cool.

AORUS OSD Side Kick
OSD Side Kick Software – Allows greater control of Monitor settings.

OSD Side Kick – Best Feature !

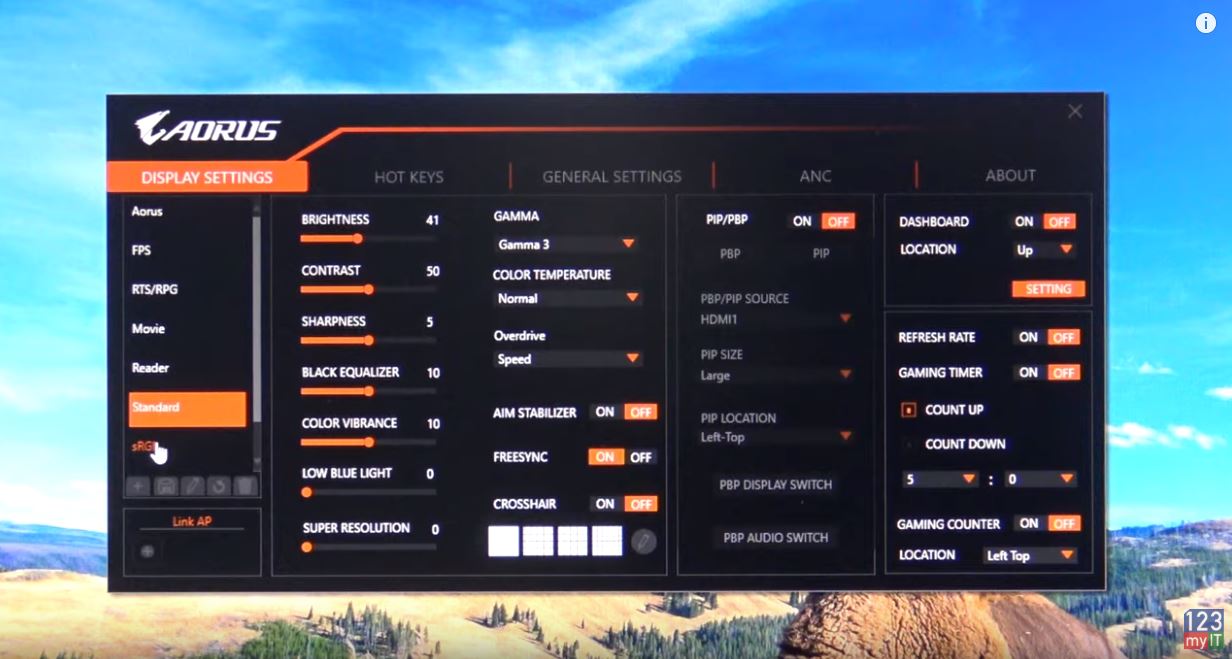
The OSD sidekick software allows you to control the settings of you monitor with your mouse. You need to plug the USB into your computer for it to work but it has some great features.

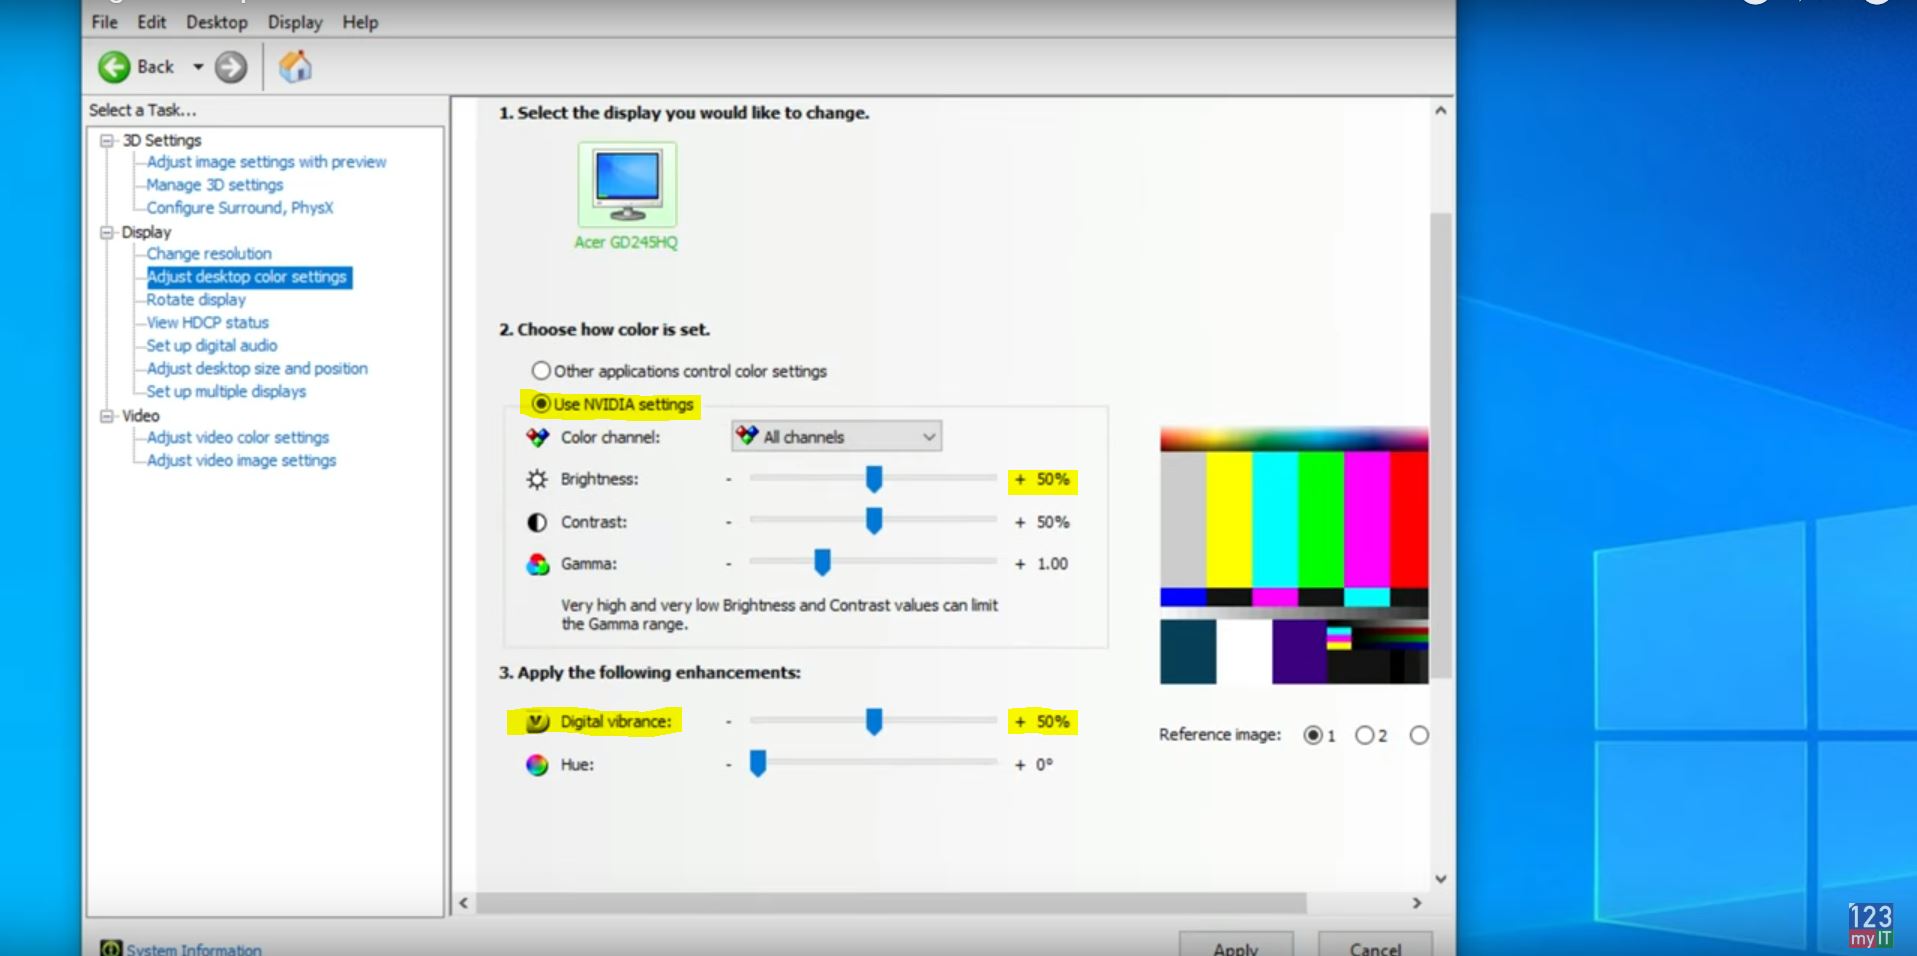
The first thing you will notice the Aorus KD25F monitor is really bright, to the point of where its hard to look at. So in the OSD there is a set of seven profiles. Each of these profiles give you different settings such as Brightness, Contrast, Sharpness, Black Equalizer, Colour Vibrance, Low Blue Light and super resolution. This means you can set a really bright profile for gaming and then another low light profile for browsing the internet or working. Then you can bind these profiles to a Hot Key so you can change them on the fly. Here you can see change a few settings within the Aorus profile.

Next up we have the Gamma setting which you can change as well as the colour temperature. However, the one I want to talk about most if the Overdrive setting. The Overdrive setting controls the response time of your monitor, which is very important for RTS and First Person shooter games. You have three settings Quality, Balanced and Speed. Quality is over drive turn off and it’s the slowest setting. It has an average Gray to Gray of 5.5 ms and no overshoot. The Balanced setting has a faster response time of 3.1 ms Gray to Gray and still no overshoot so this is a great setting to use for that balance between speed and quality. Speed mode is the fastest with an average of 1.5 ms gray to gray. However you will start to see some overshoot errors and ghosting with this mode.

Ok so the next setting is Aim Stabilizer, this reduced the motion blur in fast moving games. However you cant use this feature with the FreeSync function enabled. And to be honest I couldn’t see any difference with this on.

FreeSync and G Sync

Turning on the FreeSync option will turn FreeSync or G Sync on depending on if you have AMD or NVidia graphics card. When this option is turned on it eliminates screen lag and tearing whilc playing games.

The Cross Hair option is borderline cheating. Turning this on will allow you to paint anything in the middle of the screen. So if I click on the edit button and paint a crosshair or anything else this gives an advantage over other players for sure. I was surprised how easy it was to make good Crosshairs.

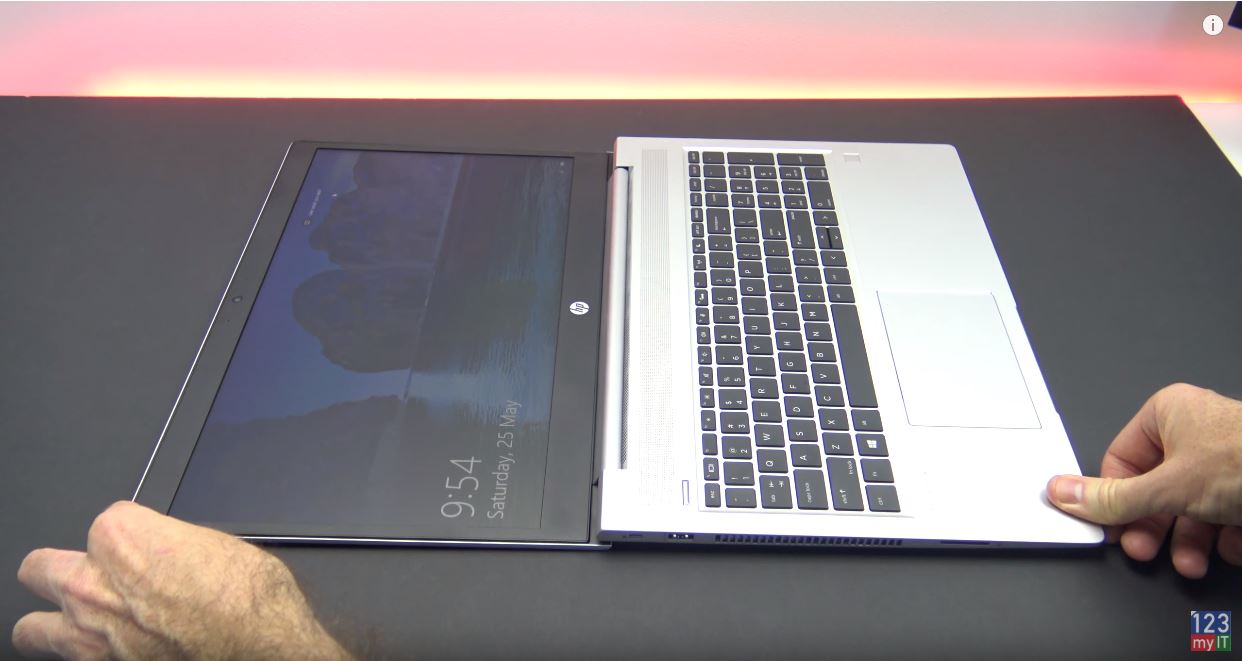
PIP and PBP. This setting allows you to create a picture inside your picture or make two pictures beside each other. Lets take a look. As you can see here I now have my laptop and monitor computer screen side by side. Now the settings is picture in picture and I can change the size and the location of the picture. You can also swap your pictures around and bring the small picture to the front and large picture to the back.

Cheating Possible with the Aorus KD25F Monitor

I racked my brain thinking how this technology could be used and then it hit me. If you are a stream sniper you could use this to follow someone’s stream at play your own game. Then I realised you could watch a team mates stream and you might be able to see what enemy players are. It would be delayed slightly but still helpful!!! Again great from cheating. J

Dashboard is pretty cool. Lets say you want to keep an eye on the temperature of your CPU or GPU you can do it through the dashboard. It makes a little display which you can make it see through so it doesn’t get in the way. It’s a nice feature. Just turn off what you don’t need. For me the CPU and GPU temps were pretty helpful.

Cancel Noise

You can turn the LED indicator on and off on the monitor. Not a big deal, but I also wanted to show you that there is a mic pin hole just above it which works with the noise cancelling feature.

There is also a noise cancelling feature which people on the internet said it would be good for when you take your computer to a lan party. But I was thinking it would probably be best for those of us who intend on getting on discord with loud clacky keys. Hopefully this feature would filter out allot of that background noise.

Here is some footage of the Crosshairs in action! I will be selling the 123 crosshair on my website. Just kidding J And here is the default crosshair. Its pretty good.

Also guys don’t forget to check out my other video such as The Witcher Media PC Build. And do me a favour hit the subscribe button and smash the bell icon.

Setup XBOX controller on Apple TV, iPad or iPhone + Games

Setup DUALSHOCK 4 controller on Apple TV, iPad or iPhone

Setup XBOX controller on Apple TV, iPad or iPhone + Games

Setting up the XBOX Controller on Apple TV

Hi Guys and welcome to 123myIT, in this video we will show you how to Setup XBOX wireless controller on Apple TV, iPad or iPhone.

One of the new features with iOS 13 is that you can pair XBOX controllers with Apple TV, iPad and iPhone. This means you can use the XBOX controller to play games on Apple Arcade as well as iOS supported games.

All right let’s get started its pretty simple on your Apple TV go to Settings > Remotes and Devices.

setup xbox controller
Getting started, use the Apple TV remote to setup the Xbox controller.

Scroll down to Bluetooth. And under BlueTooth you will see other devices.

Next up grab your XBOX controller and put it in pairing mode. To do this Press the XBOX button to turn it on. Then press the connect button for 3 seconds or until the XBOX button starts to flash. The XBOX controller should show up under other devices select it with your AppleTV remote. Once you see the Controller Connected popup you should be good to go.

Connect the XBOX to your

Let’s connect the XBOX controller to your iPad or iPhone. Go into Settings > BlueTooth. And just toggle on the BlueTooth switch. Again put your controller in Pairing mode. And tap your controller to connect it.

Awesome lets go test out some games. On Apple TV just go into Apple Arcade and sign in with your Apple ID. Its free for the first month. The game I have played most is one called OceanHorn2. The games on Apple Arcade are pretty basic at the moment so don’t expect to the blown away. But they are ok for a bit of fun. OceanHorn2 is a Adventure Role Play game.

Lets check out some games on the iPad or iPhone. Not all iOS games will work with the XBOX controller. But when you load a game that does it should tell you at the bottom of the screen.

The game I am playing now is called real racing 3. In real racing 3 you can change your views in the car and also look behind you. This iPhone 11 pro does a good job with the sound and games can be quite fun on a bigger iPad screen. If racing is not your thing there is loads of other games like fortnight and actually having a controller will give you some advantage over other mobile players as the controller is much easier to use. Sonic Racing game on Apple TV is also a bit of fun.

Also guys don’t forget to check out my other videos such as How to setup DUALSHOCK controller on Apple TV, iPad and iPhone. And do me a favour hit the subscribe button and smash the bell icon.

Turn on Voice control on iPhone or iPad

10 iPhone settings that you should turn off straight away

Setup DUALSHOCK 4 controller on Apple TV, iPad or iPhone

Making the DUALSHOCK 4 work with Apple TV

Hi Guys and welcome to 123myIT, in this video we will show you how to Setup Dualshock 4 controller on Apple TV, iPad or iPhone.One of the new features with iOS 13 is that you can pair Dualshock 4 controllers with Apple TV, iPad and iPhone. This means you can use the Dualshock 4 controller to play game on Apple Arcade and iOS supported games.

All right let’s get started its pretty simple on your Apple TV go to Settings > Remotes and Devices.

setup dualshock 4 controller
Use the Apple TV remote to setup DualShock 4 controller.

Scroll down to Bluetooth. And under BlueTooth you will see other devices.

Next up grab your DualShock controller and put it in pairing mode. To do this hold down the PS and sharing buttons for 3 seconds or until the light starts flashing on the top. The DualShock controller should show up under other devices select it with your AppleTV remote. Once you see your Controller Connected popup you should be good to go.

Lets connect the DualShock to your iPad or iPhone. Go into Settings > BlueTooth. And just toggle on the BlueTooth switch. Again put your controller in Pairing mode. And tap your controller to connect it.

Apple TV Games

Awesome lets go test out some games. On Apple TV just go into Apple Arcade and sign in with your Apple ID. Its free for the first month. The game I have played most is one called OceanHorn2. The games on Apple Arcade are pretty basic at the moment so don’t expect to the blown away. But they are ok for a bit of fun. OceanHorn2 is a Adventure Role Play game.

Lets check out some games on the iPad or iPhone. Not all iOS games will work with the DualShock controller. But when you load a game that does it should tell you at the bottom of the screen.

The game I am playing now is called real racing 3. In real racing 3 you can change your views in the car and also look behind you. This iPhone 11 pro does a good job with the sound and games can be quite fun on a bigger iPad screen. If racing is not your thing there is loads of other games like fortnight and actually having a controller will give you some advantage over other mobile players as the controller is much easier to use. Sonic Racing game on Apple TV is also a bit of fun.

Also guys don’t forget to check out my other videos such as Turn on Voice control on iPhone or iPad. And do me a favour hit the subscribe button and smash the bell icon.

10 iPhone settings that you should turn off straight away

Forgotten Passcode on iPad, iPhone, or iPod Touch 2019

Gaming PC Settings – Nvidia Control Panel

Use the Nvidia control panel to increase performance of your games.

Nvidia Control Panel – What can it fix?

If you are having issues with your Gaming Pc such as Low Frame rates
Game lag or Game Stuttering, then this video should help. By following this video and optimizing the Nvidia control panel you can do the following.

  • Increase your Frames rates.
  • Fix Game Stuttering
  • Increase power
  • Optimise Nvidia GPU
  • Best colour settings and brightness for games
  • Smooth out your gameplay

As mentioned this video is for Nvidia GPU, If you have an AMD GPU I plan to do video for AMD as well so make sure you hit the subscribe button.

Nvidia Control Panel – Config

Alright first step is to open your Nvidia control panel. You can do this by right clicking the Desktop and selecting Nvidia control panel.
If you cant find it there try looking in the bottom right hand corner of your screen near the time. If you still cant find it, check what GPU you have installed by right clicking the start button and selecting Device Manager.
Under Display adapters you can check what Nvidia GPU you have and download the driver for it.

Download your GPU drivers – Nvidia.com

Head over to nvidia.com and download your driver or you can download the GeForce Experience software and I will leave links to those pages in the description below.

In the Nvidia control panel go to Adjust image settings with preview. Click on use 3D image settings and click Apply.
Next up click on Manage 3D settings and make sure you are on the Global Settings Tab. These settings will apply globally you can change these at any time or click restore if you want to set settings back to defaults.

  • Set Ambient Occlusion to Off
  • Anisotropic filtering to Off
  • Antialiasing to Off
  • Leave Gamma correction On
  • Antialiasing – Mode Off

Antialiasing on or off?

Don’t worry you can still turn Antialiasing on in Game. Also if the options aren’t the same as this video just change the options that are the same.

  • CUDA -GPUS Should be set to all.
  • DSR Factors should be off.
  • With Maximum pre rendered frames set this to 1, if you have an older pc you can try setting this to 2 or 3. But if you have a newer PC set this to 1.Multi-Frame Sampled AA set to Off. Open GL set to Auto.
  • Power Management Mode set this to Prefer Maximum Performance.
  • Preferred Refresh rate set it to Highest Available.
  • Shader Cache set to On.
  • Turn on – Texture Filtering – Anisotropic
  • Texture Filtering – Negative LOD Bias set to Allow
  • Texture Filtering – Quality set to High Performance
  • Threaded Optimisation you can set to Auto, however if you play games like PUBG, FORTNIGHT and Battlefield which are quite demanding. You can set this to On.
  • Triple buffering set to Off
  • Vertical sync to Off
  • Last setting Virtual Reality pre-rendered frames set this to the same value as Maximum pre rendered frames.

Once you are done make sure you click Apply. Once you have set this go ahead and click Apply.
Next up go back to the left hand side and click on Adjust desktop colour settings.
Select the Use Nvidia Settings on the right.
Click Apply then click Yes.

PRO TIP!

Heres a little secret. If you play first person shooters you have just made the colours much better than the default ones by selecting Use Nvidia settings. Also if you scroll down to the Digital vibrance slider its default settings is 50%. If you slide this upto 80% suddenly the dark areas of your game will become much brighter. This will allow you to see your emimenes in game before they see you. This really helped me allot in PUBG.

nvidia control panel
PRO TIP: Use Nvidia settings to control brightness and colour – this helps when spotting enemies.

Best image and colour settings

Click Apply and then go to the Adjust video colour settings.
Next up select the with the Nvidia settings. Click onthe Advanced tab.
In the Dynamic range drop down menu select Full. Next click Apply this should allow you to see better colours when watching videos.

Next go to the Adjust video image settings.
In here you can also use the Nvidia settings and change these however you like. These last two settings only change video and image settings outside of Games and they wont effect Gaming performance.

Another point to mention is, if you update your Nvidia driver, make sure you come back to this video and check that the driver update hasnt reset your Nvidia control panel settings back to defaults. And lastly I get asked allot of questions about customising Windows 10 and AMD settings I will do a few more videos on this topic so do me a favor. Hit the subscribe button and smash the bell icon.

iPhone Battery Drain – Is your iPhone letting you down?

Setup Bedtime on iPhone

Apple Shutting Down iTunes

HP ProBook 455 G6 AMD – Will it run Fortnight?

HP ProBook 455 G6 Unboxing

This video & article will show you an unboxing and fortnight benchmark of the HP ProBook 455 G6 Notebook.

HP ProBook 455 G6

The ProBook 455 G6 comes with an AMD Ryzen CPU and Radeon Vega GPU. When buying the notebook you can configure it with different versions of CPU and GPU. So if you are keen to do some gaming I would suggest trying to get the Radeon RX Vega 10 GPU included with your model. This means that you will be able to play games at a higher framerate which makes for smoother game play. The stock version which features in the video, comes with the Ryzen 5 2500U and Radeon Vega 8. This combo was a little slow when gaming in Fortnite and the benchmark. It means you might also struggle when doing video editing and CAD work.

HP ProBook 455 G6
HP ProBook 455 G6 laying flat – Good for sharing content.

Fold it down.

One of the really nice features about the ProBook 455 G6 is that the notebook folds down to 180 degrees. This is great if you are sitting around a table as it helps others see the screen without to much bother. Overall the notebook is designed very nicely and the case is made from silver plastic but it doesn’t feel cheap. The Keyboard is nice to type on and doesn’t bend. This click pad comes with multi touch gesture support however sometimes I struggle to find the left click. It feels like I have to put move my hand to far to the left to find it.

Work faster.

One thing I really like is the removal of having to hold down the FN “Function key” when turn the display brightness up and down. It just takes that extra step out of the equation which make sense because you use these buttons so much why not make them primary.

If you want to compare the HP ProBook 455 G6 with the other models we have reviewed check out the links below.

HP ProBook 430 G5 Unboxing FirstLook

HP ProBook 430 G4 Notebook – MacBook Killer?

ProBook 430 G6 – Coming soon – on YouTube now! 🙂