Gaming PC Setup – Turn Off Turbo Boost to Fix Lag

Turning off Turbo Boost can fix lag in Games.

Hi Guys and welcome to 123, in this video I will show you how to turn off Turbo Boost in the bios.Ok guys about 2 years ago I made a video on how I fixed CPU Game Lag by turning off Turbo boost on a laptop with software. And you can find that video here.

A few of you guys are still having issues, mostly on laptops where your CPU heats up and it start to throttle down to stop itself from over heating.

What you can do is turn off Turbo Boost and this will reduce heat of your CPU, stop the CPU from throtling back and then this should stop your Game from lagging.
On my ASUS laptop the software helped me and allot, but some users couldnt use the software because their CPU wasnt supported. This video should help resolve that issue. Lets get started.

CPU Check – turn off turbo boost

Ok so the first thing to do is check your CPU. We can do this by right clicking the Taskbar and going to Task manager. Once in there if you click on More Details and click the performance tab.
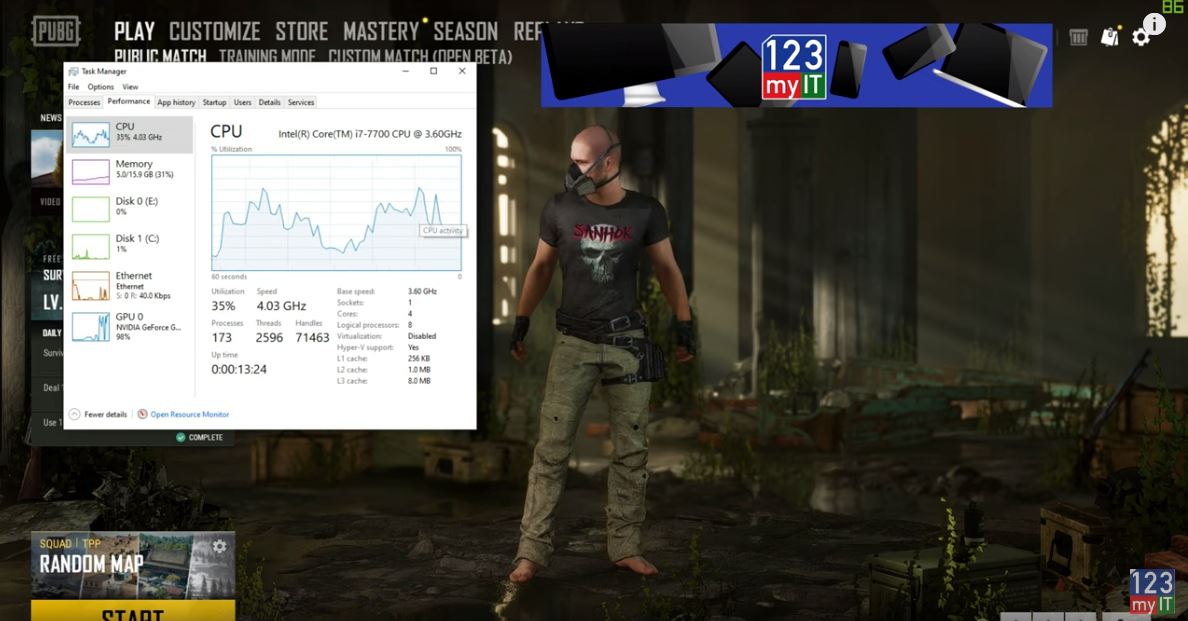
Click and highlight CPU and take note of your CPU speed and base speed. As you can see my base speed is 3.6GHz and my actual speed is 4.00GHz. This means I am getting Turbo Boosted from 3.6GHz to 4GHz. So turning this off should drop my speed back to 3.6GHz.

Check CPU - turn off turbo boost
Check your CPU performance first so you can check the bios change.

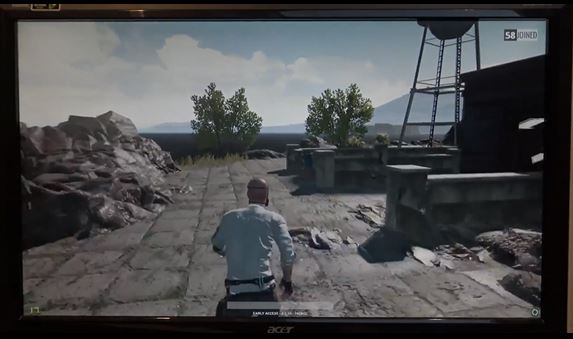
I know what you are thinking, hey but wont that reduce the computer speed. Kind of yes, but it will reduce heat and may fix your lag. Plus you can turn this back on at anytime. Before I show you how to turn it off, let start up your game that you are having problems with and check what your CPU is doing. In my case its PUBG.

Alright start your game up and press Alt Tab to show your Task Manager and you should see some more activity on your CPU now. For me you can see that it doesnt really go past halfway and actually most of the work is being done by the NVidia GPU which is sitting on 98%. This is a good sign that Turning off Turbo Boost shouldnt effect the game play.

Enter Bios

Ok Restart your PC and tap your bios key to get into bios. For my ASUS mother board the bios button is Delete. However on different brands it could be Escape, F1 or F2 or something different. On some motherboards its F10 if you cant work it out check the manufactures website.

Once you are in your bios it should look something like this. You will need to find your CPU menu. For me its in advanced mode.
Click the Advanced tab and then click the CPU Configuration menu.

Scroll down to and find CPU power management control. You can see that Turbo Mode is Enabled. Just set this to disabled and press F10 to save changes. These steps should be simular for other brands of motherboards.

Test your settings change

Awesome you have made it this far restart windows and go back into Task Manager. Excellent you can see that the CPU speed has dropped down from 4GHz to 3.4GHz. This means that the bios change worked. Start your game back up and test and see if you are still getting the throttling game lag. If this doesnt help you can just go back into the bios and turn Speed boost back on.

Also guys don’t forget to check out my other Gaming PC Setup videos like Nvidia Control Panel. And do me a favor hit the Subscribe button and smash the bell icon.

Transfer Data Old iPhone to New iPhone

Apple Watch Series 5 Unboxing First Look

Apple iPhone 11 Pro Silver Unboxing First Look

Gaming PC Settings – Nvidia Control Panel

Use the Nvidia control panel to increase performance of your games.

Nvidia Control Panel – What can it fix?

If you are having issues with your Gaming Pc such as Low Frame rates
Game lag or Game Stuttering, then this video should help. By following this video and optimizing the Nvidia control panel you can do the following.

  • Increase your Frames rates.
  • Fix Game Stuttering
  • Increase power
  • Optimise Nvidia GPU
  • Best colour settings and brightness for games
  • Smooth out your gameplay

As mentioned this video is for Nvidia GPU, If you have an AMD GPU I plan to do video for AMD as well so make sure you hit the subscribe button.

Nvidia Control Panel – Config

Alright first step is to open your Nvidia control panel. You can do this by right clicking the Desktop and selecting Nvidia control panel.
If you cant find it there try looking in the bottom right hand corner of your screen near the time. If you still cant find it, check what GPU you have installed by right clicking the start button and selecting Device Manager.
Under Display adapters you can check what Nvidia GPU you have and download the driver for it.

Download your GPU drivers – Nvidia.com

Head over to nvidia.com and download your driver or you can download the GeForce Experience software and I will leave links to those pages in the description below.

In the Nvidia control panel go to Adjust image settings with preview. Click on use 3D image settings and click Apply.
Next up click on Manage 3D settings and make sure you are on the Global Settings Tab. These settings will apply globally you can change these at any time or click restore if you want to set settings back to defaults.

  • Set Ambient Occlusion to Off
  • Anisotropic filtering to Off
  • Antialiasing to Off
  • Leave Gamma correction On
  • Antialiasing – Mode Off

Antialiasing on or off?

Don’t worry you can still turn Antialiasing on in Game. Also if the options aren’t the same as this video just change the options that are the same.

  • CUDA -GPUS Should be set to all.
  • DSR Factors should be off.
  • With Maximum pre rendered frames set this to 1, if you have an older pc you can try setting this to 2 or 3. But if you have a newer PC set this to 1.Multi-Frame Sampled AA set to Off. Open GL set to Auto.
  • Power Management Mode set this to Prefer Maximum Performance.
  • Preferred Refresh rate set it to Highest Available.
  • Shader Cache set to On.
  • Turn on – Texture Filtering – Anisotropic
  • Texture Filtering – Negative LOD Bias set to Allow
  • Texture Filtering – Quality set to High Performance
  • Threaded Optimisation you can set to Auto, however if you play games like PUBG, FORTNIGHT and Battlefield which are quite demanding. You can set this to On.
  • Triple buffering set to Off
  • Vertical sync to Off
  • Last setting Virtual Reality pre-rendered frames set this to the same value as Maximum pre rendered frames.

Once you are done make sure you click Apply. Once you have set this go ahead and click Apply.
Next up go back to the left hand side and click on Adjust desktop colour settings.
Select the Use Nvidia Settings on the right.
Click Apply then click Yes.

PRO TIP!

Heres a little secret. If you play first person shooters you have just made the colours much better than the default ones by selecting Use Nvidia settings. Also if you scroll down to the Digital vibrance slider its default settings is 50%. If you slide this upto 80% suddenly the dark areas of your game will become much brighter. This will allow you to see your emimenes in game before they see you. This really helped me allot in PUBG.

nvidia control panel
PRO TIP: Use Nvidia settings to control brightness and colour – this helps when spotting enemies.

Best image and colour settings

Click Apply and then go to the Adjust video colour settings.
Next up select the with the Nvidia settings. Click onthe Advanced tab.
In the Dynamic range drop down menu select Full. Next click Apply this should allow you to see better colours when watching videos.

Next go to the Adjust video image settings.
In here you can also use the Nvidia settings and change these however you like. These last two settings only change video and image settings outside of Games and they wont effect Gaming performance.

Another point to mention is, if you update your Nvidia driver, make sure you come back to this video and check that the driver update hasnt reset your Nvidia control panel settings back to defaults. And lastly I get asked allot of questions about customising Windows 10 and AMD settings I will do a few more videos on this topic so do me a favor. Hit the subscribe button and smash the bell icon.

iPhone Battery Drain – Is your iPhone letting you down?

Setup Bedtime on iPhone

Apple Shutting Down iTunes

ASUS Strix GL702V Game Lag – Fixed

ASUS Strix GL702V Game Lag – Fixed

This video will show you how to fix in game lag by turning off Turbo Boost.
I had a massive problem that the Asus themselves could not fix and this related to in game lag. This lag would slow the game down every five seconds or so and the frame rate would drop from around 40-50 to below 20. This would happen in multiple games such as Elder scrolls online and Player Unknowns Battlegrounds. I was so stressed and frustrated with this lag so I want to try and help others hopefully fix this issue if they are having it.

This big issue is when you buy a product and you have a problem with it and you try your upmost to get help with that problem and no one listens. I had put a post up on the Asus ROG forum and it was removed when I said Asus service centre couldn’t resolve the problem. Which was the truth. But it made Asus look bad so they removed it because it proved that there was an issue with their laptops. Shortly after they released BIOS 305 Update thermal policy to reduce CPU temperature. 🙂 I will do a video shortly on this update. But it has really left a sour taste in my mouth with regards to their after sales support.
After all, they only need to acknowledge that there is an issues and that they are looking for a fix.

The picture below shows the game at the drop of 19 frames per second.

Game Lag

The tool I used to turn off Turbo Boost is called Throttle Stop and you can find it here. Simply download and install Throttle Stop, then run he program and you should get a series of check boxes, simple select the checkbox that you want to change and click save. This should then apply the setting you wish to apply. Don’t forget this will reset after a reboot so you might have to reapply the setting when you restart the computer.

Throttle Stop - Game Lag

Good luck guys, I hope it helps out.