HP EliteBook 830 G8

Hi guys Matt from 123myIT here. In this video, we will show you everything you need to know about the HP EliteBook 830 G8.

HP Range of Laptops – HP EliteBook 830 G8

The EliteBook range is the premium level for HP’s Business laptops. Below the EliteBook you will have the ProBook and above the ZBook range.

This is 13.3-inch business laptop comes with an Intel Core i5 11th Gen Processor which has an integrated Iris Xe Graphics. Along with 8GB of Ram and 256 GB of NVMe storage.

Pricing

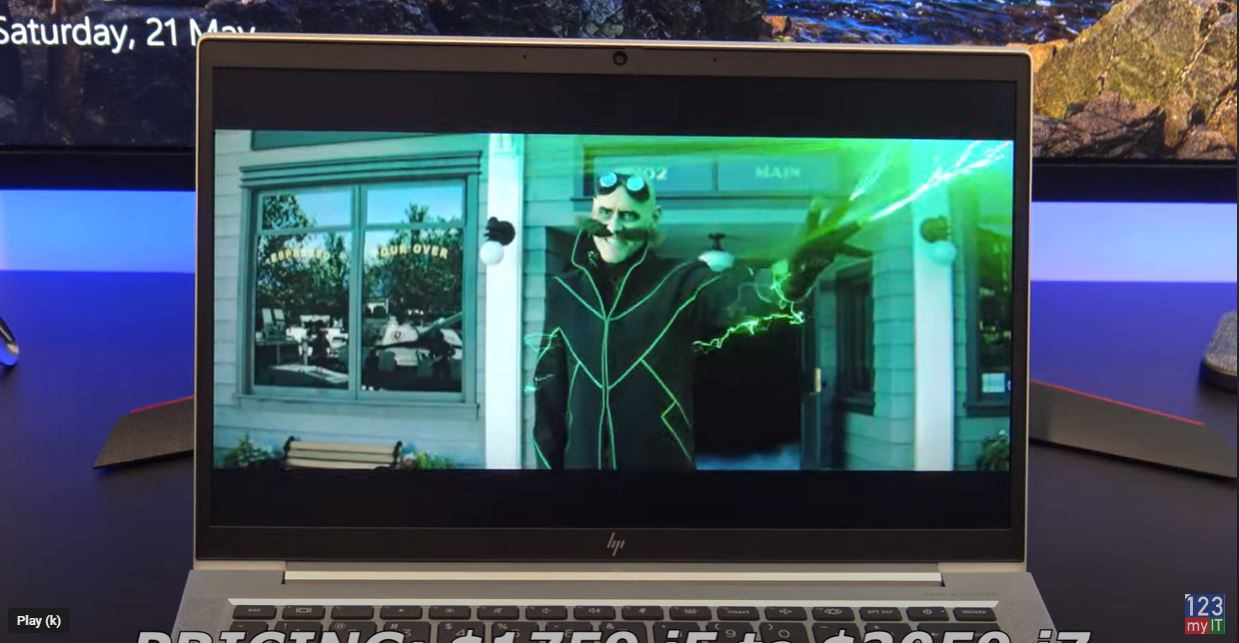
Pricing for the 830 G8 starts at $1759 USD for the Intel i5 CPU and goes up to $2059 USD for the i7 CPU. On the HP website, you can customize and buy. If you are going to do this, then I recommend upgrading to an i7 CPU and changing the screen to a screen with better brightness. The default screen comes only with 250 nits of brightness. You can upgrade to a screen with 1000 nits of brightness, which means the screen will be brighter. However, you should be aware that a brighter screen would also take up more battery life.

In the Box

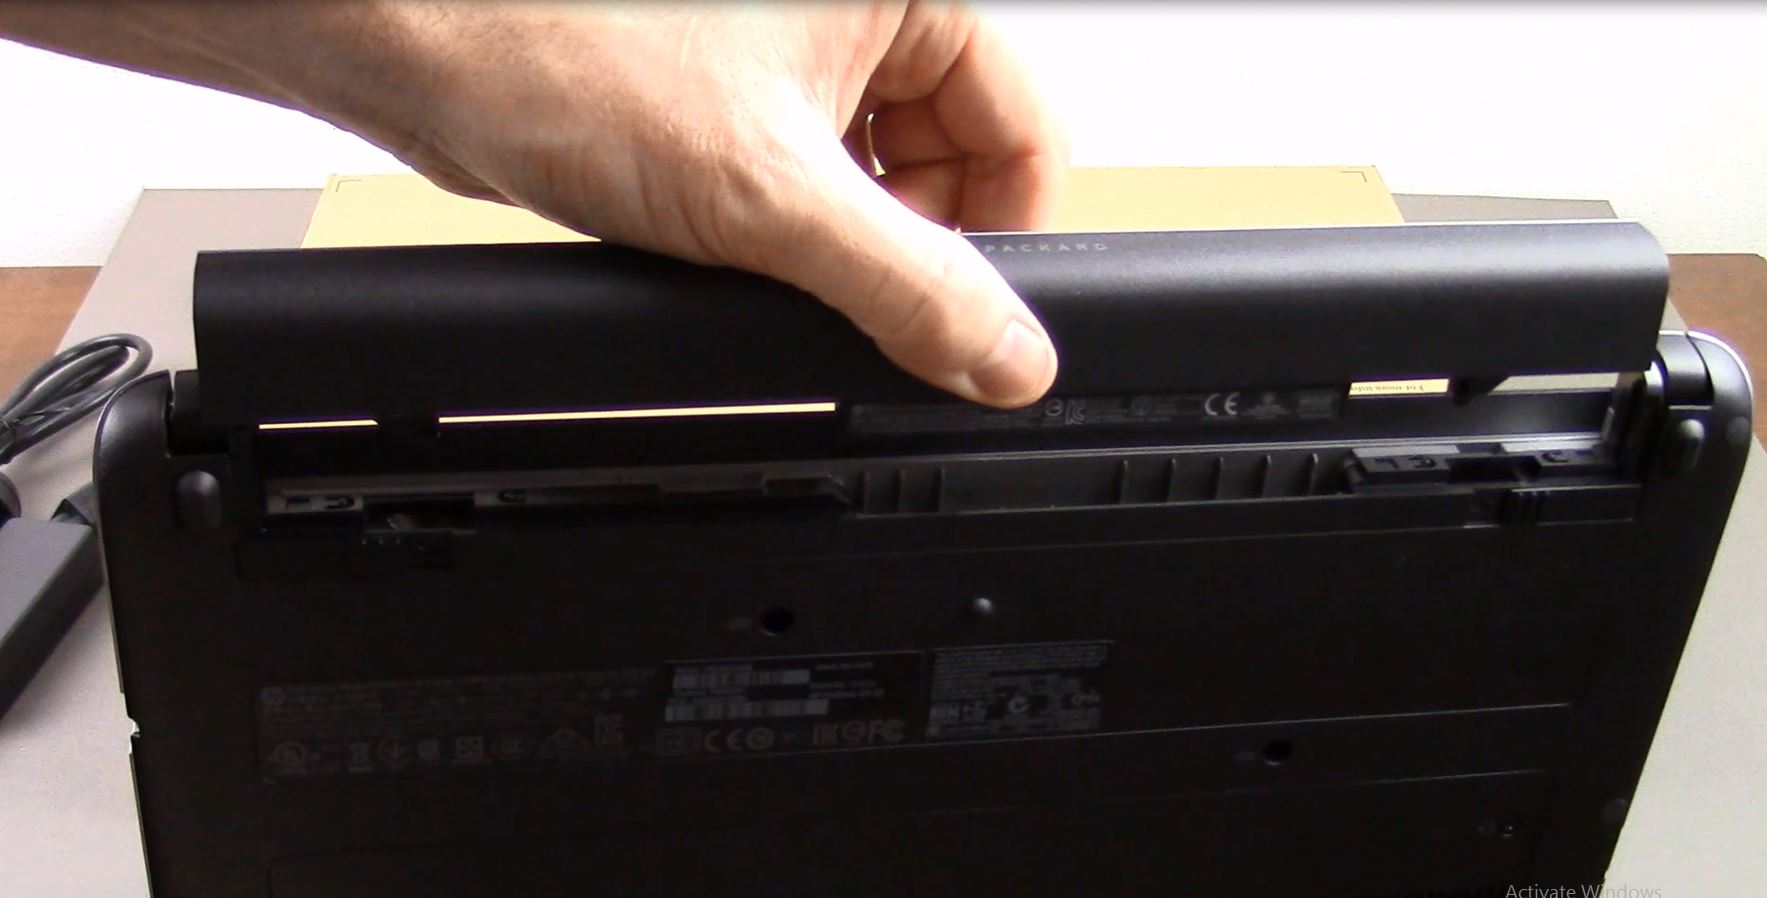
In the box, you will get the 830 G8 itself. Along with a 45 watt power adapter. After testing the 830 G8 I found it uses around 14 to 37 watts of power. In addition, you can expect to get around 12 hours of battery life 8 hours if you select the 1000 nits brightness screen I talked about earlier. Charging the battery will take just under one and a half hours.

The 830 G8 comes with a 13.3 inch FHD LED Anti-Glare Display. With a resolution of 1920×1080 and 250 nits of brightness. The display is a bit dim however, this laptop designed to be portable, so a less power hunger display means longer battery life.

Does it Game?

In terms of gaming, I was able to get FortNite to run ok on giving up about 35 to 50 Frames per second. This would be mostly due to the Intel quad core i5 11th gen CPU as the Intel Iris Xe GPU is not the best for gaming.

The 830 G8 also has a finger print scanner, which allows you to unlock Windows with a touch of the button, but you need to add it in the customise and buy section I mentioned earlier. Along the top, you will find an integrated HD 720p webcam with dual microphone and indicator light. One of the cool things about the 830 G8 design is you can close the camera off with a sliding button.

Ports

On the right side, you have the charging port, HDMI 1.4 port, two USB C ports and a SIM card slot. This SIM card slot is cool but you will two add this as an option when you buy. You also have an indicator light to show when the laptop is being charged. The USB C doubles as a display port so if you have a USB C to HDMI adapter you can plug in an external display.

On the left, you have a security lock, two USB 3 port, Audio Jack and SC card reader. Annoyingly there is no SD card reader.

EliteBook 830 G8

Speakers

The 830 G8 comes with Bang & Olufsen dual stereo speakers and they are designed to point upwards towards your ears. The speakers sounds pretty good but missing a little bass.

The Trackpad is nice and wide. But I do find myself right clicking allot because to left click you need to press on the bottom left side of the Trackpad. For me it feels like the trackpad sits too far to the left.

Keyboard

The keyboard is excellent it is a delight to type on and the keys don’t bend or wobble when you press them. And it comes with two stage backlit keyboard as standard which is a nice touch.

The overall build feels like premium quality as it is made from aluminium and there is little to no flex on the laptop. In addition, it does not seem to leave fingerprints, which is great.

The display hinge folds all the way back 175 degrees; however, other laptops go all the way to 180 degrees, so 175 feels a bit awkward.

Can you upgrade it?

 You can also upgrade the 830 G8 by removing the screws from the bottom cover. The system supports 64 GB of RAM so you can upgrade that along with a 1TB NV Me SSD. The WIFI card is already WIFI 6 so you will not need to upgrade that for a while.

Benchmarks

Here’s the Geekbench CPU score and the GPU score. Moreover, when comparing the scores with the EliteBook 840 G7 model from last year the 830 G8 is much faster. However, the ProBook 640 G8 seems to be faster than the EliteBook 830 G8.

While running the benchmark if we check what temperature the laptop gets too which is around 35 degrees. You can see the heat does not show up around the palm rests. This is good design it means you palms won’t get uncomfortable when typing.

Worth it?

The EliteBook is a great portable business laptop. This means that typing and battery life will be really good. But this is not a gaming laptop. If you are looking for a gaming laptop you should look for a laptop with the GeForce MX or Radeon RX GPU configured.

Don’t forget to check out my other videos such as How to Transfer Data iPhone to Android with a cable. And do me a favour if you know anyone who might like this video please share it with them, hit the subscribe button and smash the bell icon.

My Android Settings Start to Finish

Apple iPhone 13 Pro First Look Sierra Blue & Blue Case

Hi Guys and welcome to 123myit. In this video, we will show you everything you need to know about the iPhone 13 Pro. The iPhone 13 Pro has the same A15 Bionic processor as its bigger brother the iPhone 13 Pro Max. Both models have the same price as last year’s 12 Pro and 12 Pro Max.  The cameras have been updated and the battery is larger.

Pricing

Pricing for the iPhone 13 Pro starts at $999 USD and it comes in four different colours Blue, Silver, Gold and Graphite. Storage capacity starts at 128GB and goes up the to 1TB which is impressive.

First up in the box you have the iPhone 13 Pro itself. Next will find the documentation a SIM card eject tool, quick start guide, Guarantee information and Apple sticker. The only other accessory is the Lighting USB cable, which does up to 50% charge in 30 mins with a 20-watt adapter. Not to forget that the 13 Pro supports 15 watts wireless charging and is IP68 water and dust resistant.

This video & article will show you everything you need to know about the Apple iPhone 13 Pro. Helpful if you are looking to upgrade your phone

Display

The iPhone 13 Pro has a 6.1-inch Super Retina XDR OLED display, which is the same size as the iPhone 12 pro. However, the display now includes ProMotion technology that automatically changes the screen refresh rate from 10Hz to 120Hz. It has a 2532 by 1170-pixel resolution at 460 ppi and a brightness boost starting at 1000 nits, which is brighter than the iPhone 12 Pro. If you compare the Pro 13 with the Pro 12 on the left, you can’t really see allot of difference side by side. Therefore, an upgrade from the Pro 12 to the Pro 13 might not be worth it. However, for those of your who are thinking about upgrading from the iPhone 8 it would be a big update.

Design

Apple has kept the smooth flat edge design from the 12 pro on the 13 Pro line up as well. This allows the iPhone to stand up on its end. I love this design we first saw it on the iPhone SE. However, if you buy a cover the phone might not stand on its side with the cover on the aluminium frame does show fingerprints.

The left side of the iPhone, you have the Ring Silent and Volume up and down buttons and a SIM card slot.

On the right side, you have the Sleep Wake power button. On the bottom, you have the lighting connector, microphone and one of the stereo speakers. Actually, the Stereo speakers are impressive. Take a listen.

Face Unlock

Face unlock is standard on the iPhone 13 models. Also along the top, we have a 12-megapixel True Depth Camera that has a F2.2 aperture. While you cannot see them, there is actually a whole bunch of sensors hidden here. Ambient light, Proximity, Flood illuminator, infrared camera and dot projector.

On the back of the 13 Pro, you have a Triple Camera setup which features a Ultra Wide, Wide and Telephoto cameras. The Telephoto camera has a 3x optical zoom. The Ultra Wide camera has a f 1.8 aperture and allows better photos in low light. In addition, the new Wide Camera has a F.15 aperture.

Therefore, out of the box the iPhone 13 Pro will take amazing photos. Here are some comparisons between the iPhone 13 Pro and iPhone 8. Can you spot the difference?

Processor

The iPhone 13 Pro has the A15 bionic processor, which has an updated 5 GPU cores. A fast processor is important when playing games and videos or when generally moving around the iPhone. Here is the Geekbench scores for the iPhone 12 Pro and the iPhone 13 Pro. As you can see the iPhone 13 Pro wins with a single core score of 7509 and multicore score of 19477

Battery

In terms of Battery life for the iPhone 13 Pro, it has a 3095 mAh battery and you can expect up to 22 hours video playback. This will get you about 20 hours of streamed video playback. Say from the web.

My thoughts pretty amazing phone. The cameras get better all the time so if you are looking for the best Instar worthy shots you can’t really go wrong. However I think the price could have dropped a bit since Apple no longer includes a charger and battery life could be also be improved in my mind. I would like to see it last longer.

Guys, don’t forget to check out my other videos such as How to record your screen on iPhone or iPad. Also do me a favour if you know anyone who might like this video please share it will them, hit the subscribe button and smash the bell icon.

Clean Install Windows 11

How to Create a Windows 11 Bootable USB

Google Pixel 4 Unboxing Firstlook

A look at the Google Pixel 4

Hi guys and welcome to 123myIT. In this video we take a first look at the Google Pixel 4 Unboxing. Check out the Pixel 4 on Amazon here 👉 https://amzn.to/30Bb6QU

Prices for the Pixel 4 start at $799 us and it is $100 cheaper than the Pixel 4 XL. And the main new features for the Pixel 4 over the Pixel 3 are a new bigger OLED display which has improved refresh rate up to 90hz. As well as 6 GB of Ram and a new Snapdragon 855 processor.

And of course it launches with Android 10 right of the bat.

Pixel 4 Unboxing – Right out of the Box!

All right guys let’s get to the unboxing and take a look what’s inside. So the first thing we see when doing the Google Pixel 4 Unboxing is the phone itself wrapped in plastic. And the colour I got is the clearly white, but it is also available in Just Black and Oh So Orange.

Under the phone we have the pretty standard documentation. This includes a SIM eject tool and user guide on how to setup your Pixel.

Next up we have a set of Google Pixel USB-C earbuds and there is an adjustable loop on the earbuds which allows you to set the size of your ear so they grip to the inside of your ear better.  Also included is a USB C cable and adapter for charging the phone. This adapter has the Australia new Zealand plug. However if you are in the US you will have the US adapter. You will also get a USB C to USB adapter plug. This is helpful when transferring content with the a USB cable.

Design

The pixel 4 is a decent looking phone. I actually like the design of it. It has a low key clean look. It has matt black rails that go all the way around the side of the phone. No markings along the back just the Google G at the bottom and at the top a black square which contains the rear facing camera. As well as the coloured power button on every version.

Google Pixel 4 Unboxing
Google Pixel 4 Unboxing – Display

The screen on the Pixel 4 is bigger than the Pixel 3 going from 5.5 inches to 5.7 inches. Its also got more rounded corners and it doesn’t include the annoying notch that some other phones have.

The Screen

It’s a FHD+ flexible OLED display at 444 pixels per inch and contains another big upgrade which is called Smooth Display. Smooth Display refreshes the display at 90 Hz instead of the normal 60 Hz this means the scrolling and movement of the screen will look somewhat smoother than normal. The downside to high refresh rate is the battery life. More power is needed to refresh the screen more often and thus this feature has been blamed for the Pixel 4s poor battery life.

Playing Games!

You can turn this feature off at least under the Advanced Display settings. I found it hard to tell the difference when looking at the phone in person so maybe this isn’t such a big deal for normal use.

The phone doesn’t have a finger print sensor which I thought would be quite annoying. But it does have the fastest face unlock of any smart phone.  It does this by detecting movement earlier with a little sensor called Motion Sense. This sensor detects moment early and prepares the phone to detect a face. Once it detects your face the phone unlocks it works really well.

Motion Sense

You can turn Motion Sense off under Settings System and you can also use this feature to skip songs, silence /snooze alarms and silence phone calls.

On the right hand side you have a coloured sleep wake power button. The colour will be different depending on which colour you buy. And below that you have the volume up and down buttons. On the left side you have the sim card slot. If you eject the slot you will see a little rubber seal which keeps water out and makes the phone dust and water resistant. This gives the pixel its IP68 water resistant rating.

On the bottom the speaker slots are lined up nicely with the USB type C port. On the top of the pixel  there is allot of action going on however its mostly hidden so the best way to show you is with a picture. You have a Face unlock IR Camera, 8 mega pixel Front facing camera, Ambient light Proximity sensor, Audio port, Soli radar chip, Face unlock dot Projector, Face unlock IR Camera and Face unlock Flood illuminator.

Audio

The speakers sound really good and here’s a quick sample.

Good for Movies!

The specs for the Pixel 4 are similar to the Pixel 4 XL they both have the Snapdragon 855 cpu and 6 GB of Ram. Of course to view video on the screen and play games you will need to help of a GPU and the Pixel 4 comes with the Adreno 640 chip. This also gives us a pretty solid improvement over the Pixel 3. Both the Pixel 4 and XL come with a storage options of 64 GB or 128 GB.

Battery

Battery size has been downgraded from a 2915 mAh battery on the Pixel 3 to a 2800 mAh battery on the Pixel 4. Its disappointing to say the least as the battery doesn’t seem to last as long as it should.

Camera

In terms of the two cameras on the back of the Pixel 4 you have a 12.2 mega pixel, dual pixel rear camera with a 1.7 aperture. And you also have a 16 mega pixel telephoto camera with a f 2.5 aperture. Testing out the Super Res Zoom on the camera and it does a good job zooming down the street. The Telephoto camera only has a 2x optical zoom this mean the rest of the zoom is handled by the Super Res Zoom.

The camera also has some neat new sliders for exposure and shadows adjustment. And as you can see here I change the exposure and shadows on the fly. Even when objects are closer the camera does a really good job keeping all the detail.

Lets take a quick look at the camera settings. At the bottom we have different modes. Night sight for night photos. Portrait mode for Portrait photos. The regular camera mode and a Video mode.  We also have a more setting which opens up Panorama mode. Photo sphere which is a 360 degree Panorama feature. Slow motion and time lapse mode.  Playground mode which allows you to put object within other photos.

Google Lens

And the last one is Google Lens which allows you to take photo and then it will return a Google search on the object that you photograph. As for video it will do 720p 1080p and 4K, but you will need to turn on the 4K feature in settings.

Don’t forget the Pixel 4 also support wireless charging. When using the pad you might need to ajust the phone slightly until it makes a connection.

Overall the Pixel 4 is a great phone, but I find it hard to recommend because of the small battery. I also found the software at times buggy, like when using the zoom on the camera and for no reason it would flick back to the home screen. I can imagine this happening when you are about to capture that special moment. Very frustrating.

Also guys don’t forget to check out my other videos such as Backup & restore WhatsApp messages on Android. And do me a favour hit the subscribe button and smash the bell icon.

Turn Caller ID off iPhone

Backup & Restore WhatsApp Messages on iPhone

Aorus KD25F Gaming Monitor – Cheating Stream Snipers Paradise

Hi Guys and welcome to 123, in this video I will show you how to an unboxing and first look at the Aorus KD25F Gaming Monitor.

Check out the KD25F on Amazon here 👉 https://amzn.to/2Pd7K2F

The Aorus KD25F is a 24.5 inch 240hz Gaming monitor with a 0.5ms response time. Its also  Gsync and Free sync compatible. The KD25F retails for around $400 usd and $750 aussie at the time of this video. Other features include LED Fusion lighting, Aim Stablizer and what I consider the best feature of them all OSD SideKick. Lets take a look what you get inside the box.

You get three different power plugs. So it looks to be a Chinese power plug, an Australian New Zealand power plug and a US power plug. Next we have display port 1.2 and a HDMI 2.0 cable. Its nice that you get one of each. In some monitors you will only receive one cable. And last up we have a USB 3.0 cable which powers the USB hub and OSD SideKick software.

A monitor in this price range should come with a really good stand. And the Aorus KD25F monitor doesn’t disappoint with a really solid base to the stand. More about this later in the video. Its looks a bit like a boomerang.

Next up is the arm that connects to the monitor to the base. Taking the monitor out of the box you can see it has a Energy rating of 4 stars and while on the Gigabyte website it says it uses 60 watts on average it uses about 21 watts. Which is actually pretty good for a gaming monitor.

Also in the box you get the installation guide and warranty card.

The Stand

The stand is solid as and the arm and base just slot it together. After this just tighten the screw on the base. On the back of the monitor you have a power plug with an on off switch and a Kensington lock.  You also have a toggle switch to navigate the monitor OSD which is really helpful when navigating the menus. Above that Audio and Microphone jacks. Two HDMI posts, one Display Port port! USB 3 in port and two USB 3 out ports.

On the back of the monitor itself you will find 4 screws which means the monitor has VESA wall mounting support. Helpful if you want to change stands. The stand snaps into place nicely and there is a quality feel to it. There was talk on the internet about the stand being flimsy and wolling allot and it does move when I shake like this. However after testing the monitor for about a week I didn’t find it to be an issue at all.

Once setup the monitor take up about 21 cms of desk space. This means if you have a small desk it like I do. It will sit off the wall about 21 cms. Its not a deal breaker but just something to be aware of.

Rotate the Stand

The stand not only looks great but it allow you to ajust the height. Also the pivot the monitor 90 degrees. Tilts up and down. And it can swivel 20 degrees side to side.

Aorus KD25F Monitor
Wings of excellence design

The stand has the Aorus Wings of Excellence design which looks cool. But in my opinion it lacks functionality. You can change the colour of the LEDS on the back of the Aorus KD25F monitor and the stand however they are very bright and most of the time you wont see them so they are a complete waste of time. If they were brighter you could shine them on a wall behind the monitor like I have done with my LEDs and it would make for an excellent gaming experience. The stand also has a nice built in handle, which is handy if you need to carry it.

Iam going to spend a bit of time going through the OSD SideKick because I think its really cool.

AORUS OSD Side Kick
OSD Side Kick Software – Allows greater control of Monitor settings.

OSD Side Kick – Best Feature !

The OSD sidekick software allows you to control the settings of you monitor with your mouse. You need to plug the USB into your computer for it to work but it has some great features.

The first thing you will notice the Aorus KD25F monitor is really bright, to the point of where its hard to look at. So in the OSD there is a set of seven profiles. Each of these profiles give you different settings such as Brightness, Contrast, Sharpness, Black Equalizer, Colour Vibrance, Low Blue Light and super resolution. This means you can set a really bright profile for gaming and then another low light profile for browsing the internet or working. Then you can bind these profiles to a Hot Key so you can change them on the fly. Here you can see change a few settings within the Aorus profile.

Next up we have the Gamma setting which you can change as well as the colour temperature. However, the one I want to talk about most if the Overdrive setting. The Overdrive setting controls the response time of your monitor, which is very important for RTS and First Person shooter games. You have three settings Quality, Balanced and Speed. Quality is over drive turn off and it’s the slowest setting. It has an average Gray to Gray of 5.5 ms and no overshoot. The Balanced setting has a faster response time of 3.1 ms Gray to Gray and still no overshoot so this is a great setting to use for that balance between speed and quality. Speed mode is the fastest with an average of 1.5 ms gray to gray. However you will start to see some overshoot errors and ghosting with this mode.

Ok so the next setting is Aim Stabilizer, this reduced the motion blur in fast moving games. However you cant use this feature with the FreeSync function enabled. And to be honest I couldn’t see any difference with this on.

FreeSync and G Sync

Turning on the FreeSync option will turn FreeSync or G Sync on depending on if you have AMD or NVidia graphics card. When this option is turned on it eliminates screen lag and tearing whilc playing games.

The Cross Hair option is borderline cheating. Turning this on will allow you to paint anything in the middle of the screen. So if I click on the edit button and paint a crosshair or anything else this gives an advantage over other players for sure. I was surprised how easy it was to make good Crosshairs.

PIP and PBP. This setting allows you to create a picture inside your picture or make two pictures beside each other. Lets take a look. As you can see here I now have my laptop and monitor computer screen side by side. Now the settings is picture in picture and I can change the size and the location of the picture. You can also swap your pictures around and bring the small picture to the front and large picture to the back.

Cheating Possible with the Aorus KD25F Monitor

I racked my brain thinking how this technology could be used and then it hit me. If you are a stream sniper you could use this to follow someone’s stream at play your own game. Then I realised you could watch a team mates stream and you might be able to see what enemy players are. It would be delayed slightly but still helpful!!! Again great from cheating. J

Dashboard is pretty cool. Lets say you want to keep an eye on the temperature of your CPU or GPU you can do it through the dashboard. It makes a little display which you can make it see through so it doesn’t get in the way. It’s a nice feature. Just turn off what you don’t need. For me the CPU and GPU temps were pretty helpful.

Cancel Noise

You can turn the LED indicator on and off on the monitor. Not a big deal, but I also wanted to show you that there is a mic pin hole just above it which works with the noise cancelling feature.

There is also a noise cancelling feature which people on the internet said it would be good for when you take your computer to a lan party. But I was thinking it would probably be best for those of us who intend on getting on discord with loud clacky keys. Hopefully this feature would filter out allot of that background noise.

Here is some footage of the Crosshairs in action! I will be selling the 123 crosshair on my website. Just kidding J And here is the default crosshair. Its pretty good.

Also guys don’t forget to check out my other video such as The Witcher Media PC Build. And do me a favour hit the subscribe button and smash the bell icon.

Setup XBOX controller on Apple TV, iPad or iPhone + Games

Setup DUALSHOCK 4 controller on Apple TV, iPad or iPhone

Apple Watch Series 5 Unboxing First Look

Hi Guys and welcome to 123, in this video we will show you a first look at the Apple watch series 5.
The big news for the series 5 watch is the Always-On retina display. Which allows you to always see the time and watch face.
So when the watch is sitting idea or upside down the display will dim which saves energy, but it won’t go completely off which means you can still see everything you need.

The display can refresh as high as 60 hertz and as low as 1 hertz. This is what makes the watch so efficient. Apple says that the battery life will last for 18 hours.

apple watch series 5
Refresh rate can go as low as 1 Hertz allowing 18 hours of battery life.

Cost and Sizes?


The Apple watch comes two different sizes.
40mm and 44mm. and there are heaps of different colours, cases and bands to choose from. Pricing starts at $399 for the 40mm and $429 for the 44mm in the Aluminium case.
Case types are Aluminium Stainless steel, titanium and ceramic.
And the wrist band types are Sport Band, Sport Loop, Leather and Stainless steel.

On the outside of the box you will just have the Model Case and band information.
And when you open the box you will be greeted with an embossed image of the watch face that you have purchased which is also colour matched to the model you have purchased.
The model that we have here is the Series 5 Gold Aluminium Case in the 40mm size with the Pink Sand Sport Band.

Accessories

So lifting the lid the first thing you will see are all the accessories. The USB wall adapter for charging the watch.
And to plug into the adapter you also get the wireless inductive charging puck.
Now for this Aluminium model we get a plastic puck, however with the stainless steel model you might get a stainless steel puck.
The paper work you get is very basic it shows you a setup guide and how to install the wrist band for the first time.


The last component is the Apple watch itself and its protected by a microfibre pouch. Its coloured matched to the Apple watch and it has the size imprinted on the back.
A nice feature about the wrist bands is that they should fit any model. So if you have an older band that you really like you should be able to attach it to the series 5. And if you look on the inside you should see details like the model and serial numbers.
Now you can install and remove the wrist bands by pushing a button on the underside of the watch. And you will need to move the band side to side to make sure it has latched on properly.
Next up we take a look at the watch band and we have the Pink Sand Sport Band.

Bands!

Two sizes come with the watch so you should feel comfortable not matter the wrist size.

This is the 40 mm sport band which is the same design as the original Apple watch. Another great thing to mention is that you actually get two band sizes with your Apple watch. As you can see here we have the small medium and a medium large. So that should suit most people.

Attaching the band is as easy as sliding it into the apple watch and you should feel it click into place.
In terms of setting up the watch you will need an iPhone to do this and its a fairly simple process. All you have to do is boot up the Apple watch and hold it near your iPhone.

You need an iPhone to pair your Apple watch too.

Once your Apple watch is paired just go through the setup prompts.
Underneath the watch in the centre we have a compact optical heart rate sensor which is surrounded by electrodes, this is used to measure your heart rhythm in addition to your pulse.
If we go in and start the heart rate app you will see this sensor turn green. You will also find the specs for the apple watch etched into the ceramic bottom and these include details such as LTE, GPS and 50 meters water resistant.
On the right hand side you will notice the digital crown has a little round red circle which indicates that this is a cellular model. You also have a microphone pin hole, followed by the side button.

On the left we have a speaker grill which allows better audio for two-way communication and Siri feedback.

Water resistant.

Water resistant to 50 meters.


Also another nice feature for the Apple Watch Series 5 is the watch is water resistant up to 50 meters. You can control your iPhone as well so let say you want to take a photo with your iPhone, simply setup your iPhone and open the camera app. Press the button to take a phone. You also have a three second timer, which gives you three seconds before the photo is taken.
Series 5 is the first Apple watch to come with a built in compass. This allows you to see where you are facing in the updated maps app, just like on the iphone and you can add the compass to your watch face to see which direction you are heading.

Safety Apps

You also have safety features such as fall detection, emergency sos and medical id. Every series 5 watch with cellular has international emergency calling. So you can call emergency services in 150 country’s by pressing and holding down the side button. And you don’t need your iPhone to do this.

Noise detection App

Another cool app on the Apple Watch series 5 is the noise detection app which measures the ambient noise levels of whatever environment you’re in and warns you if the sound around you is loud enough to cause hearing loss.
Here you can see the sound has gone to high and the watch starts to give a yellow warning.
So if you want to change your watch face there are heaps to choose from simply open up face gallery app on your iphone and find the face you like and add it.

Customise !

And these watch faces are configurable. So if you want to customise your complications. Just press and force touch the screen. Tap customise. Just scroll down and you can see here its changing the colours of the compass dial.
Swipe across and you will be able to configure different complications. Next up I change it from Analog to digital. Swipe across again and i can change the smaller complications. Lets see Audiobooks, Battery, Breathe I think i will stick with battery. Tap the next complication to edit it. Starts on earth find friends, heart rate. I will stick with heart rate.

And then Just tap twice to return to watch face.

Now to find your notifications just swipe down and can scroll through them.
On the side you have the side button. If you press this once it will display a list of recent apps. Again use your digital crown to scroll through them.
If you double tap the side button it will activate Apple pay.
If you tap and hold you will be able to shut down your Apple watch.


to get to your control centre you can swipe up from the bottom. In your control center you can toggle off or on your WIFI. You also have a cellular button. If you cant find your iPhone you can ping it from your watch. Check your battery and power reserve. You also have do not disturb options. Of corse there is aeroplane mode which turns off all your wireless on your watch.

My thoughts – is the battery life enough?

Is the Apple watch worth it? I don’t know. This is the first experience with the Apple watch and I have to say its a great device that does allot! However I sat it down and left it for a day without any use and when I came back to turn it on the battery was dead. For me personally I feel like the Apple watch should last for at least three days before a charged. Already I am plugging my phone in to charge daily. Do I really want another device which I have to take off and charge after 18 hours?

Also guys dont forget to check out my other videos like iPhone 11 unboxing and do me a favor hit the subscribe button and smash the bell icon.

Apple iPhone 11 Pro Silver Unboxing First Look

Transfer data Android to iPhone 2019

Transfer data Oppo to iPhone 2019

Apple iPhone 11 Pro Silver Unboxing First Look

iPhone 11 Pro Silver

Hi Guys and welcome to 123. In this video, we will show you a first look at the Apple iPhone 11 Pro Silver. While the iPhone 11 has the Pro name. Right off the bat, I am not sure that these models have enough PRO type features.

Apple have focused on four main features for this iPhone. The Display gets a small upgrade. Battery life a big upgrade. Some small design changes and the new Cameras.

iPhone 11 Pro Silver – new features

The design does grow on you. When the pictures came out of those three cameras, they looked awful. However, getting one in your hand and seeing it in person will change your mind. Another great design change is the matt finish on the back. Its such an improvement over the glossy finish. Even if that finish makes the iPhone a little more slippery. I think its worth it.

iPhone 11 Pro and Pro Max sizes and price

The iPhone 11 Pro comes in two different sizes. You have the Pro and the Pro Max. The Pro has a 5.8 inch display while the Max has a 6.5 inch display. Starting price for the Pro is $999 USD while the Max will set you back $1099 USD. They come in four different colours. Space Grey, Silver, Midnight Green and Gold. And you have three different capacity’s to choose from 65GB, 256GB and 512GB.

iPhone 11 Pro Silver
Apple iPhone 11 Pro and Pro Max

Inside the box – Accessories

So after lifting the lid the first thing see is the iPhone 11 Pro in Silver with the stunning frosted glass back panel. Normally you would see some paper work first, but this time you get to see the iPhone right away along with that new triple camera design.

Other accessories under the iPhone is the Welcome to iPhone quick guide. Which guides news users on all the buttons on the phone.  We also have the sim eject tool. And some Apple stickers.

Next up we get a set of lighting connected ear pods. In addition, the BIG news is you get the 18 watt power adapter. This means you can charge the battery up to 50% in only 30 mins. That’s a massive improvement over the smaller 5 watts adapters. I have the Australian adapter, however if your are in the US you can expect to have the US adapter.  Lastly, we have a USB C to lighting cable to support the fast charging.

The iPhone 11 Pro Silver

On the back of the phone you have the three dimensional machined glass back panel which Apple says this is the strongest glass on any iPhone. I am not going to test that but, this design does make the camera look more integrated. Inside the camera bump you will find three cameras with matching metal rings around the lenses. It is a nice look and it’s hard to tell if they are uneven or if it just an optical illusion. Don’t forget we still have wireless charging 7.5 watts.

Three Cameras, Telephoto, Wide & Ultra Wide.

The iPhone Pro is the only iPhone that has a stainless steel frame as you can see from the nice polished finish around the edges. One of the biggest new features is the battery life. Apple have added an extra 5 hours over the 10S which is a massive improvement for the iPhone. However the trade off for that is the phones are thicker and heavier.

On the left side we have the volume up and down and mute switches. On the right side we have the sleep wake power button and sim tray. However these button have been moved down slightly to make them easier to reach.

Some improvements on wireless charging, but I still had to move the iPhone around to get it to charge!

There has been some improvement with fast charging, however you still might need to move the phone around on the wireless charging pad to get it to charge. On the bottom we have a speaker on one side and microphone on the other as well as the lighting USB connector in the center.

iPhone 11 Pro Specs

Along the top once again we the earpiece which double as the second part of the stereo speakers. And these speakers sound much louder than the iPhone 10s.These phones do come with new OLED displays and they are 15% more energy efficient. But they are also brighter with 800 nits of Max brightness and can go up to 1200 nits in HDR content.The water resistance has also been improved, its still IP 68, but the depth has been doubled to four meters.

Those Cameras!

Cameras working together

So lets take a look at the all new cameras on the back. The 3 cameras all have 12 megapixels, and the camera in the top left has a F1.8 aperture with a 6 element lens an optical image stabilization. Plus we now get 100% focused pixels which helps improve auto focus in low light conditions.The Telephoto camera has a larger F 2.0 aperture and it let 40% more light into the camera.

The UltraWide camera has an F2.4 aperture and 120 degree field of view. The cameras all work together so there is no flipping between. Ill give you a demo, I start in the Ultra wide then move to Telephoto then the Wide camera. You can use the wheel to toggle up to the 2 x optical zoom, however after that it’s a software zoom. How good is it though you can see all the way down the street!!!

iPhone 11 Pro Camera Zoom

Photo Examples

And the photos come up really nice too here some examples.

Lets not forget about the new 12 megapixel front facing camera with a wide angle lens. Now its able to record 4k video at 60 frames per second plus because it’s a wider lens you don’t need to hold the phone further away to get a selfie. It also now comes with a slow motion feature so if you want to do a slowfie as Apple calls it you can.

This year’s CPU is the A13 Bionic CPU, which is a 2nd gen 7 nanometer chip and it main focus is energy efficiency. So you should see a about 20% increase in performance and about 30 to 40% improvement in energy efficiency. Of course, this improves the battery life which make gaming even better on the iPhone.

Also guys don’t forget to check my other videos like Transfer data Oppo to iPhone and do me a favour hit the subscribe button and smash the bell icon.

Fix Could not communicate with the device Move to iOS

iPhone Battery Drain – Is your iPhone letting you down?

Setup Bedtime on iPhone

Unboxing & First Look at the HP ProBook 430 G2 Laptop

This video will show you an Unboxing & First Look at the HP ProBook 430 G2 Laptop.

Hi All
I had a chance recently to Unbox the HP ProBook 430 G2 model and I must say it has a very nice sleek design, however not much has changed over the HP ProBook 430 G1 model. If you are looking for a Windows based laptop that you would use for web browsing word processing and a bit of YouTube play back then this laptop might be for you. If you are into gaming then I would suggest you probably look else where.
While this laptop can run games its more designed for corporate use.
If you did want to play games on the laptop then you would be advised to upgrade the memory in the laptop so that you have a second working memory module. Once this is done the memory will work in duel-channel mode and you will get more performance out of the GPU.
One change from the G1 model is the removal of the separate headphone and mic jack and this has been replaced with an all in one combined mic and headphones port.
The display is probably the least exciting part of the G2 while the laptop is designed for indoor use the screen just isn’t as bright as other laptops in its class.
Battery life is pretty good with this model and power consumption when the device is idle is low.

HP ProBook 430 G2 Battery

This is really good because it mean if you step away form the laptop you can expect the battery to last even if you are not using the laptop.
You can expect the battery life to last around 4.5 to 5.5 hours depending on use, so that actually not to bad.

For a more in deapth write up you can check out a great review on the HP ProBook 430 G2 at the NotebookCheck website here.
Want to buy this model? click here.

Cheers
Matt