Take Control of Your Notifications iPhone iPad iOS

Hi Guys and Matt from 123myit here. I had a funny story recently where a family member said. I was getting to many notifications on a chat group, so I had to leave the group. And, my reply was, why didn’t you turn off the notifications iphone or adjust them? So, I wanted to do a video which will hopefully help you guys take control of your notifications and stop them from being annoying and distracting.

Lets get started.

Notification Centre – Notifications iPhone

You can find Notification Centre by swiping down from the top left. In addition, to edit a notification directly you can just swipe across on it and you will get more options depending on the type of notification.
Notifications iPhone

So if you get a SMS notification on the messenger app swipe across on it and you will have an Options button.  You can Mute for one hour or mute it for the whole day. You can turn off all notifications for messages or you can tap view settings.

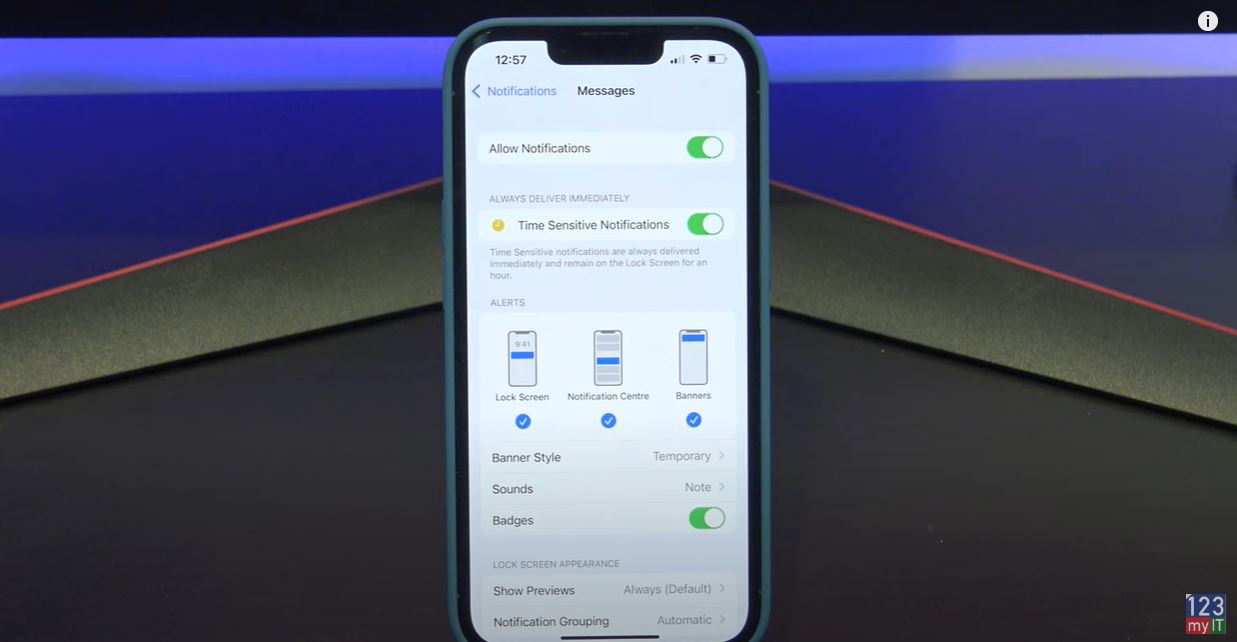
This will take you into the Notification settings for the App that you were in. In this case, it’s the notification settings for Messages. IF you want to find the notification settings for all apps. You can find it under Settings and then Notifications.

Toggle Notifications – Notifications iPhone

At the top, you have a blanket toggle button which turns the notifications on or off for the app that you select. Therefore, if I turned this off I would not get any notifications for Messages.

Always deliver immediately, will deliver messages even in you have Focus setup with Do Not Disturb. So if you leave this turned on it will Deliver the message straight away and leave it on the locked screen for 1 hour.

I will do a video on Focus at some stage so hit that Subscribe button. Alright lets learn about what the different alerts are. You have Lock Screen, Notification Centre and Banners. Lock screen is the first screen you see on your phone when you unlock it. Notification Centre you can find when you swipe from the top left and I will show you banners when I send a text to my phone. Ok cool there it is at the top that is the banner. If you do not want any of these notifications to show up you can turn them off here. So if you wanted the messages to not show up on Lock Screen you would turn that off.

Choose your banner style

If you tap on banner style. This will allow you to set the banner as persistent. This means it will stay up as a banner until you read it. So it will sit at the top of your screen until you do something with it.

If you go into sounds, you can change the vibration of an alert as well as the sound it make when it comes in.

Badges, Badges are the little round red circles that appear on your app when you have an unread message. These are good on messages but when I had these on my emails it showed 12000 unread emails which was rather annoying. So I have this turned off on my emails.

Next is locked screen appearance. Show previews you can set to Always When unlocked or never.

Show notification on the locked screen

Always means it will show up on the locked screen. This can be a privacy issue. If you do not want others to read your message I would set these to When unlocked or never.

Notification Grouping allows you to group your notifications iphone. You can group by App or turn groups off. The last option and possibly the most annoying is Customise notifications and then repeat alerts.

Repeat sounds on messages

In here you can control how many times your messages will make a sound when a message comes in. If you do not pick your phone up and check the message when it comes in the first time it will send another alert two mins later. This could be why people get overwhelmed and think that they are getting so many messages. For me I would set this to never. Its probably the main reason people are addicted to their phones.

Guys if you want to see other iPhone iPad tips such a how to arrange your iPhone icons the easy way click on the video. And do me a favour if you know anyone who might like this video please share it will them, hit the subscribe button and smash the bell icon.

HP ProBook 640 G8

Transfer WhatsApp iPhone to Samsung

How to use Apple Reality Composer on your iPhone or iPad

Hi Guys and welcome to 123myit, in this video we will show you, how to use Apple’s Reality Composer. Apple’s Reality Composer allows you to create and interact with Augmented Reality on your iPhone and iPad. This allows you to blend virtual content with the world around you.

In this video, we will show you how to download Reality composer.

  • Create a project
  • Select an Object
  • Add Looks and Behaviors
  • Place your Object in AR
  • Before you start make sure that the iOS version of your iPhone or iPad is 13.2 or later.
  • Lets get started.

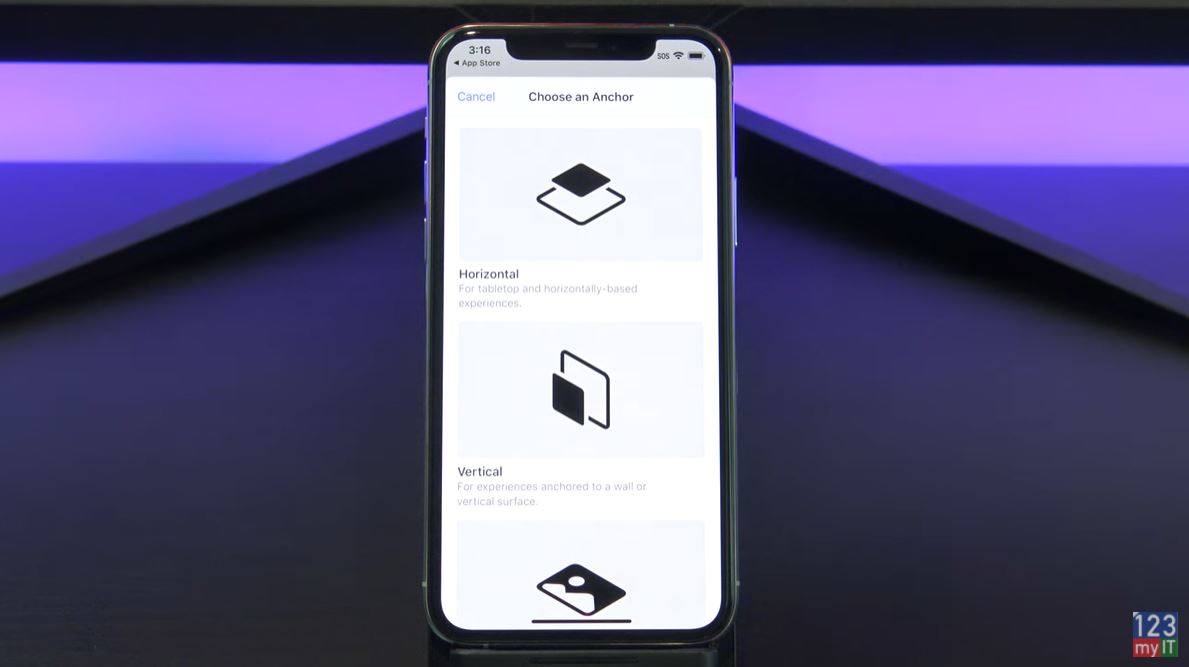
To download Reality Composer go into the App store and search for Reality Composer. Download and open it to get started. Once you have it open tap the plus start a new Project. Next, you need to choose and Anchor.

Reality composer
Choosing and Anchor

You use an Anchor to place an Object in the real world. There are a few anchors to choose from. Want your Object to be placed on a table or floor choose Horizontal. If you want to place it on a wall use Vertical. Are using a movie poster, book, brochure or packaging choose image anchor. If you want a selfie effects such as virtual hats and glasses use the face anchor.

Content Library

I am going to choose Horizontal. A square is the default Object lets delete it an add something more exciting. To delete tap and hold and then select delete. Cool, once that’s gone tap the Plus to open the Content library. Now you can select anything in here, but I am going to choose the rocket.

Adding Objects

If you want to change the look of your Object. Tap your Object and select the Cog. You have heaps of options in here, go ahead and select whatever you like. I am going to go with the realistic version. To close it press the cog again.

Lets add some action to the Object. Tap the Object and then tap the more icon. Then select Behaviours. To create a new behaviour tap the plus icon. 

Add Behaviours

A behaviour allows you to move, scale or add emphasis to your Objects. You can also create proximity triggers and other cool stuff. To make our rocket shoot upwards lets scroll down to custom. Make sure you select the Object first and then select the Trigger called Tap. Next select move rotate scale by to move the rocket upwards.

Launch Speed

Now if you want to set the Rockets launch speed move the Duration slider to the left or right. Next select the ease type. Selecting this will make the rocket go faster as it lifts off. Select Ease in. Under Position tap clear and type in how high you want the rocket to go. I am going to type 500 as its in centimetres. Make sure you press Return. To give your Behaviour a new name tap more and name your Behaviour.

Ok let place our Rocket in the real world. I want to launch it off my wireless charger. Tap the AR button and move your iPhone or iPad side to side. If its too big pinch it to make it smaller and tap and drag to move it to the right spot. Sweet now hit the play icon to set it. And tap the Rocket to launch it!  Houston we have lift off!

If you get stuck and your Rocket doesn’t fly. Go back into Behaviours and make sure you select your rocket and then choose Tap.

Also guys don’t forget to check out my other videos such schedule do not disturb on your iPhone, iPad and iPod touch. And do me a favour hit the subscribe button and smash the bell icon.
iPhone 11 Pro vs Samsung S20+ Battery Test

Optimize Windows 10 for Gaming & Performance 2020

Enable Window Zoom on iPhone or iPad

Zoom in anywhere on your iPhone or iPad.

In this video we will show you how to enable Window zoom on your iPhone or iPad.
So have you ever needed to zoom in on your iPhone or iPad to see fine text? Have you also noticed that not all apps will allow you to use the pinch to zoom function? What you can do is turn on three finger zoom or window zoom.

How does it work Window Zoom work?

You can use 3 finger double tap to zoom in on any part of your screen. So if you wanted to zoom on your main screen you can just double tap with three fingers. Once you’re zoomed in you can use one finger to move the screen side to side. However if you want to move all around the screen just tap and drag with 3 fingers.You can zoom in on anything and if you want to get back out of zoom simply double tap three fingers.

Enable Windows Zoom
Moving the screen Zoomed in with three fingers.

Turn on Windows Zoom for iOS 13

Lets go through and enable Window Zoom on iOS13 first. Go into settings and then tap Accessibility and then tap Zoom.In your Zoom menu you simply toggle the Zoom switch on. Straight away it starts to zoom just double tap three fingers to zoom back out.

Turn on Windows Zoom for iOS 12

In iOS 12 its a little different. Go into Settings, go into General and into Accessibility and then Zoom. Once again toggle your Zoom button on. In iOS12 it comes up with a little Zoom window which you can drag around with one finger.

You can test it in Safari with some fine text. Simply tap three Fingers and drag the screen around.

Ok Guys, Don’t forget to check out my other videos.

Make your iPhone iPad speak each word you type

Clean Install MacOS Catalina on any Mac

Create macOS Catalina USB Installer Drive

Make your iPhone iPad speak each word you type

Your iPhone iPad can talk!

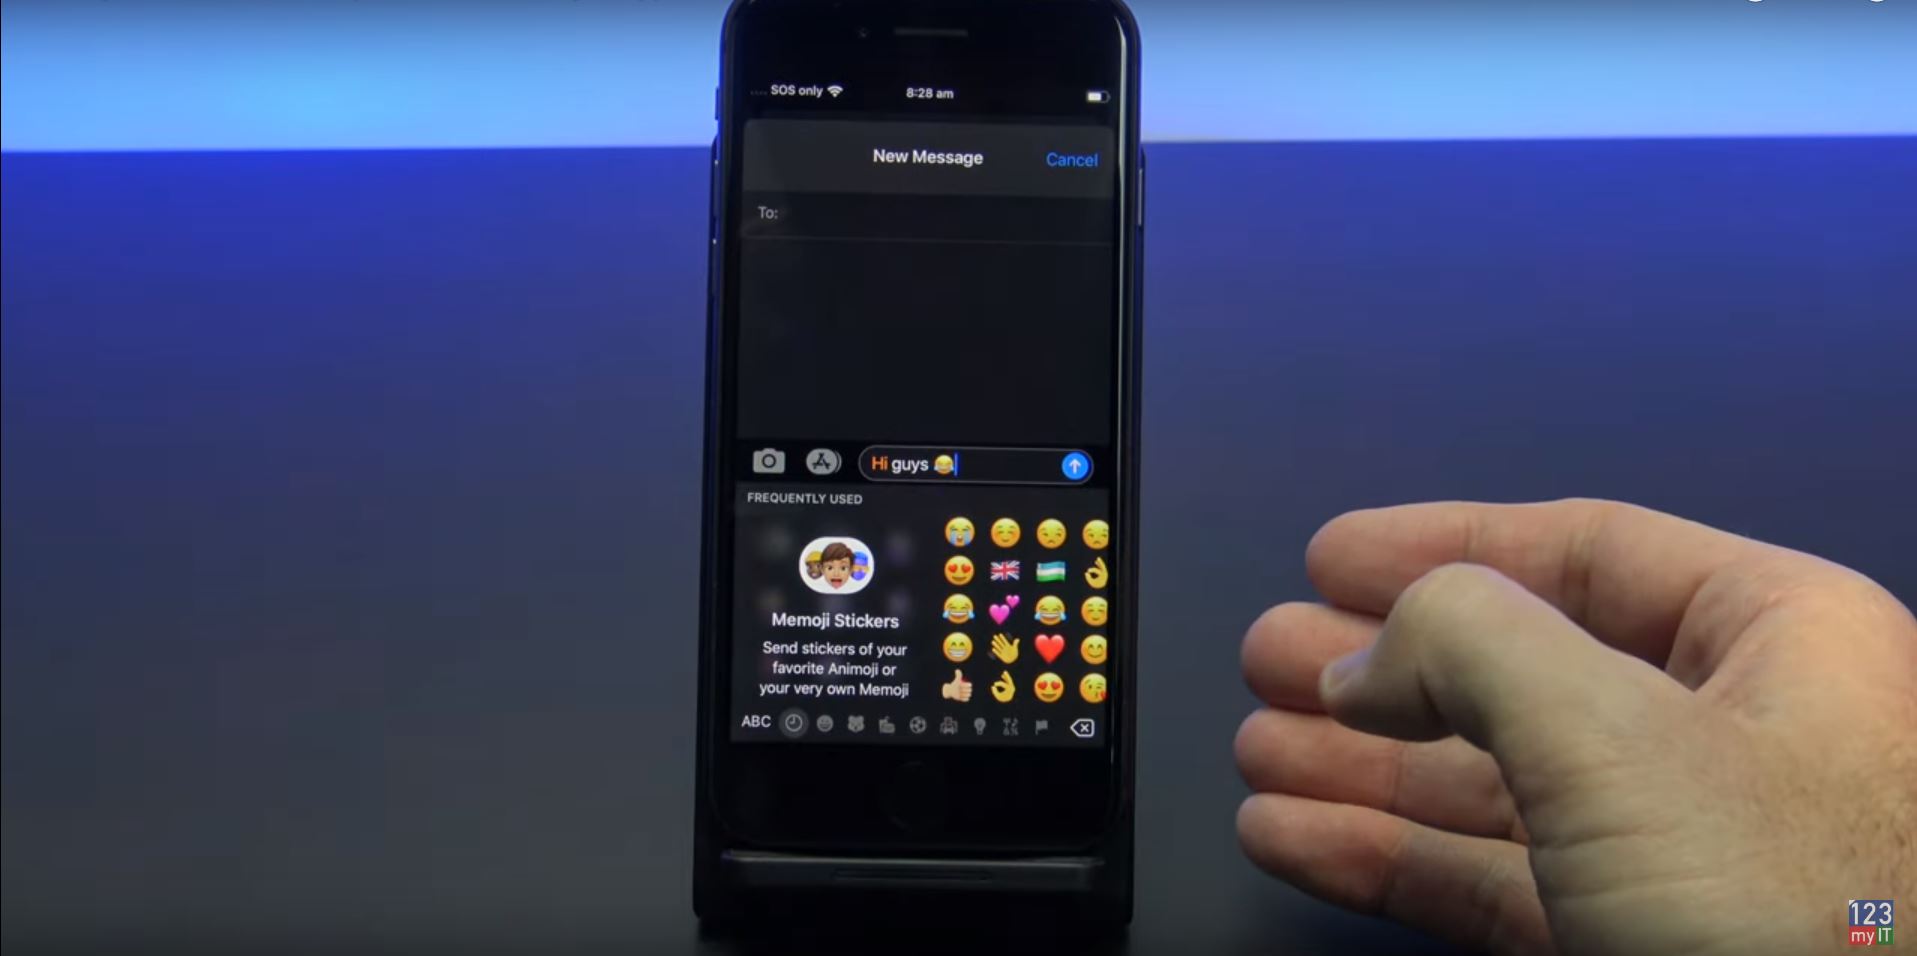
You probably didn’t know that your iPhone or iPad can speak words back to you as you type. Its pretty good its can actually do full sentences as well. It can even speak EMOJIS! LOL. So if you listen to the start of the video your get the idea of how powerful it can be. The iPhone voice does the video introduction for me.

Step 1 – iPhone iPad Speak – Turn it on

If you are using iOS 13 then you can find the speak words switch under Settings, Accessibility, Spoken Content, Toggle on Speak Selection. Then go down to Typing Feedback and toggle on the Speak words button.

iPhone iPad speak
You can even speak Emojis. 🙂

However if you are on iOS 12 you will find it a little bit different. Go into Settings, General and Accessibility. Then make sure your Speak Selection is toggled on at the top and in Typing Feedback make sure your Speak Words is turned on.

Step 2 – Turn it all off

So to turn off the Speak word function you can just reverse the steps mentions above. So that its guys go ahead and turn it on and have a bit of fun with it.

Ok Guys, Don’t forget to check out my other videos.

Clean Install MacOS Catalina on any Mac

Create macOS Catalina USB Installer Drive

Share files iPhone to Mac with AirDrop

iPhone to Android data transfer 2019 with iCloud

Moving content? make a backup first.

iPhone to android 2019

This video and article will show you how to transfer data, such as clips, messages and contacts from your iPhone to Android device.

Getting a new phone is great. But there is always the problem of moving your data from your old phone to your new one. I have done a few transfer videos before however this changes year on year depending which model phone you have. So this is the 2019 version which will hopefully make it an easy process.

Step 1 – Back up your iPhone to icloud

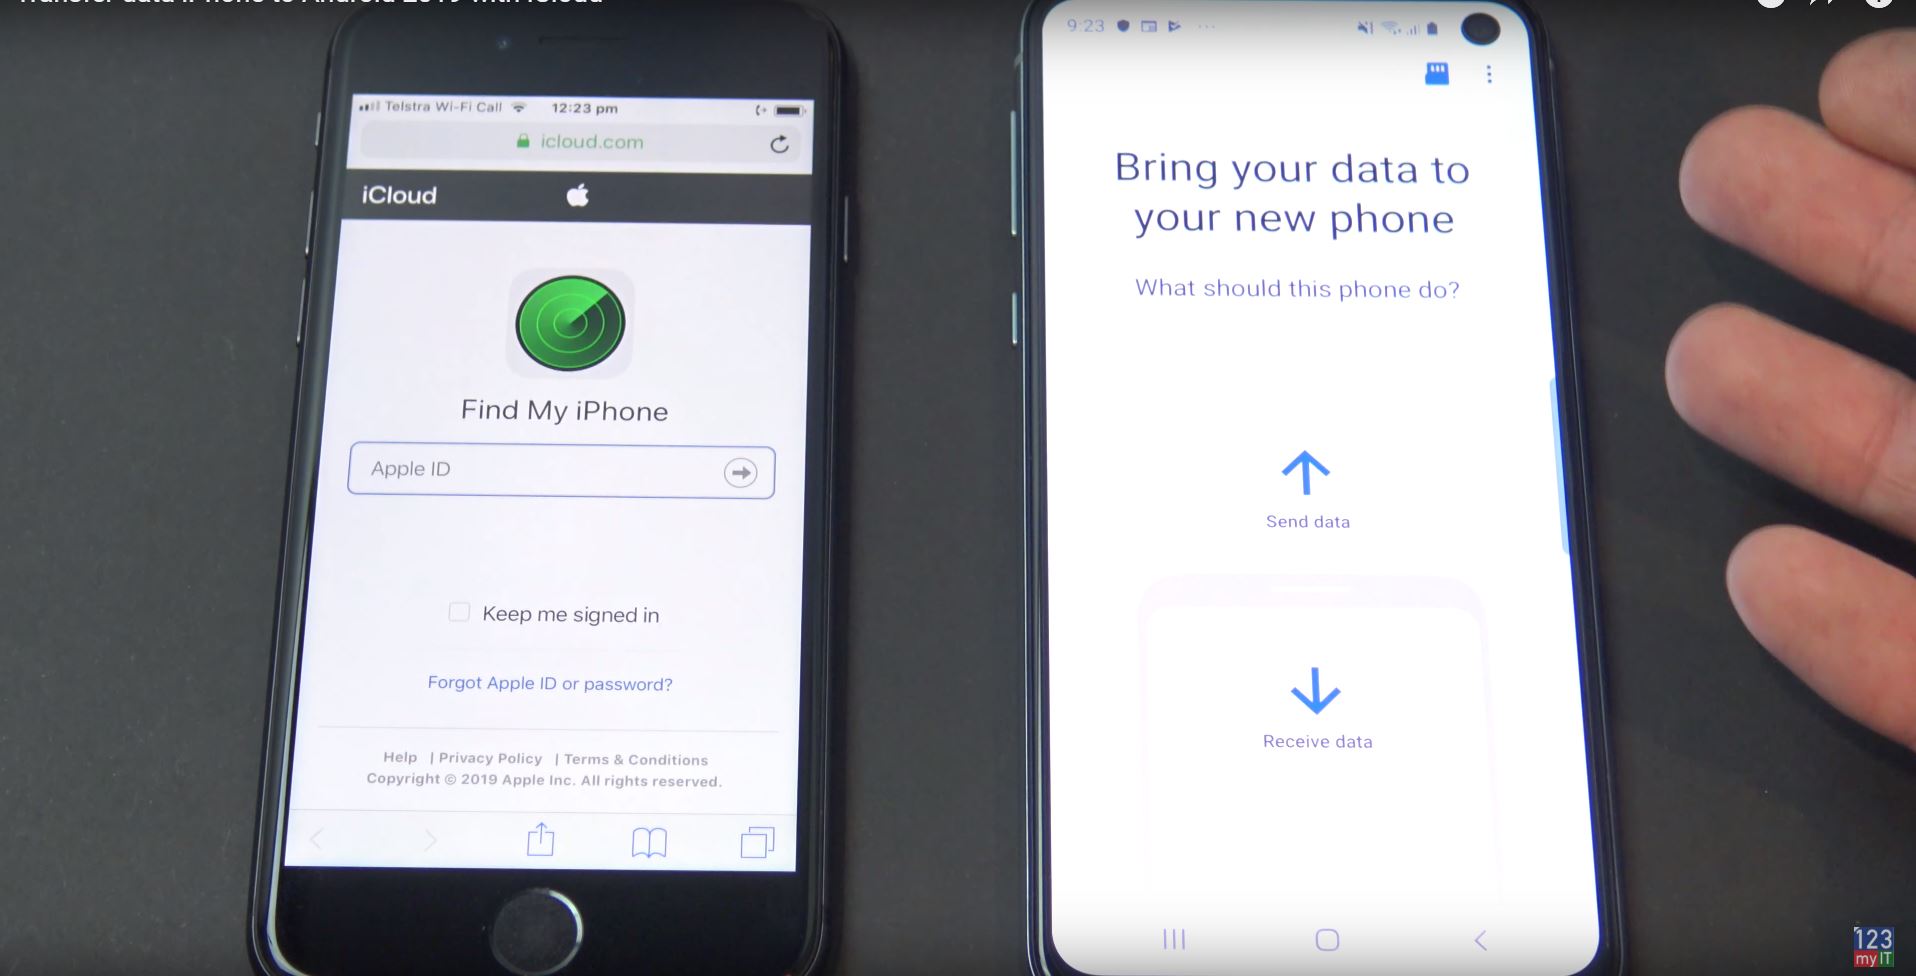
The first step is to backup your data to iCloud. You can do this by going into Settings and at the top sign into iCloud with your Apple ID. You want to make a backup of your data before you move to the next step. Also now is a good time to get rid of any data you don’t want moved over to your Android phone. In your iCloud account setting go through and toggle off anything you don’t want. Lastly go onto the iCloud.com website and check your data has been backed up. Very Important!

iPhone to android
Using iCloud to backup your data before moving it to Android.

step 2 – use smart switch app to download data from icloud to your android device.

If you don’t have smart switch on your phone already you can pick up this app from play.google.com. Direct link here. Go through the options. Bring data to your new phone. Next select the WIFI option and make sure both phones are on your WIFI.

You can also use a cable if you prefer. An option should now come up asking you to Get Connected. Choose the device you want however in this video we choose iPhone/iPad. Next put in your Apple ID. Select the data that you want to download from iCloud. Simply press Import and you are done.

Guys don’t forget to check out my other great videos.

Forgot your Passcode iPhone X, 8, 7, 6, iPad, iPod

Apple iPhone 8 – is it still good in 2019?

Fix MacBook by resetting SMC

iOS 12, Is it faster? Benchmark & Features

iOS 12, Is it faster? Benchmark & Features

Hi guys Matt from 123myit here and in this video I will go over Apples iOS 12, Is it faster? we will find out.

Ok Guys I heard that Apple latest iOS 12 update should improve device performance rather than slow it down. So I thought I would give this upgrade a shot and test it on my older iPhone 5s and see if I notice any better performance along with checking out the new iOS 12 features.

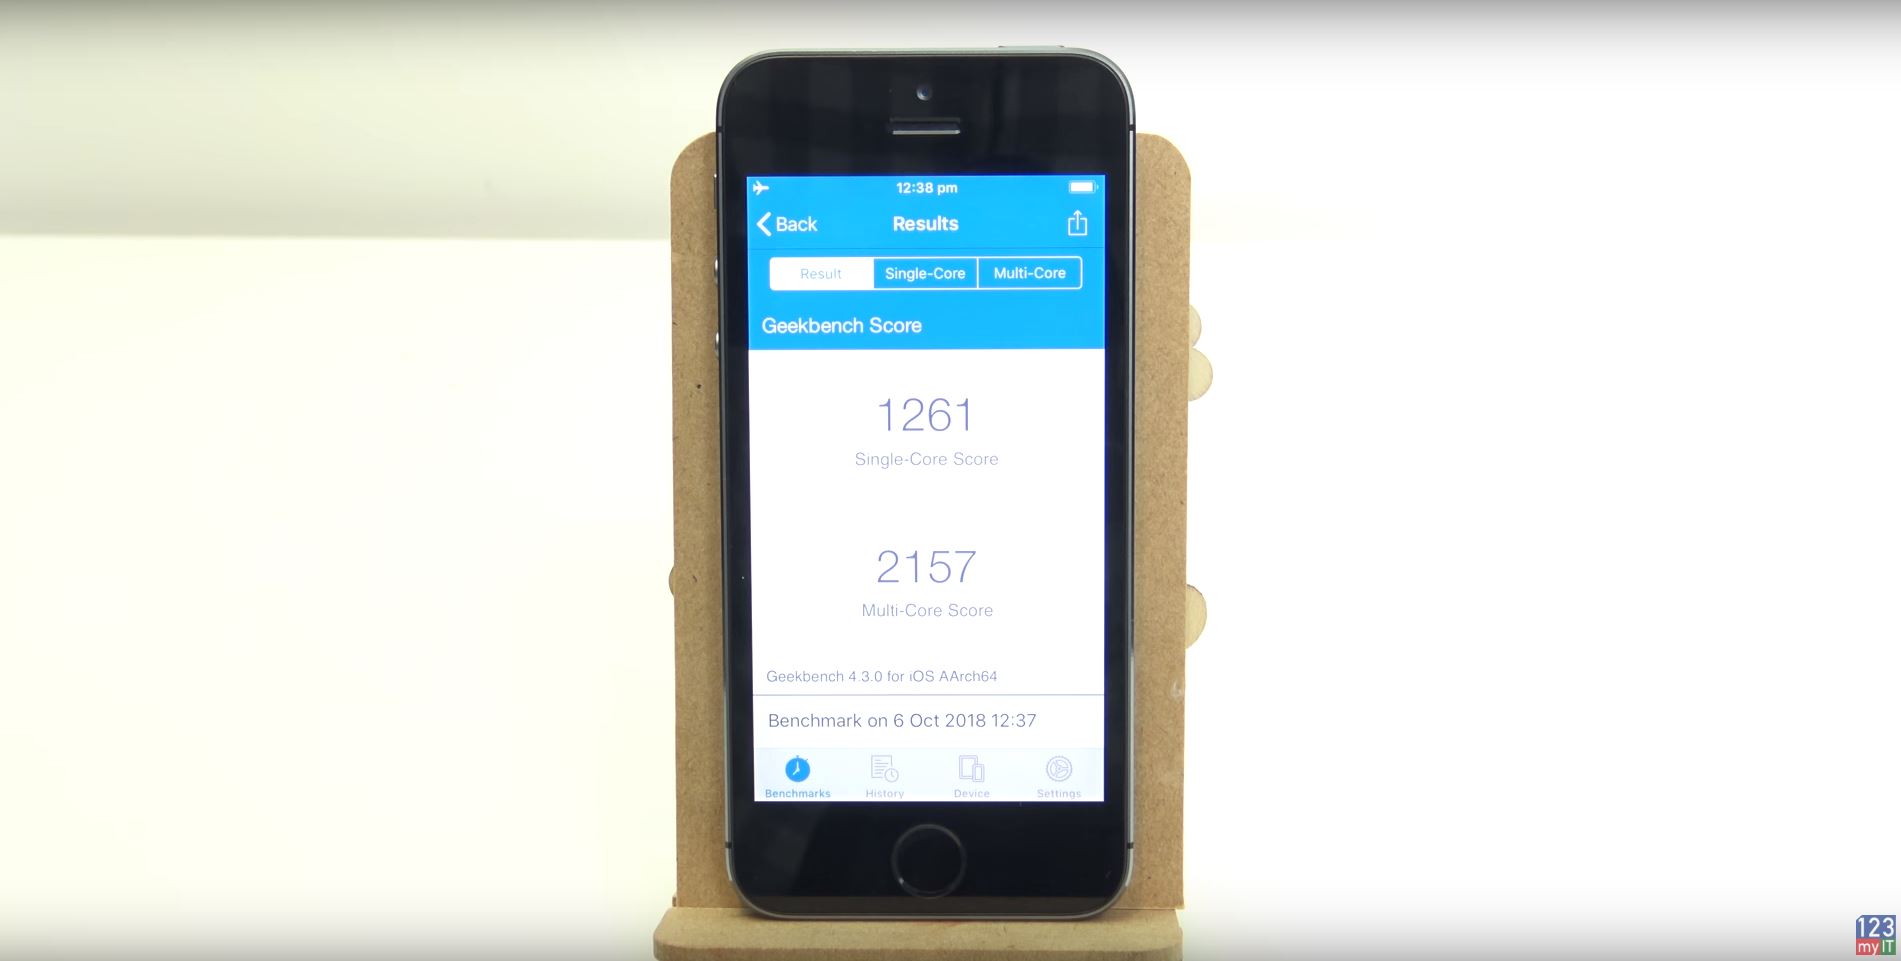
Before upgrading I ran the Benchmark and you can see the result below with iOS 11.2.

iOS 12, Is it faster?

The results from iOS 11.2 were as follows:
Single core score, 1261
Multi cord score, 2157

To upgrade your iPhones iOS to 12 you can do this by going into Settings > Software update.
And you will read in the update information it states iOS 12 brings performance improvements and exciting new features.

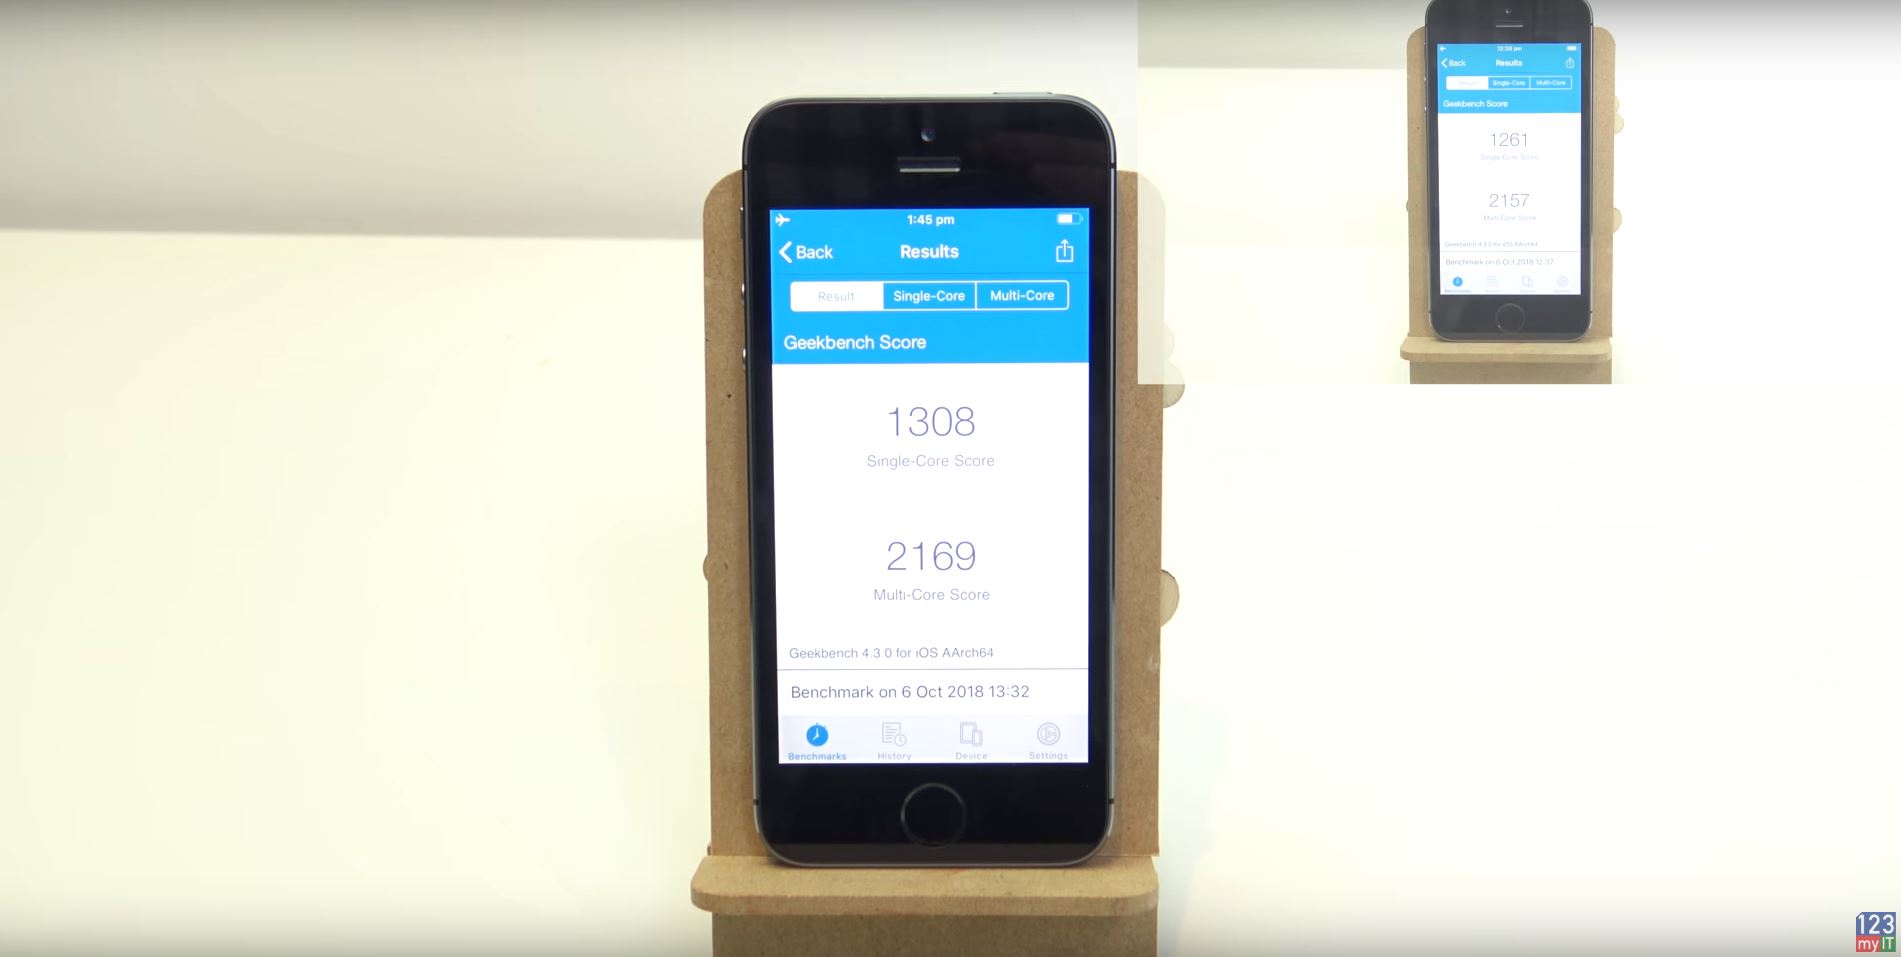
Below is a picture of the Benchmark result after the upgrade to iOS 12. As you can see the Benchmark does confirm Apples claims to being faster.

iOS 12, is it faster 2

The results from iOS 12 were as follows:
Single core score, 1308
Multi cord score, 2169

For me personally I think this is a welcomed change from Apple who was always the company seen to slow down the older devices to force customers to upgrade their iOS device. Right now this means you might get a little bit more use out of older devices which is fantastic news, however lets see what happens when Apple releases iOS 13. Will they delivery the same positive boost?

Other features that have been added to iOS 12:

Notification’s screen.
Battery usage.
Measurement screen ar kit leveler tool
New animal emojis koala and t-rex
Create your own emojis
Screen time how you are using iOS device
Limits on apps
Downtime app limits
Content and privacy restrictions
For more information on iOS 12 check out Apple’s website here.

Erase passcode on iPhone, iPad, or iPod touch with iCloud

Erase passcode on iPhone, iPad, or iPod touch with iCloud

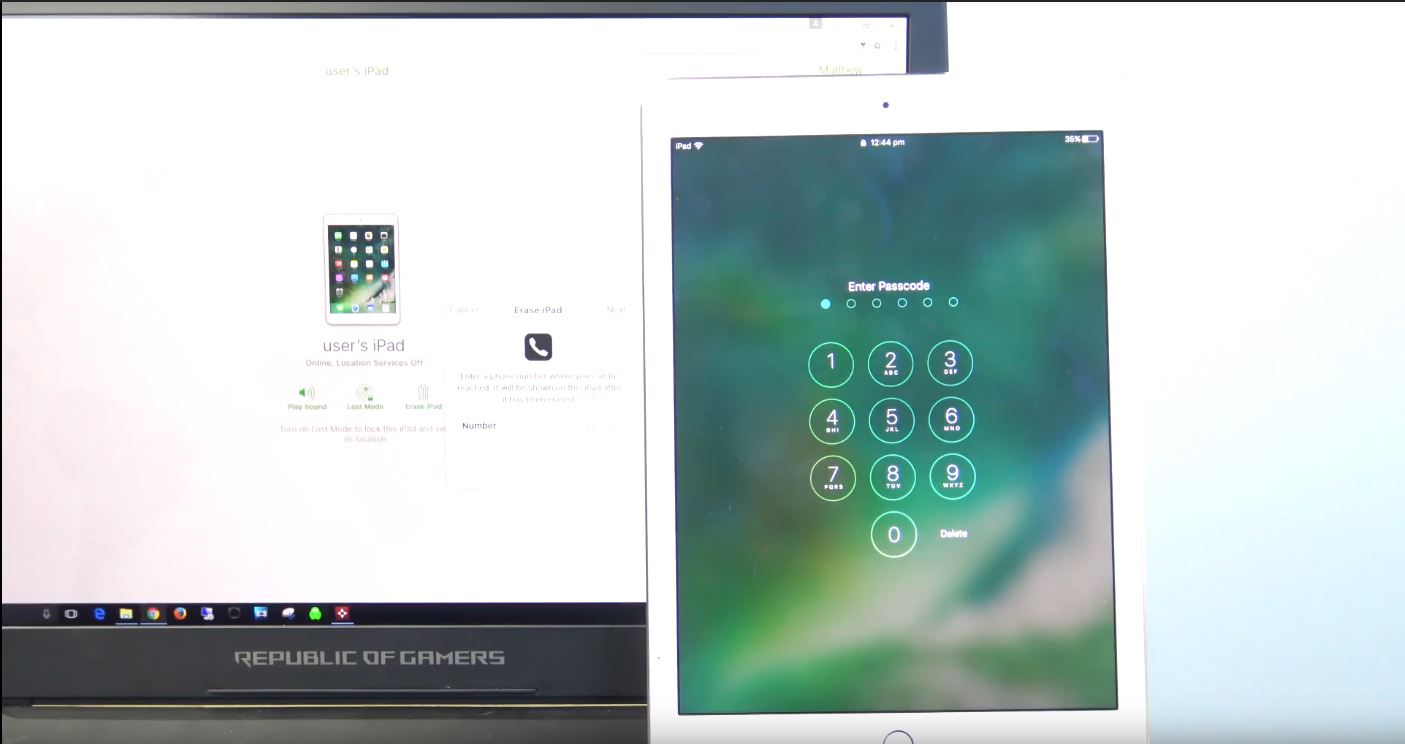
This video will show you how to erase passcode on your iPhone, iPad or iPod touch by erasing your device with iCloud. This is helpful if you have forgotten your passcode or don’t know what it is.
This video if only for people that have attached their iPhone, iPad or iPod touch to an iCloud account. If you have not setup your device with an iCloud account then you would need to look at the other video on this website the erase passcode with iTunes account here.

Erase Passcode iCloud

To erase passcode with iTunes click here.
To erase passcode with Recovery mode click here.

Transfer data from iPhone to Android with iCloud

Transfer data from iPhone to Android with iCloud

LINK: How to backup with iCloud

This video will show you how to Transfer data from iPhone to Android using Apple’s iCloud service.