Hi Guys and welcome to 123myit, in this video we will show you, how to use Apple’s Reality Composer. Apple’s Reality Composer allows you to create and interact with Augmented Reality on your iPhone and iPad. This allows you to blend virtual content with the world around you.
In this video, we will show you how to download Reality composer.
- Create a project
- Select an Object
- Add Looks and Behaviors
- Place your Object in AR
- Before you start make sure that the iOS version of your iPhone or iPad is 13.2 or later.
- Lets get started.
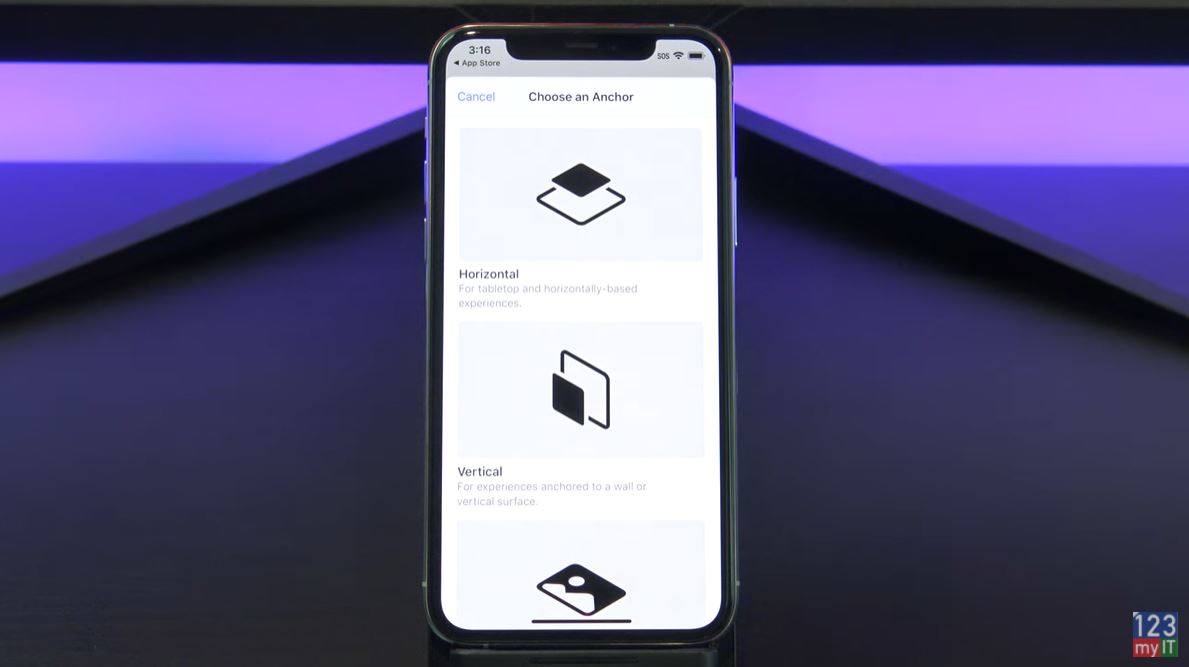
To download Reality Composer go into the App store and search for Reality Composer. Download and open it to get started. Once you have it open tap the plus start a new Project. Next, you need to choose and Anchor.

You use an Anchor to place an Object in the real world. There are a few anchors to choose from. Want your Object to be placed on a table or floor choose Horizontal. If you want to place it on a wall use Vertical. Are using a movie poster, book, brochure or packaging choose image anchor. If you want a selfie effects such as virtual hats and glasses use the face anchor.
Content Library
I am going to choose Horizontal. A square is the default Object lets delete it an add something more exciting. To delete tap and hold and then select delete. Cool, once that’s gone tap the Plus to open the Content library. Now you can select anything in here, but I am going to choose the rocket.
Adding Objects
If you want to change the look of your Object. Tap your Object and select the Cog. You have heaps of options in here, go ahead and select whatever you like. I am going to go with the realistic version. To close it press the cog again.
Lets add some action to the Object. Tap the Object and then tap the more icon. Then select Behaviours. To create a new behaviour tap the plus icon.
Add Behaviours
A behaviour allows you to move, scale or add emphasis to your Objects. You can also create proximity triggers and other cool stuff. To make our rocket shoot upwards lets scroll down to custom. Make sure you select the Object first and then select the Trigger called Tap. Next select move rotate scale by to move the rocket upwards.
Launch Speed
Now if you want to set the Rockets launch speed move the Duration slider to the left or right. Next select the ease type. Selecting this will make the rocket go faster as it lifts off. Select Ease in. Under Position tap clear and type in how high you want the rocket to go. I am going to type 500 as its in centimetres. Make sure you press Return. To give your Behaviour a new name tap more and name your Behaviour.
Ok let place our Rocket in the real world. I want to launch it off my wireless charger. Tap the AR button and move your iPhone or iPad side to side. If its too big pinch it to make it smaller and tap and drag to move it to the right spot. Sweet now hit the play icon to set it. And tap the Rocket to launch it! Houston we have lift off!
If you get stuck and your Rocket doesn’t fly. Go back into Behaviours and make sure you select your rocket and then choose Tap.
Also guys don’t forget to check out my other videos such schedule do not disturb on your iPhone, iPad and iPod touch. And do me a favour hit the subscribe button and smash the bell icon.
