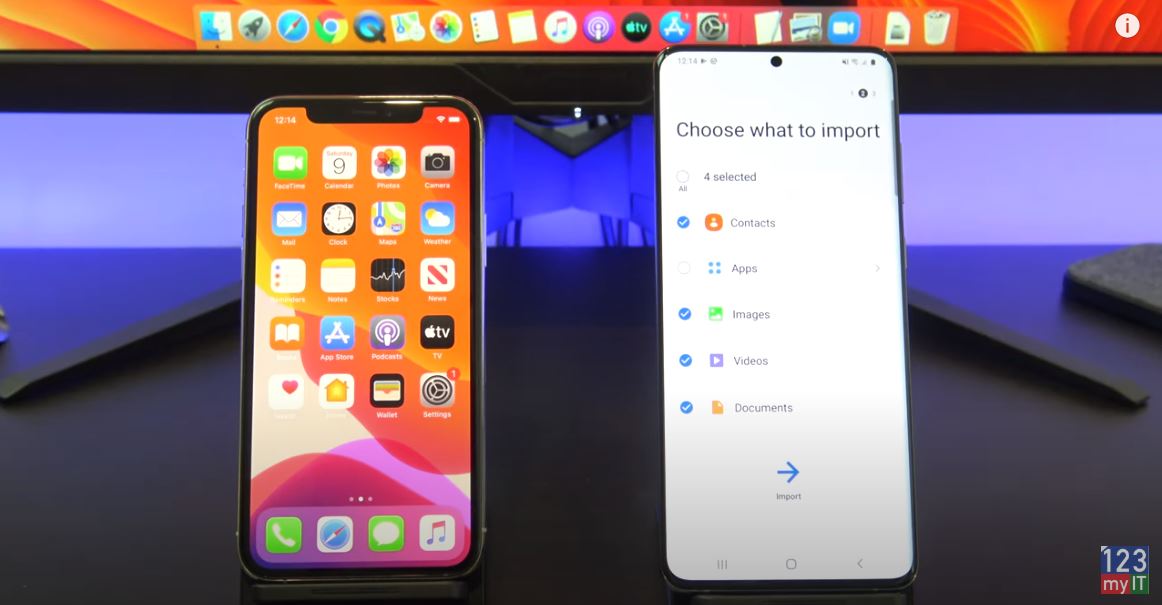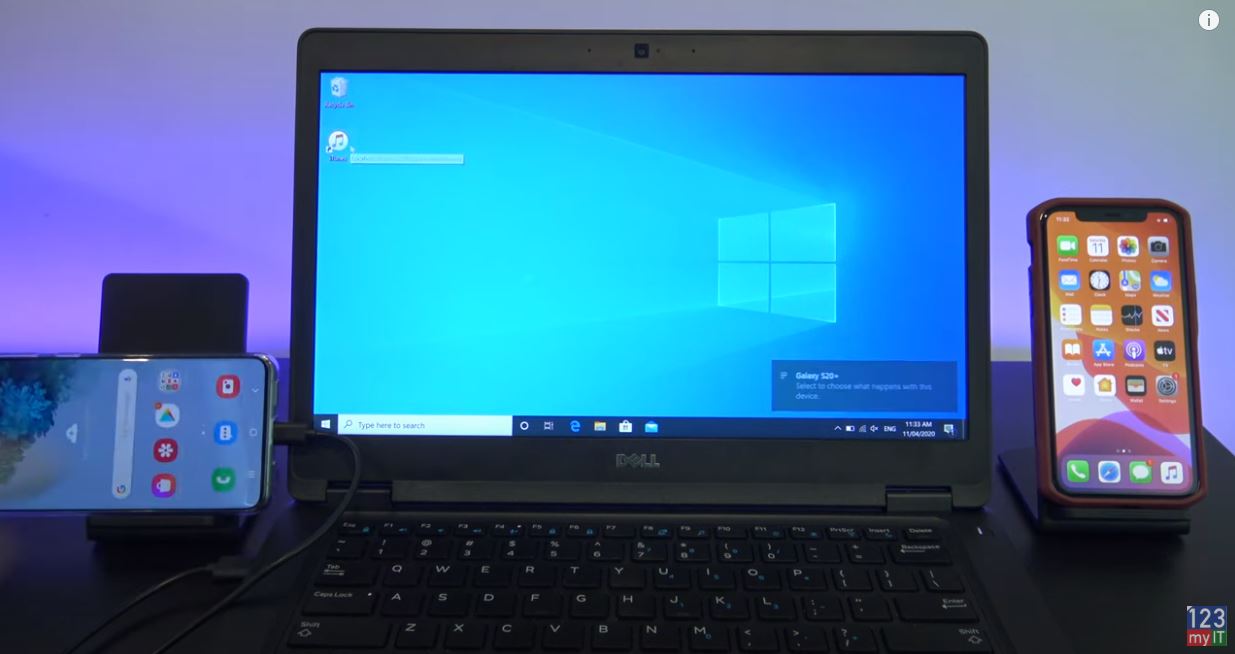
Transfer Data iPhone to Huawei

Hi guys and welcome to 123myIT. In this video, we will show you how to transfer data from iPhone to Huawei.

What can you copy across? iPhone to Huawei

Ok guys by following this video you will be able to transfer Contacts, Photos, Videos, Calendar items and more from iPhone to Huawei. Let get started. If it’s a new phone we will need to do a reset first to start to copy the data. If you don’t want to reset you phone skip to the 3 min mark on this video. And open the Clone phone app.

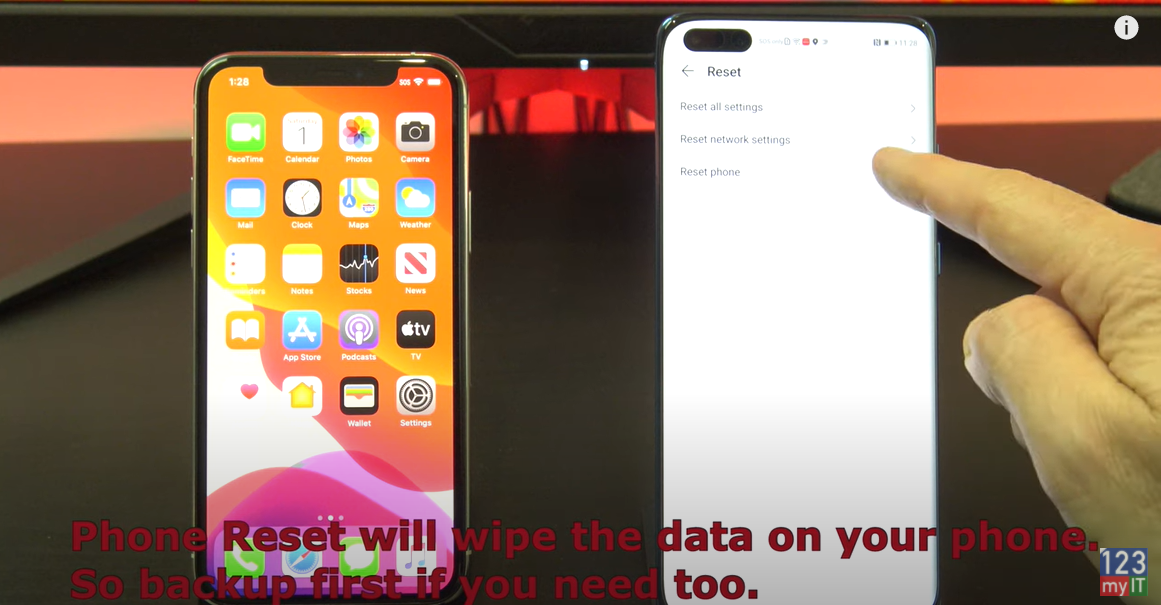
. To reset the phone go to Settings, Then System and then reset. Resetting your phone will wipe the data on it so make sure you back it up first if you need too. While that’s doing a reset go into the App store on your iPhone and download Clone Phone.
iphone to huawei reset
A reset will wpie your data.

Move data from another device

Now that your Huawei phone has reset itself follow the prompts to setup your phone. Once you get to the data import screen, tap move data from another device. Tap on iOS iPad. Press next and then start up Clone phone on your iPhone.

Tap agree and then tap Allow to give Clone phone access to your data so it can move across to the Huawei phone.

Next tap on this is the old phone. And then tap continue. On your Huawei phone do the same thing tap allow. Grab your iPhone and scan the QR code. Tap join on your iPhone and then select the data you want to copy across. I only want to copy the contacts across. Tap transfer and then tap yes.

Awesome you have now transferred all your data from your iPhone to your Huawei phone. If you don’t want to reset you phone just open the clone phone app on both phones. Allow on both phones and tap this is the old phone on your iPhone. Tap continue and tap This is the new phone on your Huawei phone. Tap iOS iphone and tap next. Again go ahead and scan the QR code with your iPhone. Just go ahead and select what you want to transfer. Tap yes

Guys, don’t forget to check out my other videos such as Everything Huawei P40 Pro. Also do me a favour if you know anyone who might like this video please share it will them, hit the subscribe button and smash the bell icon.

How to Record your Screen on a Mac

Setup & Reset Screen Time Passcode on iPhone iPad & iPod Touch
Everything Huawei P40 Pro in 3 Minutes

Hi guys and welcome to 123myIT. In this video, we will show you everything you need to know about the Huawei P40 Pro in three minutes. Huawei released three different versions of the P40, there the P40, P40 Pro and P40 Pro Plus. Pricing for the base P40 model starts around $700 USD and it comes in five different colours, Silver, Gold, Blue, Black and White.

The Box

On the outside of the box you will see that the phone is co engineered with Leica and down the bottom you will see explore it with App Gallery. So Huawei is advertising their own app store in the absence of the Google stores.

Deeps Blue Sea Colour – Huawei P40 Pro

Huawei P40 Pro
Huawei P40 Pro

First up in the box you will find the P40 Pro,the colour that we have is called Deep Blue Sea. Next you get the documentation, Quick start guide, SIM card eject tool and Warranty information. Along with a clear protective case. Other accessories are Earpods with USB C connector. USB C cable and a forty watt USB C Super charger adapter. Forty watts should charge the battery from empty to 80% in thirty minutes. Not to forget that the P40 Pro supports 27 watt fast wireless charging and the P40 Pro Plus supports 40 watt fast wireless charging. To put that in perspective the wireless charger on my desk only supports 10 watts max. So 40 watts wireless charging is incredible. Both models are IP68 dust and water resistant.

OLED Screen

The P40 Pro has a 6.5-inch OLED Capacitive touchscreen. It has a 1200 by 2640-pixel resolution at 441 pixels per inch. If you compare it with the iPhone 11 Pro on the left, you can see the P40 Pro has allot more screen real-estate on its 6.5-inch OLED display. Comparing the Samsung Pro Plus model has a slightly larger 6.7-inch display.

FingerPrint ID & Face Recognition

The P40 Pro comes with fingerprint ID and Face Recognition. And you can set these up at the start. There are two options side unlock by default or direct unlock which is my favourite. Slide unlock means you will need to slide the screen to get to the Home screen. Direct unlock will take you to home screen without the need to slide.

Camera

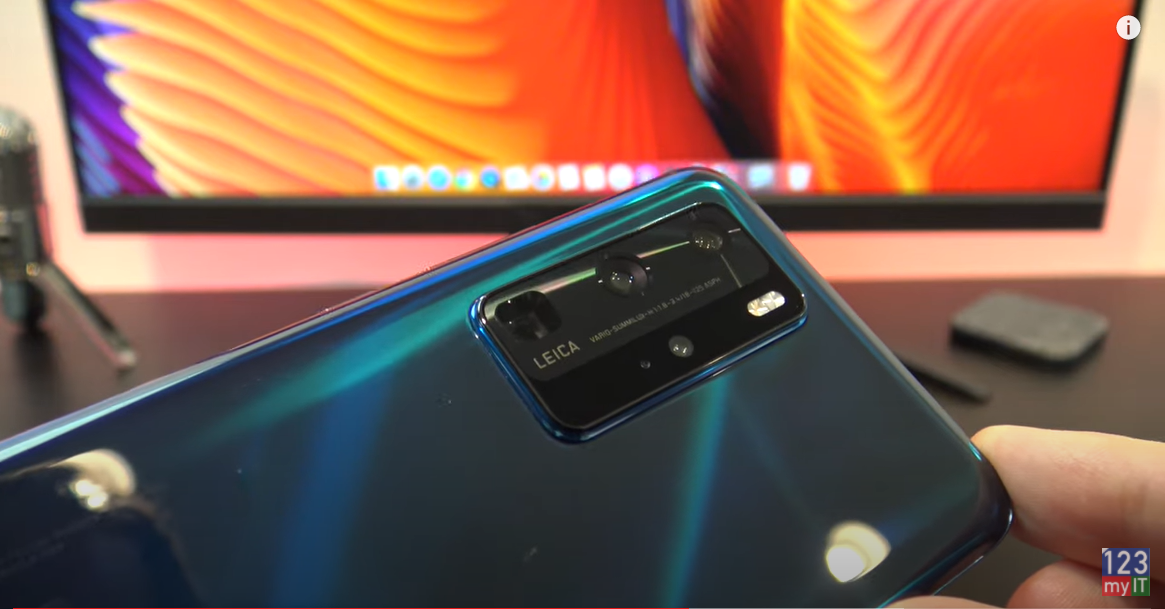
On the front top of the P40 Pro we have a 32 megapixel camera which has a F2.2 aperture. On the back of the P40 Pro you have the colour Deep Sea Blue and four cameras, all of the P40 models have a 50 megapixel Zoom lens standard. Which offers better low light performance. However the P40 Pro also features a 40 megapixel Ultra Wide lens and a 12 megapixel 5 times optical zoom. It also has a time of flight sensor, which give depth information for better portrait photos.

Here’s a side by side comparison of the back of the iPhone 11 Pro and Huawei P40 Pro.

Out of the box the P40 Pro will take amazing photos. Here are some comparisons between the iPhone 11 Pro and The Huawei P40 Pro. Can you spot the difference?

Around the Phone – Huawei P40 Pro

The right side you have Sleep Wake power button and Volume up and down button. On the left you have the Ring Silent and Volume up and down buttons. On the top you have microphone pin holes. Around the bottom you have the sim card slot, microphone, USB C slot and stereo speakers.

The P40 Pro has a Kirin 990 processor which seemed to work well for the games and movies that I tested. And a fast processor is important when playing games and videos or when generally moving around the iPhone.

Battery on the P40 Pro  is a 4200 mAh and you can expect about 13 hours between charges.

Guys, don’t forget to check out my other videos such as how to record your screen on a Mac. Also do me a favour if you know anyone who might like this video please share it will them, hit the subscribe button and smash the bell icon.

iPhone 11 Pro vs Samsung S20+ Battery Test

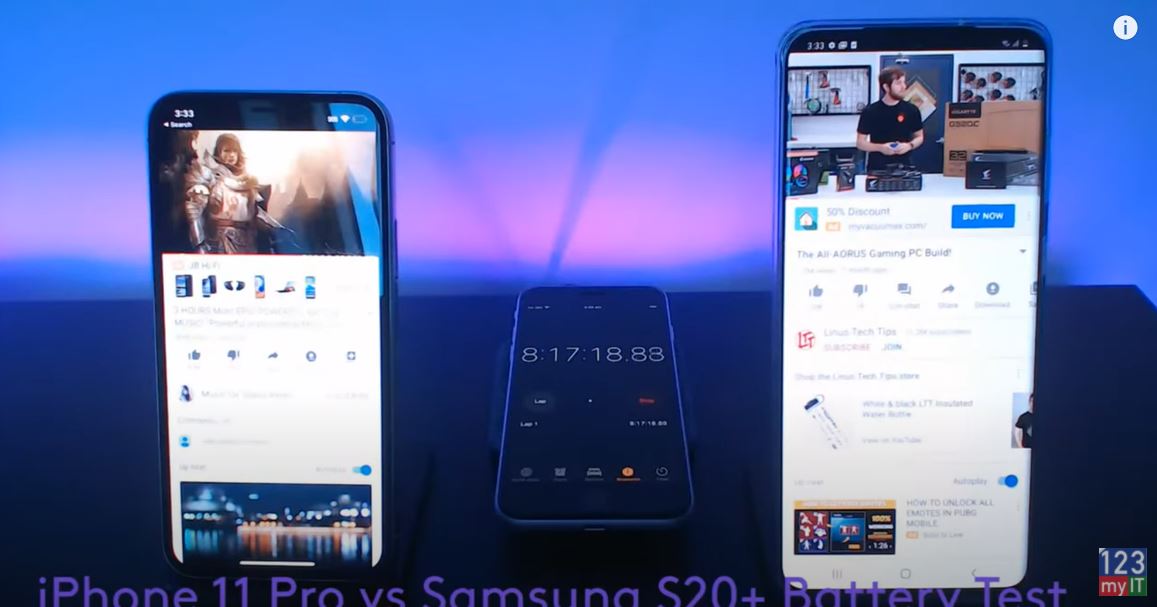
Hi Guys and welcome to 123myit, in this video we will show you, which phone, has the best battery life out of the iPhone 11 Pro vs the Samsung S20+.

iPhone 11 pro vs Samsung Battery Results

And the results might surprise you. It seems Apple might have been lying to you when they said the iPhone 11 Pro has Video playback streaming of up to 11 hours. Well in our test of YouTube streaming the iPhone 11 Pro only lasted for 8 hours 17 mins. Which is a long way short of the 11 hours that Apple suggested on their website. With the Samsung S20+ still on 26% of battery life and was the clear winner in this test. Which is pretty amazing when you consider the Samsung has a bigger screen than the iPhone 11 Pro.

iphone 11 pro vs samsung
The last few mins of the streaming battery test.

Battery Sizes

The battery’s in each phone are different sizes. With the iPhone 11 Pro being lithium-Ion 3046 mAh battery and the Samsung s20+ having a lithium polymer 4500 mAh battery. This means the Samsung’s battery is bigger. Therefore, you would expect the Samsung to win. However, I guess, the take home in this test is the information on the Apple website could be seen and misleading. Since in our test it fell short about 2 and a half hours worth.

But, how would you ever know unless you had a YouTube channel like 123myIT to tell you.

Guys please feel free to let me know any other video or articles you would want me to take a look at. I am always looking for great feedback.

Also guys don’t forget to check out my other videos such as Optimize Windows 10 for Gaming. And do me a favour hit the subscribe button and smash the bell icon.

Setup Windows Hello Fingerprint

HP ProBook 430 G7 in 3 Minutes

Transfer Data Android to Android 2020

Hi Guys and welcome to 123myit. In this video, we will show you how to Transfer data from Android to Android in 2020. Ok Guys If you are transferring data from any Android device to Samsung then you will be able to transfer Calls, Contacts, Messages, Calendar, Apps, Photos, Videos, Music and Documents. IF you transferred from Samsung to other devices, you will be able to transfer Contacts, Calendar, Photos and Videos.

Getting Started – Transfer Data Android

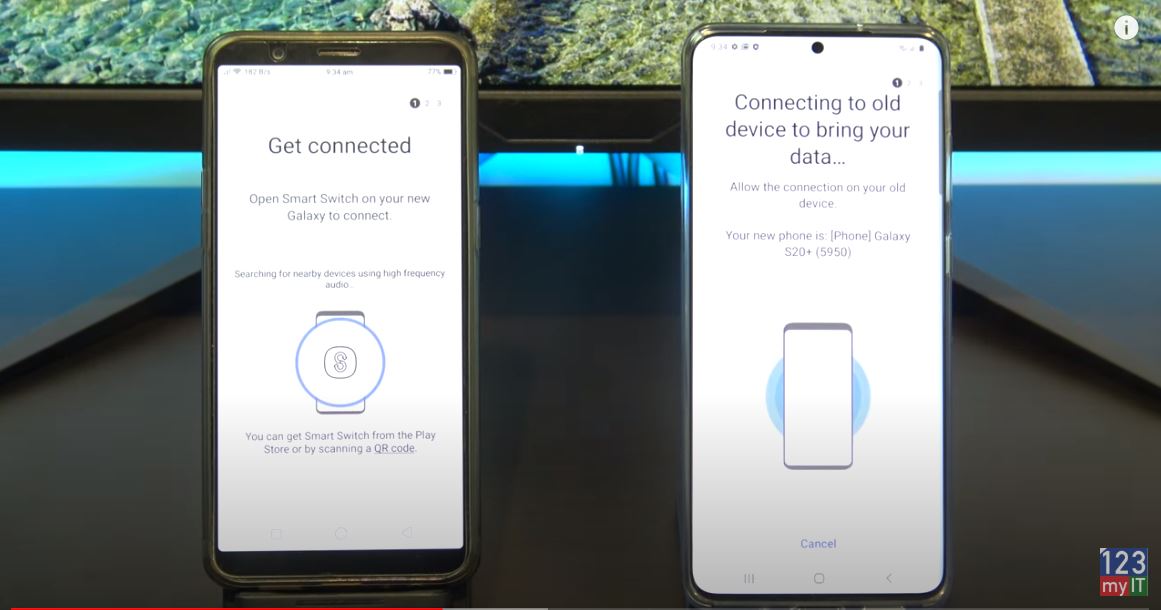
First up we are going to transfer data from my Oppo Phone to my Samsung phone and we are going to use an app called Smart Switch. Most Samsung phones will have the smart switch app already installed under Settings > Accounts and backup. But if you cant find it on your device you can download it from the Google play store.

I already have it installed so I am going to tap open and do the same on your other Android device. Tap agree and then allow. This will give the phone access to your files so it can transfer the data. Tap lets go and then tap Wireless. Make sure both devices are on the same WIFI network. Tap receive data, Tap from Android and then tap Wireless.

android to android
Get Connected Moving your data on Android

If all is going well you should see a pop up to allow access on your other phone. Just tap accept or allow. Your devices should then work out what data it can copy across. Alright choose what to bring, just deselect anything you don’t want to copy across. If you scroll down you should also get an SD card option.

Select what you want to Transfer

I am going to deselect everything and only copy across my Calls and Contacts. Once you are done tap transfer. Awesome all your stuff is copied across now. Alright lets go back the other way now. We are going to use an app called Copy my Data. You can download it from the Google play Store. I have already downloaded it so I will just start the app. Download and start the app on your other device. Tap next on both devices. Tap to or from another device over WIFI. Select your device then select copy data to selected devices. Add in the pin number. Then tap next. Deselect any of your data you don’t want to copy across. I just want my calendar and then tap next. Just tap allow on your other device. Congratulation you have just copied your data between two Android devices.

Also guys don’t forget to check out my other videos such Change Bixby side button on Samsung. And do me a favour if you know anyone who might need this video please share it will them, hit the subscribe button and smash the bell icon.

Make your Phone Number Private on Android in 2020

Copy Data iPhone to Android with iCloud 2020

Change Bixby Side Button on Samsung

Hi guys and welcome to 123myIT. In this video, we will show you to change the function of the side button on your Samsung Galaxy S20. Helpful if you want to change Bixby side button.

If you are annoyed, with the side being set to Bixby then this video will help you change it. By default the side button on your Samsung S20 and other models is set to Bixby. So lets change it.

How to change it? – change Bixby side button

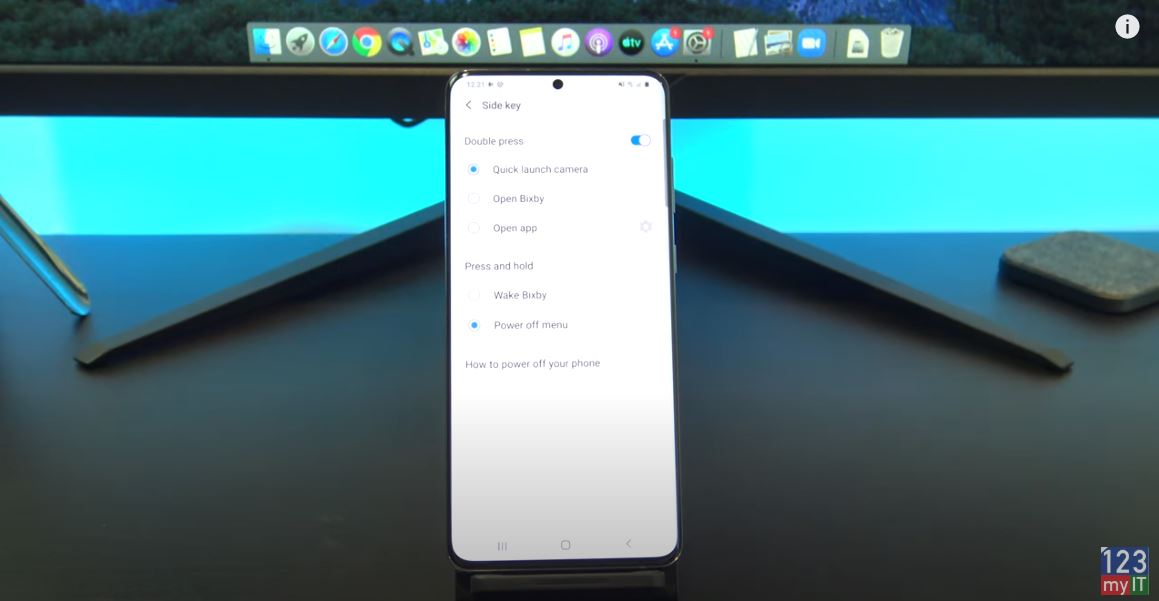
To change Bixby side button go into Settings and scroll down to advanced features. And tap side key up the top. These are your side key settings. If you want to be able to double press the side key you can turn it off by toggling the button at the top. Otherwise if its turns on you have the option of Quick launch, camera, Open Bixby and Open app. Open app can be pretty handy if you want to choose an app to quick launch. For example Google Chrome to start web browsing. If you look below that you have the Press and hold menu. This is where you can change that annoying Bixby button, as you can see I have changed mine already from Bixby to Power off Menu.

change bixby side button
The Bixby side button options.

Side button defaults

However by default yours will be set to Wake Bixby so tap Power off Menu instead and let go ahead and test it. There you go it works now. The side button has now been set back to a Power Off button.

Let try setting Google Chrome on the double press option. Awesome that works as well! Ok if you want to set it back to Bixby here’s how.

Also guys don’t forget to check out my other videos such as Make your phone number private on Android. And do me a favour if you know anyone who might need this video please share it will them, hit the subscribe button and smash the bell icon.

Copy Data iPhone to Android with iCloud 2020

Everything iPhone SE in 3 Minutes

Make your Phone Number Private on Android in 2020

Hi Guys and welcome to 123myit. In this video we will show you how to make your phone number private on Android in 2020. Ok Guys if you want to call someone’s phone but you don’t want your number to display on their phone then this video will help. There is a few ways you can hide your number so let’s get started.

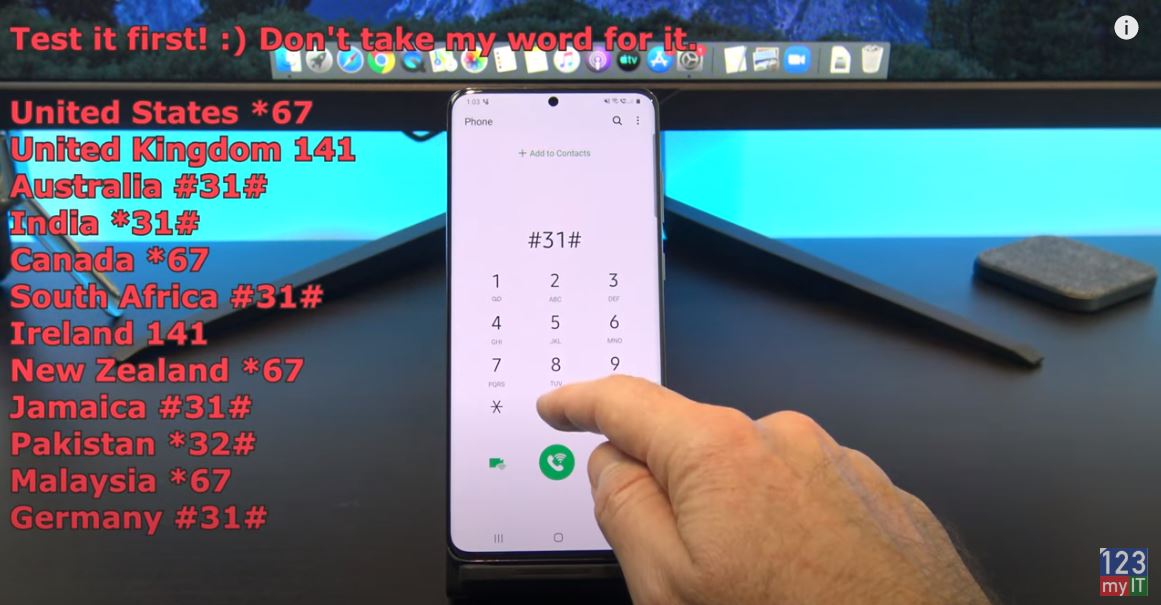
If you just want to hide your number on a single call. The you can dial a prefix before your dial then number. So for example my prefix in Australia is #31# and then the phone number I am calling. Remember this is for a single call so you would have to type your prefix every time. As always test this to another phone before you make that important call.

Private number on Android
Prefix to hide your numbers.

Make your number Private on Android

If you want to make your phone private on all calls then tap on phone and then tap the three dots. If you don’t have the three dots. Just go into the Settings Then Call Settings on your Phone. On my Samsung I tap on Supplementary services and then show caller id and then hide number. Other Android phones might be different. You might have Operator’s Call Settings, Additional Settings, and Owner number. If you can’t find it there then try one of these other locations for different Android phones. Ok before we call that crazy person lets test it to another phone to make sure its hidden.

Please always test the number before calling. Don’ take my word for it. Type *67. This code will work with virtually any North American provider.

Numbers to use – Test them first ! 🙂

*67 – United States (except AT&T), Canada (landline), New Zealand (Vodafone phones) #31# – United States (AT&T phones), Australia (mobile)[3], Albania, Argentina (mobile), Bulgaria (mobile), Denmark, Canada (mobile), France, Germany (some mobile providers), Greece (mobile), India (only after network unlock), Israel (mobile), Italy (mobile), Netherlands (KPN phones), South Africa (mobile), Spain (mobile), Sweden, Switzerland (mobile)

*31# – Argentina (landline), Germany, Switzerland (landline) 1831 – Australia (landline)[4] 3651 – France (landline)

*31* – Greece (landline), Iceland, Netherlands (most carriers), Romania, South Africa (Telkom phones) 133 – Hong Kong

*43 – Israel (landline)

*67# – Italy (landline) 184 – Japan 0197 – New Zealand (Telecom or Spark phones) 1167 – Rotary phones in North America

*9# – Nepal (NTC prepaid/postpaid phones only)

*32# – Pakistan (PTCL phones)

*23 or *23# – South Korea 067 – Spain (landline) 141 – United Kingdom, Republic of Ireland If your phone is on a GSM network (e.g., most Androids), you can always dial #31# to block your caller ID.

Awesome its working your number is coming up as No Caller ID or it will Show as private number.

Also guys don’t forget to check out my other videos such Copy Data iPhone to Android with iCloud 2020. And do me a favour if you know anyone who might need this video please share it will them, hit the subscribe button and smash the bell icon.

Everything iPhone SE in 3 Minutes

Fix Mac by Resetting NVRAM PRAM

Copy Data iPhone to Android with iCloud 2020

Hi guys and welcome to 123myIT. In this video, we will show you how to Copy data from iPhone to Android with iCloud 2020. Ok Guys so we are going to copy the data from your iPhone to iCloud and then download that data to your Android device. This will copy data such as Contacts, Messages, Free apps, Photos, Videos and Documents. We will use WIFI so make sure both devices are on WIFI.

This video & article will help you copy data iPhone to Android via iCloud in 2020.
Choose what you can copy.

Also this should with most Android phones, the process will be simular but you might have to work out which copy software to use. Ok let us start.

On your iPhone go into settings scroll to the top and sing into iCloud with your Apple id.

Sign into iCloud – Copy data iPhone to Android

Once you are signed into iCloud the next step is to do a Backup to iCloud. To do this tap iCloud and then scroll to the bottom and tap on iCloud Backup. This is where you would tap backup now to start the backup. However before you do this lets go back and select what we want to backup remember you will be copying this to your Android device.

Ok I am going to go in and turn off anything that I don’t want to backup. Ok once finished there is a few more options to turn off.

Things to turn off before you get started.

You need to turn off Turn off two-factor authentication if you have that turned on. To do this go out of settings and into Safari and browse to appleid.apple.com. Once there sign in with your Apple ID and password. Log into your account tap on Security, then scroll to the bottom, and turn off two-factor authentication. As you can see, I do not have it turned on.

The next step is to Turn off find my iPhone. This is helpful if you want to sell your iPhone afterwards. Go Back into settings, Tap Apple ID and then tap on Find my. Find my iPhone is turn on tap to turn it off. Enter your apple id and then turn it off.

The last step is to Turn off iMessages. This will stop your phone number from being linked to your Apple ID. Tap on find my, tap on Apple ID, tap on Settings. Scroll down and find messages. And then just toggle off iMessages. Go back into settings and back into iCloud again. Tap iCloud. Again go down to iCloud backup. Tap backup now to start the iCloud backup. Depending on how much data you have this might take a while. Head over to your Android device and start up the restore software. This is a Samsung S20 so the software is called Smart switch.

Smart Switch App

You can find it in the menu or if you are on other Android devices look under Settings and then Accounts and Backup or the Backup area of your Android device. Always Tap update.

Tap on Receive data and then Tap iPhone since we want receive the Data from the iPhone. You want to connect wirelessly to iCloud. The backup has finished on the iPhone now so you can close out of it. Tap done to log into your iCloud on your Android device.

Awesome it should now show you a list of data that you can copy across to your Android device. Just deselect anything that you don’t want. Great it will give you other options to copy data to your Android device. Tap next down the bottom. Its give you a warning about turning off iMessage which we already did. And then tap go to the Home screen and check if you data copied across by going into your Android device.

Guys, don’t forget to check out my other videos such as Everything iPhone SE in 3 Minutes. Also do me a favour if you know anyone who might like this video please share it will them, hit the subscribe button and smash the bell icon.

Fix Mac by Resetting NVRAM PRAM

How to join a Zoom Meeting PC & Mac

Copy Music from Android to iPhone, iPad & iPod

Hi Guys welcome to 123myIT! In this video, we will show you how to copy music from Android to iPhone, iPad and even iPod touch.

Guys this is the official way that Apple recommends to transfer you Music from Android to iPhone. However, you will need a computer to copy the music to first. Therefore, it can be a PC or a Mac.

If you need to transfer all your other files such as Contacts, Photos, Videos and Messages. I have already done a video for this and will put a link here.

Getting Started

The first step is to connect your Android device to your computer and find your music. On most devices, you can find these files in Music. On a Mac, you will need to install Android File Transfer, you can find the link on the 123myit.com website under downloads. Once you are on the Downloads page just scroll down to where it says, Android File Transfer. Then click on Download now and install the Android File Transfer software. Drag it across into your Applications folder. Once installed. Click on Go and Applications and open the Android File Transfer software. You might need to tap Allow on your Android device to give the computer access to your music folder. Close your windows and tap on the Android Transfer Software at the bottom of the screen.

Awesome you should now see the complete list of folders on your Android device. Find your music folder and drag it to the Computer desktop.

Unplug your Android

Once your music is copied, you can unplug your Android device you are finished with it now. Next, Plug in your iPhone iPad or iPod. Open up your Apple Music or iTunes. Then drag your Music folder from the Desktop into your Music or iTunes. Once that is done minimise your Music or iTunes app and the click on Go and Computer. Click on your iPhone and click on Pair if you have not done this already. Next click on the Music tab and put a tick in Sync music, then you can select Entire music library or you can do selected Albums. Once you are finished just click Apply, then go back into your iPhone and click Sync.

Cool, unplug your iPhone and check if your music copied across.

This video & article will show you how to copy music from Anrdoit to iPhone, iPad & iPod. This is helpful if you want to move data from Android to iPhone.
Using a PC to store and copy the Music.

Copying the Music on PC

The process is the same on PC but you will need to download iTunes. Open up the Android device in Windows explorer and copy the music folder to your Computer Desktop. To download iTunes you can Google it or I have put a direct link on the 123myit.com website under Downloads. Just scroll down to where is says iTunes download.

Once installed you can open it up and remove your Android device. Plug in your iPhone and tap Trust. Drag your Music folder from the Desktop into your iTunes app. In iTunes click on your iPhone then select Music and again you will have the options to choose Entire music library or Selected Playlists. Once done click Apply then click Sync. Go ahead, remove your iPhone now, and check the Music has copied across.

Guys don’t forget to check out my other videos such as how to clean and disinfect your iPhone. In addition, if you liked this video can you do me a favour and share it with someone who might need to know how to transfer his or her music. Don’t forget to hit the subscribe button and smash the bell icon.

Transfer data Android to iPhone 2020

Samsung S20 + Unboxing Firstlook Zooming Awesome!