Hi guys and welcome to 123myIT. In this video, we will show you how to fix a bricked mac or broken MacBook with revive or restore.
Guys if you are like me and you have bricked your new Mac M1 or other MacBook’s then you can try to do a restore or revive process to get it working again. You might be getting the black screen with exclamation mark and the restore URL on it. This video will show you how to fix it.
Fixing Bricked Macs with DFU mode, Like and iPhone.
Restore Revive Bricked Mac
To do a restore or revive you will need another Mac or MacBook. This Mac will push the restore to software to the broken Mac. IF you are like me and did not have a second Mac try borrowing one from a friend or you might have to go to an Apple store.
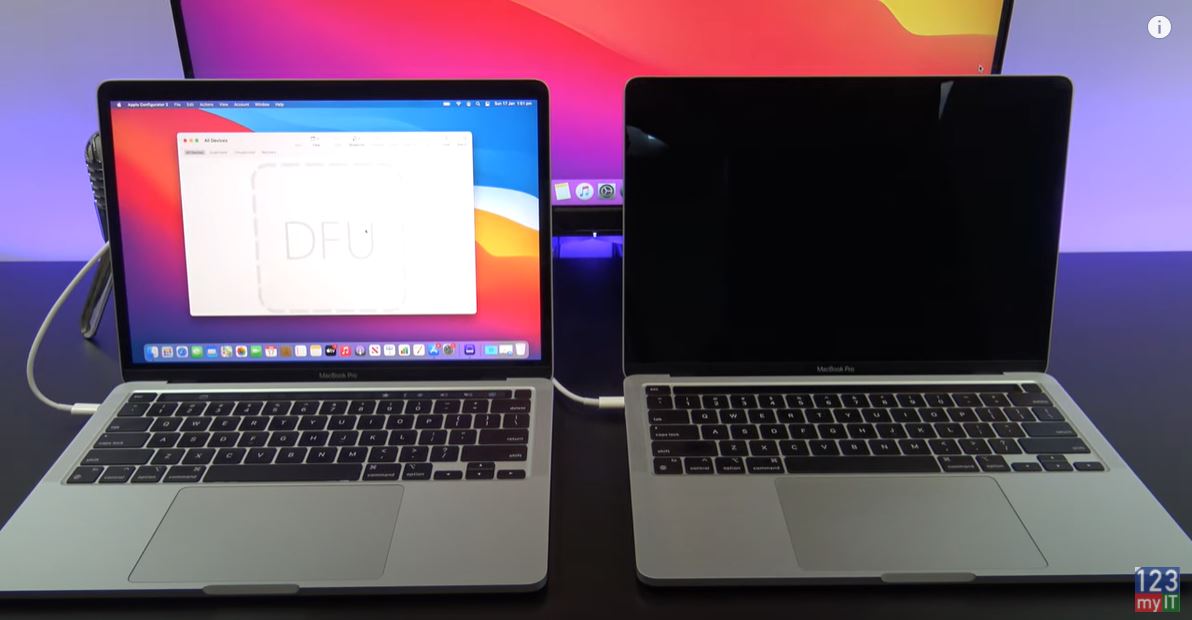
Let us get started. I am using two MacBook Pro M1 computers. You need to plug the power cable into the working MacBook on the right USB C port. In addition, plug the second USB C cable from the second MacBook to the left port. Then plug the cable from the left port into the left port of the broken Mac. Here’s a picture you might find helpful for the different Macs.
Apple Configurator
Next up download and app called Apple Configurator 2 from the App Store. Go ahead and open Apple configurator 2. Once that is done, you will need to put the MacBook in DFU mode. This can be a bit tricky.
You need to:
1. Press the power button.
2. While holding down the power button, at the same time press all three of the following keys for about 10 seconds:
The right Shift key
The left Option key
The left Control key
Other things to know are revive will revive the firmware and reinstall the latest version of recoveryOS.
Restore Firmware
Restore will restore the firmware, erase all data, and reinstall the latest version of recoveryOS and MacOS. Bricked Mac.
Therefore, if you do it wrong it will come up like this. It has the padlock there and you cannot revive or restore this Mac. Ok so let try again. Press and hold the Power button then press and hold the Right shift, Left Option and Control keys.
3. After 10 seconds, immediately release the three keys but continue to hold down the power button until it appears in Apple Configurator 2.
Your Mac in DFU mode – Bricked Mac
Awesome, you have now just put your Mac in DFU mode. Just like an iPhone. Now depending on how you broke your Mac you will need the Revive option or the restore option. To find these menus right click on the DFU sign on the first Mac and go to Advanced. Under Advanced you will have the revive option otherwise I will use the restore option.
Ok the restore revive will start and may take some time so go ahead and hit the like button and subscribe guys!
Cool, if everything goes well then you should see the DFU replaced with a padlock. Moreover, your broken Mac should now be fixed. You can go ahead and setup your Mac again.
Guys don’t forget to check out my other videos such as Setup your own Google iPhone. And do me a favour if you know anyone who might need this video please share it will them, hit the subscribe button and smash the bell icon.
Hi Guys and welcome to 123myIT. In this video, we will show you comparison between the Apple MacBook Air M1 vs MacBook Pro M1.
Before I start I already have done a video on the MacBook Air and Pro M1 model and if you want to see that video I will put a link in the top of the video and the description below.
Dirsplay – MacBook Air M1 vs MacBook Pro M1
Compare display brightness between MacBook Air M1 and MacBook Pro M1
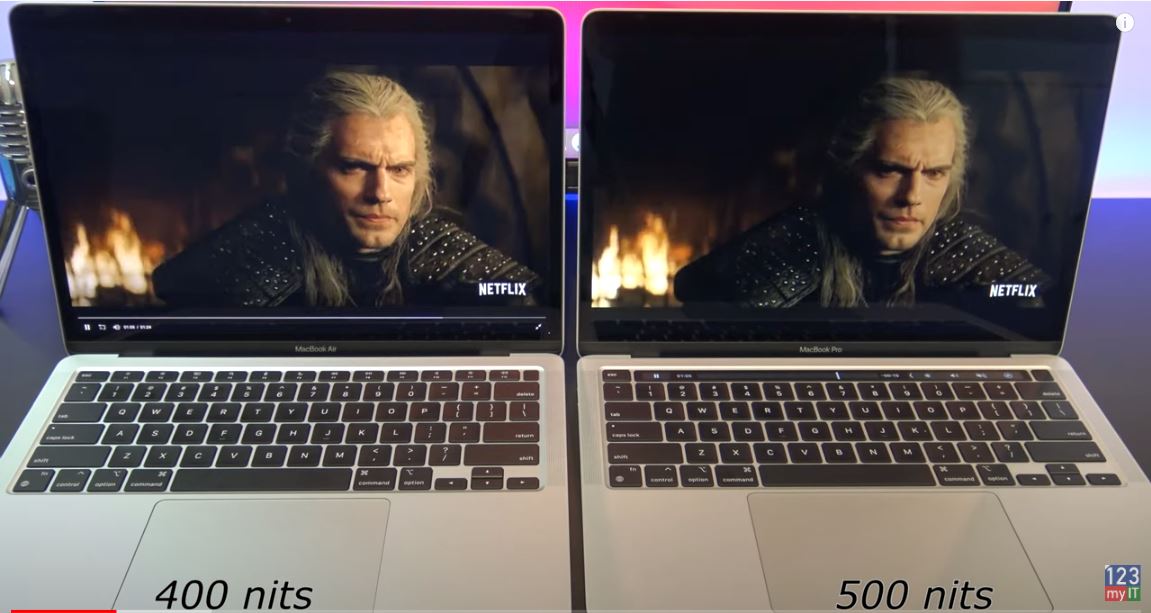
Both the MacBook Air and Pro M1 come with a 13.3-inch LED Backlit Retina Display with IPS technology. They both a resolution of 2560 x 1600 and 227 pixel per inch, but the Air has 400 nits of brightness and the Pro has 500 nits of brightness. This means you should be able to see the slightly brighter display on the Pro on the right. Its not a massive difference but if you are looking buy the Air or Pro, its something you should consider. True Tone technology also adds a warmer more realistic colour to the display.
In Terms of how heavy the MacBook Air and Pro are the Air is 2.8 pounds, which is lighter than the MacBook Pro on 3 pounds. The Dimensions are very simular for both models .16-.63 inches high on ther Air compared with .61 inches on the Pro and the are the same in width at 11.97 inches. When talking about portability the Air is slightly lighter but I don’t think the difference between 2.8 pounds and 3 pounds is noticeable.
Pricing – MacBook Air M1 vs MacBook Pro M1
Pricing for the MacBook Air M1 starts at $999 USD and the Pro is $300 more expensive on $1299. You can get the Air in three different colours Space Grey, Gold, Silver and the Pro in Silver and Space Grey. Storage options start at 256GB and go up to 2TB. Using the 256 GB model, I found the upgrade to 512 GB is probably worthwhile as I started having disk space issues after installing the Fortnite game, which requires about 90 GB. I started to wish I had the extra space. So consider this when buying the new MacBooks.
Connectivity
On the left side, you have two Thunderbolt, USB 4 ports. I would have like to see three as one could be taken up with a power adapter. There is No Ethernet, so this model is WIFI only. The USB 4 doubles as a display port so if you have a USB 4 to HDMI adapter you can plug in an external display.
On the right, you have a 3.5 Headphone Jack and there is no SD card reader so it does feel limited in terms of connectivity.
Design
The design of the MacBook Air is different from the Pro as the palm rests slope down slightly at the front. This does make resting your palms on the MacBook Air slightly more comfortable. The Backlit Magic keyboard is a delight to type on and does not bend when pressing the keys. And there is very little flex on the keyboard too. The MacBook Pro does come with a touch bar which replaces the Function keys
Both models have Stereo speakers with Wide Stereo sound. However the MacBook Pro M1 has Stereo speakers with high dynamic range. They sit both side of the keyboard and are designed to point upwards towards your ears. The speakers have the best sound on any laptop I have heard so far. They are truly amazing. Here’s a comparison. Let me know what you think in the comments below.
Trackpad
The Force Touch trackpad is nice and wide on both models however the Trackpad is smaller on the MacBook Air but I never find myself missing a click or having to click twice.
Along the top, you will find an integrated 720p FaceTime HD camera with an indicator light. This is the same webcam on both models and there is no button to manually close the webcam. MacBook Air and Pro have Touch Id built into the power button. This allows you to set a finger print which negates the need for a password and you can log in to your Mac by tapping the power key.
Also included in the box is a 30 watt USB C power adapter for the MacBook Air and the Pro has a 61 watt adapter. You can expect to get up to 18 hours of battery life on the Air and up to 20 hours on the Pro, which is outstanding.
Benchmark
Cool, let us run the benchmarks. Starting the Cinebench software really works the MacBook Air hard. But you wont hear the fan spinning because there is none.
Heres the Cinebench multicore score for the Air which was 5324 this is not as good as the MacBook Pro score which was 7780.
Here is the Geekbench CPU single core score and the Mulitcore score.
Heres the GeekBench Compute score. As you can see the MacBook Pro did much better.
One other thing I noticed too. If you have two Macs and plug them in together via the USB C cable you only need to press the power button on one Mac and it starts up the other Mac Automatically.
You should buy the MacBook Air M1 if you want an affordable Apple Mac computer. It’s a powerful thin light laptop that runs Mac OS Big Sur. It’s very portable and it has amazing battery life and runs whisper silent as it doesn’t have a fac.
You should buy the MacBook Air M1 if you need even better performance and battery life. However it does have a loud fan which can be annoying. Which even model you decide to get I would defiantly recommend getting the 512GB storage model.
Guys don’t forget to check out my other videos such as Apple MacBook Air M1 review. And do me a favour if you know anyone who might need this video please share it will them, hit the subscribe button and smash the bell icon.
Hi guys and welcome to 123myIT. In this video, we will show you everything you need to know about the Apple MacBook Air M1.
Before I start I already have done a video on the MacBook Pro M1 model and it you want to see that video I will put a link in the top of the video and the description below.
The Design of the MacBook Air M1
On the outside, the design of the Apple MacBook Air M1 has not changed from the previous model. And is also very simular the MacBook Pro M1 If you want to see that video I will put a link in the description. However, the biggest change is on the inside of the Mac. It’s the M1 chip that is custom designed by Apple. Previously a Mac needed multiple chips to deliver its features. Now all those chips are in one Soc. Basically making it faster and more efficient.
The new chip allows the MacBook Air to perform better and run longer on battery, than its Intel-based predecessors.
Pricing – MacBook Air M1
Pricing for the MacBook Air M1 starts around $999 USD for the 256 GB SSD model and goes up to $1999 USD for the 2TB model. In addition, it comes in three different colours Space Grey, Gold and Silver. After using the 256 GB model, I found the upgrade to 512 GB is probably worthwhile as I started having disk space issues after installing Fortnite game, which requires about 90 GB. I started to wish I had the extra space. So consider this when buying the MacBook Air.
Also in the box you will get Warranty and setup documentation. Along with Apple stickers. Included is a 30 watt USB C power adapter. The MacBook Air draws 30 watts of power when charging. And, you can expect to get around 15 hours of battery life. Which is less than the MacBook Pro, but still outstanding for a laptop.
Display – MacBook Air M1
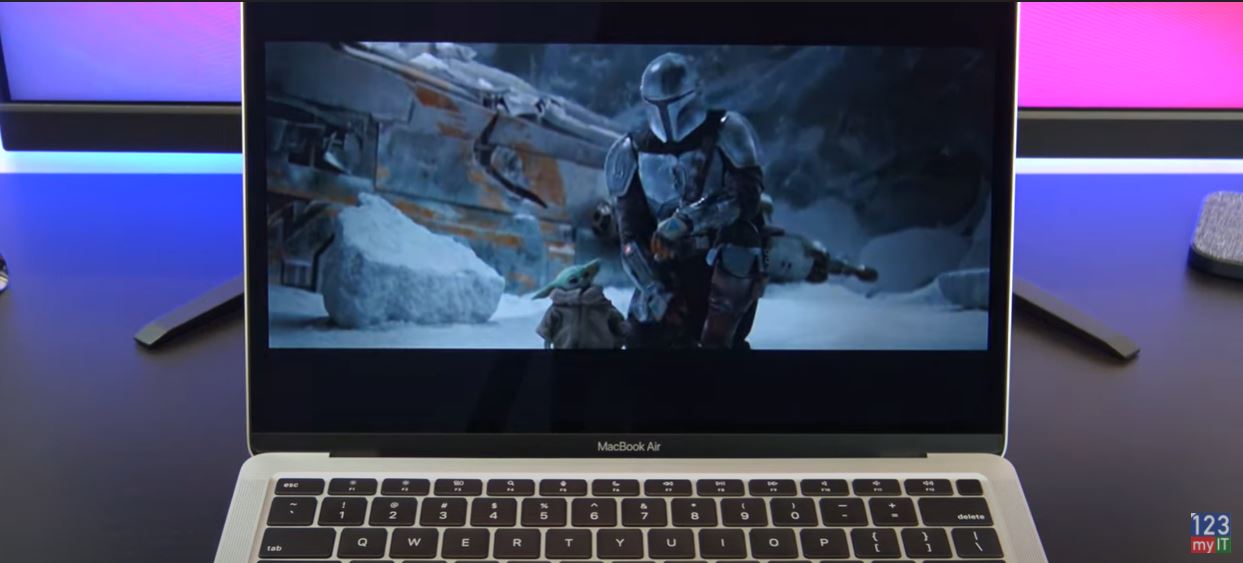
In the box you will have the MacBook Air itself. The MacBook Air M1 comes with a 13.3-inch LED Backlit Retina Display with IPS technology. And it has a resolution of 2560 x 1600 and 227 pixel per inch with 400 nits of brightness. True Tone technology also adds a warmer more realistic colour to the display. In Terms of how heavy the MacBook Air is its 2.8 pounds, which is lighter than the MacBook Pro on 3 pounds. Its Dimensions are .16 inches high and 11.97 inches wide. hHow it has the same footprint as the MacBook Pro.
MacBook Air M1 Screen
Connectivity
On the left side, you have two Thunderbolt, USB 4 ports. I would have like to see three as one could be taken up with a power adapter. There is No Ethernet, so this model is WIFI only. The USB 4 doubles as a display port so if you have a USB 4 to HDMI adapter you can plug in an external display.
On the right, you have a 3.5 Headphone Jack and there is no SD card reader so it does feel limited in terms of connectivity.
The MacBook Air M1 has Stereo speakers with wide stereo sound. They sit both side of the keyboard and are designed to point upwards towards your ears. The speakers have amazing sound and seem to be louder than the MacBook Pro. Take a listen. Let me know what you think in the comments below.
Keyboard and Touch Bar
Above the keyboard, you have the Touch Bar. This allows you to control whatever apps is on the screen. So for example, I can fast forward or rewind the YouTube song. Alternatively, if I wanted to turn the volume up and down.
The Backlit Magic keyboard is a delight to type on and does not bend when pressing the keys. And there is very little flex on the keyboard too. Which is nice.
The Force Touch trackpad is nice and wide and I never find myself missing a click or having to click twice.
Another nice feature is the MacBook Pro has this always on feature when you open the lid. Just like your iPhone it’s on and ready to go. There is a tiny bit of flex in the lid but generally, it is pretty sturdy. Along the top, you will find an integrated 720p FaceTime HD camera with an indicator light. I would like to see a button to manually close the webcam. It is a nice to have feature for the security conscious.
The overall build is excellent quality but the display hinge does not fold all the way back 180 degrees, however other laptops go all the way to 180 degrees, so it does feels a bit awkward.
Fortnite
I was able to get FortNite to run really well giving up a solid 50 Frames per second on high settings. And when I dropped it back to low settings. I was getting 130 to 140 frames. So much better performance from the gaming side of things. Having said that FortNite did crash on my once. I am not sure if that was down the MacBook hardware being so new or a bug with the FortNite software itself. At any rate, a great result in terms of gaming performance.
Benchmarks
Cool, let us run the benchmarks. Starting the Cinebench software really works the MacBook Air hard. But you wont hear the fan spinning because there is no fan. So you will never have to listen to fan noise on this model it will be wisper quite. One thing to mention is the MacBook Pro does have a fan while the MacBook Air does not.
Heres the Cinebench multicore score which is 5676 which was not as good as the MacBook Pro score which was 7795 points.
Here is the Geekbench CPU score and the GPU score.
Let us run the GFXBench Metal tool. As you can see here the MacBook Air M1 scored and average of 50.9 frames. So not outstanding but a good result.
Should you buy ?
You should buy the MacBook Air M1 if you want an affordable Apple Mac computer. It’s a powerful thin light laptop that runs Mac OS Big Sur. It’s very portable and it has amazing battery life.
You should not buy it if you are looking for an budget laptop as its very expensive. You should also not buy it for gaming. Although it did run Fortnite fine it might struggle with triple A titles.
If you want to see the MacBook Air and Pro review and comparison then subscribe to my channel as I will have this video coming up after this one.
Guys don’t forget to check out my other videos such as MacBook Pro M1. And do me a favour if you know anyone who might need this video please share it will them, hit the subscribe button and smash the bell icon.
Hi Guys and welcome to 123myIT. In this video, we will show you everything you need to know about the Apple MacBook Pro M1.
I have to say right of the bat, I am not a Mac fan. However, this MacBook Pro has me surprised and impressed.
Design of the MacBook Pro M1
On the outside, the design of the Apple MacBook Pro M1 has not changed from the previous model. However, the biggest change is on the inside of the Mac. It’s the M1 chip that is custom designed by Apple. Previously a Mac needed multiple chips to deliver its features. Now all those chips are in one Soc. Basically making it faster and more efficient.
The new chip allows the MacBook Pro to perform better and run longer on battery, than its Intel-based predecessors.
How much for the MacBook Pro M1?
Pricing for the MacBook Pro M1 starts around $1299 USD for the 256 GB SSD model and goes up to $2299 USD for the 2TB model. In addition, it comes in two difference colours Space Grey and Silver. After using the 256 GB model, I found the upgrade to 512 GB is probably worthwhile as I started having disk space issues after installing Fortnite game, which requires about 90 GB. I started to wish I had the extra space. So consider this when buying the MacBook Pro.
Fortnite taking up 90GB of hard disk space!
In the box, you will get Warranty and setup documentation. Along with Apple stickers. Also included is a 61 watt USB 4 power adapter. The MacBook draws 61 watts of power when charging. Moreover, you can expect to get around 20 hours of battery life. Which is just outstanding.
Display
Next, you will have the MacBook Pro itself. The MacBook Pro M1 comes with a 13.3-inch LED Backlit Retina Display with IPS technology. And it has a resolution of 2560 x 1600 with 500 nits of brightness. True Tone technology also adds a warmer more realistic colour to the display. In Terms of how heavy the MacBook Pro is its 3 pounds, which is slightly heavier than the MacBook Air on 2.8 pounds. In addition, regards to Dimensions its .61 inches high and 11.97 inches wide.
Connectivity Ports
On the left side, you have two Thunderbolt, USB 4 ports. I would have like to see three as one could be taken up with a power adapter. There is No Ethernet, so this model is WIFI only. The USB 4 doubles as a display port so if you have a USB 4 to HDMI adapter you can plug in an external display.
On the right side, you have a 3.5 Headphone Jack. Moreover, there is no SD card reader which I get it, you can buy an Apple Adapter if you need that. However, it does feel limited in terms of connectivity.
Audio
The MacBook Pro M1 has Stereo speakers with high dynamic range. They sit both side of the keyboard and are designed to point upwards towards your ears. The speakers have the best sound on any laptop I have heard so far. They are truly amazing. Take a listen. Let me know what you think in the comments below.
Touch Bar
Above the keyboard, you have the Touch Bar. This allows you to control whatever apps is on the screen. So for example, I can fast forward or rewind the YouTube song. Alternatively, if I wanted to turn the volume up and down.
The Backlit Magic keyboard is a delight to type on and does not bend when pressing the keys. And there is very little flex on the keyboard too. Which is nice.
The Force Touch trackpad is nice and wide and I never find myself missing a click or having to click twice.
Always On?
Another nice feature is the MacBook Pro has this always on feature when you open the lid. Just like your iPhone it’s on and ready to go. Along the top, you will find an integrated 720p FaceTime HD camera with an indicator light. I would like to see a button to manually close the webcam. It is a nice to have feature for the security conscious.
The overall build is excellent quality but the display hinge does not fold all the way back 180 degrees, however other laptops go all the way to 180 degrees, so it does feels a bit awkward.
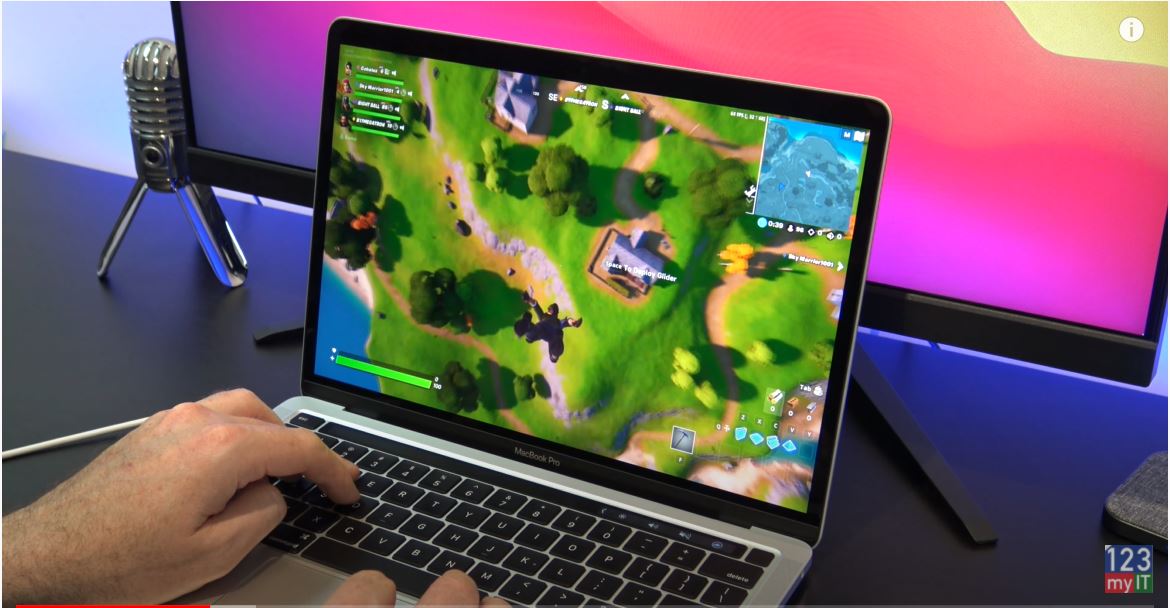
Fortnite
Now for the Amazing part, I was able to get FortNite to run really well giving up about 50 to 70 Frames per second on high settings. And when I dropped it back to low settings. I was getting 130 to 140 frames. So much better performance from the gaming side of things. Having said that FortNite did crash on my once. I am not sure if that was down the MacBook hardware being so new or a bug with the FortNite software itself. At any rate, a great result in terms of gaming performance.
Benchmarks
Cool, let us run the benchmarks quick and I will show you the fan noise. Starting the Cinebench software really works the MacBook Pro hard. You can hear the fan spinning its quite loud. To be fair though the room temperature was quite warm at 30o degrees. One thing to mention is the MacBook Pro does have a fan while the MacBook Air does not. So you won’t get any fan noise from the MacBook Air.
Heres the Cinebench multicore score which is 7795 points and if you look at the CPUs ranking its pretty good for a laptop.
Here is the Geekbench CPU score and the GPU score.
Let us run the GFXBench Metal tool. As you can see here the MacBook Pro M1 scored and average of 55.4 frames. So not outstanding but a good result.
Who should buy?
The MacBook Pro M1 is aimed for people who are doing allot of video editing or graphic design work. This laptop is amazing for that type of workload. Plus it’s very portable. For those that want to know if they should buy the MacBook Air or the MacBook Pro I would say that if you a student and just using learning some video editing or graphic design go the MacBook Air. IF you are a professional or semi-professional then go the MacBook Pro. However if you want to see the MacBook Air review and comparison then subscribe to my channel as I will have both of those videos coming up after this one.
Guys don’t forget to check out my other videos such as How to Backup Your Android Phone to Google Drive. And do me a favour if you know anyone who might need this video please share it will them, hit the subscribe button and smash the bell icon.
Hi Guys, In this video, we will show you how to Windows 10 on a mac external drive SSD on your Mac. If you don’t have much hard disk space on your Mac or you just want to run Windows 10 games and Apps on your Mac then I am going to show the whole process, step by step and this is the end result.
What you will need – Windows 10 on a Mac External Drive
Ok so things you will need are an external SSD. I am using a Samsung 512GB SSD attached with a SATA to USB 3 Adapter you can get it off Amazon for $10. I will link it in the description below. You can also use a Seagate Hard drive and even an old laptop hard drive if you have one laying around.
If you have a newer Mac you can also get the USB C to Sata adapter, Amazon link below as well. Or you could just buy a new Samsung USB C SSD like this one.
You might need a USB mouse and keyboard initially till you get the drivers working correctly and ill show you how to do that. Open Safari and go to the 123myit.com website and click on downloads.
Get your files from the Downloads Section
Scroll down to where it says Install Windows 10 on a Mac and click the first link download Windows 10. On that page in the drop down box select Windows 10 and confirm and choose your language in the second drop down box. Next click on 64 bit and that will download the Windows 10 iso file. The file is fairly big so it might take some time to download. Check it in your downloads. I’ve already downloaded these files so I will just cancel them.
Close that tab and download the WintoUSB file. Again close that tab and download the VMware fusion. Ok so you should see all three downloads in the downloads folder. The next step is to download Windows Support folder. So Quit Safari and go into finder and search for bootcamp. Start up bootcamp and on the Action menu at the top click download Windows support software. Just change the where menu to Downloads. That way all your downloads are in the same spot. Ok now it’s time to plug in your windows 10 on a mac external drive or external hard drive.
Just make sure you have no data in the SSD that you need as the next step will delete any data on that external drive. Close the drive and click on Go, Utilities and the Disk Utility. Highlight your external drive and click Erase. Rename it as BootCamp and change the format to MS Dos Fat. This will make it recognisable in Windows. Click don’t use and Done. And then close Disk Utility.
VMWare
Next we want to run the VMware installer file we downloaded earlier. So click Go and Download and open up the VMware installer file. If you get this message saying the VMware file can’t be opened go to System Prefs, Open up Security & Privacy, click on the General tab unlock your pad lock enter your password and click on Open Anyway. Click open and close the Security & Privacy window. Double click to Install VMware. Click open. Type in your password. Click open. Agree to the terms. Put a dot in the, I want to Try VMware fusion. You can use the software for 30 days which is more than we need. However if you like the software you can always buy it. Click ok and Ok again. Open System preferences and unlock your pad lock and give VMware the access it needs.
It wants to install from disk or image. So click go and downloads and drag the Windows 10 iso file you downloaded earlier to the VMware menu. And then click continue to proceed. You are setting up a new Virtual Machine here so you need to click the drop down menu and select Windows 10 Home. Click continue and continue without a key. Click More Isolated. Now you can click Finish now or if you want to customise the Virtual Machine click customise settings. Then click Save.
Customise your Virtual Machine
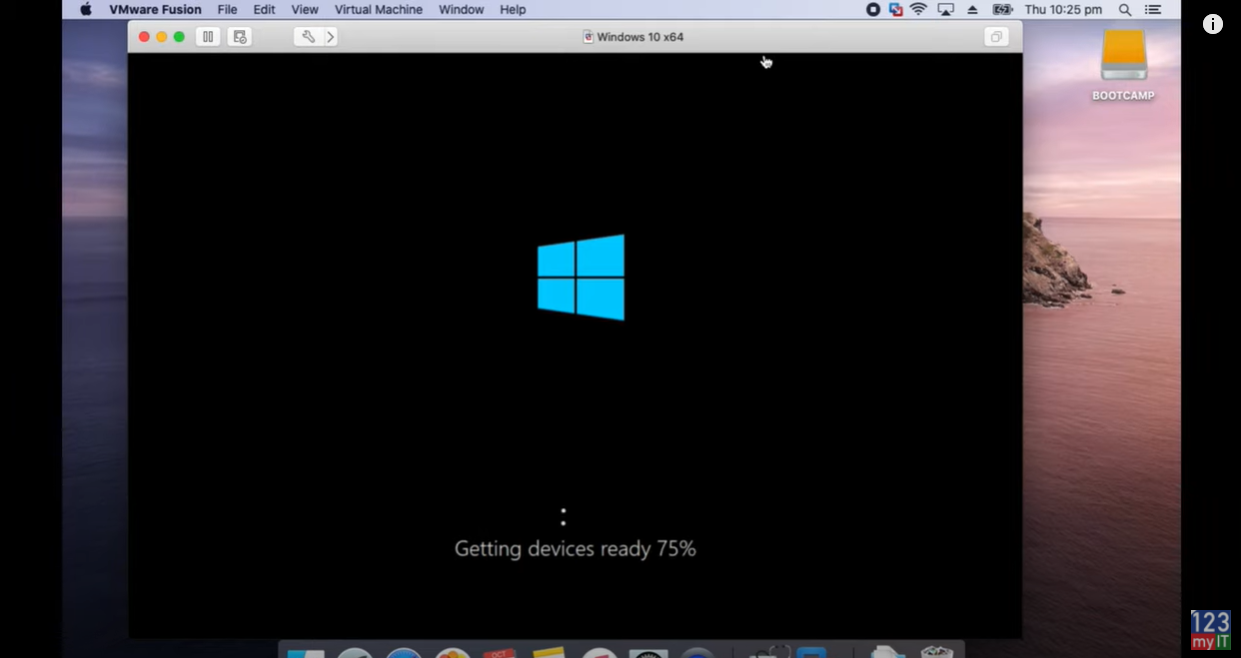
Ok to customise the install click on Processors and Memory. I am going to give it a little bit more memory. From 2GB to 4GB. That should be enough. Alright you can close that window now and click play to start Windows. If you get the broken pipe errors go Quit VMback into System preferences Security & Privacy, General tab and click allow again. Click ok. Close your padlock. Restart VMware. Press play again and it should start your Windows install now. Awesome that’s going to take a while I will speed up the install here. This is not installing Windows 10 on your external drive just yet. We are setting up a Virtual Machine which will allow you to install Windows on the external drive.
Using VMware to create a Virtual Machine.
Ok so Windows has finished installing. Click on the Go menu then click downloads and copy the WintoUSB and Windows Support folder onto your Windows desktop. I could drag the WinToUSB file. But I had to right click copy and paste the WindowsSupport folder to get it to copy across.
Connecting the SSD
Now let’s connect our External SSD to our Windows Virtual Machine. You want to go up to Virtual Machine USB & Bluetooth, find your BootCamp drive and add it. Therefore, it’s gone now on your Mac side and there it is on the Windows side now. Now go back to Virtual Machine click CD/DVD and then choose disk or image. And then choose your Windows 10 iso file. Click open. Then go back to Virtual Machine select CD DVD and Connect CD DVD. It should also pop up.
Ok so all the ground work is done its time to create the Windows 10 external drive. And the Windows support folder has just finished coping. Next thing you want to do is double click on the WintoUsb executable and follow the install prompts. So click yes. English Ok. Accept the agreement. And then next next install.
If you get Microsoft Edge popping up just close it. It doesn’t it a few times. Now you want to launch WinToUsb the shortcut with the little arrow. Click your CD DVD drive and in the drop down menu select your Windows disc. And then choose Windows 10 home click next. And then select your destination. So this will be your external drive.
Older and Newer Macs – Audio and drivers not working.
Ok heres an important bit. If you have an older Mac like mine select MBR for Bios if you have a newer Mac select GPT for UEFI. If you select the wrong option here when you start your Mac your Audio might not work. Don’t worry simply come back to this step and select the correct method for your Mac. I will select the wrong option for my Mac to show you what it does.
Ok this part shows you how your external drive will be partitioned. No changes here just hit next to start. This part will take a long time especially if you have an older sata drive. This will take at least 15 mins or more this process will install Windows 10 on your external drive and you will be able to boot into that drive shortly. Once that is complete just hit Exit and yes to quit. Alright open up Windows Explorer and click on the newly created WinToUSB drive and you want to drag the Windows Support folder into that drive.
Once that’s copied you can shut down your Virtual Machine. Because you are done here. So Restart your Mac and you want to hold down the Alt Option Key when you Mac starts up. This is so you can select the external drive to boot. If you are on a newer Mac you can use the Command R to access the start up security utility. Once that starts up go into Utilities and Startup Security Utility. If you are on a Newer Mac you might have to enter a password here. Otherwise on an older Macs just close that menu. On Newer Macs select the No Security check box and also the Allow booting from external media. This will allow you to boot to your external Windows drive.
Startup Disk – Windows 10 on a mac external drive
Alright click close on MacOS Utility’s window and select Choose Startup Disk. You can see our SSD drive starting to flash it the background. Go ahead and select your WinToUsb external drive. And this will set the external drive to boot into by default.
If for some reason it doesn’t boot restart your Mac and hold down the Alt option key. And go ahead and select your external usb drive from the menu. It should then start booting into Windows for the first time. Select your Region and follow the setup prompts. If your Trackpad doesn’t work try using the USB Mouse and Keyboard I mentioned at the start of the video. If your keyboard is not working you can open up the on screen keyboard by click the icon in the bottom left of the screen. I don’t need a password and we are going to turn all this stuff off. You don’t need that.
Ok cool we are now running windows from an external drive. The next step is to get the Windows driver installed. You can do this by opening up Windows explorer and going to your WintoUsb C drive. Go into the Windows support folder. Go into the Bootcamp folder and run the setup file. The just follow the prompts and restart Windows. If you open up device manager you can see the drivers being installed. Go ahead and click finish and restart.
Checking the Device Manager
When you are back up open your device manager again and check any drivers that have not installed properly. You can see the audio driver has not installed correctly. Let add our WIFI password first. Ok if we right click and Update driver and if that doesn’t work we can run the Windows updates. So just click check for updates. This will take some time. Click restart now. Ok once you have done the updates and restarted. Check to see if your keyboard buttons all work on the Mac. So I test the display brightness, Audio Volume and Keyboard brightness. You can see here the Audio is still not working so there are two more things you can do to get this working.
Open up device manager again. Go back to your Audio device right click it and update driver, click on browse my computer for drivers and then click the browse button. And navigate to your Windows Support folder on the C drive. Click on the WInPEdriver folder and then click ok and next and do this for any other drivers.
If you still have drivers that aren’t working go into the Start menu and right at the top you should have Apple Software update. Click that. So its gunna search the web and find any updates that are necessary. It will ask you to restart go ahead and do that.
Issues with sound Troubleshooting – windows 10 on a mac external drive
If you are still having issues with your sound then you have an older Mac and should have selected the MBR for Bios option when setting up the external drive. So head back to the 10 min mark of the video.
Here’s a tip as well. If you selected GPT for UEFI then you will have a EFI boot drive. If you have selected MBR for Bios then you will have a Windows boot drive.
Cool ok we have restarted now and if you check your buttons should all be working and if you check device manager you shouldn’t have any outstanding drivers to install.
Awesome so you are ready to go you can install Windows games and apps on your external SSD and let the fun begin. You can also setup an Xbox controller to play games with. You have finished installing windows 10 on a mac external drive.
Also guys don’t forget to check out my other videos such as Apple iPad 8th Gen 2020. And do me a favour if you know anyone who might need this video please share it will them, hit the subscribe button and smash the bell icon.
A cut-down version of Apple’s September event for 2020. Apple is releasing new hardware such as Apple Watch Series 6 with blood oxygen reader & monitoring. Along with a new more affordable Apple Watch SE. Apple also unveiled an all-new iPad Air which has an edge-to-edge display & features the A14 Bionic processor. Also releasing a new eighth-generation iPad.
iPad Air 2020
Apple’s September 2020 Event doesn’t include the iPhone 12 model range.
Guys, don’t forget to check out my other videos such Transfer Data Huawei to Android. Also do me a favour if you know anyone who might like this video please share it will them, hit the subscribe button and smash the bell icon.
Hi guys and welcome to 123myIT. In this video, we will show you how fix the error this copy of the Install Mac OS application is damaged and it will also fix the error OS X could not be installed on your computer.
Upgrading your Mac – Install MacOS Application is Damaged
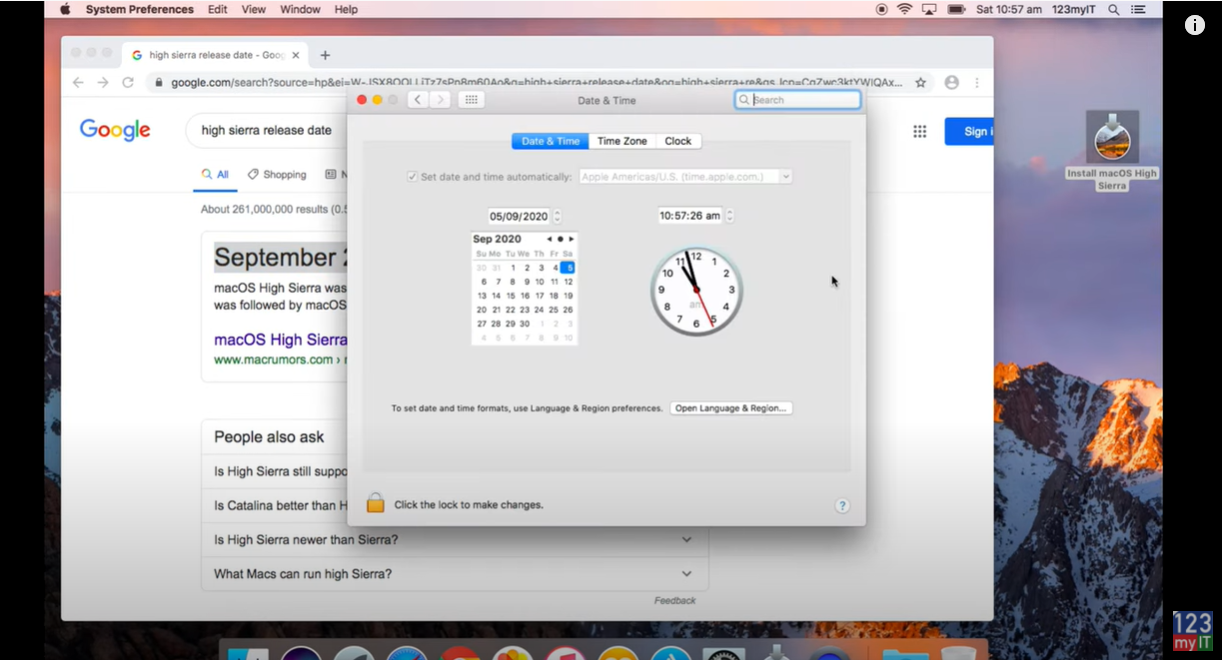
Guys if you are upgrading Mac OS or trying to do a clean install from USB you might encounter the error messages I just mentioned and the fix is easy. Open up a web browser and go to Google and do a search for the release data of the Mac OS you are trying to install. In my case its macOS High Sierra.
Changing the date.
As you can see hear the release date for High Sierra was September 25 2017. So to get the macOS installer to work you will need to change the time on your computers clock.
Open up the Date & Time on your Mac and unlock it with your Admin password. Once you have unlocked it take the tick out of Set date and time automatically. Set your time back to just after the release date of the version of MacOS you are trying to install. So for me iam going to set my data to October 2017. This tricks the installer file to thinking the date is 2017 and will install MacOS on your computer. Watch and see what happens now when I go to run the installer.
There you go the error is gone and the MacOS will continue to install. The Install MacOS Application is Damaged error is fixed.
Guys don’t forget to check out my other videos such as how to do a Clean install of MacOS Big Sur. And do me a favour if you know anyone who might need this video please share it will them, hit the subscribe button and smash the bell icon.
Hi guys and welcome to 123myIT. In this video, we will show you how to do a clean install of MacOS Bug Sur.
Guys in a previous video I showed you how to create a MacOS Big Sur installer USB. I will put a link to that in the top of the video and it the description below. Once you have followed that video and created your USB, we can now show you how to do a clean install on any Mac. Lets get started.
One more thing to mention its good to have a USB type A and USB type C this allows you to do a clean install on any Mac that has USB type A and USB C ports. I will leave an Amazon link in the description.
First Step – Install Mac OS Big Sur
So, the first step is to shut down your Mac. So go to Apple menu and hit shutdown. Ok just go ahead and plug in your MacOS Big Sur USB. Next up press and hold your Alt Option key on your keyboard.
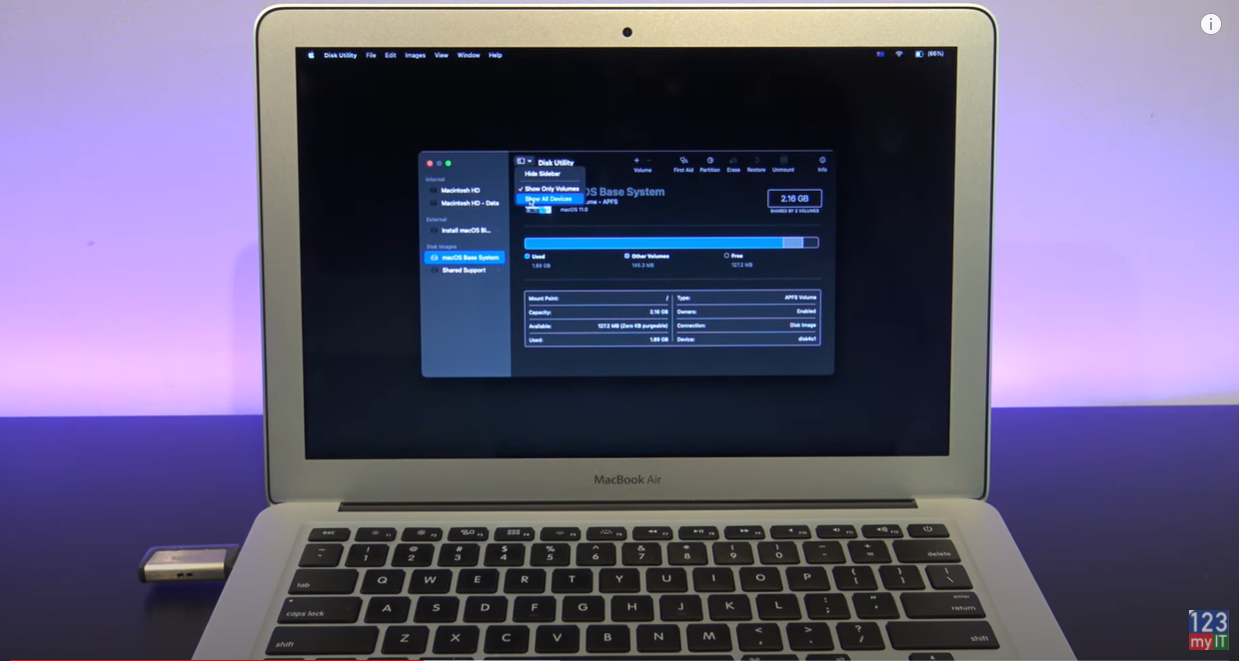
And press your power button to turn your Mac on. You should then see the boot menu with install MacOS Big Sur. Use the arrow keys to select the drive. It will eventually boot you into the MacOS Utilities menu. IF you want to upgrade or install a new copy of MacOS select the install MacOS option. I want to show you how to do a clean install so I am going to wipe the hard drive first. So click on disk utility. Go to view and then show all devices. Select your Apple Hard disk or SSD and click on erase. Type a name for your Hard drive and click erase. I will call mine Macintosh HD.
Using Disk Utility to format the disk.
Once that’s finished just click done. If you have an older Mac go to partition and partition again. And under the Format menu you will have other options. For newer Macs use APFS. For older Macs try Mac OS Extended Journaled.
Disk Utility
Once you are finished just close the disk utility and click on install MacOS. Click continue continue again and then agree. Select your Macintosh hard disk and click continue. Ok so that’s going to take a little while to install so while you are waiting why not hit that subscribe button for me and smash the bell icon! And also I will put a play list of all my Mac videos in the top of the video now.
By now you Mac would have rebooted and you should see the welcome screen where you select the country you are from. You have now done a clean install of MacOS Big Sur. And you can just go through the Mac setup prompts very similar to when you first purchased your Mac.
Dark Mode
Don’t forget to choose your look. You can choose your look, so you have the options of light or dark or auto. If you select auto it will change depending on the time of day. Pretty cool.
Guys you have just completed a clean install of MacOS Big Sur and its ready to use.
Guys don’t forget to check out my other videos such as create a MacOS Big Sur usb drive. And do me a favour if you know anyone who might need this video please share it will them, hit the subscribe button and smash the bell icon.