A new report has revealed that the number of apps containing malware reached 718,000 just last month. This is an increase of 350,000 up from the end of last year.
Some of the most common malicious apps are attempting to sign users up to pricey premium services which charge outrageous amounts for simply sending and receiving text messages for example.
According to Jonathan Oliver, Trend Micro’s software architecture director for Australia and New Zealand, there’s been a recent increase in the number of ‘genuine malware’ out there.
This type of malware knows how to take advantage of the vulnerabilities of the Android and how to access and steal sensitive information.
FAKEBANK is one example. It imitates genuine banking apps and steals usernames and passwords.
Cybercriminals make these apps by taking genuine apps and then installing the malicious software in them. Then they offer them for sale on the app store either for free or at a large discount.
According to Oliver, Android phones are more susceptible to attacks over iPhones because the Android app store is more open.
Oliver continued on to say that Australia is still a major target for cybercriminals as more and more people are using their phones for mobile banking purposes.
This video will show you how to change the default browser on your Android Device.
If you don’t like the stock standard default Android browser, you can change if for Free in the Google Apps Store.
Once you download the free browser, make sure you set it to the default browser so that you can use it every time you use the internet.
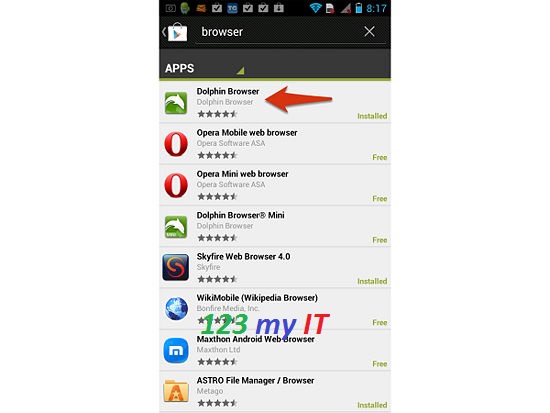
Step 1. Open up the Google Play Store and do a search for Browsers.
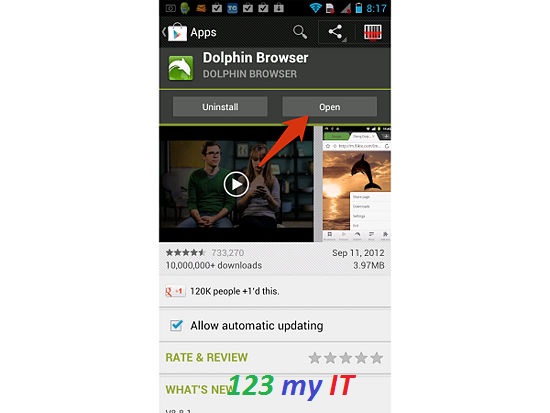
Step 2. Select the browser you want to install and press Install.
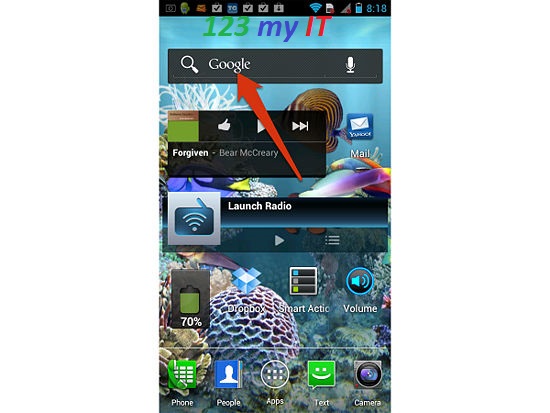
Step 3. Go back to your Home screen and tap into the Google search bar.
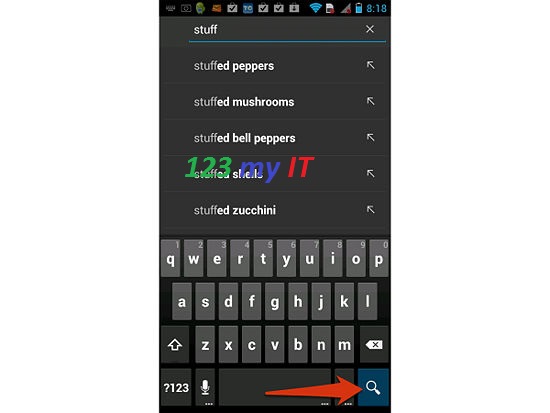
Step 4. Search for anything in the search bar and then press the Search Button in the bottom right hand corner of the screen.
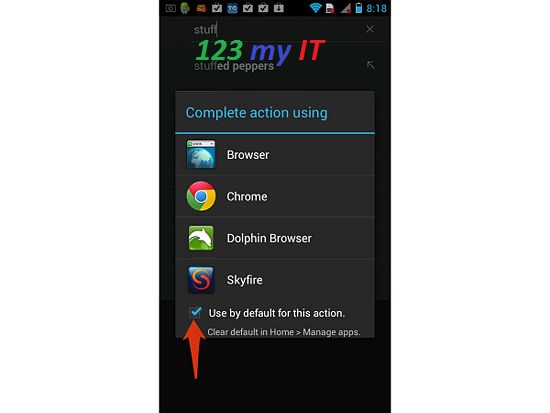
Step 5. Put a tick in the checkbox that says “Use by default for this action.” And then press the Browser that you want to be the Default Browser.
And that’s all you need to do. Changing the default web browser will give you greater functionality like being able to create new tabs more easily.
If you have been using your Android device for a while you might have noticed that it started out with really good battery life but over time, the battery life doesn’t seem to be as good as it was. It could be that the battery is slowly dying and all of them do that, however it could be that you have loads of apps running in the back ground and all of your services on.
This guide will give you some helpful tips on how to save your battery life. A few small tips will have your Android device lasting for day!! Well maybe not that long. 😉
Step 1. Have your phone tell you what is using up the most power.
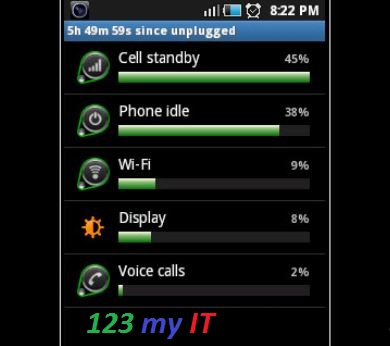
Go into Settings, About Phone, Battery Use. On my phone the app Whatsapp was using 66% of the battery. So turning off Whatsapp would help me get more battery life out of the phone.
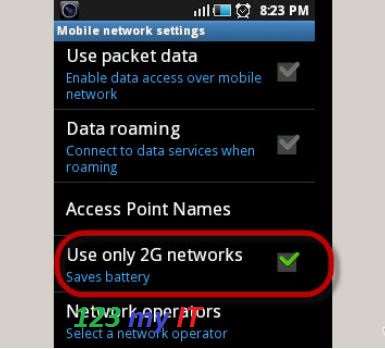
Step 2. Tell your Android device to use 2G only or use GSM over WCDMA.
Only do this if you don’t need access to 3G or 4G high speed data.
Go into Settings, Wireless and Network, Mobile networks and select your network mode.
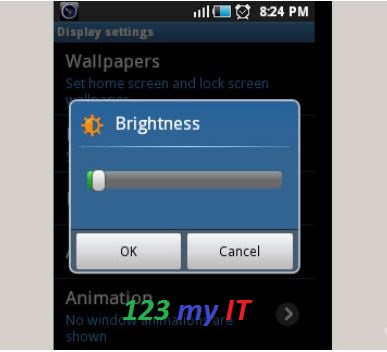
Step 3. Reduce your display brightness. Settings, Display, Brightness.
Slide brightness slider all the way to the left and it will help you save power when you are reading the phone. Most of the time people can still read the phone without needing the brightness up high.
Step 4. Always try to use a black background or wallpaper. Settings, Display, Wallpaper.
Here is a sample below but you can find loads of black backgrounds on Google images.
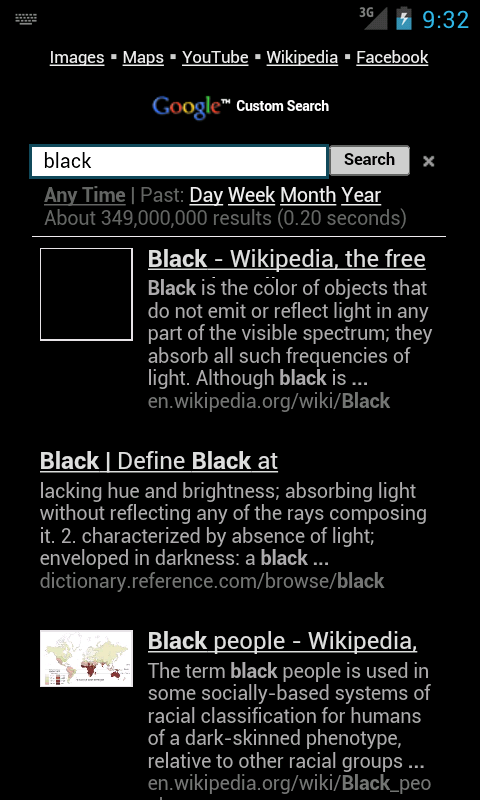
You can also set bGoog.com as your default home page. bGoog.com is a black background search engine webpage by Google and its built especially for mobile devices it allows you to search the web without using so much power on your phone. Awesome idea.
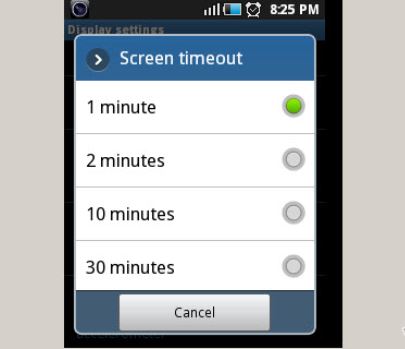
Step 5. Adjust your screen timeout to the shortest time Possible. Settings, Display and then Screen Timeout.
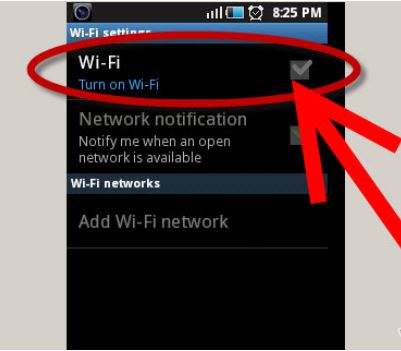
Step 6. Turn off your WIFI when you are not using it. Settings, Wireless and network, WIFI settings.
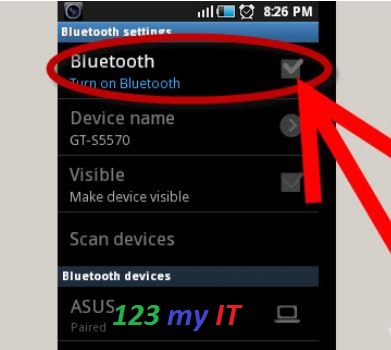
Step 7. Turn off your Bluetooth when you are not using it. Settings,Wireless and network, Bluetooth settings.
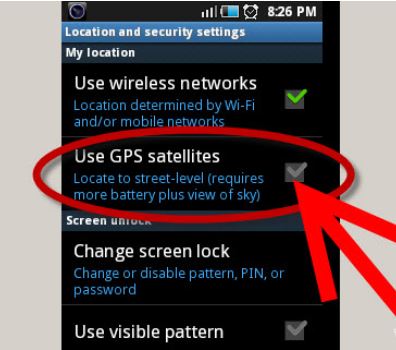
Step 8. Turn off your GPS. If your GPS is turns on it is constantly looking for satellites which takes up battery power. Settings, Location and Security, Use GPS Satellites.
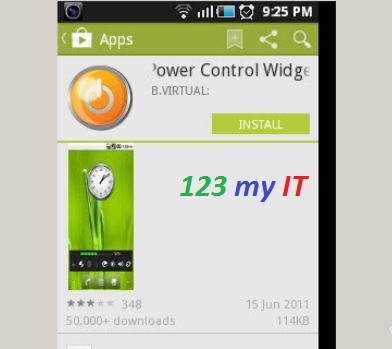
Step 9. Use Power apps and widgets. There are loads of free and paid apps that control all sorts of stuff.
The two that you should take a look at are:
* Power control Widget
* Power management
* Null BLack Wallpaper
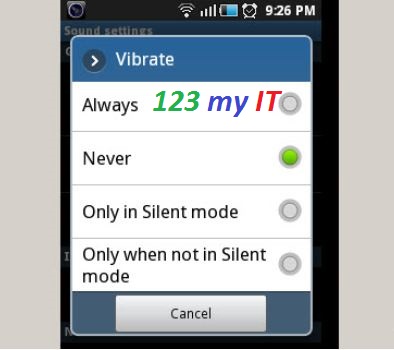
Step 10. Turn off phone vibration. Settings, Sound, Vibrate. And set vibrate to never. You have the following options Always, Never, Only in Silent mode and Only when not in Silent mode.
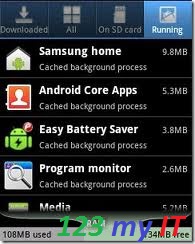
Step 11. Turn off all your applications when you don’t need them. Settings, Applications, Manage Applications. Press Running and then press and Stop any applications that you don’t need.
Step 12. Put your phone in standby mode when you are no longer using it.
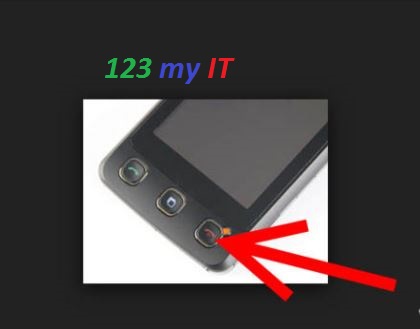
Press the Power button on your device when you are finished using it as it will use less power if you get into this habit.
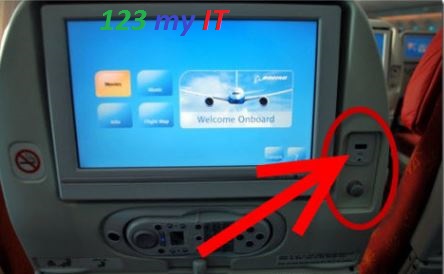
Step 13. Take your USB charger with your where ever you go as there are Free USB ports everywhere! Allot of Airlines these days have free USB ports so that you can charge your Android device while flying.
Step 14. A spare battery can be a lifesaver if you just so happen to run out of Power. Spare ones can be picked up from websites like ebay.
This video will show you how to set the Screen Time out on Android.
Hi All
One of the biggest killers of battery life is the screen timeout, so I have make a quick video on how to change the screen timeout on your Android device to save battery!!! 🙂
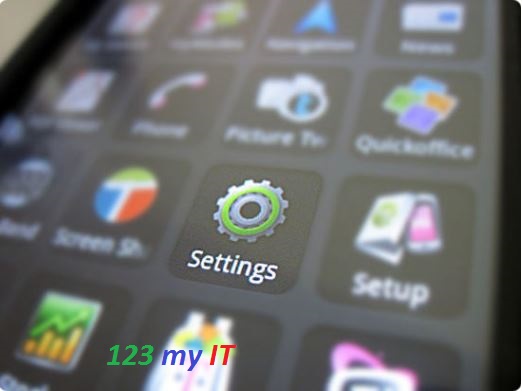
step 1. Go into your phone menu and tap settings.
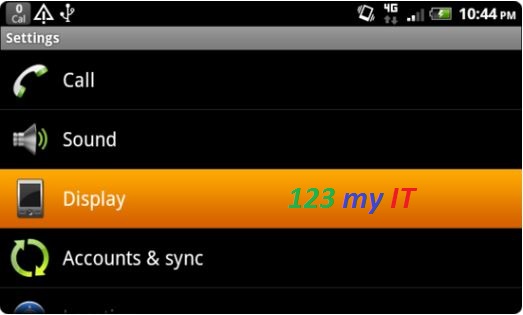
Step 2. Tap on display.
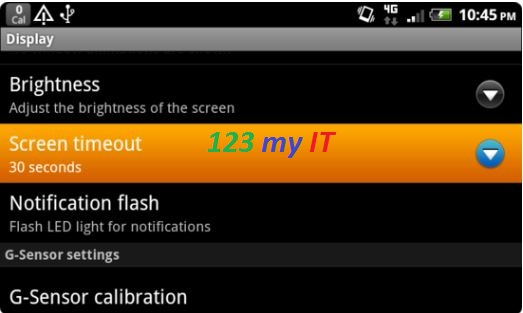
Step 3. Scroll down and press the screen timeout button.
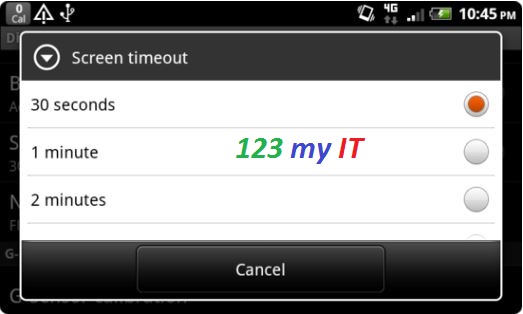
Step 4. Select how long you want the time out to be. Remember the shorter the timeout set the more battery life you will have on your Android device. You should have the following Timeout choices.
* 15 seconds
* 30 seconds
* 1 minute
* 2 minutes
* 10 minutes
* Never turn off
Hope that helps you increase your battery life ! 🙂
Good luck
This video will show you a WIFI speed test comparison between iPhone3G, iPhone4S and Samsung Galaxy S.
Hi All
So I have created this video which shows the wireless speeds of iPhone3G, iPhone4S and Samsung Galaxy S. I was asked what is the performance of the iPhone 3G when running the Whited00r 6 firmware.
I am using an the speedtest.net app which can be downloaded from iTunes store.
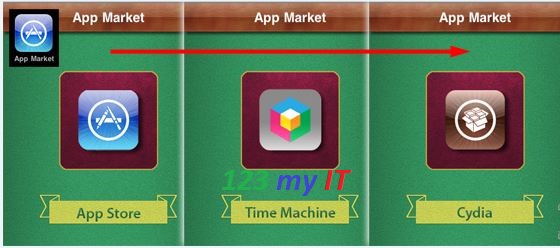
However the app wont work for the old iPhone 3G so I was able to download and use it from the Time Machine store which is one of the features in the Whited00r 6 firmware.
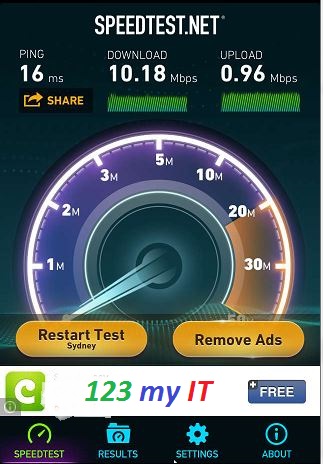
The Wifi speed on the iPhone 3G is half as slow as the iPhone 4S and Samsung Galaxy S. Both the 4S and the Samsung were able to max out my Adsl line at 10 Mbps.
So the Wifi for the iPhone 3G is still good enough to use.
Hi All
This video will show you a 3G Speed Comparison iPhone3G, iPhone4S and Samsung Galaxy S.
One of the 123 my IT readers asked me what the performance is like for the iPhone 3G running the Whited00r 6 firmware. So I did a quick test on 3 phones iPhone3G, iPhone4S and Samsung Galaxy S.
I used the Speedtest.net app from ookla.
The Speedtest app doesn’t work for the out dated iPhone 3G phone, however I was able to get it working by installing the Whited00r firmware. You can see the video on how to install Whited00r here.
The Speedtest app was available in Time Machine.
Results iPhone 3G Ping 369ms, Download 0.63 Mbps, Upload 0.01 Mbps. So performance on the old iPhone 3G was sluggish to say the least. The performance might because the phone is quite old or that the latency of the phone slows the 3G performance down. While the signal might not be strong in the place where I am testing the phones the iPhone 4S fairs much better.
Samsung Galaxy S Ping 70ms, Download 1.651 Mbps, Upload 1.12 Mbps. As you can see there is a marked improvement on the speed of both the download and uploads on between the old iPhone 3G and the Samsung Galaxy.
iPhone 4S Ping 54ms, Download 2.16 Mbps, Upload 1.03 Mbps. The iPhone 4S has a faster Ping as well as a bit quicker on the downloads compared to the Samsung Galaxy S.
The performance seems pretty normal given the age between the phones. I guess you can tell from this guide that the iPhone 3G would be next to useless when trying to browse the internet via 3G.
HI Guys
In my travels I came across a great website which allows you to unbrick or get out of the dreaded black screen of death on your Samsung Nexus or Galaxy S3 phone. This will work for the following models.
GT-i9250, GT-I9100G, GT-I9300 and the S3 GT-i9300. So I thought I would share it with my website users to help them out if they have a broken their Samsung phone.
I will quote the comments
For galaxy S3 GT-i9300, please carefully read this:
* Euro/Asian models are based on 4 core Samsung Exynos 4412 CPU
* JTAG access in all i9300 phones is DISABLED (password protected)and password is not available (yet).
* Repair procedure for bricked phones is performed via SD card
I have also added the direct download links below.
GT-I9250:
Just execute *.bat file from this package.
Installing drivers first would be pretty smart idea too.