Samsung Galaxy S7 Unboxing – not yet my 4K camera broke

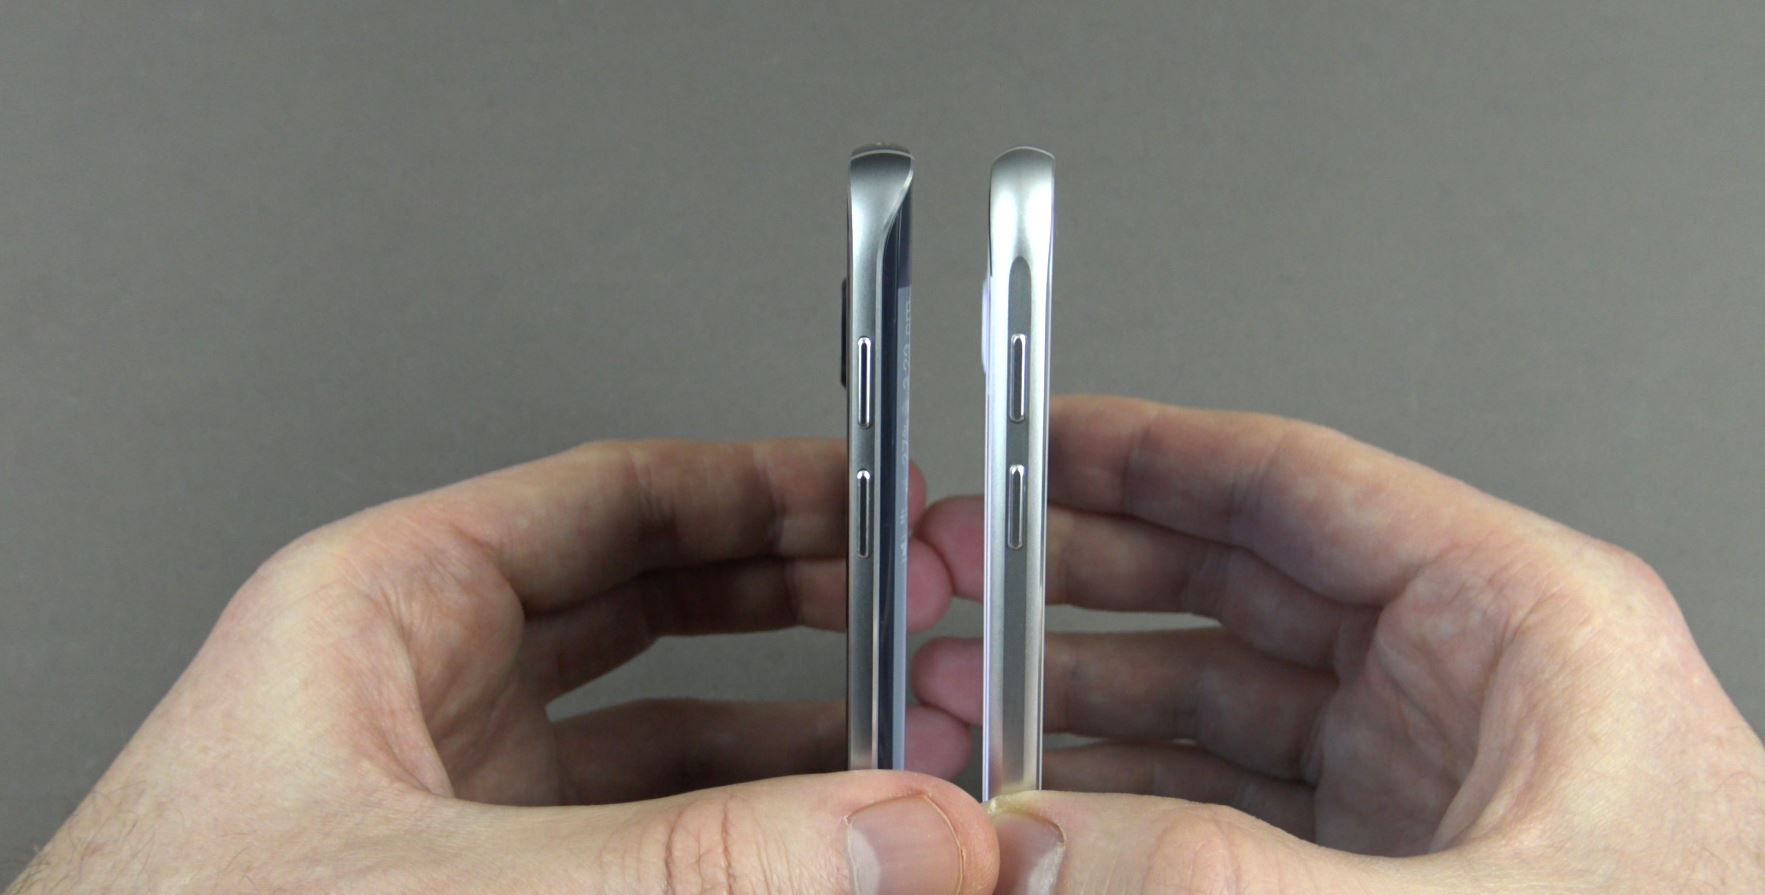
I get halfway through my Samsung Galaxy S7 unboxing video and my Sony FDR- AX33 4K camera stops charging.

Hi All,
I thought I would put up a quick video about the troubles I was having with my Sony FDR- AX33 4K camera not charging when working on the Galaxy S7 unboxing and firstlook video. I got half way through the video and couldn’t continue because the charging cable just stopped charging the camera. I called Sony support last week and it took them a whole week to get back to me.

Sony FDR-AX33

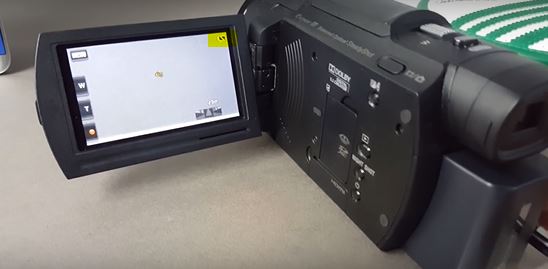
If you look at the yellow mark in the top right hand corner of the picture above you will see where the battery icon has simply stopped charging even though the cable is plugged in.
Sony finally sent a courier to pick up the FDR-AX33 yesterday 29/03/2016 so I am out of action filming wise while they fix the issue.

Samsung Galaxy S7

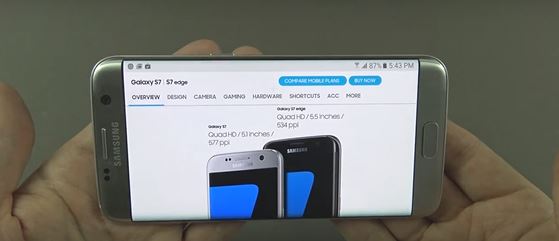
However another option might be to use the Samsung Galaxy S7 camera for 4K filming. Its funny you know the official camera makers like Sony bring out the latest 4k cameras like the FDR-AX33 and then a few months later company’s like Samsung release a 4K camera on their phones. Will the camcorder become extinct in the next few years? I guess we will find out.

If you Google cell phone tripod you might have your answer it seems these little attachments are getting pretty popular. I have been looking around for a good one myself. Although I am still unsure which brand would be the best for me. I seem to think that allot of these attachments look quite cheap and that you phone could quite easily fall out of the attachment and get scratched or broken. So if anyone out there knows a good quality brand one to buy please lets me know in the comments field below. 🙂

Samsung Galaxy S6 Unboxing & Firstlook

This video will show you the Samsung Galaxy S6 Unboxing & Firstlook.

I had the chance to get my hands on the Samsung Galaxy S6 for an Unboxing and first look. I upgraded my old phone from the Samsung S5 to the Samsung S6 Edge recently and you can check out that video here.

However I think I actually preferred the Samsung S6 over the Samsung S6 edge and the reason was yes you guessed it the edges. I find the Samsung S6 more easier to hold over the Samsung S6 edge and I seem to bump the screen allot more because of the edges and the screen doesn’t feel very accurate. To sum it up I found the edge a bit frustrating to use. However the S6 does have the fancy edges so holding the device is a breeze.

Samsung Galaxy S6 & Samsung Galaxy S6 Edge

On paper the hardware of Samsung Galaxy S6 and the S6 edge are exactly the same. So speed wise there isn’t that much difference if any between the two phones. But if you check out the video above you will see the Geekbench score the Samsung Galaxy Edge was slightly faster with a single core score of 1499 over the Samsung Galaxy S6, which had a score of 1441. And on the Multi core score the Samsung Galaxy S6 Edge reached a whooping 5281 over the Samsung Galaxy S6 at 4769.
Maybe if we ran the tests a few more times these scores would change even though the hardware is the same the Edge did seem to perform better. But does that really matter when making phone calls or sending texts messages? maybe not. But it might when you are playing video or games with the phone.

With this my personal view is that I am kind of disappointed with the latest Samsung Galaxy S6 models. Everything I liked about the Samsung Galaxy S5 is gone. Its like they are trying to hard to compete with Apple they forget what makes people choose Samsung over Apple. And lets face it, who at the moment can really compete with Apple? 🙂

Cheers
Matt

Transfer data from old phone to new phone Android

This video will show you how to Transfer data from old phone to new phone Android.

Hi All, recently I upgraded my Android phone from the Samsung Galaxy S5 to the Samsung Galaxy S6 Edge and I am slowly working through a few issues that I found when setting up the new phone.
One of those issues was a problem with Gmail contacts getting mixed up with my person phone contacts. Find that video here. Delete Gmail contacts from Android.

So how do you Transfer data from old phone to new phone on Android? Well in this video I use an application called Samsung Smart Switch, which is an app that is available on the Google Play website. It allows you to Transfer data from your old phone to your new phone without the need to plug into another computer.
And it also supports moving from IOS to Android and Android to IOS.

Samsung Smart Switch App

The process is pretty straight forward, simply download the Samsung Smart Switch app on both the old device and the new device. Start the Samsung Smart Switch app up on both devices and select the type of OS, so either IOS for Apple Devices devices or Android for Android devices. and then tap the Start button.

Next you will need to set the old device to sending and the new device to Receiving. The two phones should hopefully see each other by now and automatically connect to one another.
Select the data that you want to move from your old phone to your new phone by leaving the check boxes ticked. If there is any data that you don’t want to copy to your new phone, simply remove the tick from the checkbox.

Once done you should be good to go. Just remember that the time it takes to copy data across depends on the speed of your phones and how much data you wish to transfer. For me it was about 4GB and that would take around 40 mins.

I hope this helps out.
Good luck
Matt

How to root a Samsung Galaxy S phone.

This video will show you how to root a Samsung Galaxy S phone.

Step 1.Download and install the XXJVU firmware, the check what type of firmware you already have on your phone go to Settings and About Phone. If you want to know how to do this you can see the 123 my IT tutorial here.

Step 2.Download the CF-Root-XX_OXA_JVU_2.3.6-v4.3-CWM3RFS.zip from our downloads section here.

Step 3.Extract the CF-Root-XX_OXA_JVU_2.3.6-v4.3-CWM3RFS.zip and you will have the CF-Root-XX_OXA_JVU_2.3.6-v4.3-CWM3RFS.tar file.

Step 4.Download and run Odin software you can download it from our download page here.

Step 5. Turn off your mobile phone and wait 5 seconds for it to vibrate to make sure it is completely off.

Step 6.Put the Galaxy S in download mode by holding down the Volume Down plus Home Plus Power buttons all at the same time.

Step 7.In the Odin software select the PDA tab and then select the extracted CF-Root-XX_OXA_JVU_2.3.6-v4.3-CWM3RFS.tar file.

Odin Android Software

Step 8. Make sure you do not select the “Re-Partition” checkbox as this will brick your phone. Make sure that the “Auto Reboot” and “F. Reset Time” checkboxes are ticked.

Step 9.Click the start button in Odin to start the flash of the CF Root File.

Step 10.The phone should restart automatically when the CF Root file is installed. When Odin displays the Pass in green you can unplug the phone from the USB cable.

Step 11.Your phone should now be rooted ad you should see the CWM app and clockworkmod based recovery is installed.

Once this is done your Samsung Galaxy S should be rooted ! 🙂

Good Luck

How to upgrade the firmware 2.3.6 on a Samsung Galaxy S.

This video will show you how to upgrade the firmware 2.3.6 on a Samsung Galaxy S.

WARNING: Make sure you back up your Phone before proceeding!!!!
All the data on your phone will be deleted when you do this upgrade so please make sure you take the time to backup your data.
* Backup any photos and images that you have on the phone.
* Backup your contacts list, SMS and emails.
* Backup your music and video.
* Backup your APPS and phone settings
* Backup your bookmarks and stored pages.
* Backup all your data on your SD card.

Prepare your PC and Phone for the upgrade.
* Plug your Samsung phone into your Pc and make sure that the phone drivers install correctly. You should be able to browse to the phone in explorer.

Samsung Galaxy S in Windows Explorer

Step 1. Download the firmware and pit file from our download site here.
The firmware filename is sam_GTI9000_firmware.zip
Its quite a large file the size is 225.9 MB, so be prepared to take some time to download.
The file password is: 123myit.com

Step 2. Extract the downloaded sam_GTI9000_firmware.zip.
You should extract the following files.
* CODE_I9000XXJVU_CL851880_REV03_user_low_ship.tar.md5
* GT-I9000-CSC-MULTI-OXAJVU.tar.md5
* MODEM_I9000XXJVU_REV_00_CL1059471.tar.md5
* s1_odin_20100512.pit

Step 3. Download and extract the Odin3 v1.7.exe file from our downloads section here.

Step 4. Put your phone into “Download Mode” by holding down the Volume down button + the Home button + the Power button.

Step 5. Start the Odin3 v1.7.exe and connect your phone to the PC. The Odin application should say the message “Added!” If it doesn’t say added then you will have an issue with the drivers and your should reboot your PC with the phone still plugged in and repeat this step.

Step 6.Once Odin has started and you have your phone Added. Select the files that you extracted in step 2.
They should all be loaded in the following order.
* Select the “PDA Tab”, and select “CODE_I9000XXJVU_CL851880_REV03_user_low_ship.tar.md5”
* Select the “Phone Tab”, and select “MODEM_I9000XXJVU_REV_00_CL1092175.tar.md5”
* Select the “CSC Tab”, and select “GT-I9000-CSC-MULTI-OXAJVU.tar.md5”
* Select the “PIT Tab”, and select “s1_odin_20100512.pit”

Step 7.Make sure that you select the Re-Partition, Auto Reboot and F.Reset Time checkbox within Odin.
Step 8.Click the start button to kick off the flashing process.The phone will reboot when it finishes and Odin should give a green PASS message.
When the phone restarts you should be running the new Android, v2.3.6 XXJVU firmware.