Optimize Windows 10 for Gaming & Performance 2020

Hi Guys and welcome to 123myit, in this video we will show you how to Optimize Windows 10 For GAMING & Performance in 2020.

Ok people you can expect this video to help you get the very best performance for gaming and general system speed. Optimize Windows 10, will help reduce start up times, reduce latency, get rid of stutter, lag, and decrease the time it takes to load programs. In addition, if you can if you find this video helpful please share it with and friend’s family or anyone who you might think this video will help. And as always do me a favour hit the subscribe button and smash the bell icon. Let’s get started.

Keep Windows 10 up to date – Optimize Windows 10

In my opinion one of the most important things you can do increase the performance of Windows 10 is make sure it’s up to date and the version is at least 1903 or higher and I will explain why. To check which version of Windows 10 you have go to start run and type winver.

This will bring up the version of Windows 10 that you are using. As you can see here my version if 1903. Now to update your Windows go to Start, Settings and click update and security.  Once in here click on Download or update. As you can see here, I’m not fully up to date. Now let me explain why the version 1903 is important. 1903 version fixes speed issues with some CPUs to do with meltdown and Spectre vulnerabilities. If you want more info Go here. Otherwise 1903 or later means you get a performance fix for some CPUs.

Creating a Restore Point – Before you start

Before we make any more changes, let’s go ahead and create a restore point. This will let you revert Windows back to the way it is now. In the case of making a change and you do not know what you did you can revert to a restore point.   Go to Start and type system restore. Click your C drive and Configure. Make sure there is a dot in turn on system protection. Set the slider bar to 5%. Click Apply and then ok. Create then type a name for the restore. Click create close and then OK.

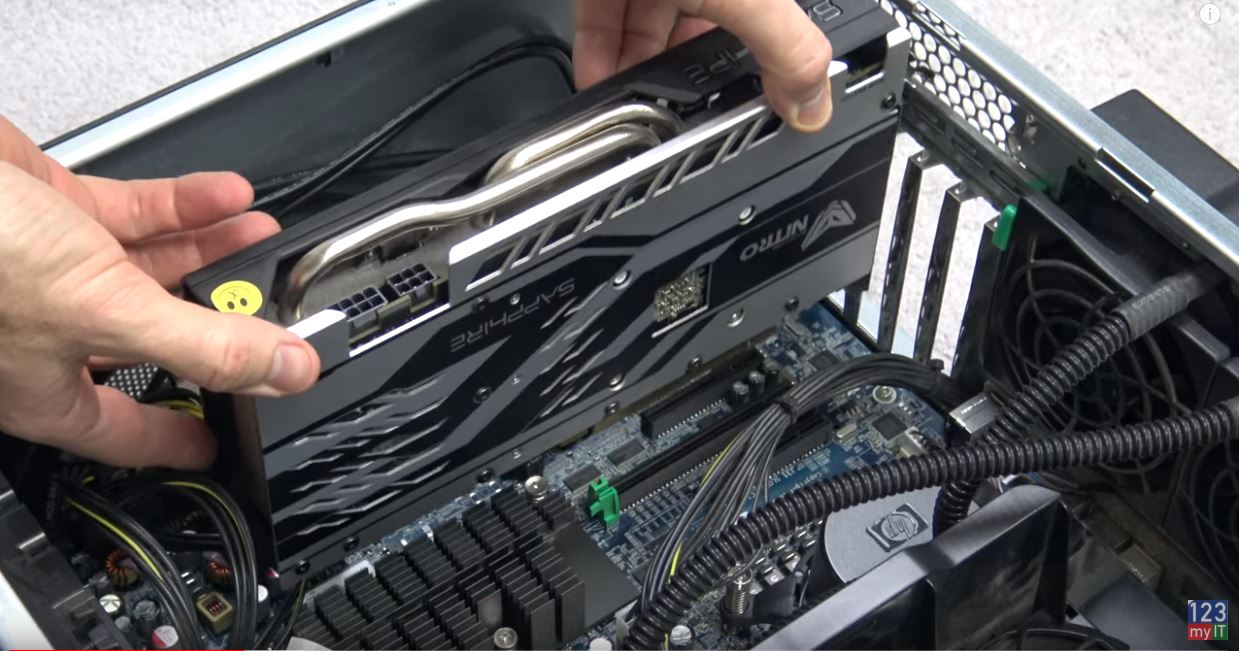
Next update your drivers right click Start and go to device manager. Look in here for any yellow exclamation marks! Windows 10 is pretty good at finding a driver so right click any driver that has a exclamation mark and click update driver and then just follow the prompts. Now if you have an NVidia graphics card I always update the driver in GeForce Experience. As you can see, mine needs updating so just click download to start it.

Turning off Overlays if you don’t need them

Also while we are in here let’s talk about Overlays. If you go to your cog you will see this in game overlay button. If you are struggling with your FPS then turn this off it’s a guaranteed extra 10 or more frames. An actually while you are at it turn off overlay in discord and steam.

In discord go to User Settings cog and click on Overlay. Make sure that in-game overlay is turned off. To turn it off in Steam go to the Steam menu then click settings. Click on the In-Game menu and take the tick out of Enable Steam Overlay. Click Ok and you are good to go.

Next we want to check the NVidia Control Panel. Right click the desktop and click NVidia Control Panel. You can also find it in the bottom right hand corner. Click Adjust image settings with preview and then put a dot in Use my preference emphasizing and drag your slider bar to performance. If you want to know more about the NVIDIA control panel, I have already done a video and will leave a link below.

High Performance Mode

Set your computer to High performance or Ultimate performance power setting. Go to Start and type power then click Power & Sleep settings. I always just turn off display after 15 mins and set the sleep to never. Then click additional power settings. Set your computer to High performance. Just remember if you are on a laptop it will chew up a bit more power. So come in here and change it back if when you are finished gaming. If you want to try, Ultimate power settings go to start type cmd and press enter.

Copy the code from the description below and you should see it enable the Ultimate power mode. To turn it on click Start type power and click and then click power and sleep settings. Then click additional power settings. And there you go Ultimate Performance. This should give you some better performance and increased frames. You can click change power settings and make some changes in there if you wish.

Use a network cable instead of WIFI

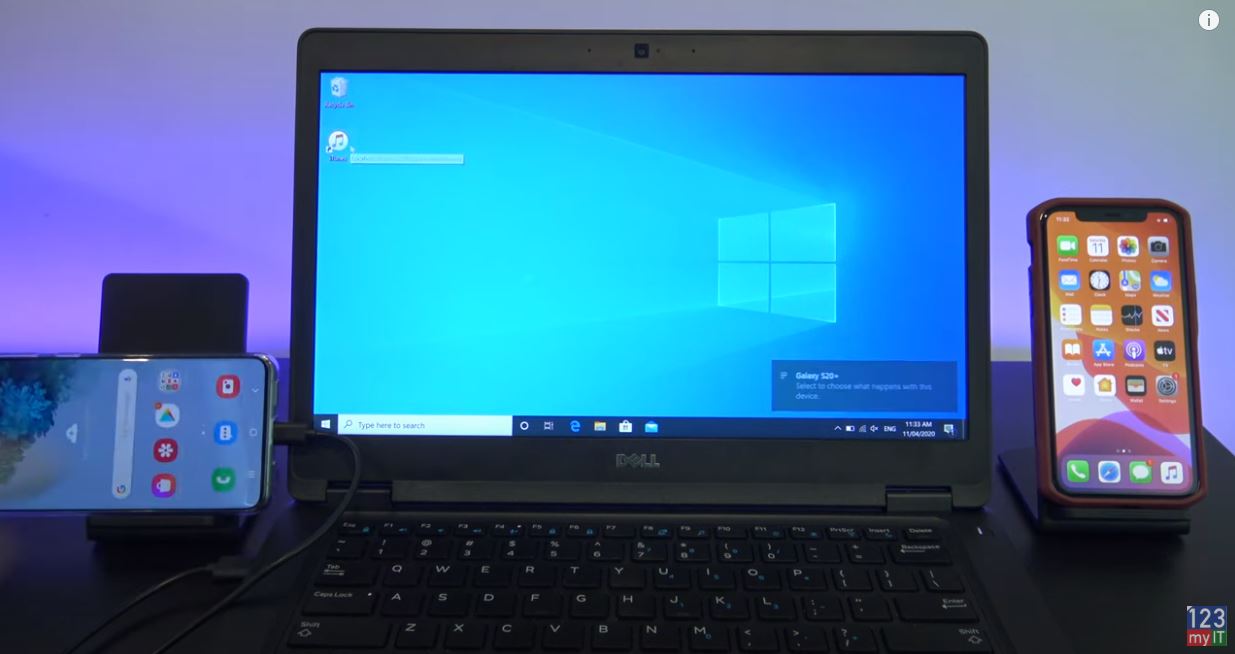
If you are gaming on laptop always, make sure you have your power cable and Ethernet plugged in. If you do not have your power plugged in the laptop will run at half speed to conserve battery power.

Optimize Windows 10 network
Using a network cable can reduce network lag

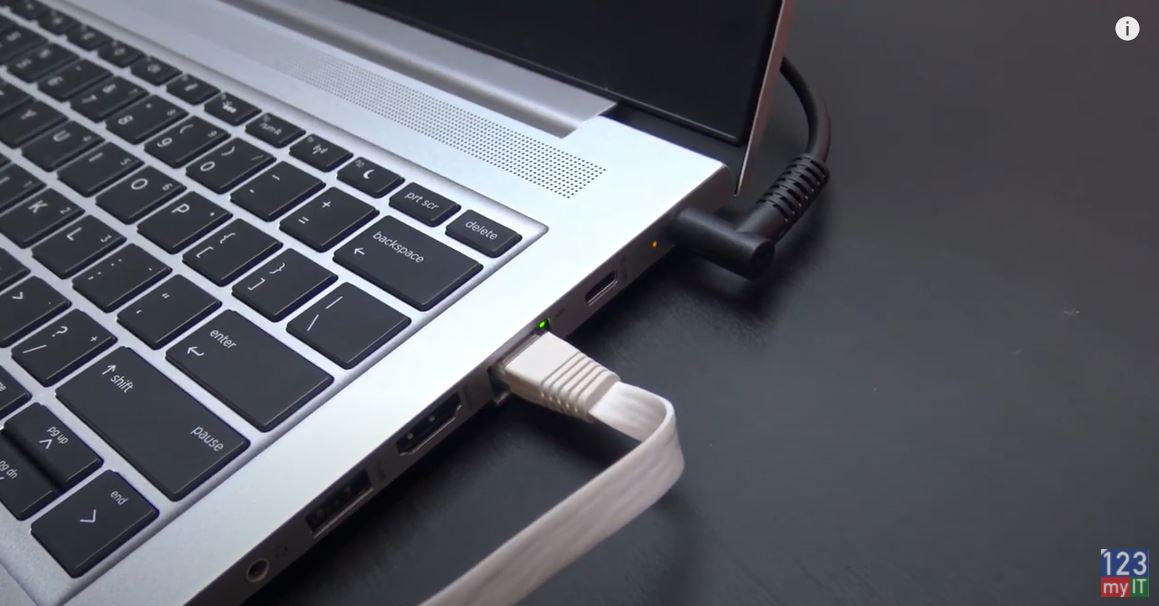
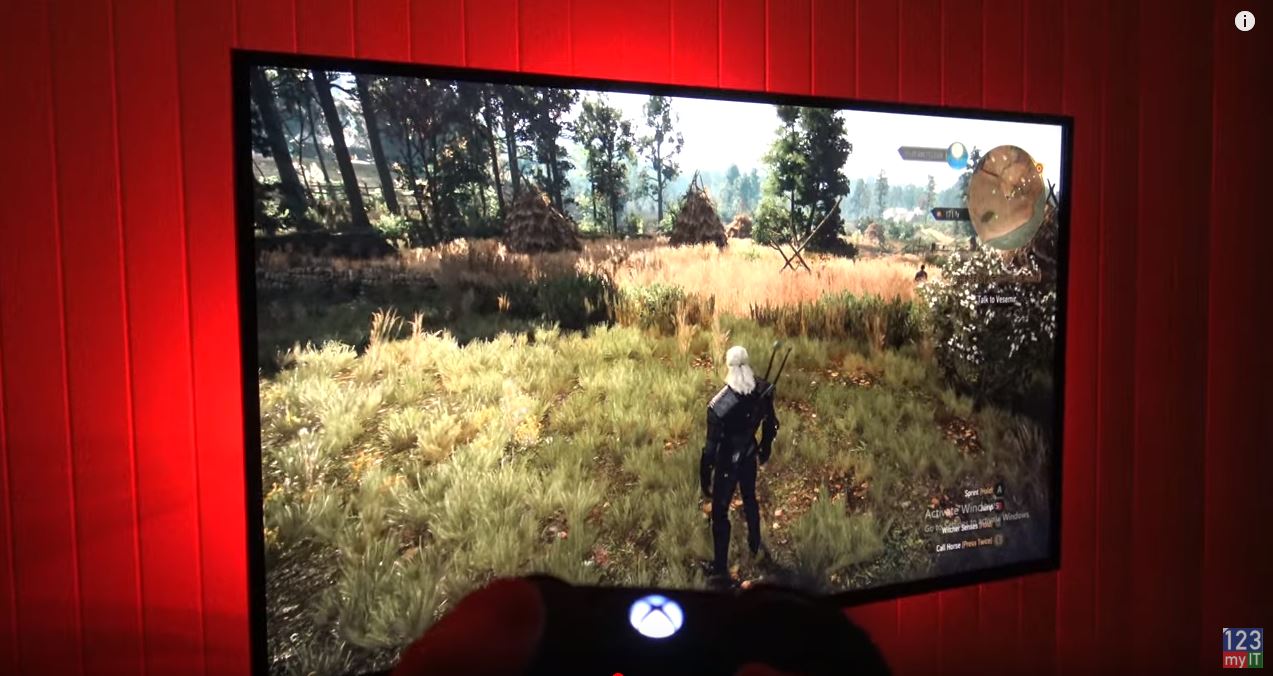
And I will show you why you should never play games on WIFI. I am connected on WIFI at the moment if I open a command prompt and ping my local router lets see the speed I get on WIFI. Ok every ping is above 1 MS or more and there’s a spike 12 MS. And some more spikes 36 to 45 MS. Now let me disconnect WIFI and plug in a network cable, watch what happens. Check it out all ping goes to less than 1ms. So let’s put this in perspective. Why bother spending huge money on a laptop or a .5 MS gaming monitor if you are going loose those gains by playing over WIFI. It drives me crazy when gamers do this and then wonder why they are having issues.

Disable programs that you are not using

Disable Start programs stops programs running in the background and will give you some extra performance. Right click taskbar, click Task Manager. Click more details and Start-up tab. In here you will have programs that start up when start your computer. Right click to disable any that you do not need. For me I am going to disable this Logitech downloader. Other good ones are Skype and OneDrive.

Uninstall Apps that you are not Using

Uninstall any apps that are not needed. Go to Start settings and click Apps. Find any apps you do not need click on it and then click uninstall.

Turn Off Windows Indexing

Next, we are going to turn off Windows indexing. Moreover, there is some times to turn this off and times to keep this on. Optimize Windows 10.

Good CPU and a standard hard drive = Keep indexing on

Slow CPU and any hard drive = Turn indexing off

Any CPU with an SSD = Turn indexing off

Otherwise click This PC, right click your hard drive, and go to properties. Down the bottom you should see allow files on this drive to have contents indexed. Take the tick out click apply and then ok. It will take some time to do this once that has done just click ok.

Turn off other Windows Settings

Next, up we are going to turn off all the little windows settings that run in the background and take up system resources. There is actually allot of these so I am going to go through them as quick as I can. Just turn off anything you do not need is the rule of thumb here. Optimize Windows 10.

Go to start settings System. Turn off any Notifications you do not need.

Go into Focus assist and make sure it’s off.

Turn off user access control. I just find this an annoying popup. So if you are not bothered go to the

Also guys don’t forget to check out my other videos such as Setup Windows Hello Fingerprint. And do me a favour hit the subscribe button and smash the bell icon.

HP ProBook 430 G7 in 3 Minutes

Transfer Data Android to Android 2020

Setup Windows Hello Fingerprint

Hi guys and welcome to 123myIT. In this video, we will show you how to setup Windows Hello Fingerprint.

If you do not know what Windows Hello Fingerprint is, it’s the little button on your Windows computer that allows you to log in to your computer without typing a password. So your fingerprint becomes the password. Let get started.

If you click on Start then go to Settings. In addition, click on accounts and go to sign in options.

Setup Windows hello fingerprint
Sign-In Options and Setup Windows hello

Then go to where it says windows hello fingerprint. Now I have already setup my fingerprint. So I am going to click remove and then click setup to create a new one. Next you click on Get started. Now it may ask you to setup a PIN. Go ahead and type one in. Otherwise, if you do not know your PIN you can click Forgot my PIN.

Ok go ahead and start tapping your finger on the fingerprint sensor. Remember to move it around a little bit, so it picks up your finger at any angle. Click next and then tap your finger again a second time. Awesome you are all set now time to test it to make sure it works.

Lock your computer and then unlock it with your fingerprint. Sweet its working!

Guys don’t forget to check out my other videos such as HP ProBook 430 G7 in three minutes. And do me a favour if you know anyone who might need this video please share it will them, hit the subscribe button and smash the bell icon.

HP ProBook 430 G7 in 3 Minutes

Transfer Data Android to Android 2020

HP ProBook 430 G7 in 3 Minutes

Hi guys and welcome to 123myIT. In this video, we will show you everything you need to know about the HP ProBook 430 G7 in three minutes.

HP ProBook 430 G7 Overview

The design of the ProBook 430 G7 is the same as the previous model the HP ProBook 430 G6. I did a review on the G6 and you can compare the two by using the link above. Personally, I think that HP have the design of the G6 and G7 right so this is probably why they have not changed it.

Pricing for the G7 starts at $792 USD for the Intel i3 CPU and goes up to $1118 USD for the i7 CPU.

Battery Life

In the box, you will get a black HP laptop bag. Warranty and setup documentation. Along with a 45 watt power adapter. The laptop uses around 31 watts of power, which is good. However, the battery life is not so great and will last around seven hours and take almost two hours to fully charge.

Next you will have the Hp ProBook G7 itself. The G7 comes with a 13.3 inch LED SVA Anti-Glare HD Display. With a resolution of 1366×768 and 220 nit of brightness. It is a TN Panel and while movies look ok you can configure the laptop with a higher res IPS panel when you buy it. However, the response time is not great so it not designed as a gaming laptop.

Will it run FortNite

Out of the box, though I was able to get FortNite to run ok on giving up about 35 to 50 Frames per second. This would be mostly due to the Intel quad core i5 Comet Lake CPU and 8gb of ram as the Intel 620 GPU has no memory and is kind of old now.

hp probook 430 g7
HP ProBook 430 G7 Runs FortNite

Finger Print Scanner and G7 Hardware

The G7 does also have a finger print scanner, which allows you to unlock Windows with a touch of the button. Along the top, you will find a integrated HD 720pwebcam with dual microphone and indicator light. One of the cool things about the G7 design is you can close the camera off with a sliding button. On the right side, you have the charging port, USB C port. RJ45 Ethernet, HDMI port, USB 3 port and Audio combo.

You also have an indicator light to show when the laptop is being charged. The USB C doubles as a display port so if you have a USB C to HDMI adapter you can plug in an external display. On the left, you have a Kensington lock, USB 3 and SD card reader. The SD card sits flush in the laptop so you can use this port to upgrade the storage without opening the case.

Sound

The ProBook 430 G7 speakers are pretty good. They are not too loud and missing some base, but otherwise sound pretty good. The Trackpad is nice and wide but I do find myself right clicking allot. Because to left click you need to press on the left side of the Trackpad.

Keyboard

The keyboard is a delight to type on and does not bend when typing. The keys are also backlit and have off, on bright and brighter setting. The overall build feels like good quality and display hinge folds all the way back 180 degrees. You can also upgrade the G7 by removing the screws from the bottom cover. The system supports 32gb of RAM. So you can upgrade that along with a spot to add another SSD if you want. The WIFI has also been upgraded to WIFI 6.

Benchmark

Here’s the Geekbench CPU score and the GPU score. If you are looking for a gaming laptop then you are better off looking for a laptop with the NVidia MX GPU. However if you are after a light cheapish laptop to browse the web and check email then the G7 is a good option.

Guys don’t forget to check out my other videos such as Transfer data Android to Android 2020. And do me a favour if you know anyone who might need this video please share it will them, hit the subscribe button and smash the bell icon.

Change Bixby Side Button on Samsung

Make your Phone Number Private on Android in 2020

How to join a Zoom Meeting PC & Mac

Hi guys and welcome to 123myIT. In this video, we will show you how to join a Zoom meeting.

If you have been asked to join an online Zoom meeting but have no idea how to do that, do not freak out. This video will show you how to do it.

Guys this video will show you how to Join a Zoom meeting, but I will also be doing a video after this one which shows you how to create a Zoom meeting. So please hit that subscribe button.

Setup Zoom on PC and a Mac

I will show you how to do it on Windows first then Mac later in the video. Ok Let’s get started. Open up a web browser and type in Zoom.US.

That will take you to the official zoom website and you should see the Join a meeting link on the top of the web page. If you click on that it will take you to a Join a Meeting page, where is asks you for a meeting ID. Below that you also have an option of joining a meeting from H.323/SIP room. Don’t worry if this doesn’t make much sense to you just pointing this out so you know where to go if you need to connect to this type of meeting.

Ok let us check the meeting invite details that were emailed to us. So if you have been invited to a meeting you will normally have some meeting details sent to you via email. Here I have a copy of that invite which says 123myit is inviting you to a scheduled Zoom Meeting. Topic My meeting and a link which you can use to join a meeting. Go ahead and copy that link and paste it in your browser.

Meeting ID details

Press Enter on your keyboard and the meeting will start. You can also copy and paste the meeting ID directly into the web page or if you have the Zoom app installed you can copy the meeting ID into the Zoom app. And below that you can change your display name. When using the Zoom app you might be prompted for a password copy and paste that to join the meeting.

You might be prompted to download the Zoom app or if you already have it installed you will be prompted to Open Zoom meetings.  You should then see a popup, which says Please wait for the host to start this meeting. As you can see the meeting starts at 12pm but the time now is 11:15am. So we are a bit early. While we are waiting click test Computer Audio. In here you can test to see if your speakers and microphone are working. If you have different speakers and microphones you can change which one you want to use in these settings. For example you might have desktop speaker or headphone.

Join a zoom meeting
Zoom settings important to setup before you start.

Video Settings

If you click on Video you can change you video settings around. So here my webcam is just pointing at my Samsung phone playing a video. If you want you can rotate your video. Under camera if you have more than one camera you can select a different one. Below that you can change the ratio from Widescreen to Original. Enable HD just allows you to up the resolution so that your camera looks less pixelated. Mirror my video flips the video around. This is important if you are reading a book or something and you want to turn the text around the right way for your views to see it. Touch up my appearance makes the video look better.

Virtual Background

Ok click on Virtual background. This allows you to virtually add a background behind you. So if I select the 123myIT logo I can add it behind me. If we untick mirror the logo faces the right way. Note that its not picking up the phone very well. We can fix this by using a green screen. I don’t have a green screen cloth but I can change the LEDs in the background to green. Watch this.

There you go you can see the phone now. Its not perfect but work pretty well on my hand!

Ok the meeting has started. Just select join with computer Audio. The first thing that I recommend doing is turning off your Audio and video in the bottom left until you are ready. Otherwise, you might interrupt the Host if he or she has started speaking. Next up select participants and chat in the bottom, this will allow you to see who is in the meeting and display the group chat if you have a question. 

Webcam

If your not camera shy you can show your video by pressing the Start video button in the bottom left hand corner along with the Unmute button to start speaking. If someone else is speaking its good practice to mute yourself until you want to talk again. Along the bottom you also have a thumbs up and clap reaction which displays on your video. You also have buttons to share your screen and record.

In the top you have gallery view and speaker view buttons. It just changes the view so you can see more participants if you need too.

If you want to make sure you leave a meeting, click the leave meeting button in the bottom right of the screen.

Join a Zoom Meeting on a Mac

Joining a meeting on the Mac is pretty much the same. Go to Zoom.us in the web browser. Click Join a meeting. Copy and paste your meeting id. If its your first time joining a meeting click download and run Zoom app. Press continue and enter your password to install. Paste your meeting ID and change your name if you want and click join. Copy and paste your password.

Congratulation you have joined a Zoom meeting. All the options will be the same as the first part of this video.

Also guys don’t forget to check out my other videos such as Install Windows 10 on a Mac 2020. And do me a favour if you know anyone who might need this video please share it will them, hit the subscribe button and smash the bell icon.

Copy Music from Android to iPhone, iPad & iPod

How to Clean & Disinfect your iPhone & Case

Install Windows 10 on Mac 2020

Hi, Guys Welcome to 123myIT. In this video, we will show you how to install Windows 10 on a Mac in 2020.

🔥 Check out the SanDisk USB on Amazon Click here. https://amzn.to/2JZiWMV

🔥 Check out the MacBook Air range on Amazon Click here. https://amzn.to/38ggr2g

I get allot people asking me. Why would you want to install Windows 10 on a Mac? Moreover, my reply is always. You have nice Apple hardware; why not put the best OS software on that hardware? People, if you disagree leave a comment in the comments section below.

Get Windows 10 for FREE

Ok let us get started. You will need a Mac a USB stick and a copy of Windows 10. To get a FREE copy of Windows 10 you can get it from the 123myit.com website under downloads. However, you will need a Windows computer to download that copy onto your USB drive. In the Downloads section scroll down to where it says Windows 10 Media Creator tool and run that. Select create installation media for another Pc. For language, I select English US, Edition Windows 10 Pro and Architecture 64 bit.

Next we want to select ISO file. This is the Windows 10 file that we will copy to the USB and then from that USB we will copy it to your Macs Desktop.

SanDisk USB C and USB 3

Ok so I have already copied the Windows 10 ISO file to my Macs Desktop from the USB stick. The USB stick I am using is a SanDisk Dual drive USB. It has both USB C and the older USB 3 so I don’t get stuck when using USBs on my new MACs. They are helpful I will leave a link here. Once the Windows 10 ISO file is copied to your Macs desktop. Go ahead an open Boot Camp assistant. Just click on finder and search Boot Camp.

Ok if Boot camp does not select your Windows 10 ISO file Automatically go ahead and select it manually. Mine has detected so all is ok.

Windows 10 on Mac
Partition the Macintosh hard drive to keep both Mac and Windows.

Partition your Macintosh HD

The next step is to Partition your drive so that you can fit Windows 10 onto you Mac. If you are unsure about this just move your slider to halfway. Click install and then your Mac will download the Windows support software. This may take a while so let the Mac do its thing. Next, it will partition the disk and just follow the prompts it will restart.

If everything has gone ok you should see the Windows 10 setup screen. Just go ahead and select the options for Language and Click do not activate Windows now.

Ok select your country and follow the prompts to setup Windows 10.

So setup for personal use, click that and I always just use offline account. However, feel free to setup Windows whatever way you want. Click limited experience and then type in your user name. I just create 123myIT as a user. Add in a password and click next. I always click no and decline. Up to you, what you want to select for Privacy settings I just click no.

Installed Windows 10!

Awesome you have just installed Windows 10 on a Mac. The last step here is to make sure the Boot Camp drivers are installed. It is an important step so do not skip this. Otherwise, things like your sound buttons on your Mac will not work properly.

You should see a Boot Camp Window on your screen just click next and follow the prompts. If you didn’t get this screen go back into your Boot Camp folder on your hard disk and run the boot camp setup.exe file again. If you want to check your drivers are installing properly go into device manager and you should see all the devices install properly.

Sweet that is finished now check your devices and you can do a restart and test if your Sound and Volume buttons work ok.

People do not forget to check out my other videos such as Copy Music from Android to iPhone, iPad and iPod. Please feel free to ask questions in the comments felid below. In addition, can you do me a favour hit the subscribe button and smash the bell icon.

How to Clean & Disinfect your iPhone & Case

Transfer data Android to iPhone 2020

Copy Music from Android to iPhone, iPad & iPod

Hi Guys welcome to 123myIT! In this video, we will show you how to copy music from Android to iPhone, iPad and even iPod touch.

Guys this is the official way that Apple recommends to transfer you Music from Android to iPhone. However, you will need a computer to copy the music to first. Therefore, it can be a PC or a Mac.

If you need to transfer all your other files such as Contacts, Photos, Videos and Messages. I have already done a video for this and will put a link here.

Getting Started

The first step is to connect your Android device to your computer and find your music. On most devices, you can find these files in Music. On a Mac, you will need to install Android File Transfer, you can find the link on the 123myit.com website under downloads. Once you are on the Downloads page just scroll down to where it says, Android File Transfer. Then click on Download now and install the Android File Transfer software. Drag it across into your Applications folder. Once installed. Click on Go and Applications and open the Android File Transfer software. You might need to tap Allow on your Android device to give the computer access to your music folder. Close your windows and tap on the Android Transfer Software at the bottom of the screen.

Awesome you should now see the complete list of folders on your Android device. Find your music folder and drag it to the Computer desktop.

Unplug your Android

Once your music is copied, you can unplug your Android device you are finished with it now. Next, Plug in your iPhone iPad or iPod. Open up your Apple Music or iTunes. Then drag your Music folder from the Desktop into your Music or iTunes. Once that is done minimise your Music or iTunes app and the click on Go and Computer. Click on your iPhone and click on Pair if you have not done this already. Next click on the Music tab and put a tick in Sync music, then you can select Entire music library or you can do selected Albums. Once you are finished just click Apply, then go back into your iPhone and click Sync.

Cool, unplug your iPhone and check if your music copied across.

This video & article will show you how to copy music from Anrdoit to iPhone, iPad & iPod. This is helpful if you want to move data from Android to iPhone.
Using a PC to store and copy the Music.

Copying the Music on PC

The process is the same on PC but you will need to download iTunes. Open up the Android device in Windows explorer and copy the music folder to your Computer Desktop. To download iTunes you can Google it or I have put a direct link on the 123myit.com website under Downloads. Just scroll down to where is says iTunes download.

Once installed you can open it up and remove your Android device. Plug in your iPhone and tap Trust. Drag your Music folder from the Desktop into your iTunes app. In iTunes click on your iPhone then select Music and again you will have the options to choose Entire music library or Selected Playlists. Once done click Apply then click Sync. Go ahead, remove your iPhone now, and check the Music has copied across.

Guys don’t forget to check out my other videos such as how to clean and disinfect your iPhone. In addition, if you liked this video can you do me a favour and share it with someone who might need to know how to transfer his or her music. Don’t forget to hit the subscribe button and smash the bell icon.

Transfer data Android to iPhone 2020

Samsung S20 + Unboxing Firstlook Zooming Awesome!

Aorus KD25F Gaming Monitor – Cheating Stream Snipers Paradise

Hi Guys and welcome to 123, in this video I will show you how to an unboxing and first look at the Aorus KD25F Gaming Monitor.

Check out the KD25F on Amazon here 👉 https://amzn.to/2Pd7K2F

The Aorus KD25F is a 24.5 inch 240hz Gaming monitor with a 0.5ms response time. Its also  Gsync and Free sync compatible. The KD25F retails for around $400 usd and $750 aussie at the time of this video. Other features include LED Fusion lighting, Aim Stablizer and what I consider the best feature of them all OSD SideKick. Lets take a look what you get inside the box.

You get three different power plugs. So it looks to be a Chinese power plug, an Australian New Zealand power plug and a US power plug. Next we have display port 1.2 and a HDMI 2.0 cable. Its nice that you get one of each. In some monitors you will only receive one cable. And last up we have a USB 3.0 cable which powers the USB hub and OSD SideKick software.

A monitor in this price range should come with a really good stand. And the Aorus KD25F monitor doesn’t disappoint with a really solid base to the stand. More about this later in the video. Its looks a bit like a boomerang.

Next up is the arm that connects to the monitor to the base. Taking the monitor out of the box you can see it has a Energy rating of 4 stars and while on the Gigabyte website it says it uses 60 watts on average it uses about 21 watts. Which is actually pretty good for a gaming monitor.

Also in the box you get the installation guide and warranty card.

The Stand

The stand is solid as and the arm and base just slot it together. After this just tighten the screw on the base. On the back of the monitor you have a power plug with an on off switch and a Kensington lock.  You also have a toggle switch to navigate the monitor OSD which is really helpful when navigating the menus. Above that Audio and Microphone jacks. Two HDMI posts, one Display Port port! USB 3 in port and two USB 3 out ports.

On the back of the monitor itself you will find 4 screws which means the monitor has VESA wall mounting support. Helpful if you want to change stands. The stand snaps into place nicely and there is a quality feel to it. There was talk on the internet about the stand being flimsy and wolling allot and it does move when I shake like this. However after testing the monitor for about a week I didn’t find it to be an issue at all.

Once setup the monitor take up about 21 cms of desk space. This means if you have a small desk it like I do. It will sit off the wall about 21 cms. Its not a deal breaker but just something to be aware of.

Rotate the Stand

The stand not only looks great but it allow you to ajust the height. Also the pivot the monitor 90 degrees. Tilts up and down. And it can swivel 20 degrees side to side.

Aorus KD25F Monitor
Wings of excellence design

The stand has the Aorus Wings of Excellence design which looks cool. But in my opinion it lacks functionality. You can change the colour of the LEDS on the back of the Aorus KD25F monitor and the stand however they are very bright and most of the time you wont see them so they are a complete waste of time. If they were brighter you could shine them on a wall behind the monitor like I have done with my LEDs and it would make for an excellent gaming experience. The stand also has a nice built in handle, which is handy if you need to carry it.

Iam going to spend a bit of time going through the OSD SideKick because I think its really cool.

AORUS OSD Side Kick
OSD Side Kick Software – Allows greater control of Monitor settings.

OSD Side Kick – Best Feature !

The OSD sidekick software allows you to control the settings of you monitor with your mouse. You need to plug the USB into your computer for it to work but it has some great features.

The first thing you will notice the Aorus KD25F monitor is really bright, to the point of where its hard to look at. So in the OSD there is a set of seven profiles. Each of these profiles give you different settings such as Brightness, Contrast, Sharpness, Black Equalizer, Colour Vibrance, Low Blue Light and super resolution. This means you can set a really bright profile for gaming and then another low light profile for browsing the internet or working. Then you can bind these profiles to a Hot Key so you can change them on the fly. Here you can see change a few settings within the Aorus profile.

Next up we have the Gamma setting which you can change as well as the colour temperature. However, the one I want to talk about most if the Overdrive setting. The Overdrive setting controls the response time of your monitor, which is very important for RTS and First Person shooter games. You have three settings Quality, Balanced and Speed. Quality is over drive turn off and it’s the slowest setting. It has an average Gray to Gray of 5.5 ms and no overshoot. The Balanced setting has a faster response time of 3.1 ms Gray to Gray and still no overshoot so this is a great setting to use for that balance between speed and quality. Speed mode is the fastest with an average of 1.5 ms gray to gray. However you will start to see some overshoot errors and ghosting with this mode.

Ok so the next setting is Aim Stabilizer, this reduced the motion blur in fast moving games. However you cant use this feature with the FreeSync function enabled. And to be honest I couldn’t see any difference with this on.

FreeSync and G Sync

Turning on the FreeSync option will turn FreeSync or G Sync on depending on if you have AMD or NVidia graphics card. When this option is turned on it eliminates screen lag and tearing whilc playing games.

The Cross Hair option is borderline cheating. Turning this on will allow you to paint anything in the middle of the screen. So if I click on the edit button and paint a crosshair or anything else this gives an advantage over other players for sure. I was surprised how easy it was to make good Crosshairs.

PIP and PBP. This setting allows you to create a picture inside your picture or make two pictures beside each other. Lets take a look. As you can see here I now have my laptop and monitor computer screen side by side. Now the settings is picture in picture and I can change the size and the location of the picture. You can also swap your pictures around and bring the small picture to the front and large picture to the back.

Cheating Possible with the Aorus KD25F Monitor

I racked my brain thinking how this technology could be used and then it hit me. If you are a stream sniper you could use this to follow someone’s stream at play your own game. Then I realised you could watch a team mates stream and you might be able to see what enemy players are. It would be delayed slightly but still helpful!!! Again great from cheating. J

Dashboard is pretty cool. Lets say you want to keep an eye on the temperature of your CPU or GPU you can do it through the dashboard. It makes a little display which you can make it see through so it doesn’t get in the way. It’s a nice feature. Just turn off what you don’t need. For me the CPU and GPU temps were pretty helpful.

Cancel Noise

You can turn the LED indicator on and off on the monitor. Not a big deal, but I also wanted to show you that there is a mic pin hole just above it which works with the noise cancelling feature.

There is also a noise cancelling feature which people on the internet said it would be good for when you take your computer to a lan party. But I was thinking it would probably be best for those of us who intend on getting on discord with loud clacky keys. Hopefully this feature would filter out allot of that background noise.

Here is some footage of the Crosshairs in action! I will be selling the 123 crosshair on my website. Just kidding J And here is the default crosshair. Its pretty good.

Also guys don’t forget to check out my other video such as The Witcher Media PC Build. And do me a favour hit the subscribe button and smash the bell icon.

Setup XBOX controller on Apple TV, iPad or iPhone + Games

Setup DUALSHOCK 4 controller on Apple TV, iPad or iPhone

Media PC Build – The Witcher

The Witcher 3 PC Build.

If you did not know already, The Witcher is Netflix series, which is due to be released on the 20th of December. Before that, it was a series of books written by Andrzej Sapkowski. In 2015, The Witcher 3 game was released and it won numerous Game of the year awards. This was one game that I felt like I missed out on playing, so when I found out that the Witcher 3 supports XBOX controller on the PC. I decided to build a media pc complete with an XBOX controller.

In this build, I repurpose an OLD HP Z800 which featured in a Cryptocurrency CPU build I did. And I will be reusing an RX 570 card which I used in the Kraken mining rig build. I will put a link to that video as well.

All right let get started.

If we take, a look at the specs needed to run the Witcher in the z800 we have 12 GB of ram and duel Xeon X5660s which is more than enough and adding the rx570 should give us a great result for a media pc build.

Media PC Build
AMD RX 570 GPU install.

First up let’s remove the Nvidia Quadro 4000 card. Remove the 6 pin power plug first. You might have noticed I did not use the GPU clip, which unlocks the card from the motherboard. That is because I’ve modified the clip and when I say modified I really mean I broke it. I did this because I found the clip annoying when adding and removing cards.

Install the GPU RX 570

Let’s remove the Sapphire RX 570 from the Kraken mining rig by removing the 8 pin power cable. As well as removing the PCIE connector from the bottom. The Sapphire RX 570 cards are great for mining and gaming and heres why. They have a dual bios switch, which means you can have one bios for Mining and one bios for Gaming. So I just switch the bios switch over and start gaming with it. I do not have to flash the bios or anything messy like that.

As you can see she’s a bit dirty, so let’s give her a quick clean up before we move her into the case.

Alright let’s add the GPU to the case. Pretty straight forward. Just add the card in the same spot we removed the Quadro 4000 card from.

The Z800 only comes with 6 pin power connectors. So we need to add a 6 pin to 8 pin power connector. You can get these cheap online.

Make it power efficient as possible.

I am going to remove the SATA hard drives and replace them with a faster SSD. You could keep these in if you wanted extra storage for games or movies, but I do not need it and they will just waste power being plugged in.

The SSD I am going with is a Kingston brand and I could slot it into the same spot as the SATA hard drive, however it will not have any support there so I am going to gerry rig it inside the case.

Add in a new SATA cable and give it some power. And then I just find a spot to wedge it in the drive bay area and it’s good to go. Plug the SSD into the motherboard on bay 0. Remove the power from the DVD drive since I am not going to be using that.

Close the case and hopefully we are done on the inside of the build. Next up plug in power keyboard and mouse into the media pc build.

Install Windows 10

To install Windows 10 I’ve got an installer copy on this Seagate USB hard drive. Newer USBs do not seem to detect properly on this older computer. Do not forget our HDMI cable for our monitor. To boot into bios or boot menu. On your keyboard you might have tap F2 Delete or in this case of the Z800 you press F9. Once you are in the boot menu select the USB device. Then go ahead and install Windows. When windows finishes installing remove your USB hard drive.

Check that your RX 570 card is correctly installed. This is important if they were used for Cryptocurrency as they will show up with a yellow exclamation mark next to them and your game will be slow or not even load. Make sure your driver date is on the money as you can see here mine is recent so we are good to go. This next addition is what will really make the build shine. We are going to add in the XBOX controller. The Beauty of the XBOX controller is when family or friends come over to your house and they are a bit bored, you throw them an XBOX controller and they are instantly entertained.

XBOX Controller working?

All right plug in your XBOX USB and let it detect in Windows. Go ahead and pair your controller it, the USB should flash when successful.

The Witcher build going live!

Ok so I have connected the Z800 to my LG TV and I’ve got my XBOX controller ready to go for the media pc build. But I feel like there is something missing. I still feel like there is something missing. How about LEDS? That is better!

Cool, let’s fix up the TV settings. On the LG TV I have this button called Q menu and it allows me to choose a few different TV options such as Gaming and Cinema. What I noticed is the picture on Cinema was far superior to Gaming. Because I am not playing the game competitively, I am just going for the best picture and man it really made a difference. Take a look.

I decided to leave it on Cinema. A quick check to see how many frames the RX 570 is giving me and as you can see here, it is a solid 60 frames. Its a great result. I tested this on my 120 hertz monitor. I set the game to unlimited so I am sure it is higher than this but maybe it is a limitation of the TV.

Let check out some gameplay!

Also guys don’t forget to check out my other videos such as How to setup XBOX controller on Apple TV, iPad and iPhone. And do me a favour hit the subscribe button and smash the bell icon.

Setup DUALSHOCK 4 controller on Apple TV, iPad or iPhone

Turn on Voice Control on iPhone, iPad and iPod Touch