Clean GPU in 2021

Hi Guys and welcome to 123myit. In this video, we will show you how to clean GPU in 2021. Ok Guys If you are like me and you have a Crypto GPU or a Gaming GPU and you have been using it a while and it needs a clean then follow me and I will show you how to fix it up.

In this video, we will clean the GPU as well as replace the heatsink thermal paste and the thermal pads.

Dirty GPU to Clean GPU

The model I have here is the Radeon RX 570 and I was using it on a mining rig and as you can see its really dirty and clogged up with dust and to the point where its just over heating all the time. And even some of the heat sink is starting to corrode.

Take the GPU apart

Let us get started. The first thing you will need to do is take apart the card. You can do that by finding the screws that attached the fans to your heatsink. Once you have found them, just go ahead to and remove them. If you have, a different model and you are unsure. My best advice is to take it slow and gently. Moreover, do not get frustrated with it, as you will wreck your card.

When you have the screws loose gently, try to remove the Fans. With my card I have 3 fan cables which I need to remove. Be very gentle with these cables. Make sure you pull them out by the plug and not by the cables. If you pull it out by the cables, there is a chance the cable can break.

Go slowly

Just do your best to kind of slow massage them out. This top one was in awkward position so I just leave it and try doing the bottom one. Try not to force things.

Finally, I get the bottom cable off and wow check out all that dust and the corrosion. To clean the dust off the heat sink, some people use a can of compressed air and blow It everywhere. I just use a vacuum with brush attachment. In addition, do the same cleaning on the fans.

Remove Heatsink

Next step is to remove the heat sink screws. Generally, they will be the four screws on the back of the card. Gently try to remove the heatsink. If it does not move, do not force it. Go back and check there are no more screws to remove.

Cool, there it goes I had two more screws to remove. Therefore, we are going to replace the Thermal pads and Thermal paste. As you can see, the Thermal Pads are pretty much gone on the memory. Gently remove the Thermal Paste. I very slowly just peal it off where I can.

The harder dry pieces gently remove with a screwdriver. Make sure you do not scratch the memory.

How to Clean GPU

You can use a damp cloth or an alcohol wipe to remove any leftover thermal pads and thermal paste.

Clean GPU

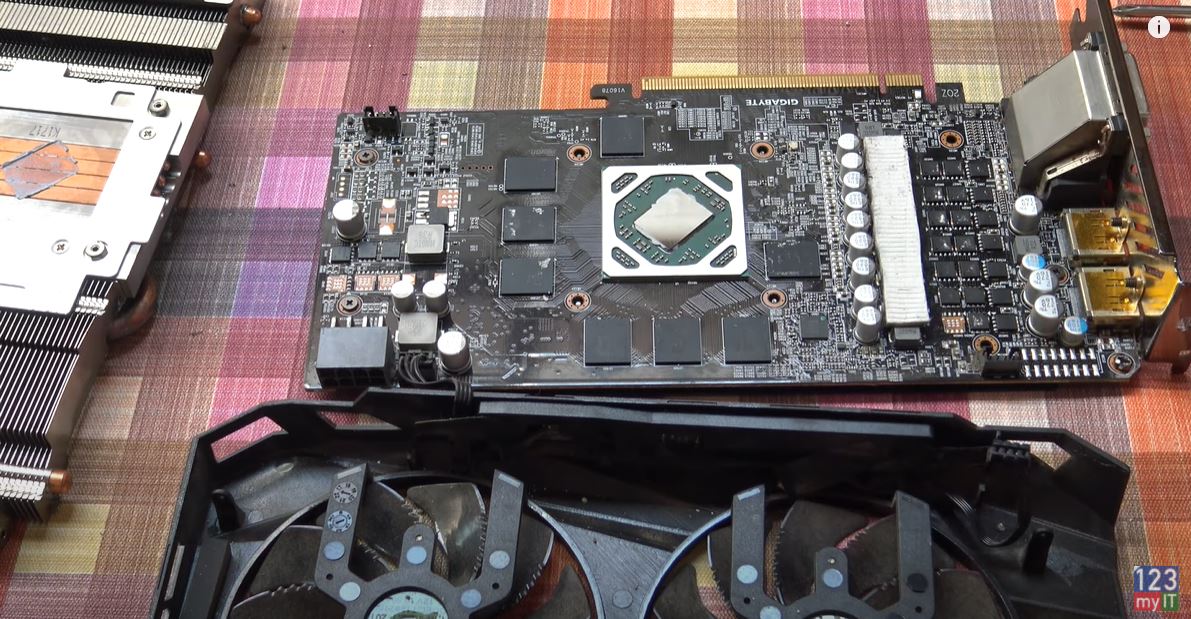
Ok time to apply the new Thermal Pads and Paste. There is different thicknesses of thermal pads that go on the memory. On this RX570, .05 thickness goes on the memory and 1.0 goes on the VRMs. However, the VRM Thermal pads seemed ok on this card so I am not going to replace those. I will show you what they are in a second. Also, If you want an Amazon link the Thermal paste and Pads I will leave a link in the description. Cut the thermal pads to size and remove the two bit of plastic either side. Then place it carefully on the memory. If you need to know what thickness, Thermal pads go on your GPU then Google your GPU along with Thermal pad size.

Adding Thermal Paste

Do the same clean for the heatsink and then apply the Thermal Paste. I just put a little bit of Thermal Paste on the GPU. It will spread out when the heatsink and GPU are pushed together.

Both sides of the heatsink have guiding screws, which allows me to place the heatsink on in the right spot.

You can see there is more Thermal pads on the heatsink. It is in good condition so I did not change it.

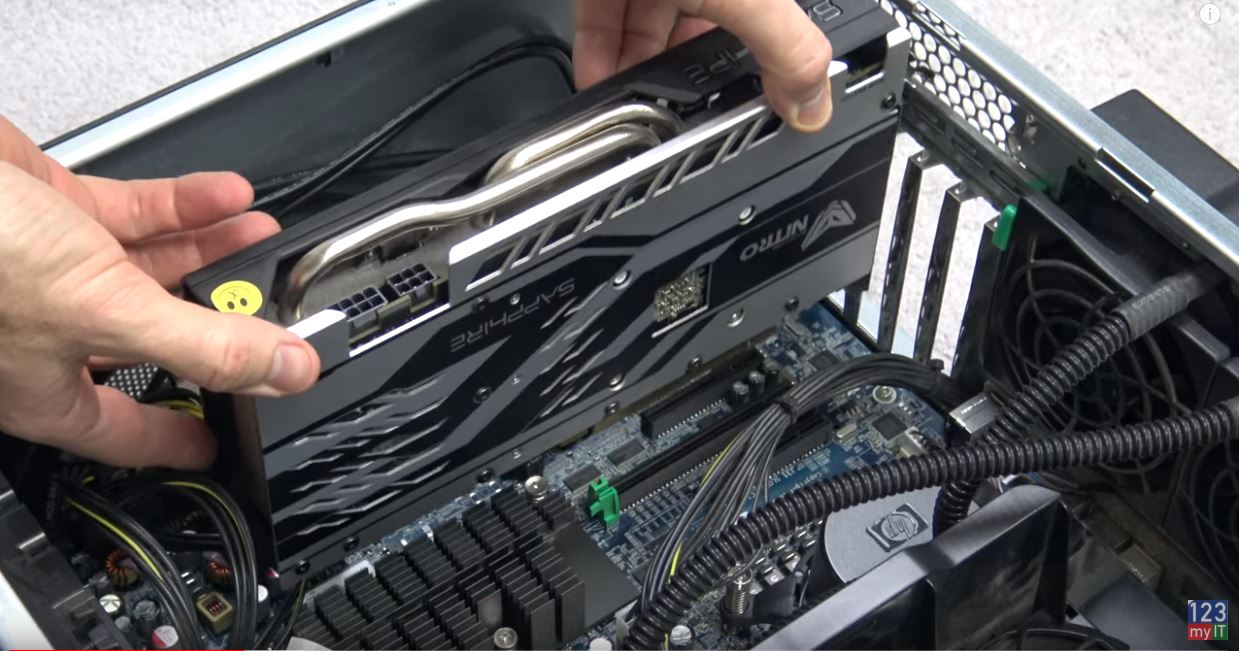
Once the heatsink is back on flip the card over and replace the screws. Next up replace the fan power cables and screw the fans back on to the GPU.

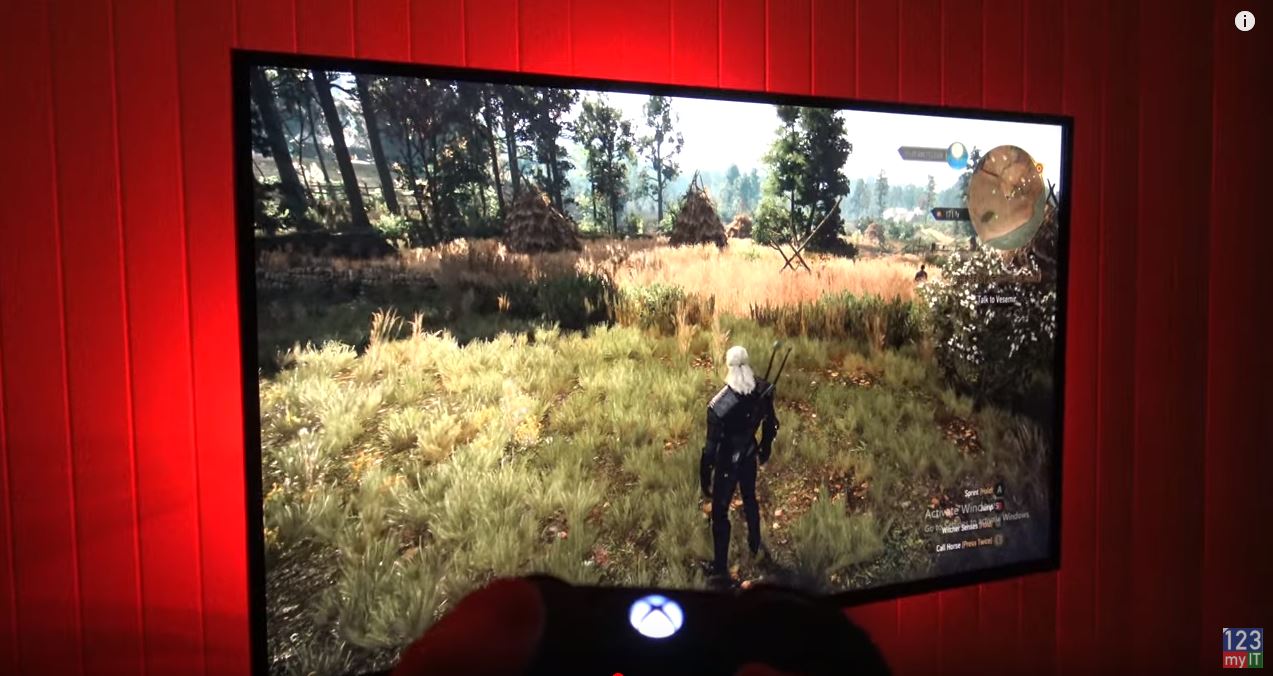
Awesome you have now cleaned the GPU and replaced the Thermal Pads and Paste. Time to put it back to good use.

In addition, people do not forget to check out my other videos such Transfer Data Android to Android. And do me a favour if you know anyone who might need this video please share it will them, hit the subscribe button and smash the bell icon.

Transfer Data Android to iPhone 2021

Samsung Galaxy S21

Media PC Build – The Witcher

The Witcher 3 PC Build.

If you did not know already, The Witcher is Netflix series, which is due to be released on the 20th of December. Before that, it was a series of books written by Andrzej Sapkowski. In 2015, The Witcher 3 game was released and it won numerous Game of the year awards. This was one game that I felt like I missed out on playing, so when I found out that the Witcher 3 supports XBOX controller on the PC. I decided to build a media pc complete with an XBOX controller.

In this build, I repurpose an OLD HP Z800 which featured in a Cryptocurrency CPU build I did. And I will be reusing an RX 570 card which I used in the Kraken mining rig build. I will put a link to that video as well.

All right let get started.

If we take, a look at the specs needed to run the Witcher in the z800 we have 12 GB of ram and duel Xeon X5660s which is more than enough and adding the rx570 should give us a great result for a media pc build.

Media PC Build
AMD RX 570 GPU install.

First up let’s remove the Nvidia Quadro 4000 card. Remove the 6 pin power plug first. You might have noticed I did not use the GPU clip, which unlocks the card from the motherboard. That is because I’ve modified the clip and when I say modified I really mean I broke it. I did this because I found the clip annoying when adding and removing cards.

Install the GPU RX 570

Let’s remove the Sapphire RX 570 from the Kraken mining rig by removing the 8 pin power cable. As well as removing the PCIE connector from the bottom. The Sapphire RX 570 cards are great for mining and gaming and heres why. They have a dual bios switch, which means you can have one bios for Mining and one bios for Gaming. So I just switch the bios switch over and start gaming with it. I do not have to flash the bios or anything messy like that.

As you can see she’s a bit dirty, so let’s give her a quick clean up before we move her into the case.

Alright let’s add the GPU to the case. Pretty straight forward. Just add the card in the same spot we removed the Quadro 4000 card from.

The Z800 only comes with 6 pin power connectors. So we need to add a 6 pin to 8 pin power connector. You can get these cheap online.

Make it power efficient as possible.

I am going to remove the SATA hard drives and replace them with a faster SSD. You could keep these in if you wanted extra storage for games or movies, but I do not need it and they will just waste power being plugged in.

The SSD I am going with is a Kingston brand and I could slot it into the same spot as the SATA hard drive, however it will not have any support there so I am going to gerry rig it inside the case.

Add in a new SATA cable and give it some power. And then I just find a spot to wedge it in the drive bay area and it’s good to go. Plug the SSD into the motherboard on bay 0. Remove the power from the DVD drive since I am not going to be using that.

Close the case and hopefully we are done on the inside of the build. Next up plug in power keyboard and mouse into the media pc build.

Install Windows 10

To install Windows 10 I’ve got an installer copy on this Seagate USB hard drive. Newer USBs do not seem to detect properly on this older computer. Do not forget our HDMI cable for our monitor. To boot into bios or boot menu. On your keyboard you might have tap F2 Delete or in this case of the Z800 you press F9. Once you are in the boot menu select the USB device. Then go ahead and install Windows. When windows finishes installing remove your USB hard drive.

Check that your RX 570 card is correctly installed. This is important if they were used for Cryptocurrency as they will show up with a yellow exclamation mark next to them and your game will be slow or not even load. Make sure your driver date is on the money as you can see here mine is recent so we are good to go. This next addition is what will really make the build shine. We are going to add in the XBOX controller. The Beauty of the XBOX controller is when family or friends come over to your house and they are a bit bored, you throw them an XBOX controller and they are instantly entertained.

XBOX Controller working?

All right plug in your XBOX USB and let it detect in Windows. Go ahead and pair your controller it, the USB should flash when successful.

The Witcher build going live!

Ok so I have connected the Z800 to my LG TV and I’ve got my XBOX controller ready to go for the media pc build. But I feel like there is something missing. I still feel like there is something missing. How about LEDS? That is better!

Cool, let’s fix up the TV settings. On the LG TV I have this button called Q menu and it allows me to choose a few different TV options such as Gaming and Cinema. What I noticed is the picture on Cinema was far superior to Gaming. Because I am not playing the game competitively, I am just going for the best picture and man it really made a difference. Take a look.

I decided to leave it on Cinema. A quick check to see how many frames the RX 570 is giving me and as you can see here, it is a solid 60 frames. Its a great result. I tested this on my 120 hertz monitor. I set the game to unlimited so I am sure it is higher than this but maybe it is a limitation of the TV.

Let check out some gameplay!

Also guys don’t forget to check out my other videos such as How to setup XBOX controller on Apple TV, iPad and iPhone. And do me a favour hit the subscribe button and smash the bell icon.

Setup DUALSHOCK 4 controller on Apple TV, iPad or iPhone

Turn on Voice Control on iPhone, iPad and iPod Touch

Best AMD RX 570 GPU for Mining Cryptocurrency

Best AMD RX 570 GPU for Mining Cryptocurrency

In this video I talk about the AMD RX 570 graphics cards and which brand I think is the best AMD RX 570. All cards will do a pretty good job at mining Ethereum at about 27 to 30 Mh/s however some cards are just better built easier to use and don’t get as hot.
The three different brands of RX 570 cards are Asus, Gigabyte and Sapphire.
Don’t forget to check out the best AMD rx 570 cards in action on my KraKen build.

Sapphire RX 570

Lets get straight into it, I have listed the pros and cons of the Sapphire cards below.
Pros
* Price around $329 usd
* Has a bios switch which allows you to switch between a gaming bios and a mining bios, really handy if you want to build a gaming / mining rig.
sapphire bios switch
* 2 x power ports 1 x 6 pin and 1 x 8 pin power ports. Handy for different power supplies.
* Save power by turning off the flashy lights. Can turn these lights off permanently without the need to install extra software.
* Cards come with a back plate good if you have cards sitting close together.
Cons
* The cards are big so you will need allot of room to store them. 26 cms long.
* Sapphire cards heat up a bit more than their rivals.
* a little less stable and a little less able to be overclocked.
* Tend to use a little bit more power

Asus RX 570

Pros
* Price around $379 usd
* Smaller than the Sapphire cards at 24 cms.
* Run a little bit more stable at higher clocks.
* No back plate so they wont heat up as much.
best AMD rx 570
* 1 x 8 pin power slot only. Comes with led though so you can see when the card is plugged in properly.
Cons
* The cards don’t come with a back plate. Can be annoying when installing or when you have cards sitting close together.
* 1 x 8 pin power slot only.
* Can’t turn the light off permanently without installing software.

Gigabyte RX 570

Pros
* Price around $279 usd
* Cheap price return on investment will be faster.
* Smaller than the Asus at 23 cms long.
* Has a back plate.
* Memory does over clock quite high.

Cons
* Gets hot! Can’t run to many of these cards together.

In the end the all the cards will do the job. However the best AMD rx 570 card would be the Asus. If you want to buy any of these cards and support 123myIT.com please use the licks below.
○○○○○○ Want to buy the parts at Amazon ○○○○○○
Recommened Best:
ASUS AMD RX 570 4GB https://amzn.to/2Lh9FiA
Others:
Gigabyte Aorus RX 570 4GB https://amzn.to/2GzpwVZ
Sapphire Nitro + RX 570 4GB https://amzn.to/2rUvI6u

Recommened Best:
ASUS AMD RX 580 https://amzn.to/2Lh9FiA
Others:
Gigabyte Aorus RX 580 https://amzn.to/2rXu0Bt
Sapphire Nitro + RX 580 https://amzn.to/2kbIw4k

One click AMD bios mod – Timings Only no Over Clock

One click AMD bios mod – Timings Only no Over Clock

This video will show you how to modify the timing on your AMD bios with one click bios, AMD bios mod.
This is the software that I currently use for AMD graphics cards. I use this AMD bios mod to increase the hash rate of the graphics card by changing the memory timings this is not an over clock more adjusting the way that the graphics card processes information.
This is the safer option than using a bios over clock.

Once you make this change then you can an over clocking tools such as over drive to over clock the graphics card via software over clock. Software over clock is safer than bios over clock as there is less chance of bricking your card.
Click here to get the Polaris link.
Under the downloads section of the 123myit.com website you will find the list of all software included in this video and all 123myit.com videos. For more info check it out here.

AMD bios mod

Bios Mod Tools
GPUZ https://www.techpowerup.com/download/techpowerup-gpu-z/
Sapphire RX570 4gb Elpida Memory bios click here.
Sapphire RX570 4gb Elpida Memory bios 512 click here.
ATIFLASH 2.77 Download here.
ATI Patcher Download here.
Polaris Bios Editor Elpida Download here.
Anorak.tech
PolarisBiosEditor-Master
Download PolarisBiosEditor-master.zip here.

Then simply follow the rest of the video to apply the AMD bios mod. The software allows a really easy one click to manage most AMD graphics cards not just the RX570. If you run into issues try a restart of the computer and then if you are still having issues remove the new bios and replace with the old one.
This software makes the AMD bios mod changes quite easy, otherwise it might be allot harder for new people to try this mod. I hope it helps out and good luck! 🙂

First Mining Rig Update – Troubleshooting Hardware

First Mining Rig Update – Troubleshooting Hardware

123myIT’s First Mining Rig Update

Quick video update to the First Mining Rig Build video. Link here. This video will talk about some of the pitfalls and hurdles I had building the rig. The problems I had were mostly Sapphire RX 570 cards not over clocking as high as some of the other cards. The point of over clocking and undervolting is to make the cards perform the highest on the lowest power usage.

First Mining Rig Update build

Other problems I had with the rig were the USB hard drive didn’t work so well with Windows 10. I fixed this by adding in an old sata hard drive that I had.
Below is a list of parts that I have used in this first mining rig build.

Gigabyte motherboard
This motherboard is specifically designed for 6 GPUs and is cheap buy in price makes it a steal. Worst comes to worst you can reuse this motherboard for gaming if you wish.

Celeron CPU
We choose the Celeron CPU because it’s cheap to buy. But also it’s cheap to run. 3930 has a power draw of 51 watts.

EVGA Power supply
EVGA power supply are probably the best power supplies around. Their power supply’s efficient and they also have plenty of cables so that you are not daisy chaining to much hardware together.

Crucial 8GB Memory
You can go the cheaper 4GB of ram. But just in case I want to turn this rig into a gaming PC I went with the 8GB of ram.

Sapphire Nitro + 4GB
Sapphire RX 570s pound for pound probably the best cards that’s you can get with regards to hash rate and power supply. The higher the hash rate the higher the return on investment.

PCIE Riser cards
PCIE riser cards, these little babies are used to lift the graphics cards off the motherboard allowing you to stack more graphics cards.

SSD
Your SSD allows you to store the Windows 10 software along with the Software that you will use for mining example NiceHash or Claymores.

Frame if you need one.
This hold all your equipment together in one frame. I made mine out of a chest of draws that someone threw out. Cheap and good for the environment as it doesn’t go into landfill.

I hope this helps guys.

First Mining Rig Build

First Mining Rig Build

123myIT’s First Mining Rig Build!

Hi all
Well busy time of the year Christmas. For of all Merry Christmas to all. So I have been very busy trying to get into the Cryptocurrency market by learning how to build a first mining rig.
This video will show you how I got started as I go about building my first mining rig. the aim of this build is to mine Cryptocurrency’s. Mainly Ethereum and Bitcoin.

First Mining Rig Build

Below is a list of parts that I have used in this first mining rig build.

Gigabyte motherboard
This motherboard is specifically designed for 6 GPUs and is cheap buy in price makes it a steal. Worst comes to worst you can reuse this motherboard for gaming if you wish.

Celeron CPU
We choose the Celeron CPU because it’s cheap to buy. But also it’s cheap to run. 3930 has a power draw of 51 watts.

EVGA Power supply
EVGA power supply are probably the best power supplies around. Their power supply’s efficient and they also have plenty of cables so that you are not daisy chaining to much hardware together.

Crucial 8GB Memory
You can go the cheaper 4GB of ram. But just in case I want to turn this rig into a gaming PC I went with the 8GB of ram.

Sapphire Nitro + 4GB
Sapphire RX 570s pound for pound probably the best cards that’s you can get with regards to hash rate and power supply. The higher the hash rate the higher the return on investment.

PCIE Riser cards
PCIE riser cards, these little babies are used to lift the graphics cards off the motherboard allowing you to stack more graphics cards.

SSD
Your SSD allows you to store the Windows 10 software along with the Software that you will use for mining example NiceHash or Claymores.

Frame if you need one.
This hold all your equipment together in one frame. I made mine out of a chest of draws that someone threw out. Cheap and good for the environment as it doesn’t go into landfill.

I hope this helps guys. Heap more to come.