Samsung Galaxy S22 Unboxing Benchmark Compare

Hi Guys Matt from 123myIt here. In this video, we will show you everything you need to know about the Samsung Galaxy S22.

Models of Samsung – Samsung Galaxy S22

There are three different models of Samsung Galaxy range. There is the S22, which is the model we have here. Then there is the S22+ and the S22 Ultra.

Pricing for the S22 is the same as last year’s S21 and starts at $799 USD for the 128 GB model. You also have four different colours to choose from, black, White, green and Pink.

The S22 is has a 6.1 inch display and it comes with Qualcomm Snap Dragon 8 chipset which has an octa core CPU. In addition, the Qualcomm Adreno 730 gpu. Along with 8GB of ram. Let look inside the box.

In the box

First up in the box of the Samsung Galaxy S22 you have the phone itself. There is a little bit of plastic on the front, back and sides, which needs to be removed. Next will find the documentation a quick start guide, Warranty information and Samsung Care info. On the back of the black box there is also a sim card eject tool. The only other accessory are the USB C cable.

The Galaxy S22 supports 15 watts wireless charging and is IP68 water and dust resistant up to 1.5 meters for 30 mins. THEREFORE, it means you can run it under a tap to clean it, which is cool.

Samsung Galaxy S22

Display

The Galaxy S22 has a 6.1-inch Dynamic AMOLED 2X display. It has a 1080 by 2340 -pixel resolution at 425 ppi. If you compare it with last year’s model the S21 on the left, you can see the S21 has a bit more screen real estate on its 6.2-inch AMOLED display. If you are looking to update to the S22 from the S21 just be aware that the screen is smaller. Although the screen is smaller, I actually liked the size it feels more compact. A bit like an iPhone. I will let you be the judge.

On the right side, you have then Volume up and down buttons and Sleep Wake power button. On the bottom, you have the USB C connector, microphone pinhole, sim card slot and one of the stereo speakers. Actually, the Stereo speakers are impressive. Take a listen.

Face Unlock

Face recognition, Face unlock and finger print scanner are standard on the Galaxy S22 models. Moreover, they work really well now. There is also a toggle button to turn off the swipe part on the lock screen when your face is recognised. I found it very annoying to have to swipe to access the phone even though your face has unlocked the screen. Just let me in the phone once it unlocked.

Along the front top of the S22 we have a 10 megapixel Camera which has a F2.2 aperture. Same as last the S21 from last year so no changes here.

Cameras

On the back of the S22 you have a Triple Camera setup which features a Ultra Wide, Wide and Telephoto cameras. The 12MP Ultra Wide lens has a 120-degree field of view with a F2.2 aperture. There is a new 50 megapixel Wide lens has a larger sensor and f 1.8 aperture. And the last camera features the new 10 MP tele lens which has a 3x optical zoom and F2.4 aperture. For stunning portrait shots.

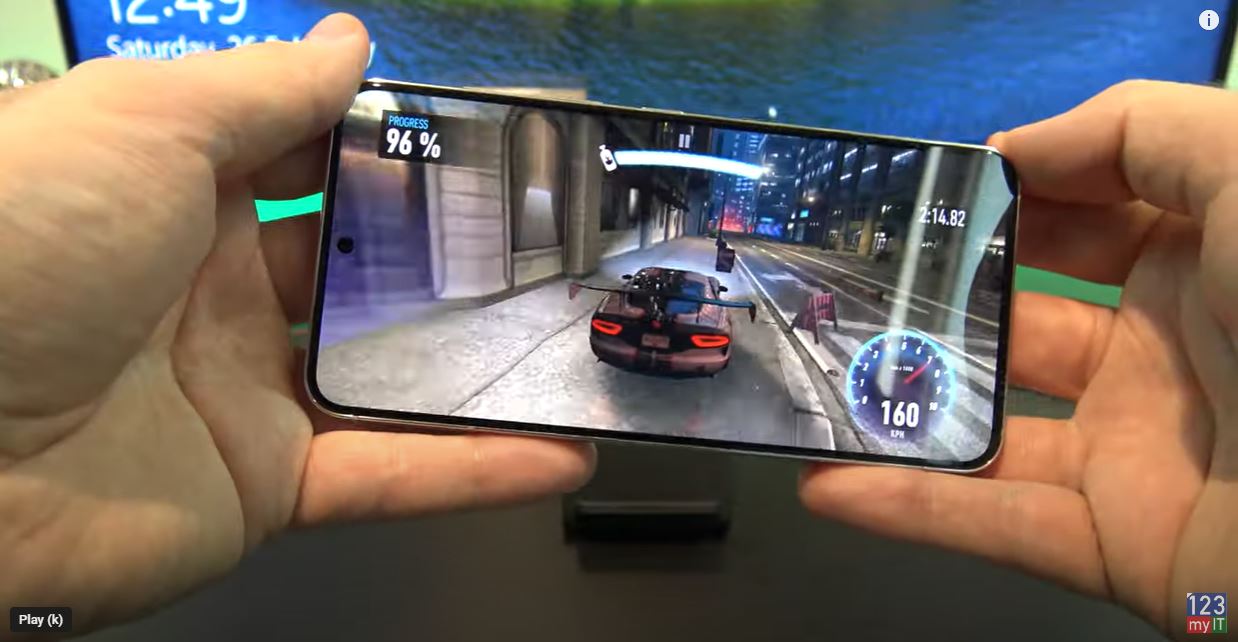
The Galaxy S22 can come with either the Exynox or Snapdragon CPU depending where you live. A fast processor is important when playing games and videos or when generally moving around the phone. Let us run the Geekbench benchmark and see how the S22 performs against other models.

Benchmark

The results of the Geekbench scores show that the S22 does outperform last year’s model the S21 and the S20+. However the S10 in my video showed a very high Geek Bench score of 4461 which I am not sure why it is that high it might be and older version of the Geek Bench software. It should be around the 746 mark. IF you want to check out those videos, I will put a link in the description.

While running CPU benchmark software lets take a look at where the S22 is heating up it seems to me mostly at the top of the device near the cameras. Which is away from where your hand might be resting so fair good design here. However, the s22 does get quite hot at 34 to 39 degrees, which is probably one of its downfalls.

Made from Glass

Another thing to mention the back of the S22 is now made of glass. Last years model the S21 it was made of plastic. In addition, the edges on the S22 are sharper and not smooth which did annoy me a bit when I first picked it up. But now not so much. And the battery is smaller on the S22 at 3700 mAh which sounds like a bad thing. However, I look at it as a good thing. First the screen is smaller and the chipset more efficient. So you just do not need a bigger battery I think its good design by Samsung here.

Ok so here is the pros and cons guys. The S22 it’s a great phone it’s hard to pick anything wrong with it. Samsung have taken the already great phone from last year and just made a few little tweaks to make it even better and more compact.

Pros – Smaller more compact

More efficient hardware

Better cameras

Cons – Heats up

Sharper edges

Guys, don’t forget to check out my other videos such as top 5 Android settings to turn off in 2022. Also do me a favour if you know anyone who might like this video please share it will them, hit the subscribe button and smash the bell icon.

Apple MacBook Pro 14 Inch Unboxing, Benchmark Compare

Apple MacBook Pro 14 Inch Unboxing, Benchmark Compare

Hi guys Matt from 123myIT here. In this video, we will take a look at the Apple MacBook Pro 14 inch and see if it’s still worthwhile in 2022.

There are three different MacBook’s in the MacBook Pro range. There is the entry level 13 Inch MacBook which I already did a video and you can check that out from the link in the description. Then there is the 14-inch MacBook, which is the model we have here today. Last in the line-up is the 16 inch, which has a slightly larger screen.

MacBook Pro Hardware

This MacBook is a 14-inch laptop comes with a M1 Pro processor, which has 8 cores it also has a 14 core GPU and a 16 core Neural Engine. If you do not know what a neural engine is, it controls the AI part of the MacBook.  Along with 16GB of Unified Memory and 512 GB of SSD storage.

Pricing for the 14 Inch Pro starts around $1999 USD for the M1 Pro CPU and goes up to $3499 USD for the M1 Max CPU. When buying the laptop on the Apple website you will have a chance to choose bigger storage memory and CPU options. Let’s take a look inside the box.

What’s in the box

First, up you will have the Apple MacBook Pro 14 itself. Along the bottom, it has MacBook Pro Stamped in the aluminum. The chassis is held together by eight-teck screw and It also has four think black rubber feet to improve air flow. In addition, on the top you will have the standard Apple logo.

Accessories

In terms of accessories, in the box you will get Warranty and setup documentation. It also includes two black Apple stickers. Next, up you have a 67-watt USB C power adapter. I tested the MacBook and it uses around 42 watts when charging and a Max of 60 watts when doing benchmark. However, you can expect to get around 11 hours of general use and up to 17 hours of video playback. Charging the battery from empty to full should take around 1 hour. The plug of the adapter does come off and you can buy an extension cable for it. The last accessory in the box is the USB-c to MagSafe 3 cable.

MacBook Pro Touch ID

When you take the MacBook Pro out and open the lid it will guide you through the setup process. During this process, you will be prompted to setup Touch ID and you will have to train your finger. Now this can used to unlock your MacBook Pro, authenticate payments or authenticate passwords.

If it’s one thing that I feel Apple never skimp on its their screens. The MacBook Pro comes with a 14.2 inch Liquid Retina XDR Display. With a resolution of 3024×1964 at 254 pixels per inch and up to 1000 nits of sustained brightness. It can even go higher to 1600 nits for HDR content.

apple MacBook pro 14

And it makes for some pretty impressive movie watching. Let’s take a look.

MacBook Notch

You might have noticed across the top of the display there is a notch. Apple has done well with this design as it gives you more display space without taking up any extra room because it sits in the menu bar. Inside the notch, you have an upgraded 1080p FaceTime HD camera. Which is great for those conference calls. Its upgrade from the 13 inch MacBook that only has a 720p camera.

All the MacBook Pros come with backlit Magic Keyboard and its a delight to type on. The keys do not bend when pressing and don’t tend to wobble too much. One difference between the 13 inch model and the 14 inch model is the touch bar has been remove and the Escape and function keys have been re-added. The backlit keyboard is also controlled by the ambient light sensor so it only turns on when the lights are low. Pretty cool huh!

Trackpad

The trackpad is still pretty much the same, it’s a force touch trackpad and allows for precise cursor control and multi-touch gestures.

The MacBook Pro 14-inch comes with a six-speaker sound system with force-cancelling woofers and wide stereo sound. I thought the 13-inch had good speakers but the speakers on this 14-inch MacBook Pro are really the next level. I do not say this lightly. It’s like having a dedicated stereo in your room. Let’s take a listen.

Ports

On the left, you have a MagSafe 3 Charging port, two Thunderbolt 4 ports and a headphone jack.

On the right side, you have a HDMI port, Thunderbolt 4 port and a SDXC card reader. The Thunderbolt 4 port doubles as a display port so if you have a USB C to HDMI adapter you can plug in an external display. For me the HDMI port is a necessary addition and I never understood why Apple didn’t include them in the first place. You can have up to two externals displays at 6K resolution running at 60Hz. 

Build Quality

The overall build quality is great and there is little to no flex on the MacBook Pro. Also the silver aluminium doesn’t leave finger prints which is great. For me I feel like its almost the perfect size but there is some weight to it. So if you intend to carry the MacBook Pro around allot maybe check the weight because the 13 inch MacBook Pro or MacBook Air range might be better for you.

Underneath on both sides you have an air vent. I get that there are they for airflow, but the position of these vents are right where you would put your hands to carry the MacBook. In addition, while they are not sharp I found them annoying. Better placement for air vents are within the hinge itself like these ones are.

Display Hinge

Talking about hinges the display hinge only folds back about 160 degrees, however other laptops go all the way to 180 degrees, so 160 feels a bit awkward.

Lets go ahead and run the Geek Bench Benchmark software. Cool, so the MacBook Pro 14 Inch recorded a single-core score of 1770 and a multi-core score of 9995. Moreover, if we compare that with the scores from the MacBook Air and MacBook Pro 13 inch we see there is not much difference in the single core scores. However, the multi-core scores there is a big difference of 2315.

Benchmarks

When running a Benchmark and while the Apple MacBook Pro 14 is under load, it is a really good time to check the temperatures and see where the MacBook Pro is heating up. The room I am in has a temperature of about 27 degrees Celsius at the time of recording. As you can see here, the MacBook Pro really heats up in the middle of the keyboard to about 44 degrees. And about 40 degrees in the hinges of the display. So there is some clever design here as there is no heat where you might be placing your hands and palms when typing.

MacBook Pros are designed with content creators in mind. People who are video editors and music creators. And in doing so they leave out gamers. The hardware just does not support gaming or a native install of Windows. So if you are after a gaming machine then you’re better off going with a gaming laptop. However if you are a content creator then the Apple MacBook Pro 14 is the best all-rounder in my opinion. The display is brilliant and the speakers are the best I have heard on any laptop. And you get all this in 14 inch footprint.

Guys don’t forget to check out my other videos such as How to use focus on iPhone and iPad. And do me a favour if you know anyone who might like this video please share it with them, hit the subscribe button and smash the bell icon.

Top 5 Android Settings to Turn Off in 2022

Top 5 Android Settings to Turn Off in 2022

Hi Guys and Matt from 123myit here. In this video, we will show you my top 5 Android settings that you should turn off in 2022. Guys I’m going to show you some Android settings that you should turn off straight away. These settings are designed to take the load off your phones CPU which will speed your phone up or save the battery life. It will also help you increase the privacy on your phone. Let’s get started.

I am using a Samsung Phone, but if you are using a different phone, it might look a bit different the settings will be the same.

Turn off device scanning – Android Settings to Turn Off

The first thing to turn off is nearby device scanning. And you can find it under Settings > Connections > More Connection Settings. This sets your phone to scan for nearby devices. This is constantly running so if you turn it off it will save battery power.

Android Settings to Turn Off

Next, you can turn off usage and diagnostic’s settings. This is information that is being sent to Google or Developers when you not using your phone and it chews up battery life. To find it go to Settings, Google and Tap the 3 dots in the top right and tap Usage and Diagnostics. Then just toggle the button off. Saves your battery life and cellular data. It’s a Win win.

Ads Personalization

Next setting is turning off Ads Personalization. You can find it under settings, Google, Ads. This is a funny one, have you ever been talking about something and then all of a sudden and ad for that starts popping up on your phone? This data is collected and sent to ads networks so they can send you more relevant ads. It’s too creepy in my opinion. To turn it off you actually need to turn this one on to opt out.

Improve accuracy

Next, we will talk about Turning off Improve accuracy with WIFI and Bluetooth scanning. You will find it under Settings, Location and tap Improve accuracy. If you turn these two settings off, you will save a ton of battery life. And toggle the WIFI and Bluetooth buttons off. Great your phone will not be constantly scanning, and your GPS will still work no problems there.

The next one is Google location history. You will find it under Settings, location and Google Location History, this lists all of the locations you have been. It’s similar to iPhones significant locations where is saves a long list all the places you have been. It’s a bit weird in a tracking sense. So just, turn it off at the bottom. Done.

Guys don’t forget to check out my other videos such as how to forward calls on Android in 2022. And do me a favour if you know anyone who might like this video, please share it will them, hit the subscribe button and smash the bell icon.

Using Focus on iPhone iPad and iPod touch

How to Forward Calls on Android Samsung 2022

Hi Guys and Matt from 123myit here. In this video, we will show you how to forward calls on Android. If you have, two phones and you do not want to carry them both around. You can forward phone calls from one phone to another.

How to forward calls on Android – forward calls on Android

Here’s how to do it. Open up your phone app and go to the three dots in the top right-hand corner.

And you will find it under Settings > Supplementary Services > Call forwarding > Voice Calls. If you are on an older Android phone it will be under Settings > More Settings > Call forwarding. If you cant find it on your Android phone. Just do a search for call forwarding.

forward call on android

When you tap on Voice Calls it will take a few seconds to get the settings from your service provider.

Cool so in here we have a few options. Always Forward means that it will forward any phone calls that go to your phone. Forward when busy means it will forward calls only when you are talking on the phone. This could be handy in an Office situation. Forward when unanswered means it will ring on the phone first than if the call is not answered it will forward the phone call to another number. And forward when unreachable means it will forward the call if the phone is out of service.

To forward the calls. Tap on Always forward and then enter the phone number you want to call to forward too. Tap enable when you are done.

Congratulations you have just forwards all calls to another phone. One last thing to mention. Calls will be forwarded. But services like SMS text messages will not be forwarded.

Guys don’t forget to check out my other videos such as how to focus on iPhone and iPad. And do me a favour if you know anyone who might like this video, please share it will them, hit the subscribe button and smash the bell icon.

How to find Purchase History on iPhone iPad

Using Focus on iPhone iPad and iPod touch

Hi Guys and Matt from 123myit here. In this video I will show you how to use focus on iPhone or iPad. Focus allows you to filter notifications based on what you are doing. You will find focus in control centre by swiping down from the top right and tapping on focus.

Do not disturb – Focus on iPhone

In here you will find the default focus which is do not disturb. Do not disturb silences all notifications by default. So, if you are really busy and don’t want to be interrupted you could set this and your phone won’t send any notifications. You can also tap the three dots and turn it on for 1 hour or until this evening. Alright if you close it and just go back out I will show you where it displays that Do Not Disturb is turned on.

focus on iphone ipad

Ok if you look in the top left corner you should see the do not disturb icon which tells you that the do not disturb is not turned on. Cool ok, let go back in an setup our own personalised do not disturb.

If you want to find the focus menu if is located under Settings and Focus. Focus on iPhone.

Focuses

To setup your own focus tap the plus icon down the bottom. Then you will have a list of pre set focuses. Up the top you have driving and fitness. Driving silences notifications, but will turn on automatically when connected to carplay or Bluetooth. Also if you have friends on iPhones, it will send them a reply that you are driving. Which is handy.  Gaming is a good one too. So if you want playing games on your iPhone and don’t want notifications interrupting the game then you can turn this on. And the last two down the bottom are mindfulness and Reading. Lets go a head and setup our own custom Focus.

Study Focus

Iam going to call mine Study. Because I want my phone to be quite when I study. Next you can select a colour and an icon for study. Tap Next. Now choose the people you want notifications from while you are studying. Notifications from other people wont appear until you turn the focus off.

That’s for notifications what about phone calls? If we tap on Calls From and then can choose calls from Everyone, No one Favourites or all contacts. When you are finished tap allow. If you don’t want to hear from anyone tap Allow none.

Allow notifications on Apps

Next you can select which Apps you want to allow notifications from so tap the plus and I am going to select Find My, Books and Messages. You can also turn on Time sensitive apps to send you notifications. Tap allow and your Focus is setup tap done to continue.

Alright before we personalised the focus I will show you what it looks like if you turn it on. Ok to personalise your Focus under the Options menu you have Focus Status. When Focus Status is turned on Apps like Messages will let people know that you have your Focus turned on.

Hide notifications on home screen

If you want to hide notification badges you can tap Home Screen. And in custom pages you can select which home screen page you want to show while in the focus. Under the lock screen menu you can dim lock screen in your focus and or show silenced notifications there.

One of the cool features is the Add Schedule or Automation. This allows you to choose to start your focus as a specific time, in a specific location or when you launch an app. So lets say I want to turn on the Study focus when I go to the Library. I would tap Smart activation to turn it on and then tap on Add Schedule or Automation. You want to tap on location and then type Library at the top. This will show you a list of Libraries near you. If this does not come up check under Settings, Privacy, Location Services and System Services.

Library Focus – focus on iPhone

Cool I found the library I am after. So what this will do is Whenever I go to the Library it will turn on my Study Focus automatically. You can use the little slider bar to make the circle bigger or smaller. Lets say I go to a nearby café afterwards. Really cool. So this would be useful if you had a work or school focus setup or a church or mosque something like that. If you scroll down you can also delete the Focus if you no longer need it.

Awesome so our Study focus is setup and ready to use. Guys don’t forget to check out my other videos such as how to find Purchase History on iPhone and iPad. And do me a favour if you know anyone who might like this video, please share it will them, hit the subscribe button and smash the bell icon.

Take Control of Your Notifications iPhone iPad iOS

Take Control of Your Notifications iPhone iPad iOS

Hi Guys and Matt from 123myit here. I had a funny story recently where a family member said. I was getting to many notifications on a chat group, so I had to leave the group. And, my reply was, why didn’t you turn off the notifications iphone or adjust them? So, I wanted to do a video which will hopefully help you guys take control of your notifications and stop them from being annoying and distracting.

Lets get started.

Notification Centre – Notifications iPhone

You can find Notification Centre by swiping down from the top left. In addition, to edit a notification directly you can just swipe across on it and you will get more options depending on the type of notification.

Notifications iPhone

So if you get a SMS notification on the messenger app swipe across on it and you will have an Options button.  You can Mute for one hour or mute it for the whole day. You can turn off all notifications for messages or you can tap view settings.

This will take you into the Notification settings for the App that you were in. In this case, it’s the notification settings for Messages. IF you want to find the notification settings for all apps. You can find it under Settings and then Notifications.

Toggle Notifications – Notifications iPhone

At the top, you have a blanket toggle button which turns the notifications on or off for the app that you select. Therefore, if I turned this off I would not get any notifications for Messages.

Always deliver immediately, will deliver messages even in you have Focus setup with Do Not Disturb. So if you leave this turned on it will Deliver the message straight away and leave it on the locked screen for 1 hour.

I will do a video on Focus at some stage so hit that Subscribe button. Alright lets learn about what the different alerts are. You have Lock Screen, Notification Centre and Banners. Lock screen is the first screen you see on your phone when you unlock it. Notification Centre you can find when you swipe from the top left and I will show you banners when I send a text to my phone. Ok cool there it is at the top that is the banner. If you do not want any of these notifications to show up you can turn them off here. So if you wanted the messages to not show up on Lock Screen you would turn that off.

Choose your banner style

If you tap on banner style. This will allow you to set the banner as persistent. This means it will stay up as a banner until you read it. So it will sit at the top of your screen until you do something with it.

If you go into sounds, you can change the vibration of an alert as well as the sound it make when it comes in.

Badges, Badges are the little round red circles that appear on your app when you have an unread message. These are good on messages but when I had these on my emails it showed 12000 unread emails which was rather annoying. So I have this turned off on my emails.

Next is locked screen appearance. Show previews you can set to Always When unlocked or never.

Show notification on the locked screen

Always means it will show up on the locked screen. This can be a privacy issue. If you do not want others to read your message I would set these to When unlocked or never.

Notification Grouping allows you to group your notifications iphone. You can group by App or turn groups off. The last option and possibly the most annoying is Customise notifications and then repeat alerts.

Repeat sounds on messages

In here you can control how many times your messages will make a sound when a message comes in. If you do not pick your phone up and check the message when it comes in the first time it will send another alert two mins later. This could be why people get overwhelmed and think that they are getting so many messages. For me I would set this to never. Its probably the main reason people are addicted to their phones.

Guys if you want to see other iPhone iPad tips such a how to arrange your iPhone icons the easy way click on the video. And do me a favour if you know anyone who might like this video please share it will them, hit the subscribe button and smash the bell icon.

HP ProBook 640 G8

Transfer WhatsApp iPhone to Samsung

HP ProBook 640 G8

Hi guys Matt from 123myIT here. In this video, we will show you everything you need to know about the HP ProBook 640 G8.

The ProBook range is the entry level for HP’s Business laptops. Above the ProBook you will have the EliteBook and ZBook range.

This is 14-inch business laptop comes with an Intel Core i5 11th Gen Processor which has an integrated Iris Xe Graphics. Along with 16GB of Ram and 512 GB of NVMe storage.

Pricing

Pricing for the G8 starts around $1339 USD for the Intel i5 CPU and goes up to $1709 USD for the i7 CPU. On the HP website, you can customise and buy. If you are going to do this, then I recommend upgrading to an i7 CPU and changing the screen to a screen with better brightness. The default screen comes only with 250 nits of brightness. I would recommend the screen with 400 nits of brightness and the default one feels a bit dull to me.

In the box, you will get Warranty and setup documentation. Along with a 45-watt USB C power adapter. The laptop uses around 24 to 27 watts of power. In addition, you can expect to get around 12 hours of battery life. Charging the battery will take just under one and a half hours.

Display

The G8 comes with a 14-inch FHD LED Anti-Glare Display. With a resolution of 1920×1080 and 250 nits of brightness. As I mentioned earlier I felt like the display was a bit dim even when I turned the brightness up so I would suggest upgrading to 400 nits of brightness if you can.

Out of the box, though I was able to get FortNite to run ok on giving up about 35 to 50 Frames per second. This would be mostly due to the Intel quad core i5 11th gen CPU and 16gb of ram as the Intel Iris Xe GPU is not the best for gaming.

Windows unlock

The G8 does also have a finger print scanner, which allows you to unlock Windows with a touch of the button, but you need to add it in the customise and buy section I mentioned earlier. Along the top, you will find an integrated HD 720p webcam with dual microphone and indicator light. One of the cool things about the G8 design is you can close the camera off with a sliding button.

HP ProBook 640 G8

On the right side, you have the charging port, one USB C port, two USB-A ports, one HDMI 1.4 port, Audio Jack and a SIM card slot. This SIM card slot is pretty cool but you will two add this as an option when you buy. You also have an indicator light to show when the laptop is being charged. The USB C doubles as a display port so if you have a USB C to HDMI adapter you can plug in an external display.

Connectivity

On the left, you have a security lock, one RJ45 Ethernet, one USB 3 port, and SC card reader. Annoyingly there is no SD card reader.

The 640 G8 comes with standard duel stereo speakers and they are designed to point upwards towards your ears. The speakers sounds pretty good but missing a little bass.

The Trackpad is nice and wide but I do find myself right clicking allot because to left click you need to press on the left side of the Trackpad. For me it feels like the trackpad sits too far to the left. Having said that it does feel like this issue has been improved since last year G7 model.

Keyboard

The keyboard is a delight to type on and does not bend when pressing the keys. However, the base model does not come with backlit keys. So make sure you add that feature when you buy.

The overall build feels like good quality and there is little to no flex on the laptop. Also the silver plastic doesn’t leave finger prints which is great. The display hinge folds all the way back 175 degrees; however, other laptops go all the way to 180 degrees, so 175 feels a bit awkward.

Upgradable

 You can also upgrade the 640 G8 by removing the screws from the bottom cover. The system supports 64 GB of RAM so you can upgrade that along with a 1TB NV Me SSD if you want. The WIFI card is already WIFI 6 so you won’t need to upgrade that for a while.

Here’s the Geekbench CPU score and the GPU score. And when comparing the scores with the EliteBook 840 G7 model from last year the 640 G8 is much faster. However, I am surprised it didn’t give better performance in Fortnight. So maybe there is some fine turning to do there.

If you are looking for a gaming laptop then you are better off looking for a laptop with the GeForce MX or Radeon RX GPU configured. While this laptop is small and easy to carry, the performance in games is what stops it from being an all-round great laptop.

Guys don’t forget to check out my other videos such as How to Transfer WhatsApp from iPhone to Samsung. And do me a favour if you know anyone who might like this video please share it with them, hit the subscribe button and smash the bell icon.

LG 27GL850-B Gaming Monitor Unboxing & Gaming Settings

How to Arrange your iPhone icons the Easy Way!