
Create MacOS Sierra Install USB
Hi guys and welcome to 123 my IT’s video on how to create an MacOS Sierra Install USB.
Ok guys recently I did a video on how to download Mac OS Sierra and to see that video you can find it on the following link. How to download Mac OS Sierra.
That video shows you how to download this app and now the next step is to show you how to actually create a MacOS Sierra Install USB from this app. So the USB thumb drive has to be a minimum of 8 gigabytes in size for you install the OS X Sierra software on the USB and then you can do a fresh install of Mac OS Sierra from this use to any Mac.
Lets for example say you wanted to sell your old Mac or you had a problem with your Mac like you had a virus on there any need to do a fresh install. You can use this USB to format the Mac and install a fresh copy of OS X.
So the first step you will need to do is format the USB and you can do this by plugging your USB thumb drive and then go to go in the Apple menu and then go down to disk utilities.
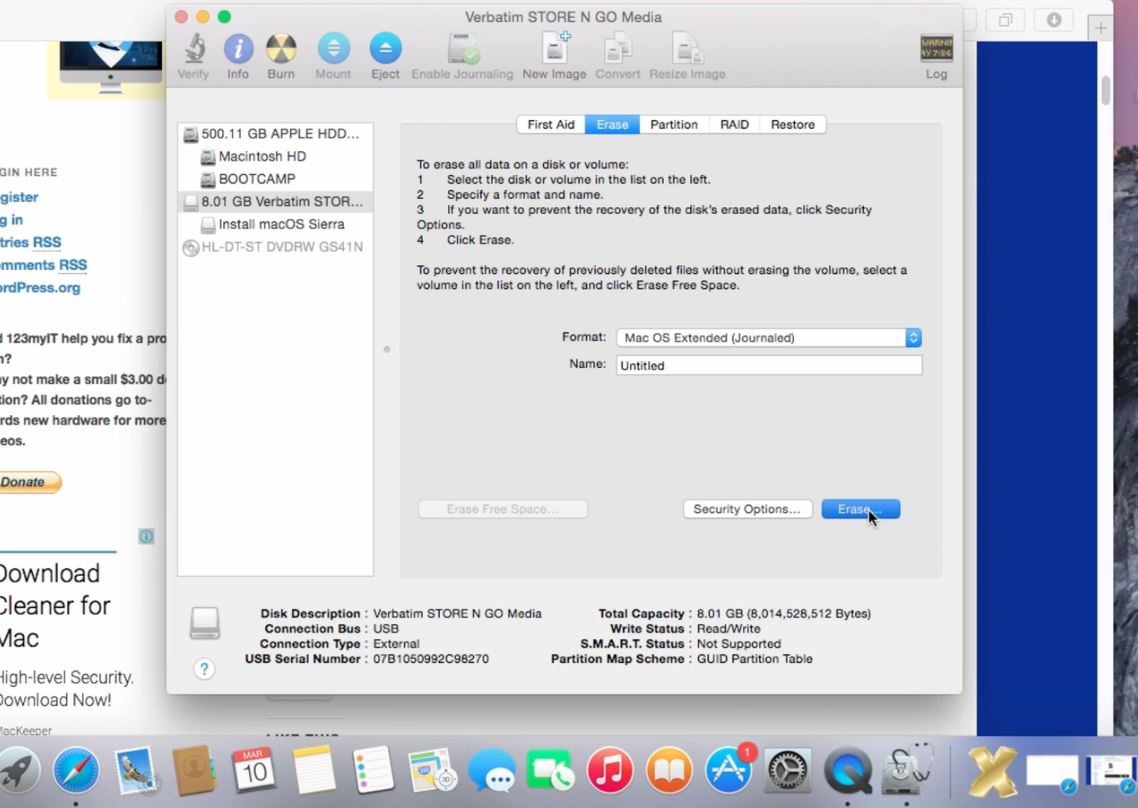
Click on the USB that you want to format and make sure it’s set to Mac OS X extended journaled and keep it as untitled for now you can change this around but if you change this around you have to actually change the untitled part in the code there so let’s just leave it as untitled for now.
Make sure you have no important data on the USB because the next step will delete any data that was on the USB.
Once you have done this just click erase and then erase again. The USB will disappear and it will start to format the USB.
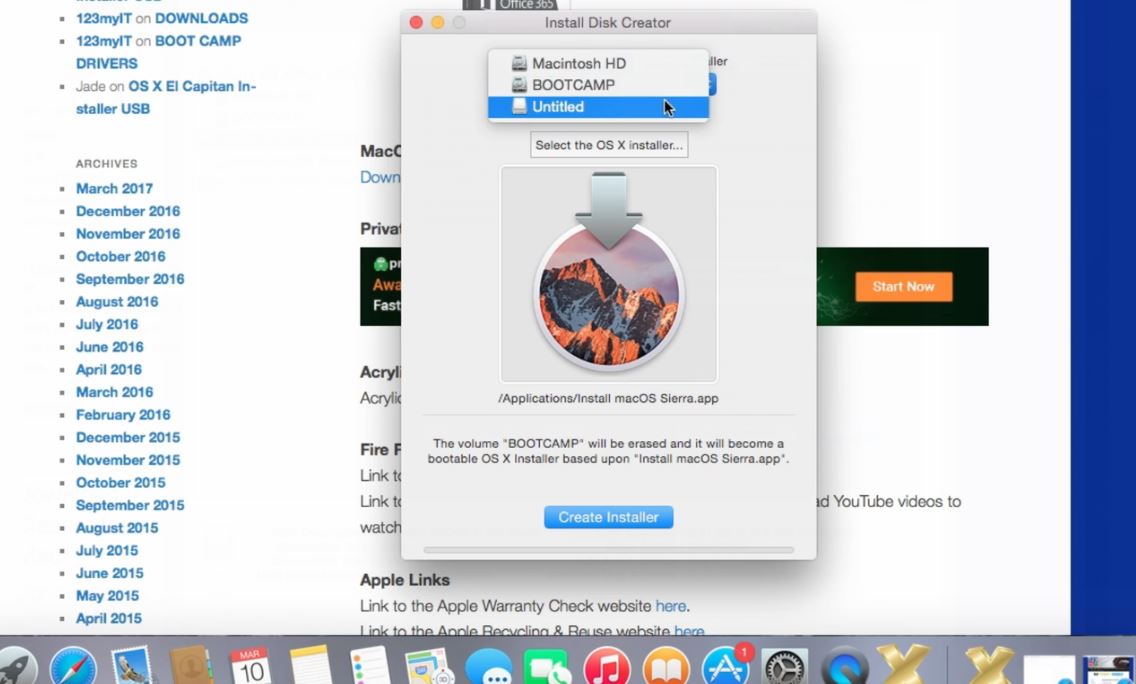
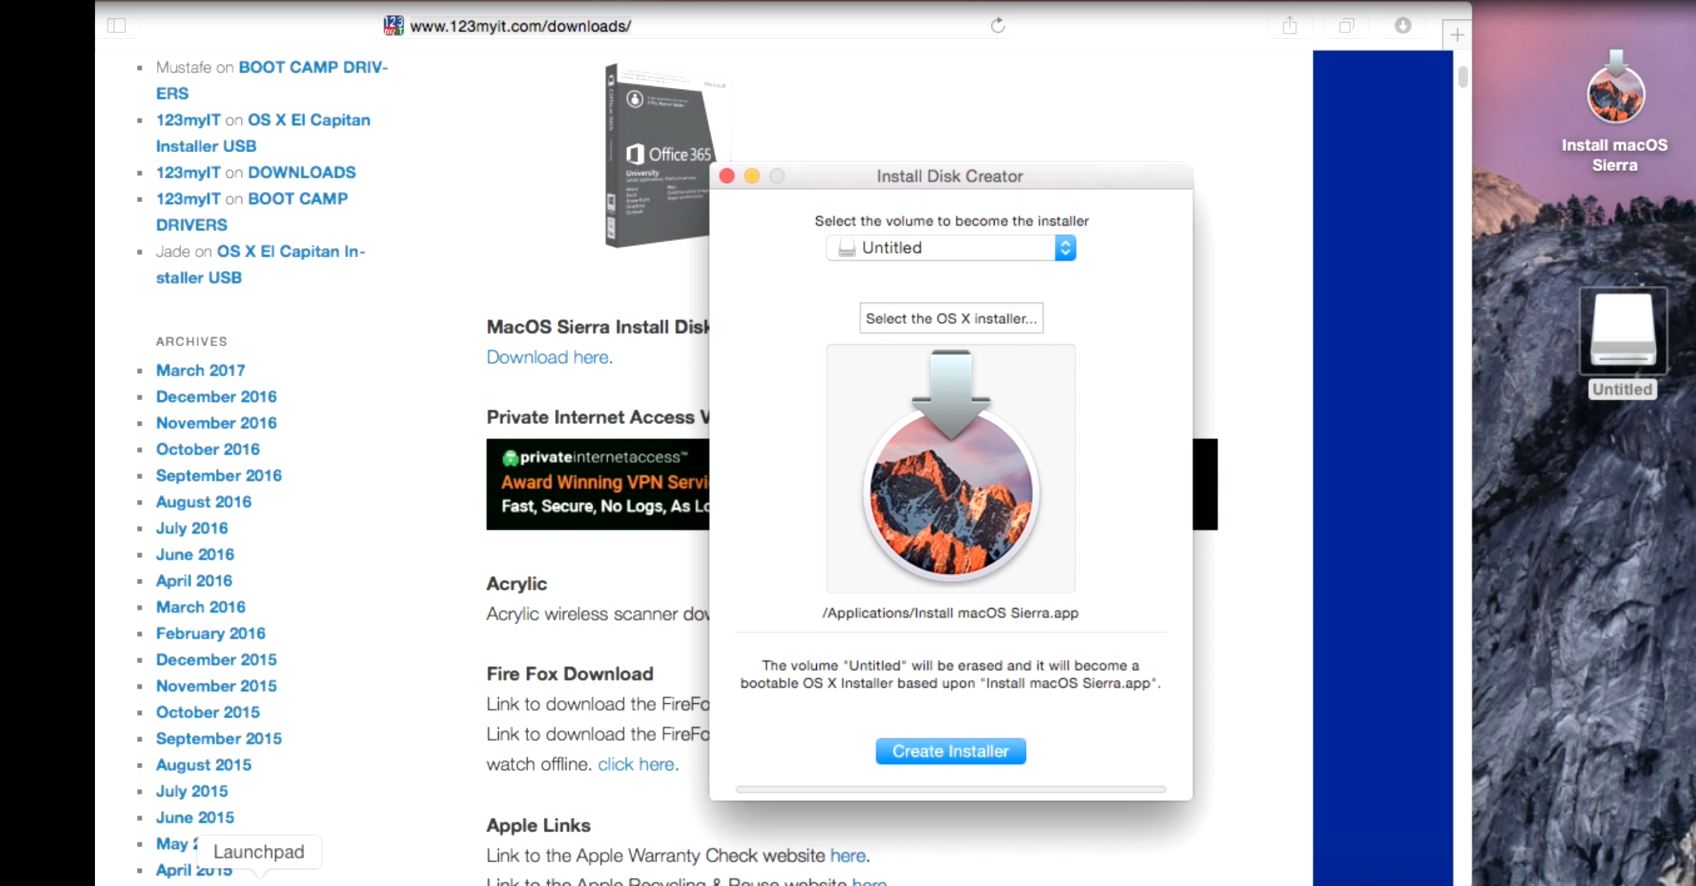
The next step is to download the install disc creator app you can get the install disc creator app from the 123myIT.com website, under downloads or simply click the link here.
Open up the install disc creator you will need to select the untitled USB from the drop-down menu. Make sure the OS X Sierra app is selected below then click create installer button. You may be prompted for a password this will be the administrator password type in the password and then click ok. This process can take about 5 to 10 minutes depending on the speed of your Mac.
To do this same process with the terminal code copy the terminal code below then open up a terminal Window by going to finder and then type terminal and then hit return.
sudo /Applications/Install\ macOS\ Sierra.app/Contents/Resources/createinstallmedia --volume /Volumes/Untitled --applicationpath /Applications/Install\ macOS\ Sierra.app --nointeraction &&say Done
Simply right click and paste the command into the terminal window, press return again and you will be prompted for your administrator password type in your administrator password.
if successful you should see the terminal window start to erase the USB and copying installer files to the disc. Once this is done you should be able to then use the USB to do a clean install of any Mac.
I hope that helps guys ! 🙂