Hi Guys and welcome to 123myit. In this video, we will show you how to use the Accessibility feature called Sound Recognition on your iPhone. This feature will allow your iPhone or iPad to listen out for certain sounds and notify you when it recognizes them.
Here is the Door Knock Notification. Let’s try it again.
Cool, lets go ahead and set it up. You can find it under Settings, Accessibility and Sound Recognition.
Just toggle the Sound Recognition button on at the top and then to select sounds tap sounds below.
My Favorites – Sound Recognition on your iPhone
In here, you have a whole heap of Sounds to try. My Favourites are Door Bell, Door Knock, Baby Crying, Shouting and Coughing. The idea is, let’s say you have a friend coming around to your house but don’t always hear the knock at the door. You could put your iPhone or iPad near the door and when they knock you would be notified on your iPhone, iPad or Apple Watch.
Once you turn on Sound Recognition for the first time. You can access it quickly from the Control Panel. So swipe down from the top on your device and then Tap to turn it on or off.
In your control panel you will see the new Sound Recognition button. Just tap it to turn it off and on. And then if you tap and hold you will be able to change which sounds you want your device to listen for.
Also guys don’t forget to check out my other videos such as the Secret iPhone Trick called Back Tap. And do me a favour if you know anyone who might need this video please share it will them, hit the subscribe button and smash the bell icon.
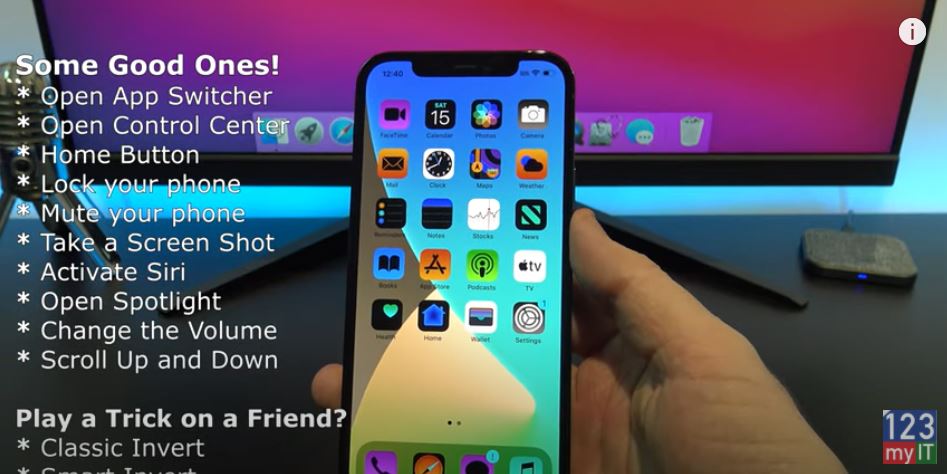
Hi Guys and welcome to 123myit. In this video, we will show you how to use the Accessibility feature called tap back on your iPhone. This Secret iPhone Trick feature allows you to tap the back of your iPhone two or three times and the phone will perform an action.
You can apply all sorts of different action like invert colours or scroll up and down just by taping the back of your iPhone.
Ok lets go ahead and set it up. You can find Back Tap under Settings Accessibility Touch and then scroll to the bottom and you will find Back Tap.
Double tap and Triple Tap – Secret iPhone Trick
In here you have two settings, double tap and triple tap. If we go into double tap it means that you will have to tap the back of your phone two times to perform the action. So you have a whole heap of actions you can perform. Lets test some out. Currently we are on Classic Invert lets change it to Smart Invert. Smart Invert is a bit like Dark Mode. It will change the colours of your iPhone to make it a bit easier on the eye. You could prank a family member with this.
The next one to try is scroll down. So it I select scroll down and tap the back of the phone twice it will scroll down in whatever menu I am in. Also you can set the Triple Tap as a scroll up action.
App Switcher
Next one to try is setting Triple Tap to Control Center and Double Tap to App Switcher. So if you do a double tap it goes to App Switcher so I can change apps or close them. And if you do a Triple Tap it will take you to your control Center where you can change your volume, turn your touch or turn on aeroplane mode.
You can set it up with volume up and down. This is handy if you listen to music allot. You probably want to set these to something you use frequently. You can select other apps like Magnifier. But, its not something I use allot so I would not find it that handy. It is a pretty fun App though.
Also guys don’t forget to check out my other videos such as 8 iPhone settings you need to turn off in 2021. And do me a favour if you know anyone who might need this video please share it will them, hit the subscribe button and smash the bell icon.
Hi Guys and welcome to 123myit. In this video, we will show you how to use private browsing in Safari on your iPhone or iPad. Private browsing allows you to visit websites without creating search history in Safari. When Private Browsing is turned on, your private information will be protected and it will block some websites from tracking your searches. Safari will not remember your Search History or Autofill information.
Turning on Private Browser is super easy. When you open up Safari you will notice that the Navigation buttons are blue. This means Private Browser is turned off.
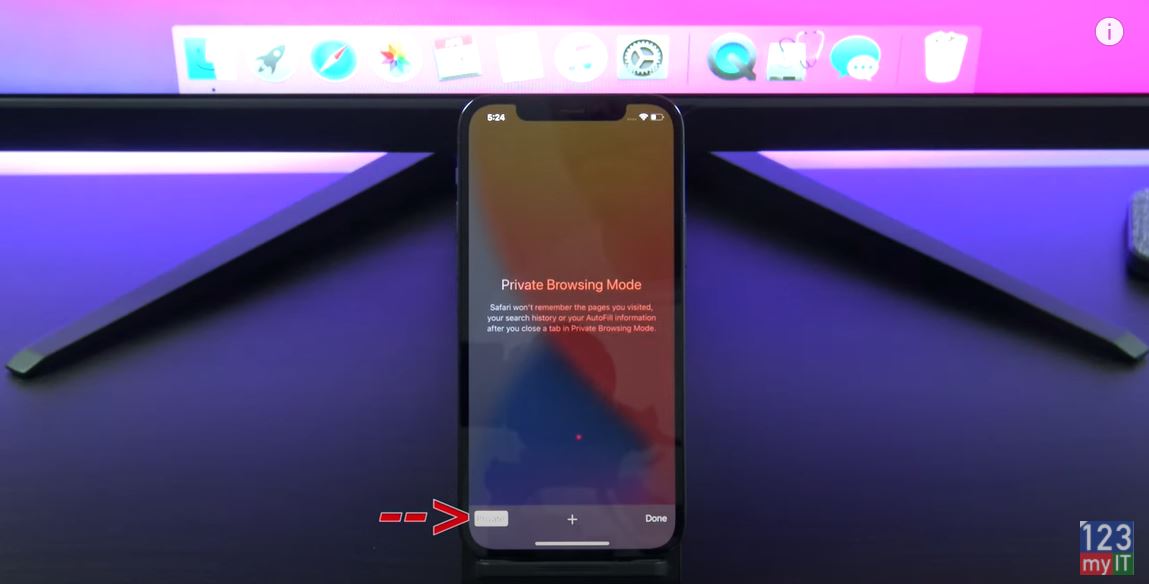
To turn it on tap the Tabs button and then tap Private. The Private button will then be highlighted in White. And when you open a new tab you will see an explanation of what private browsing is.
You will notice the Navigation buttons are no longer blue this will let you know that Private Browser is turned on. If you tap the Tabs button and Tap the Private button this will turn the Private Browsing off.
Here’s how to do it on an iPad. Also guys don’t forget to check out my other videos such as Transfer data iPhone to Android in 2021. And do me a favour if you know anyone who might need this video please share it will them, hit the subscribe button and smash the bell icon.
Hi guys and welcome to 123myIT. In this video, we will show you how to Copy data from iPhone to Android 2021. Ok Guys so we are going to copy the data from your iPhone to iCloud and then download that data to your Android device. This will copy data such as Contacts, Messages, and Free apps, Photos, Videos and Documents. We will use WIFI so make sure both devices are on WIFI. In addition, this should with most Android phones, the process will be similar but you might have to work out which copy software to use. Ok let us start.
Sign into iCloud – iPhone to Android 2021
On your iPhone go into settings scroll to the top and sing into iCloud with your Apple id.
Once you are signed into iCloud, the next step is to do a Backup to iCloud. To do this tap iCloud and then scroll to the bottom and tap on iCloud Backup. This is where you would tap backup now to start the backup. However before you do this lets go back and select what we want to backup remember you will be copying this to your Android device.
Ok I am going to go in and turn off anything that I do not want to backup. Ok once finished there is a few more options to turn off.
Turn off Two Factor Authentication – iPhone to Android 2021
You need to turn off Turn off two-factor authentication if you have that turned on. To do this go out of settings and into Safari and browse to appleid.apple.com. Once there sign in with your Apple ID and password. Log into your account tap on Security, then scroll to the bottom, and turn off two-factor authentication. As you can see, I do not have it turned on.
The next step is to turn off find my iPhone. This is helpful if you want to sell your iPhone afterwards. Go Back into settings, Tap Apple ID and then tap on Find my. Find my iPhone is turn on tap to turn it off. Enter your apple id and then turn it off.
Turn off iMessages
The last step is to turn off iMessages. This will stop your phone number from being linked to your Apple ID. Tap on find my, tap on Apple ID, tap on Settings. Scroll down and find messages. Then just toggle off iMessages. Go back into settings and back into iCloud again. Tap iCloud. Again, go down to iCloud backup. Tap backup now to start the iCloud backup. Depending on how much data you have this might take a while. Head over to your Android device and start up the restore software. This is a Samsung S20 so the software is called Smart switch.
You can find it in the menu or if you are on other Android devices look under Settings and then Accounts and Backup or the Backup area of your Android device. Always tap update.
Transfer Data
Tap on Receive data and then Tap iPhone since we want receive the Data from the iPhone. You want to connect wirelessly to iCloud. The backup has finished on the iPhone now so you can close out of it. Tap done to log into your iCloud on your Android device.
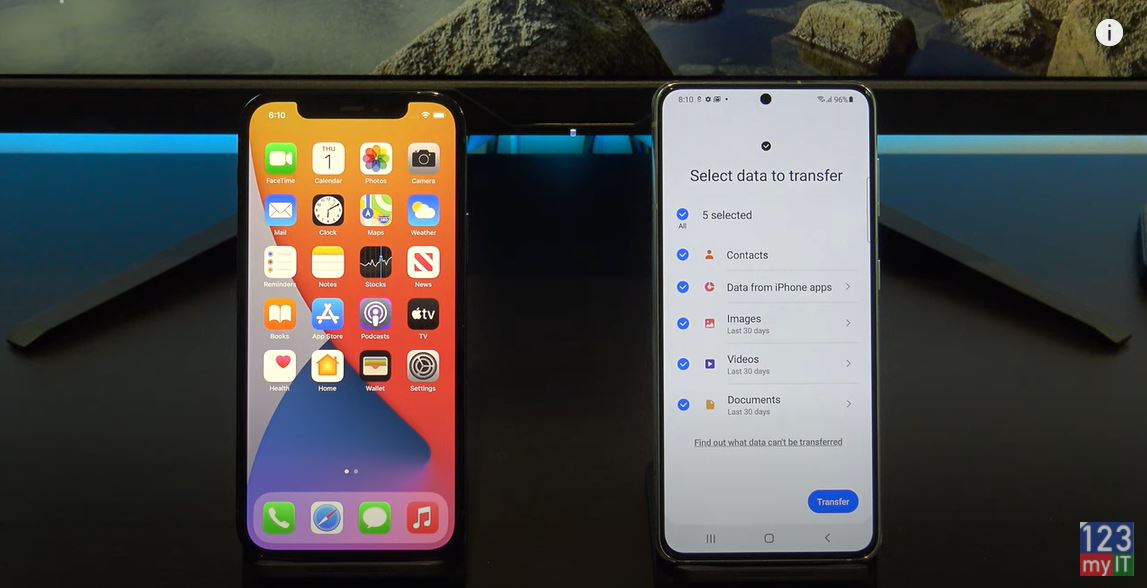
Awesome it should now show you a list of data that you can copy across to your Android device. Just deselect anything that you do not want. Great it will give you other options to copy data to your Android device. Tap next down the bottom. It’s give you a warning about turning off iMessage which we already did. Then tap go to the Home screen and check if you data copied across by going into your Android device.
Guys, don’t forget to check out my other videos such as How to mine Bitcoin on a Laptop. Also do me a favour if you know anyone who might like this video please share it will them, hit the subscribe button and smash the bell icon.
Hi Guys and welcome to 123myit. In this video, we will show you two free ways to transfer your data from Android to iPhone 2021. There are two ways to transfer your data from Android to iPhone. The first way I will show you is recommended by Apple and way requires you to reset your iPhone. If you don’t want to reset your iPhone then fast forward to the 4:46 min mark and I will show you how to Transfer your data without resetting your iPhone.
What can your Transfer? Android to iPhone 2021
This video will help you transfer your contacts, message history, camera photos and videos. Web bookmarks, mail accounts, calendars and free apps.
Go into settings > General and scroll down to reset. Once you are there tap on Erase Content and settings. Next Tap Erase iPhone. This will delete all media and data so do a backup first if you need too.
Once your iPhone has reset itself. Just follow the prompts and start setting it up again.
Next up connect to your WIFI and make sure your Android device is connected to the same WIFI.
Continue setting up your iPhone until you get to the Apps and data screen. Once you’re on the Apps and data screen. Go to your Android phone and download the move to iOS app from the Google play store. Play.google.com
Go ahead and tap install and when that’s done tap open. On your iPhone tap Move data from Android. Then tap continue, agree and then allow on your Android phone.
Could not connect error?
If you are getting the could not connect error message make sure you turn on location services on your Android phone. You will find it under settings and location. Its important to turn that on. Here it is under Settings and location. Just toggle the button on and go back to the move to iOS app.
Tap continue on your Android device and then type in the code that you see on your iPhone. It now shows you the iPhone wifi. Tap continue. If it comes up again with the wifi to connect to just tap connect.
Select the data you want and Transfer.
Ok great you are on the transfer data screen just deselect anything you don’t want to transfer and press Continue. Also here’s a Pro tip. If your transfer is taking to long stop the transfer and delete and photos and videos you don’t want from your Android phone. This will free up space and make the transfer faster.
Your Data is Transferred now!
Cool your data is transferred now. Tap done on your Android phone and you can close the app. On your iPhone tap, continue setting up iPhone. And then go ahead and set up your iPhone.
While you are doing that guys do me a favour and press the like button it shows everyone that this is a legit video. Thanks very much!
Awesome the last step here is to install your free apps. To do this you will need your Apple iD. Just tap add apps and then enter in your apple id. If you don’t have an apple id you can create one by going to the website applied.apple.com.
Download Free Apps
Your iPhone will start to download all your free apps for you. If you get the Apple iD Verification just tap settings and then enter in your Two Factor Authentication. This will pop up as a message on one of your other Apple devices if you have it or as an SMS on your phone.
If you swipe across you should see all your apps start to appear. If you didn’t get the prompt to Add Apps, then don’t worry, just go to the App store and download the Apps you need. You can also check if your if you photos messages and video copied across.
The second part of this video is if you don’t want to reset your iPhone. We will move the data with an App called, Copy my data. Open up the App store on you iPhone and download the copy my data app. Tap open and then tap OK to allow the app access to your data.
Download Google Play Store
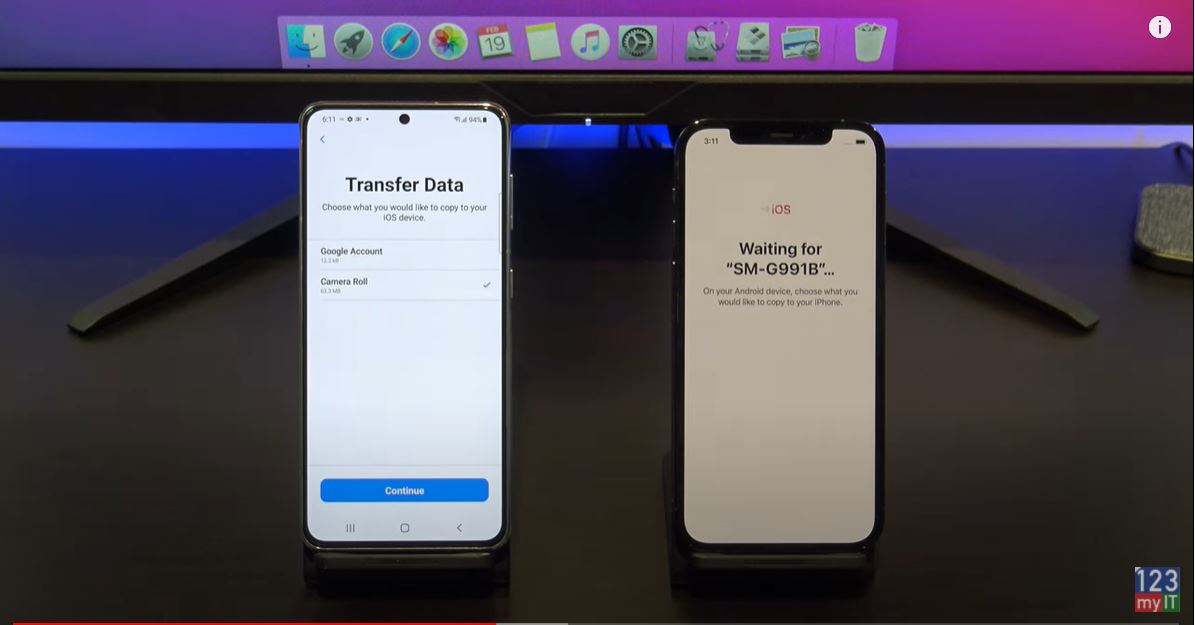
Go to the google play store on Android phone and download Copy my data. I’ve already downloaded it so I will tap open. Go ahead and select what you want to copy. I don’t want contacts or calanders so I will deselect them. On your iPhone Tap next and on your Andriod phone tap next. Tap on to or From Another Device Over Wifi.
If you done everything right you should see the iPhone appear on your Android phone. Tap copy data to selected device. Enter the pin number from yoru android device onto your iPhone. On your Android phone deselect any data you don’t want to copy across. I don’t want contacts and calanders.
Awesome all your data is copied across now. If you have a SIM card you can move it across now too.
The last step is to tap finish and close your apps and then check if your photos and apps copied across. Cool there they are.
Also guys don’t forget to check out my other videos such Samsung Galaxy S21 and do me a favor If you know anyone that might need this video please share it with them hit the subscribe button and smash the bell icon.
Hi guys and welcome to 123myIT. In this video, we will show you how to setup your iPhone as a Google iPhone. Ok Guys I’m an Android user and I wanted to see if I could convert myself to use an iPhone by creating a Google iPhone and replacing all the Apple Apps with Google ones.
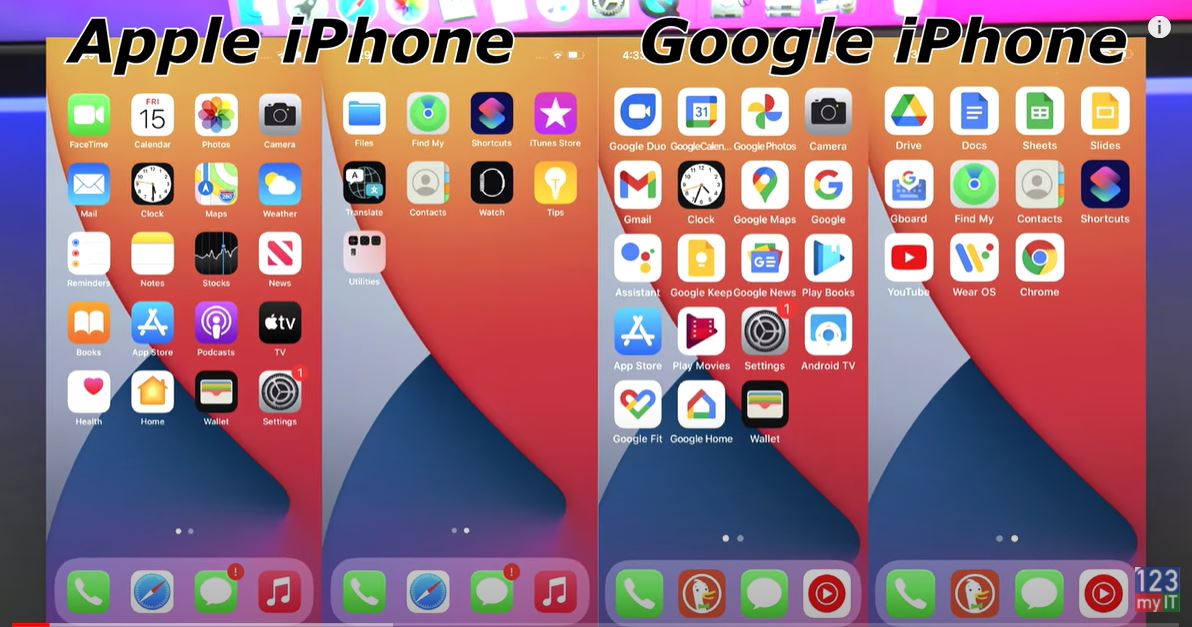
Before and After – Google iPhone
This is what you iPhone will look like before and after you change it to a Google iPhone. You don’t need to change all the Apps you could just change the Apps you want. For example, one of the reasons I have not changed to an iPhone is I really like the Google Assistant. Later in this video, I will show you how to setup the Google Assistant with the tap back function.
What your Google iPhone will look like before and after.
Let get started. First I would need to transfer the data from my old phone to my iPhone. I already have a video how to do this and if you are interested, I will put a link in the description.
Download the Apps – Google iPhone
Next, you will need to download the Apps that you use from the Apple Apps Store. Because I used the Transfer to iOS app, some of my free apps will download automatically. Once you have some apps downloaded, you can start organising them. You can replace the safari with Google Chrome or in my case, I prefer the DuckDuckGo browser and I will show you why later in the video. You can also replace Apple music with YouTube music. To edit the home screen tap, hold, and then drag the icons to where you want them. Alternatively, you can tap and hold the app and drag it.
I have not downloaded YouTube music yet so I will do that now. Just tap to download it and once its downloaded drag It to wherever you want it.
DuckDuckGo – Google iPhone
Cool, now you have you main bar down the bottom sorted. Open up your browser so Chrome or Duckduckgo and set it as the default browser. The reason I use Duckduckgo is that it is a private browser so it doesn’t track you which is nice. In the top of Duckduckgo tap the cog icon and then tap set as default browser. This will open any links in Duckduckgo rather than safari. I will show you how to do this for the Chrome browser as well.
In the Chrome browser, tap the three dots tap Settings. Tap Default browser, Tap open Chrome settings. Tap on default browser App and select Chrome. You can see Duckduckgo is selected I am going to leave it on that. However, if you want to use Chrome select Chrome.
Replace Facetime
You can replace FaceTime with Google Duo. So tap and hold the App to remove it. Then go ahead and download Google Duo from the App store. I already have it downloaded so I will move it to replace FaceTime.
You can replace Apple Calendar with Google Calendar. Photos with Google Photos. So just, download them and drag them into place.
Swap out Mail for Gmail – Gmail is better anyway.
Delete Apple maps for Google Maps – Google Maps is better anyway.
Download Google App and replace it with Weather and Download Google Assistant to replace it with Siri. You can still use Siri however; we will set up Google assistant with the Tap Back feature. Which is just awesome.
Ok while that is downloading lets change out the Weather app. Moreover, you can move the Google Assistant to the main screen.
Download Google Keep and replace notes.
Delete News and download Google News.
Replace Books with Play Books.
Delete unwanted apps
Go ahead and delete any Apps you are not using. Remember you can always download the App again if you need too.
All right swap Play Movies with Apple TV which we deleted earlier. Another good one is Android TV.
Moreover, you can replace the health app with Google Fit.
You can swap Apple Home with Google Home.
On the Second screen you can delete any apps you are going to use. You can replace files with Google drive. Delete ITunes store. Also remove Translate and delete Watch if you do not have an Appel Watch. Delete tips and Utilities. Keep the Shortcuts icon because we will use that for the Google Assistant.
You can move your Google drive to the top to make it neater, then go back to apps store, and download Google Docs, Sheets and Slides. Tap and hold and bring them to the top so its neater.
GBoard the Google Keyboard
Go back to the Apps store and download Gboard, which is the google Keyboard. In addition, download Wear OS which is an App for your Apple Watch. To Setup Google Keyboard to to Settings General Keyboards and tap add a new keyboard. Select Gboard and then tap on Gboard and toggle the Allow full access button. Cool you have just setup you’re Google Keyboard.
Setup Google Assistant
Let us setup Google Assistant. Open Google Assistant and login to it with your Google Account. Just tap no thanks and continue to get it started.
All right its working go back to the Home screen find the Shortcuts icon and tap to open it. Tap the plus icon and tap Add Action. You should see Hey Google down the bottom tap that and then tap the Next button at the top. Type in the name for the Action. I just type Google Assistant this will help you identify the shortcut when you add it to the tap back action.
Cool you have a short cut now for the Hey Google command. Let’s add it to the Tap back section. Go into settings accessibility Touch and scroll down to the bottom to where it says Back tap. If you double or triple tap the back of your iPhone it can do an extra command. Go into Double tap and scroll to the bottom. Under Shortcuts you will see the Google Assistant Shortcut we created earlier select that and watch the magic. If you double tap, the back of the iPhone the google assistant starts up.
Guys, don’t forget to check out my other videos such as setup your iPhone or iPad in 2021. Also do me a favour if you know anyone who might like this video please share it will them, hit the subscribe button and smash the bell icon.
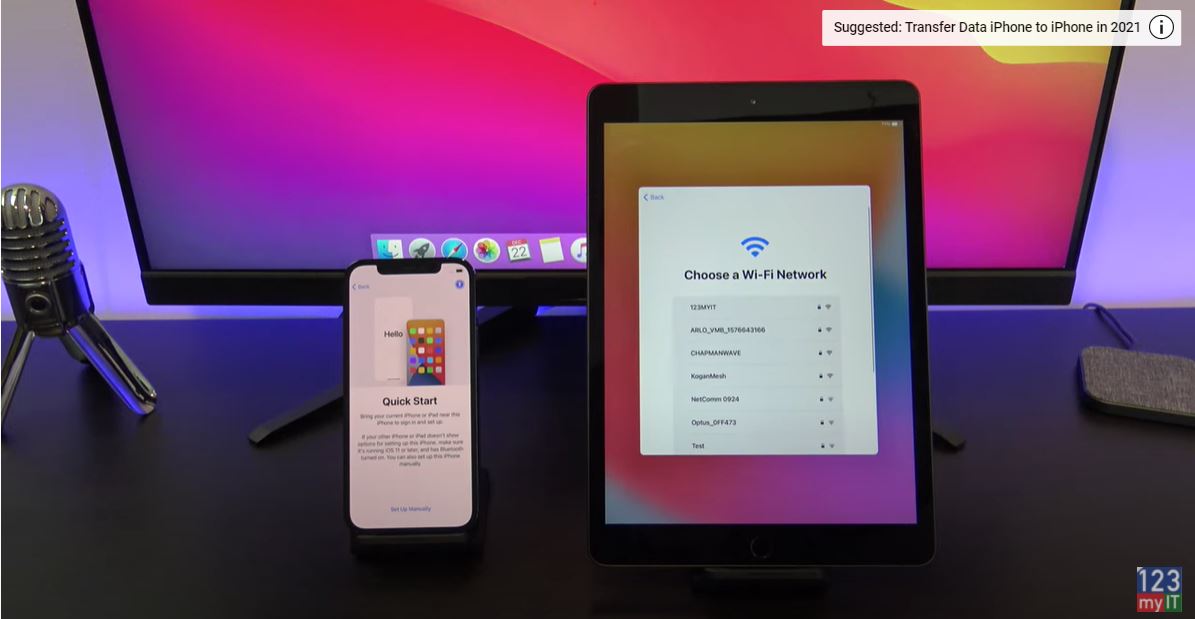
Hi guys and welcome to 123myIT. Do you have a new iPhone or iPad? Lets go through the setup process. Swipe up on the iPhone 12 and press the Home button on the iPad to get started. Next select your language and region. Setup your iPhone, let get started.
If you want to transfer your data from another iPhone or Android, you can use the quick start guide. I have already done a video on this I will put the link in the description. Otherwise tap setup manually and then connect to your WIFI. Go ahead and enter your WIFI password then tap next.
Setup your iPhone and iPad in 2021
Your iPhone and iPad will take a few mins to activate. If you have a sim card for your iPhone you can put it in now or you can fast forward to the 5:51 mark and I will show you how to add the sim card. Go ahead and tap continue on the Data & Privacy screen.
Different Models? – Setup your iPhone
Depending on which device model you have. You might have Face ID or Touch ID. Face ID unlocks your device with your face and Touch ID with your fingerprint. Tap continue and get started for the Face ID and move your head around in the circle. Cool that’s setup now. Let us setup Touch ID next. To setup Touch ID tap continue then press and hold your finger on the Home button.
Setup Touch ID – Setup your iPhone
Adjust your grip and setup a second fingerprint. Tap Continue.
Next, you will need to setup a six-digit passcode. This is used to unlock the Face ID or Touch ID settings. If you tap Passcode option, you can set a four-digit passcode or no passcode at all.
If you want to transfer data from another device, you can use the Apps and Data screen to do so. I have plenty of videos you can follow to do this I will put them in the description. For this video, we are just going to go to Don’t Transfer Apps & Data.
Apple ID
If you have an Apple ID go ahead and type it in now. If you do not have, an Apple ID now is a good time to set this up. You will need an Apple ID to download Apps to your iPhone or iPad. My Apple ID has Two Factor authentication, which means it will send a code to your email or another device. So check your other device or email for a code and type it in.
Almost there now, tap Continue on the updates screen. Then you can enable disable locations services. This turns on the GPS and it allows Apple to see where you are to recommend services to your device. Normally I turn this off and you can always turn it back on later.
Apple Pay
If you have Apple pay setup on your credit card, you can setup Apple Pay now. This allows you to pay with your iPhone or iPad instead of your credit card. I am going to tap setup later and continue to the SIRI screen. Ok I am going to setup SIRI on the iPhone you can also do this on the iPad if you want to. Ok So I finished setting up the iPad the steps will be the same on the iPhone. Tap continue and you can now use the side button to ask siri a question. You can share your Audio with Apple. I never do this always tap not now. If you want screen time reports on how you use your phone hit Continue and on iPhone Analytics tap Don’t Share.
True Tone
True tone display allows you to have a warmer display on your device. Press the see without True Tone Display to see if you like it or now. You can change this later if you want.
Select light or dark appearance which ever your prefer. IF you got big fingers or you want the text on your screen to be larger select Zoomed.
Awesome so you are all setup now. One last thing if you want to setup your SIM card you can get the little SIM card eject tool and on the iPhone 12 Pro the slot is on the left side. Push the pin into the hole to eject the slot out. Just add your SIM and replace the slot back inside the iPhone. If you do not have a sim contact your carrier. Your sim card might have a PIN on it enter your PIN. IF you do not have one contact your carrier..
Guys, don’t forget to check out my other videos such as Transfer Data iPhone to iPhone in 2021. Also do me a favour if you know anyone who might like this video please share it will them, hit the subscribe button and smash the bell icon.
Hi Guys and welcome to 123myit. In this video, we will show you how to Transfer your data from your older iPhone to your newer iPhone in 2021. Therefore, if you have the iPhone 12 Pro like this one or any other iPhone that’s new to you, then this video will help you move contacts, text messages, music, photos apps and app data. This also includes apps like WhatsApp for example.
Already Setup your iPhone
If you have already setup, your phone and you are on the Home screen. Unfortunately, you will have to reset the new phone. If you do not want to reset your iPhone then you can do a backup and restore from iCloud. Alternatively, backup and restore from iTunes.
To reset your phone Go into settings > General and scroll down to reset. Once you are there tap on Erase Content and settings. Then Erase iPhone.
After Reset
Once your iPhone has reset itself. Go ahead and select your country and language. You should see the quick start screen appear on your old Phone. Tap Continue. If you don’t see the quick start screen make sure Bluetooth is turned on and you can also press the sleep wake power button to put the device to sleep then tap it again to wake it up.
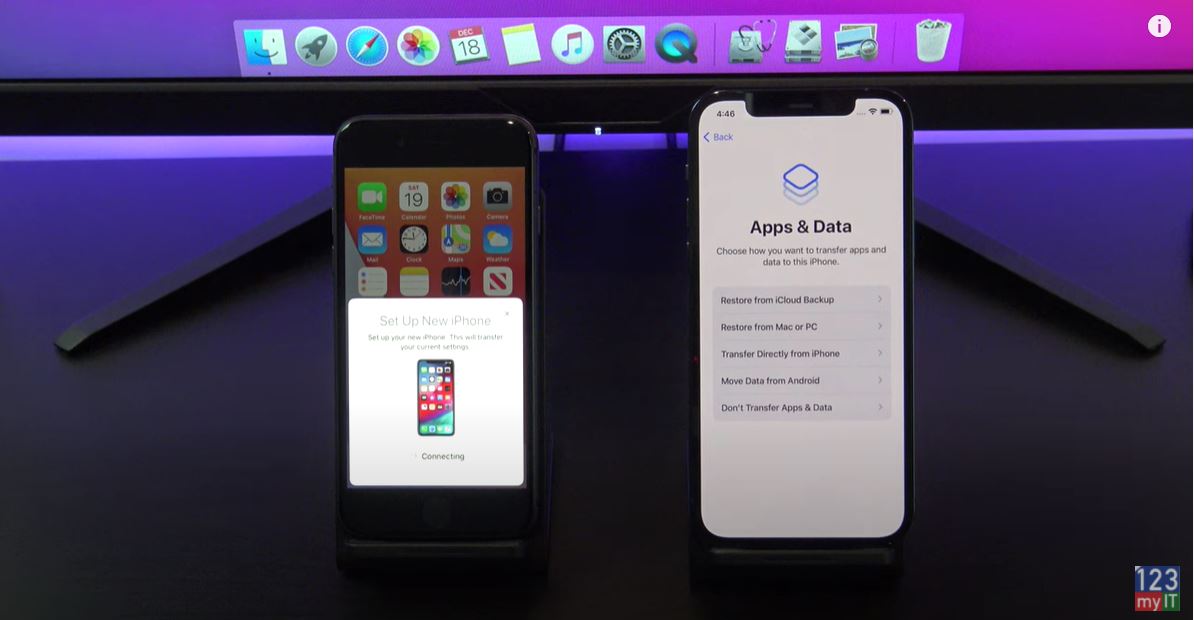
Apps & Data Screen- This is where the magic happens.
You should get a little blue animation now. However, if it does not come up continue setting up your Phone until you get to the Apps and data screen. Once you are on the Apps and data screen. Transfer directly from Phone. There you go now the little blue animation has come up. Scan it with the rear Camera on your old Phone. Now at this stage you might need to enter your old Phone passcode on your new Phone. It did not come up for me because I turned it off before starting the transfer process. Follow the prompts to setup touch id or face id on your new Phone.
Almost there!
Finally, tap continue and agree to start the Data Transfer from your old Phone to your new Phone. Almost there follow a few more prompts to setup your Phone until you get to the Transferring Data from Phone screen. There it is so all your data should be copying across now.
Keep the two devices close by and make sure they are plugged into power.
Your new iPhone will restart itself and when you log on you go and check that all your data has transferred across ok. I will check my pictures and see if that are the same. Cool looks like everything has copied across.
In addition, guys don’t forget to check out my other videos such as backup your iPhone or iPad to Google Drive. Do me a favor If you know anyone that might need this video please share it with them hit the subscribe button and smash the bell icon.