How to install Facebook App on your old iPhone 3G iOS 4.2.1

This video will show you how install Facebook App on your old iPhone 3G.

So I after I did the tutorial on how to jailbreak your iPhone 3G running iOS 4.2.1 see the video here.
I had a few people ask me how to add Facebook to the old version of the iOS and this is how you do it.

NOTE: You must first Jailbreak your iPhone see the link above for more detail.

Step 1. Open Cydia on your freshly jailbroken iPhone 3G.
Step 2. Press Manage > Sources,
Step 3. Press the Edit than Add button.
Step 4. Type cydia.iphonecake.com and press Add Source.
You should then have iPhone under your Sources.
Step 5. Press iPhoneCake
Now here is the important part. You need to select the AppSync version for your iOS.
Since my version is iOS 4.2.1 I will need to select AppSync for OS 4.2.
Step 6. Select AppSync for OS 4.2.
Once you select it properly it should have a green tick beside it.

Ok, you are halfway through stay the coarse and you will be rewarded 🙂

Step 7. Download iTools2012.zip file from the 123myIT downloads webpage here.
iTools is an application which allows you to place apps directly on your iPhone. This is the tool that we will use to get the old version of the Facebook app on to your iPhone.
Step 8. Extract the iTools2012.zip file to your desktop.
Step 9. Run the iTools 2012.exe file.
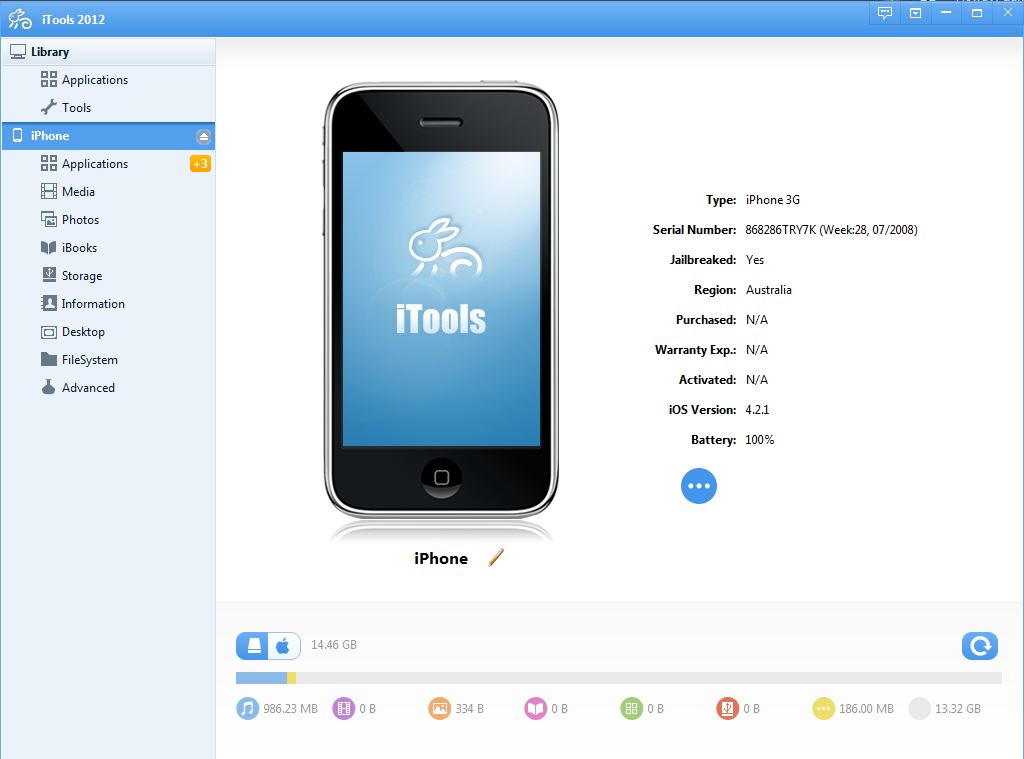
Step 10. Connect your iPhone to your PC and give the PC time to install the iPhone driver. Once its installed it should look like the screen shot below.
iTools 2012
Step 11. Download the Facebook App from 123myIT Downloads page here.
Step 12. Extract the Facebook App file to your desktop.
Step 13. Go back into your iTools 2012 application click on application inside the iTools then simply drag and drop your Facebook App file that you extracted to your desktop.

This should load your older Facebook app back on to your iPhone. Simply click on it login with your Facebook user name and password and you are ready to go. 🙂

I hope this helps you out. Please leave some feedback and thumbs and share this page with your friends if it helped you out.
Newer versions of the Facebook apps can be found on Google Play and iTunes app store.

Good Luck 😉

How to upgrade memory and hard drive on a Macbook Pro.

This video is a step by step guide on how to upgrade memory and hard drive on a Macbook Pro.
1. Turn your Macbook over so the bottom is facing up.
2. Remove the screws from the bottom of the Macbook Pro.
3. Remove the bottom of the Macbook from the rest of the shell.
4. Slide the two plastic leavers away from the memory.
5. Slide the memory back in and push it into place.
6. Put the lid back in place and screw all the screws back into place.
And then you are done.

How to install Windows 7 on an Apple Mac running bootcamp.

This video is a step by step guide on how to install Windows 7 on an Apple Mac Book Pro running OSX and bootcamp.

1. Log into your Macbook Pro.
2. Open up finder and in the spotlight bar type: bootcamp.
3. Select bootcamp from the menu.
4. On the introduction screen click continue.
5. Make sure that the download the latest support software from Apple option is ticked. If you already have a Windows partition installed you will have an option called Remove Windows 7. If you dont already have Windows installed you will have an option called Install Windows 7. Make sure you tick install Windows 7.
6. Have your 1GB USB key handy to download the Windows Support Software from Apple.
7. Now you can choose to save a copy of the Windows support software to DVD or USB. I prefer USB.
8. Select save a copy to an external drive. You can run this software after Windows have been installed.
9. The Windows support software will download to the USB.
10. At the create a partition for Windows screen you can make the partition as big as you want. However press divide equally so you will have a shared amount of space on both drives.
11. In-cert your Windows 7 DVD and click install.
12. Boot camp will start to Partition the drive.
13. Your Macbook will restart.
14. Windows is loading files screen.
15. At the Windows 7 install screen select your Language, time and currency format and Keyboard and input methods. Click next.
16. Click install now.
17. Accept the licence terms and agreements and click next.
18. Click on custom menu.
19. Select your bootcamp partition and click drive options. Hit Delete then click Ok.
20. Select the partition again and click on New, Apply and Next. And Vista will start to install.
21. The Mac will restart.
22. Setup your new Windows 7 profile and you are done.

How to install Windows Vista on an Apple Mac running bootcamp.

This video is a step by step guide on how to install Windows Vista on an Apple Mac Book Pro running OSX and bootcamp.

1. Log into your Macbook Pro.
2. Open up finder and in the spotlight bar type: bootcamp.
3. Select bootcamp from the menu.
4. On the introduction screen click continue.
5. Make sure that the download the latest support software from Apple option is ticked. If you already have a Windows partition installed you will have an option called Remove Windows 7. If you dont already have Windows installed you will have an option called Install Windows 7. Make sure you tick install Windows 7.
6. Have your 1GB USB key handy to download the Windows Support Software from Apple.
7. Now you can choose to save a copy of the Windows support software to DVD or USB. I prefer USB.
8. Select save a copy to an external drive. You can run this software after Windows have been installed.
9. The Windows support software will download to the USB.
10. At the create a partition for Windows screen you can make the partition as big as you want. However press divide equally so you will have a shared amount of space on both drives.
11. In-cert your Windows Vista DVD and click install.
12. Boot camp will start to Partition the drive.
13. Your Macbook will restart.
14. Windows is loading files screen.
15. At the Windows Vista install screen select your Language, time and currency format and Keyboard and input methods. Click next.
16. Click install now.
17. Enter your serial key and click next.
18. Select your version of Vista that you want to install and tick the terms and agreements and click next.
19. Click on custom menu.
20. Select your bootcamp partition and click drive options. Hit Delete then click Ok.
21. Select the partition again and click on New, Apply and Next. And Vista will start to install.
22. The Mac will restart.
23. Setup your new Windows Vista profile and you are done.

How to add Battery Percentage on iPhone 4S, 3G, 5, iPod and iPad.

This is a tutorial on how to show the Battery Percentage beside the battery power meter on the iPhone 3G, 4S, 5, iPod and iPad.

On your IPhone, IPod or IPad doe the following.
1. Go into Settings menu.
2. Go into General menu.
3. Go into the usage menu.
4. Scroll down till you see the Battery Usage menu.
5. Turn on the Battery Percentage menu.

And then you are done.