Hi Guys Matt from123myit here, in this video I will show you how to Transfer your WhatsApp messages from iPhone to Samsung.
Guys for as long as I can remember people have been asking me to do a video on how to Transfer WhatsApp messages. Well here is, but there is a few things you need to know first.
This video assumes that you have a new Samsung phone so it needs to be factory reset. Because you will be copying data from iPhone to Samsung. To reset it go into Settings, About Phone, Reset and Factory Data reset. This process will wipe the data currently on your Samsung. So make sure you do a backup first.
Get ready – Fully charge your battery – WhatsApp iPhone to Samsung
Second thing to know is make sure you have both phones battery has fully charged. As it will take a long time to move the data.
The next thing to do is turn off any security on your iPhone. So turn off Passcodes, as they will block the Transfer process.
Last, you will need a USB-C to lighting Apple cable. We will use the to move the data from iPhone to Samsung. Let us get started.
Plug your two phones in with the cable
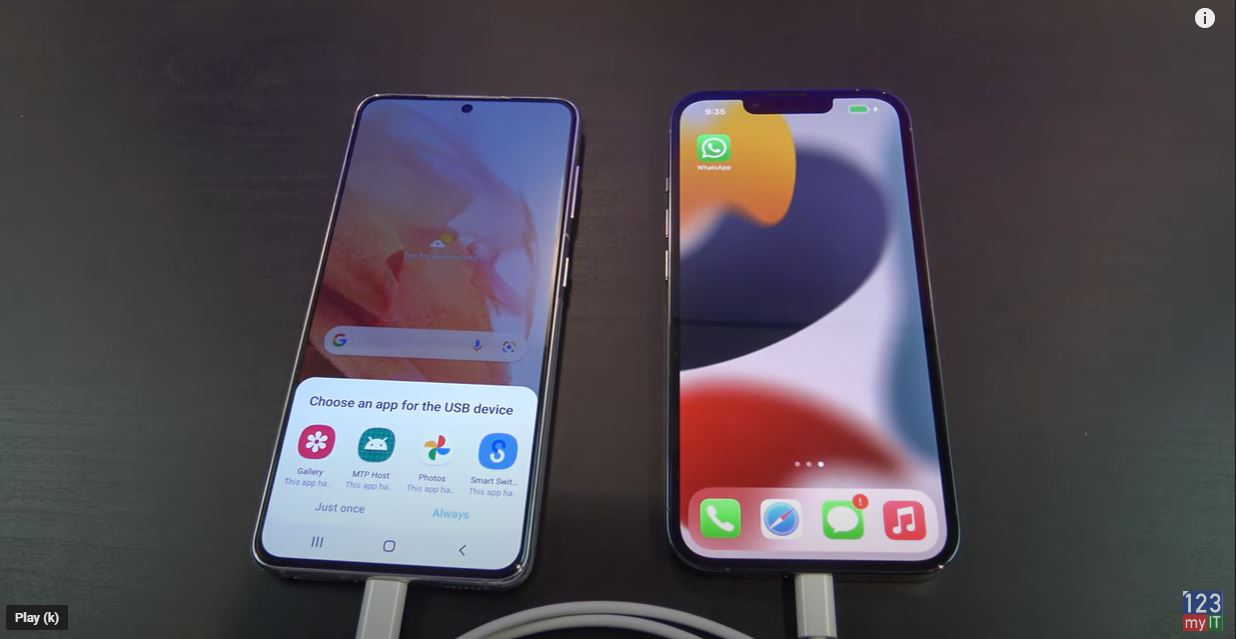
Go ahead and plug in your Samsung to your iPhone. Cool and you should see the app called Smart Switch pop up on your Samsung. Just go ahead and tap it and that download. Up to you will see a pop up that says downloading. If you do not see this swipe down from the top of your Samsung and you can check the download process, there. You will need internet access for it to download.
Cool, there it is so tap Agree on the Samsung. We want to tap Receive data because we are receiving from the iPhone. Then tap on iPhone then tap ok. All right, it has come up with the Trust this computer on the iPhone. So go ahead and tap Trust. And then tap next.
Backing up your phone
Awesome, swipe up on your Samsung and it will give you a complete list of data to backup. You can do this if you want. But for this video we want WhatsApp only. Therefore, I will take the tick out of all the data and just tap Apps. Next swipe to the bottom and tap Transfer. Now if you have a Google account go ahead and Sign In. Google will ask you to approve the account on another device or in your email.
Great if you have made it this far well done. Just unselect all the apps and tap Whatsapp Messenger. Ok some phones will start the Transfer automatically. If yours does not then go into WhatsApp on your iPhone. Go into Settings > Chats and move Chats to Android. Then tap Start.
Turn off iMessage
Cool, tap next and then you will get a prompt to turn iMessage off on your old iPhone. You can follow the prompts on the Samsung, or you can do it on your iPhone under settings, Messages and then turn the iMessage button off. Tap next, next and done.
Awesome go check and see if the WhatsApp icon is there now and tap on the WhatsApp icon. Now if you have a sim card now is the time to move it because WhatsApp needs the phone number to work properly. Once you have moved your Sim tap Agree and continue. WhatsApp will send you a text message to verify your phone number. Tap Allow and then Allow again.
Also guys don’t forget to check out my other video such as Transfer Data iPhone to Android 2021. And do me a favour if you know anyone who might need this video please share it with them hit the subscribe button and smash the bell icon.
Hi Guys Matt from123myit here, in this video I will show you how to an unboxing and first look at the LG UltraGear Gaming Monitor.
The Specs -LG 27GL850-B Gaming
The LG 27GL850-B is a 27-inch 1440p QHD Gaming monitor with a 1 ms response time. It has a refresh rate of 144Hz and its also Gsync and Free sync compatible by using Adaptive Sync. The 27GL850-B is a great buy at the moment retails for around $350 usd and $550 Aussie at the time of this video. If you are interested, I will put a link in the description below.
Other features include black stabilizer and HDR10 support. Let’s take a look what you get inside the box.
Inside the box
First up inside the box you have the base of the monitor stand. It has a black plastic cover with red highlights. Inside the LG UltraGear black box, you get a power plug. So, an Australian New Zealand power plug, but if you are in the US, you would get a US power plug. The power supply is not built into the monitor, and it comes as a separate power brick much like you see with laptop designs. I tested the power draw with HDR Effect turned on which is a bright setting, and the monitor uses about 26 watts of power. When I changed it to Reader it used 13 watts.
Power usage
The worst part when the monitor was turned off totally it still was using 1 to 2 watts while not in use.
Next in the box you have a little cable tidy, Display Port, USB 3.0 and HDMI cable. Also, in the box you have a driver CD, quick start guides and warranty information.
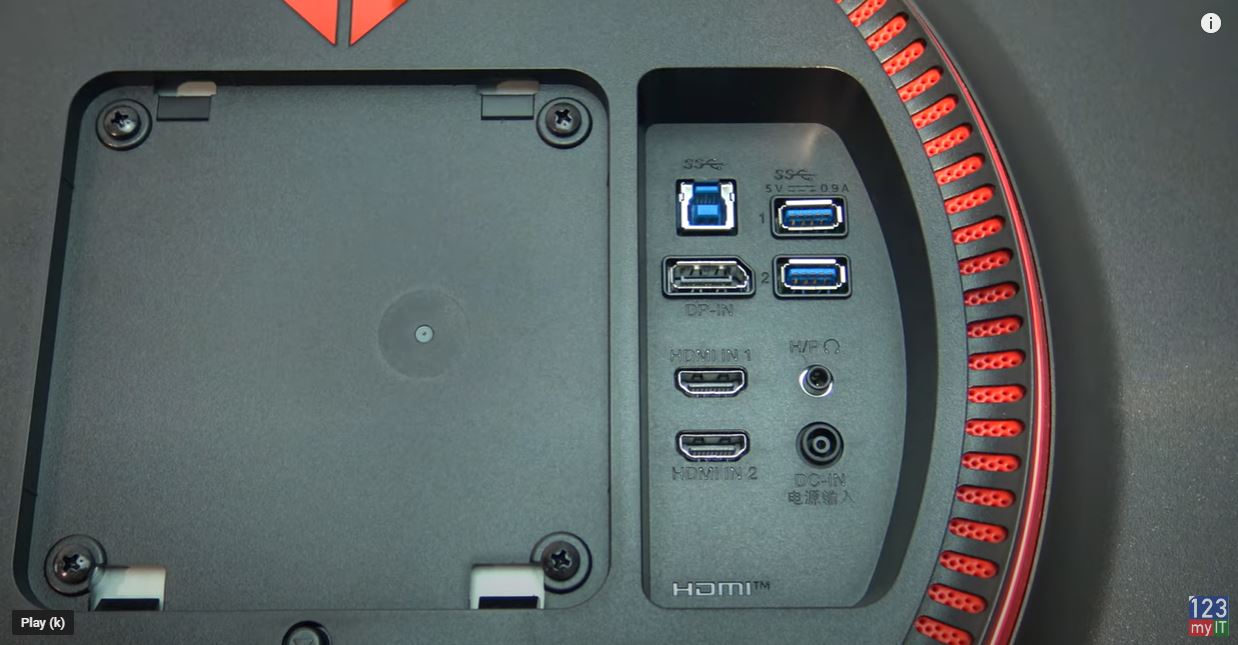
Next up is the arm that connects to the monitor to the base. Taking the monitor out of the box it’s an IPS display so blacks should look darker and colours will be brighter than a TN display. On the back you will see two HDMI and USB down ports. Along with one display and USB up ports. And if you have a VESA stand you can also attach your own.
The Stand
While the stand is solid there is some wobble, but it’s not a deal breaker. You can adjust the height and swivel as well as put it in portrait mode. Here it is beside the Aorus KD25F, which is a TN panel. Can you make out the deeper blacks and brighter colours?
Remembering that its a Nano IPS panel with a resolution of 2560 x 1440 and 350 nits of brightness.
FreeSync and G Sync
To start the OSD there is a little joystick under the logo. The thing I really like about this is it tells you the refresh rate straight away. Sweet so its running at 144Hz and you can see Adaptive Sync is on. In Game Mode it has some modes already to go which is nice. For best results in games, I set this to FPS with and went into the Game Adjust menu and turned Adaptive Sync off. The reason for this is when Adaptive Sync is turned on the Frame Rate in PUBG dropped making it terrible to play.
Adaptive Sync
If you can’t get Adaptive Sync to turn off, go into the NVidia control panel and take the tick out of Enable G-Sync. I am assuming it will be the same thing for AMD graphics cards. Once you have that turned off, go down to Response Time and make sure it is set to fast not faster. This is because the Faster setting only works with allot of errors and it looks bloody terrible.
Try it an test a game. Don’t take my word for it try it yourself. Next up to add a cross hair, go down to the Cross Hair menu and select the cross hair you want to use. I always go for the red one works best for me. Alright go in and check your display settings and make sure your 27GL850 is set to 144Hz.
On the Back
On the back the monitor has a USB hub which I really like as it allows you to plug in extra devices for your desktop. I use a desktop mic so when I turn my monitor off it also turns the mic off which is handy.
Testing how well games play
Alright let’s fire up PUBG and do some testing. So, with Adaptive Sync turned on I was getting around 71 to 74 frames per second. And with it turned off the frames improved all the way up to 110 frames per second. So, you can see why some BenQ monitors don’t even include Gsync FreeSync as it might not always be suitable.
Hi Guys and Matt from 123myit here. I am always amazed when how to do something a new way on computers or phones. Sometimes you do not even realise that there is a new way to do something until someone else shows you and you realise you have been doing it the hard way for a while.
What to do first – Arrange your iPhone icons
Take arranging your icons on your iPhone for example. Normally I would tap and drag th icons around but there is an easier way. Let me show you. If you tap your icon and hold it. I would normally drag this around but what you can do is tap the other icons that you want to arrange this icon with.
So if I grab my Calendar, Photos, Camera and Wallet. It will reorganise them in that same order that I selected. OK I will do it again. This time I want to put all my icons on the bottom row so can reach them easy. So I will tap my wallet, photos, camera and facetime. Cool so there is my wallet, photos, camera and facetime all on the easy to reach bottom row.
Here’s another one. To move an icon to a different screen I used to tap and do an awkward icon drag to one of the other screens. But what you can actually do it Tap and hold the icon and then just use your other hand to switch screens……. Oh so much easier haha.
Guys click if you want to see other iPhone iPad tips such a how your iPhone can help you sleep. And do me a favour if you know anyone who might need this video, please share it will them, hit the subscribe button and smash the bell icon.
Guys Matt from 123myit here. People you might be wondering why I am showing you a planes on a iPhone video. Well these are the planes that fly over my house and as you can hear, they are very loud! So if you are trying to sleep, study, concentrate or just get some peace from the outside world. I will show you a new iPhone feature that allows you to block out some of this outside noise.
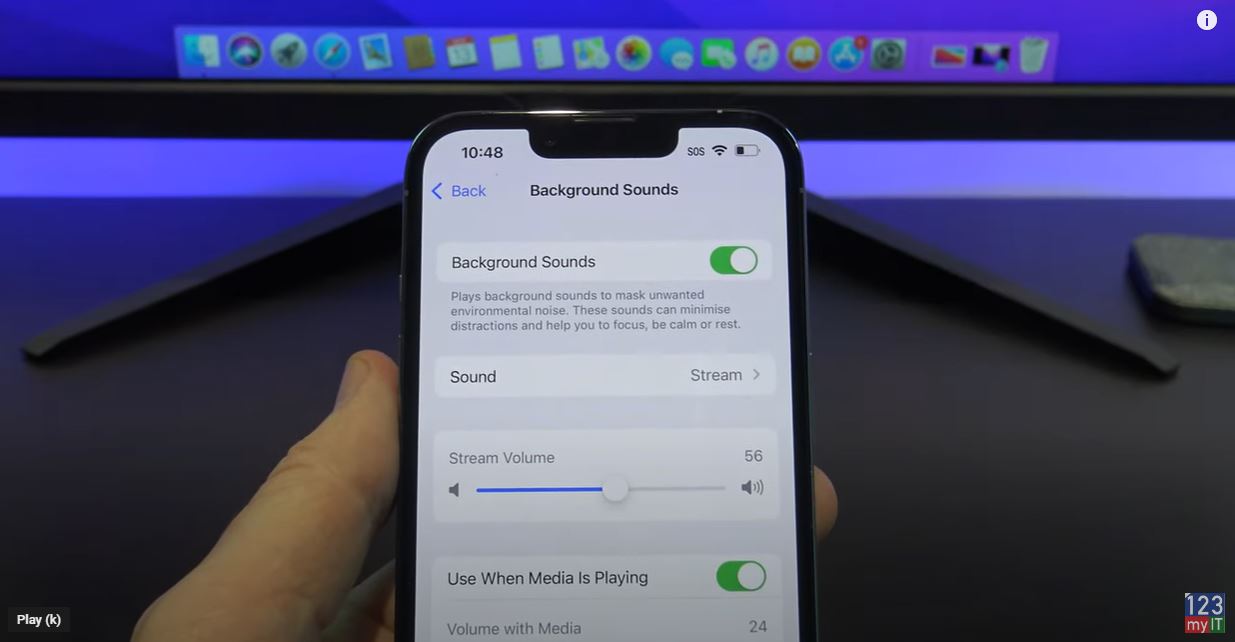
Let us take a look. Helpful background sounds on iPhone. The features is called background sounds and it’s only available on iOS version 15 or later. To find it swipe down from the top right and go into control center and it’s the little ear icon. If it off you can just tap the ear icon to turn it on. I will show you how to find it in settings and turn it on. All right so this is my older iPhone 12 and it’s not updated. So if you have swiped down from the top into control center and you do not have the ear. I will show you where to find it in settings > accessibility > Audio Visual and background sounds. On my iPhone, 12 Pro its running iOS 14 and I will show you it’s not there so you will need to update to iOS 15.
Cool so to turn it on toggle the button at the top. And then you are done. Easy as.
Guys, don’t forget to check out my other videos such iOS 15 settings to turn off right now. Also do me a favour if you know anyone who might like this video please share it will them, hit the subscribe button and smash the bell icon.
Guys Matt from 123myit here. If you are mining Nicehash on a RTX 20 series or RTX 30 series or any other NVidia card. Then in this video, we are going to show you why it’s important not to use the Nicehash optimize option for your Nicehash mining.
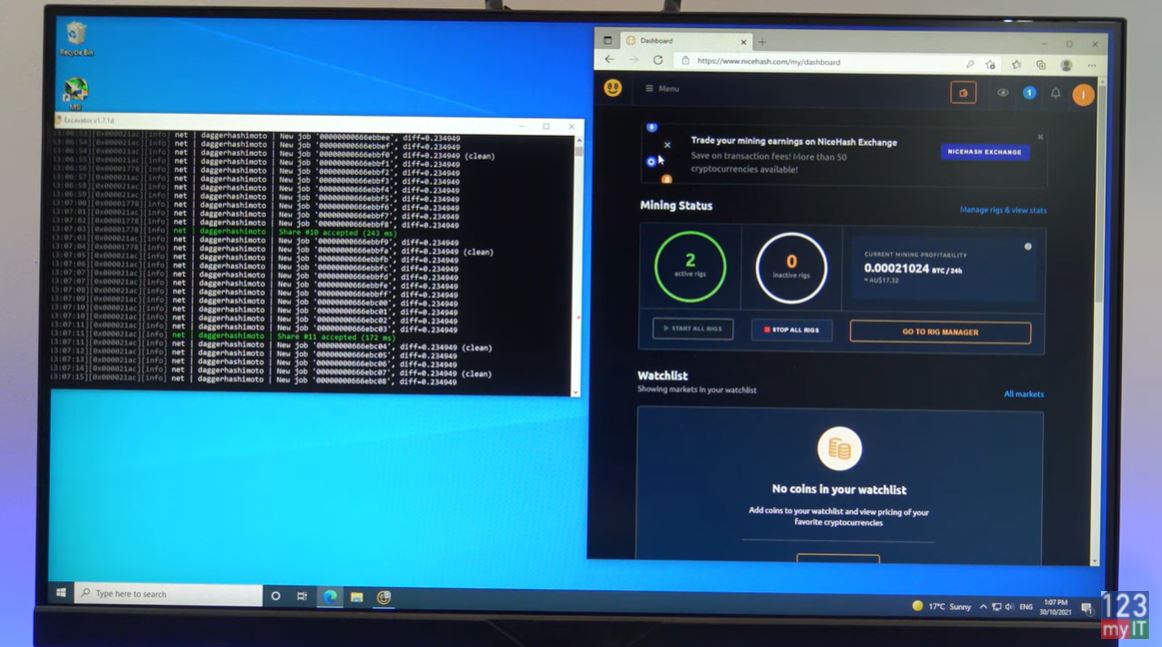
First of all guys sorry for the blurry screen. I cant screen capture as it will affect the performance of the mining. The card that I will be using is the Gigabyte RTX 3060. If you want a link to that I will put the links in the description below. So what we will do first is run the card without any optimisation. Then I will run the card with Nicehash Optimisation. Then run the card with Manual Optimisation with afterburner and we will see which offers the best return on investment.
Use a wall socket – Dont use NiceHash
Ok so here is the reading with no optimisation. And the reading from the wall socket is 178 to about 180 watts. So running the card without any optimisation gives a hash rate of 37 and overall power usage is around 180 watts.
Alright let’s set the Nicehash optimisation to high and see what it gives us. The overclock has set the card core clock to 1560 and memory to 1200. I will just minimised the browser and give it a second to pull up the top score.
Nicehash Optimisation
Cool so the Nicehash High setting has done a good job at optimising the card with a higher hash rate of 47.9 and over all power usage of 144. Let’s see what medium settings does. The medium setting sets the core clock to 1500 and the Memory clock to 1000. The Nicehash medium optimisation finished with a hash rate of 46.8 and an overall power score of 138 watts. So again dropping the power consumption, but also dropping some of the hash rate.
Ok the last setting it the Lite optimisation and this sets the cards core clock to 1440 and memory to 700. After the card settled, it was punching out 45 mh with a power outlet score of 133 watts. So again, a decrease in both power and Hash rate as expected. Alright let’s try a manual over clock using the afterburner software. I am going to do a quick restart and make sure that you turn the optimisation off in Nicehash as well before you do manual optimisation.
Using the AfterBurner Software – Dont use Nicehash
Ok starting up the afterburner software. You can see the power limit starts at 100. This is what you will mostly change to reduce the power that the card will use. I already have a clock set so I will apply those settings and you can see power limit and other settings change.
If you are not, sure what afterburner settings to use for your graphics card then look up this Nicehash page called NVidia AMD OC settings for mining. Moreover, it gives you a good starting point. So if you look here. It tells you all the types of graphics cards and I just used the numbers from here for my card the RTX 3060. No you can try any settings for your card you want. But this is a good starting point.
Ok so the card hash rate has settled on 47.55 with overall power consumption of 137 watts. Therefore, the manual overclock is pulling a similar hash rate to the Nicehash high setting but using 7 watts less. In addition, well you might say it’s such a small amount who cares right? But if you times this small amount by 24 hours a day 7 days a week and you have more than one card. This little amount will be allot. Guys don’t forget to check out my other videos such as create & download Windows 11 for Mac. And do me a favour if you know anyone who might need this video please share it will them, hit the subscribe button and smash the bell icon.
Hi Guys Matt from 123myit. In this video, I will show you how to download Windows 11 and setup a USB installer drive. Let get started.
Download Microsoft Windows 11
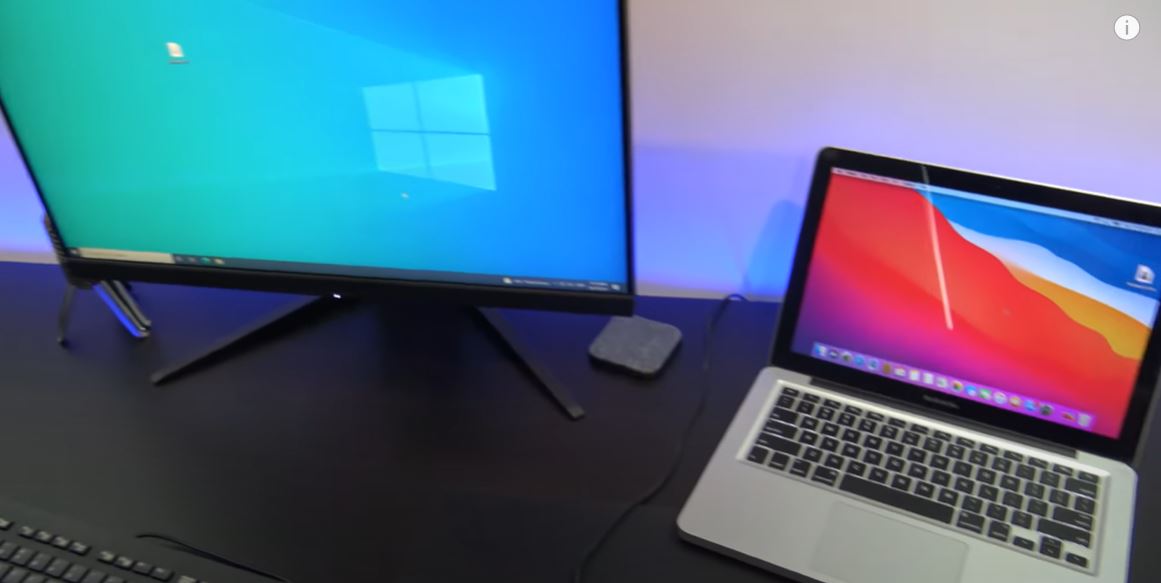
Head over to the Microsoft downloads website I will put a link here. This is where were will download the Windows 11 file for Mac and setup a USB installer drive.
If you are on a Mac, scroll down to where it says Download Windows 11 Disk Image ISO. Click select download, click Windows 11, and then click download. Go down to language and choose your language. In my case, English International is the right one for me. Click confirm and then click on 64-Bit Download. Then you are good to go. You can use that to install Windows 11 on a Mac and if you want to see my video on how to do this, I will put a link in the top of the video now.
Create Windows 11 Install Media
To create and Installer drive, go back up to Create Windows 11 Install media and click download now. You will only be able to do this on a Windows PC. Click open to Run the Media creation tool. And then Accept the Terms and agreements. You will see a checkbox to use the recommended options. If you want to change the language from English then remove the tick and select your language. Click next and we want to select USB flash drive.
Add your USB to the USB slot on your computer and make sure you back up the files as the next step will format the USB drive and wipe any data on the USB. Be careful here to select the right drive and you might accidently wipe the wrong drive. Always do a backup first. I check that my USB drive is the E drive and I then I go back and select the E USB drive and click next.
Downloaded!
Cool you have started downloading Windows 11. This will take some time depending on how fast your internet is. So grab yourself a coffer or guys if you can do me a favour and hit the link button so it bumps this video up as a legit video. Thanks very much!
Awesome so it has downloaded Windows 11 and now it is creating the USB installer drive. How easy is that? Click finish and they go down and check that the USB drive now has the Windows 11 install files on it.
Guys don’t forget to check out my other videos such as iOS 15 settings to turn off on your iPhone now. And do me a favour if you know anyone who might need this video please share it will them, hit the subscribe button and smash the bell icon.
Hi Guys and Matt from 123myit here. If you have just upgraded your iPhones iOS version to 15 or you have one of the iPhone 13 models. This video will show you the iPhone settings that you should turn off straight away. Turning off these settings will speed up your iPhone and save you cellular data and battery life. It will also increase the privacy on your iPhone which you should consider doing this anyway if you are not doing this already.
I am using an iPhone 13 Pro which comes with iOS 15, but depending on the iOS version, it might look a bit different but the settings will be the same. Let’s go into the settings of your iPhone.
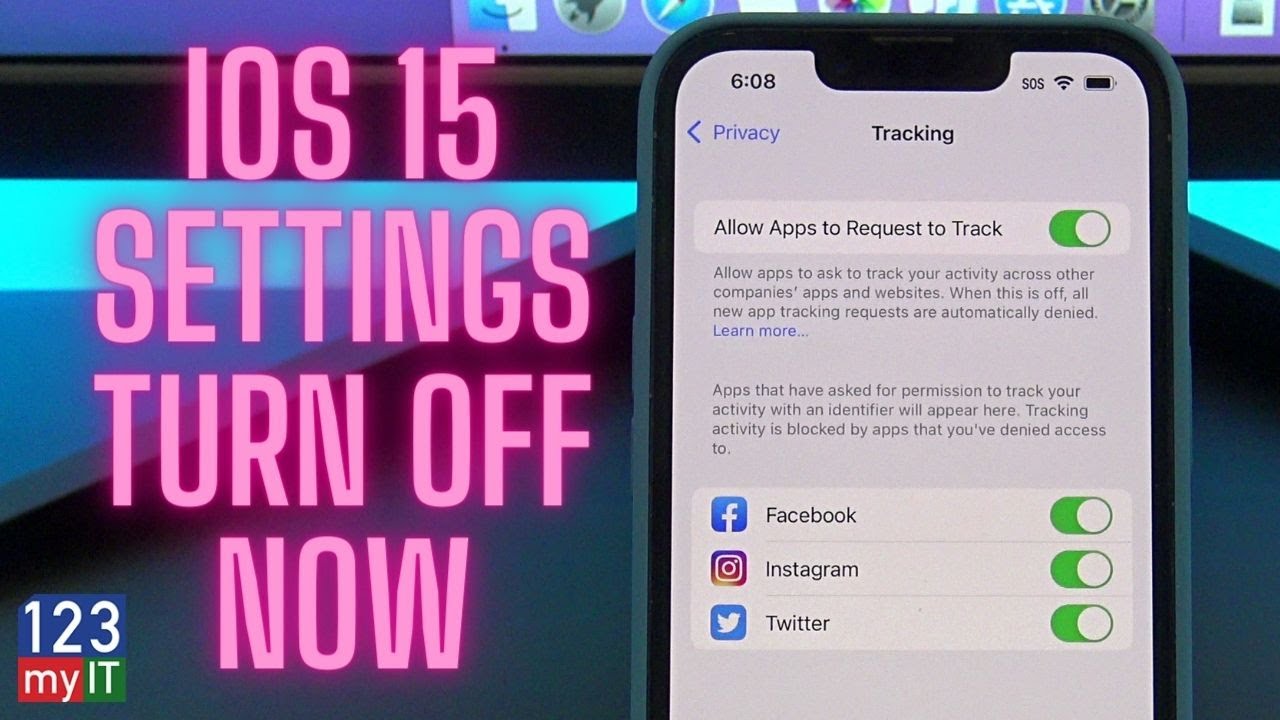
Allow apps request to Track You!
The first setting you should turn off is Allowing Apps to Request to Track you. You can find this under Settings, Privacy and Tracking. This setting allows apps to track you when you use apps or when you visit websites on your iPhone. You can see here I am being tracked by Facebook, Insta and Twitter. They track you because they can sell better targeted ads, based on where you have been and what you looked at. So when you have this turned on you are basically helping them make more money with no personal gain for yourself. Up to you if you leave this on or not. But now at least you know its there. Toggle the button at the top to turn it off and then tap Ask Apps to Stop Tracking. Really easy.
Location Services
The next one I want to talk about is Location Services. Go back out of privacy and go into location services. In here, you will see a list of Apps that are using the GPS to track your location. IF the App has the word “Always” next to it, it means that the App is tracking you via GPS all the time and not just when you are using the App. Apart from being Tracked this will also drain your battery life. As you can see most of my Apps say while using which is fine. This stuff can get confusing so let me show you and example. If you look here you can see my compass says while using the App. So if we go out and go back into your compass app. As soon as you open your compass, you will see a little blue arrow at the top of your iPhone. This means the GPS service is being used. Obviously the compass would use the GPS to find your location so it can give your co-ordinate information. So this it how Location Services work.
So at the top you can turn this off globally for all apps or if you want too you can go into each app and you can set it to Never or While using the App.
Location Services – System Services
Go back to Location Services and Scroll down to System Services.
If you have a purple arrow this might be a bad sign. It means that an app or service has been using your location. So turn all of these off accept for Emergency Calls and SOS, Find my iPhone and Networking & Wireless.
Cool you have turned them all off now, head down to significant locations. These are places that you have visited and Apple saves those locations, pretty weird. I do not have any locations because I don’t take this iPhone anywhere but if you toggle this off and clear your history, you will save data and battery life.
Product Improvement
Back under Systems Services, scroll down to Product Improvement and turn these all off. Unless Apple is paying you to help them improve their products, just turn it off.
Turn Off Analytics & Improvements. To find it go into Settings, Privacy and go into Analytics & Improvements. So if you have all these turned on, data is constantly being sent from your iPhone to Apple and other App developers. So again turn these off to save battery life and Data. You can turn them off one by one or use the global switch at the top. Too Easy!
Personalised Ads
The next one here to turn off is Personalised Ads and you can find I under Settings, Privacy and Apple Advertising. To switch it off just toggle the button off. What it does it is stops Apples advertising platform from tracking you and then it can’t use your information to sell Ads. A no brainer really.
Push Mail
The next setting we should talk about it Push Mail. This is handy if you use your phone to get email. To find it tap back to Settings and scroll down to mail. Once your in Mail tap on Accounts and then Fetch New Data. This setting uses up heaps of Battery life on your iPhone. When you have push turned on, your iPhone is constantly looking for new email. When you turn push mail off your iPhone can choose how often it will check for email.
So what you want to do is toggle the Push button to Off and then you can go into each account and set it to Manual or fetch. Manual just means when you open the Mail account it will download the mail when you look at it. Rather than checking the mail servers all the time which will drain your battery life. If you want to put a tick beside Every 30 mins or every 15 mins. This means it will check for email every 30 mins or 15 mins which ever you prefer. Obviously if you set it to every 30 mins you will save more battery life and data.
5G phone settings
This next one is for 5G iPhones only so iPhone 12 or 13 models. Go to Settings, Your Name, iCloud and iCloud Backup. Under here you have a setting which says Back Up Over Mobile Data. In the US it will say Backup Over Cellular. This pretty bad setting. It means it will backup your data over the Cellular network rather than WIFI. And if you are on a limited data plan this means you might get charged if you go over you cap.
The next one to turn off is called iCloud drive. You can find it under Settings, Cellular and iCloud Drive. What this means is if you use iCloud drive it will sync over your cellular data plan rather than WIFI. So toggle this off to save battery life and cellular data.
Photos Cellular data
Turn off Photos Cellular Data, you can find it under Settings, Photos and Cellular Data. This setting backs up your Photos and Video files over your Cellular Data plan rather than waiting till you get connected to a WIFI network. So it can put you over your cellular cap. Turn it off to save battery and cellular data.
Ok so lets show you how to turn off Safari Preload. Go into Settings, Safari and Preload Top Hit. What this does is when you do a search in Safari and you get the search results. Safari will start to load the first webpage in the list automatically without you selecting it. It will make the webpage seem to load faster if you do select it however this will use up data and battery life. SO turn it off.
Background Apps
Turn off Background App refresh, You can find it under Settings, General and Background App Refresh. This setting allows apps to use your cellular data to download new content in the background even when you might not be using the app. Turn this off to save battery life and data. And also make sure that at the top you set it to WIFI only.
Also guys don’t forget to check out my other videos such as Transfer Data iPhone to iPhone 13. And do me a favour if you know anyone who might need this video please share it will them, hit the subscribe button and smash the bell icon.
Hi Guys, Matt from 123myit here. If you have a new iPhone 13, 13 mini, 13 Pro or 13 Pro Max, this video will show you to transfer your data from any iPhone to any of the iPhone 13 models. So if you have the iPhone 13 Pro like this one on the right or any other iPhone that’s new to you, then this video will help you move contacts, text messages, music, photos, videos and app data. This also includes apps like Whatsapp but just remember you will need your Whatsapp password to transfer those apps.
The three ways to transfer your data
There is three ways to Transfer your iPhone data. You can backup and restore from iCloud. Sync and backup to iTunes on a Windows or Mac computer. You can Transfer wirelessly. I will show you how to Transfer wirelessly, because you do not need a computer and it is the easiest way.
If you have already setup, your phone and you are on the Home screen. Unfortunately, you will have to reset the new phone. If you do not want to reset your iPhone then you can do a backup and restore from iCloud. Alternatively, backup and restore from iTunes.
Reset your iPhone
To reset your phone Go into settings > General and scroll down to transfer or reset iPhone. Once you are there tap on Erase Content and settings. Then tap continue and then skip backup. If you get prompted for the Apple Id enter it now. If you have two factor authentication turned on it might send you a SMS or a code on one of your other devices. Swipe to the two factor authentication page an enter your code.
It should start the reset process, but if it does not go into settings and enter your password again and tap on sign out. Ok go back into general back into Transfer or Reset iPhone and tap on Erase all content and settings again. Then continue and Erase iPhone.
Once your iPhone has reset itself. Go ahead and select your country and language. You should see the quick start screen appear on your old iPhone. If you do not see the quick start screen on your old iphone, make sure Bluetooth is turned on and you can press the sleep wake power button to put the device to sleep then tap it again to wake it up.
Scan your Rear Camera
Tap continue and you should get a little blue animation now. There you go now the little blue animation has come up. Scan it with the rear Camera on your old iPhone. Now at this stage you might need to enter your old iPhone passcode on your new iPhone. It didn’t come up for me because I turned it off before starting the transfer process. Follow the prompts to setup touch id or face id on your new iPhone.
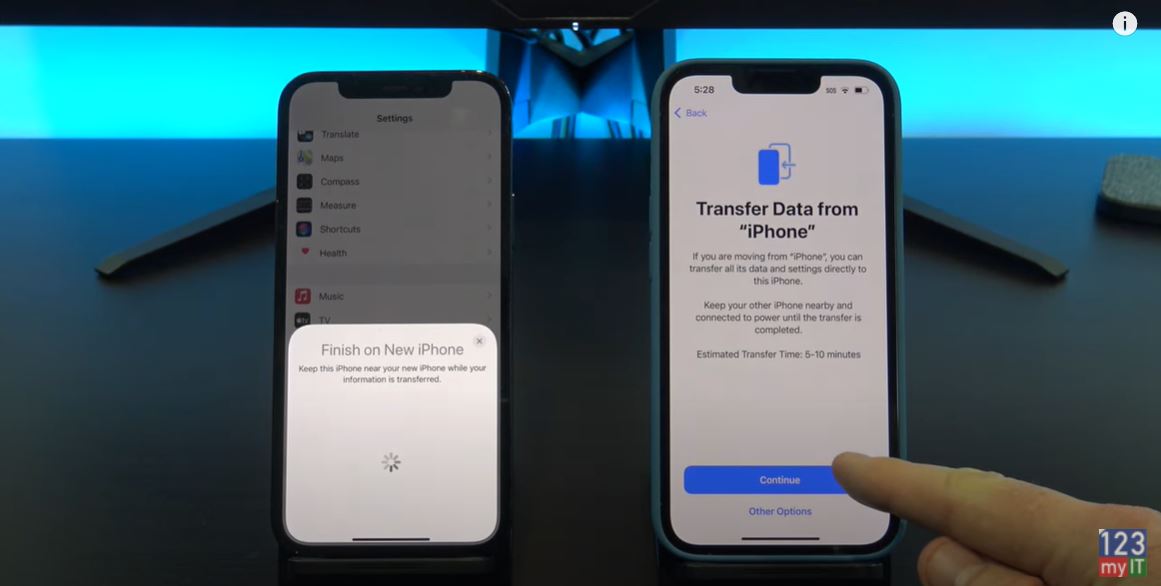
Finally, tap continue and agree to start the Data Transfer from your old iPhone to your new iPhone. Almost there follow a few more prompts to setup your iPhone until you get to the Transferring Data from iPhone screen. There it is so all your data should be copying across now.
Keep the two devices close by and make sure they are plugged into power.
Your new iPhone will restart itself and when you log on you go and check that all your data has transferred across ok. I will check my pictures and see if that are the same. Cool looks like everything has copied across.
Also guys don’t forget to check out my other videos such how to Transfer data from Android to iPhone 13. Do me a favor If you know anyone that might need this video please share it with them hit the subscribe button and smash the bell icon.